How to Use Bank Allocation in Suvit Banking Module
Learn to enable and use the Bank Allocation feature in Suvit Banking. This guide helps you manage transactions and split amounts efficiently.
How to enable Bank Allocation
How to Enable Bank Allocation
- **Step 1** - Open the Transaction Screen: 
- **Step 2** - Go to **Settings** → **Configurations**: 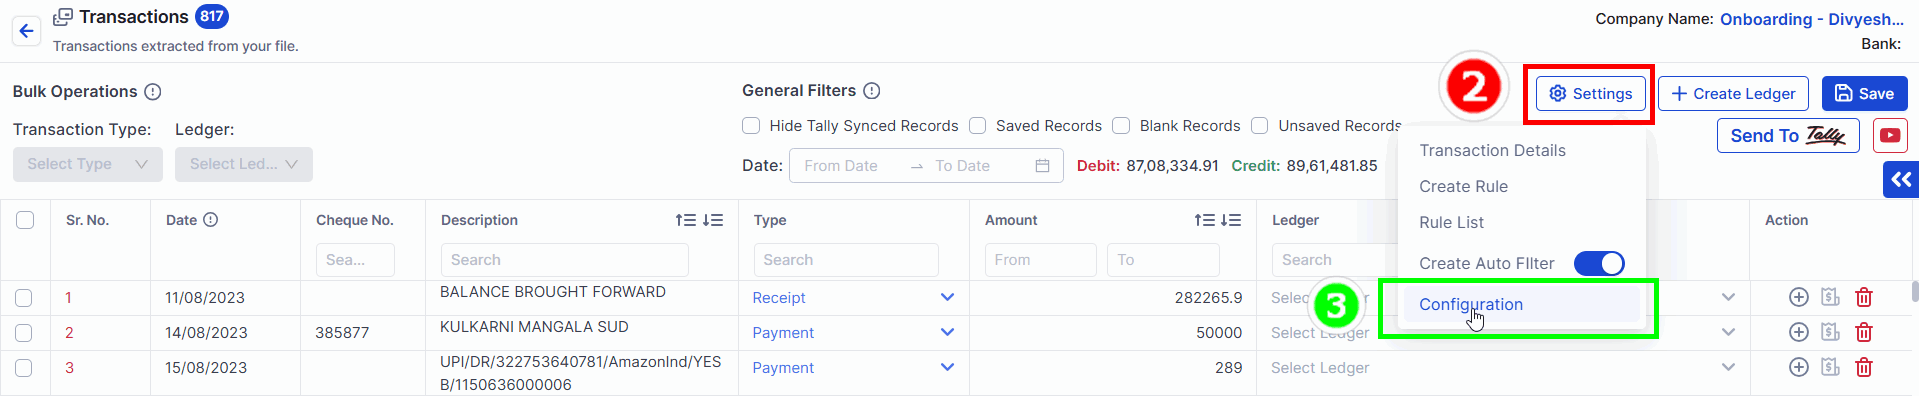
- **Step 3** - Enable Banking Allocation: 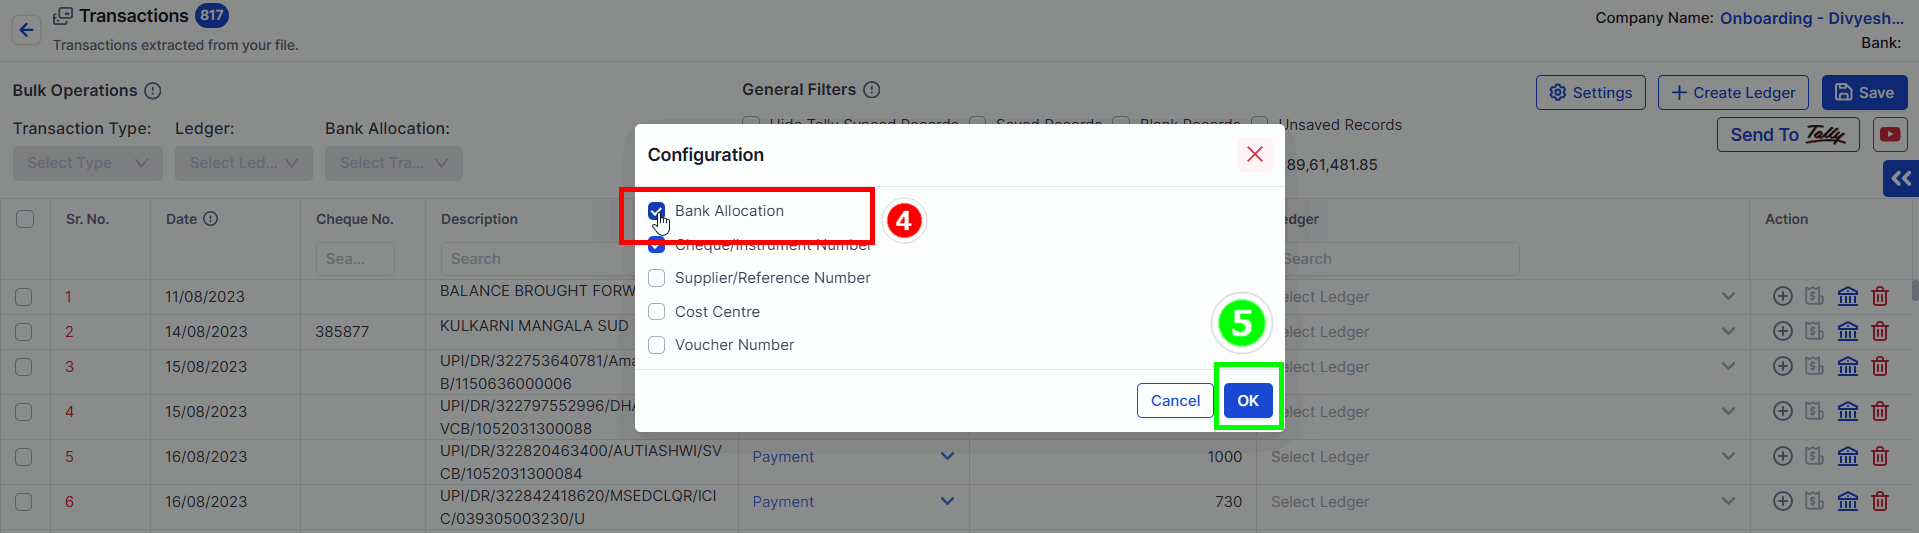
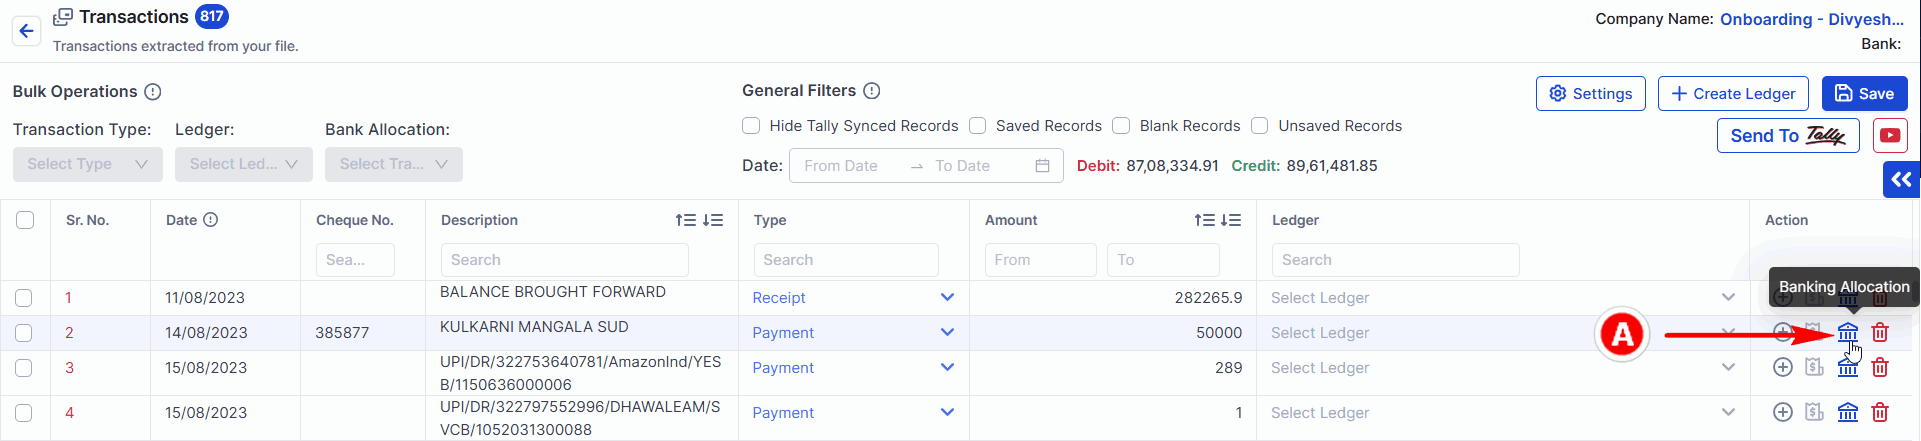
How to use Bank Allocation
You can make necessary changes and click on Submit
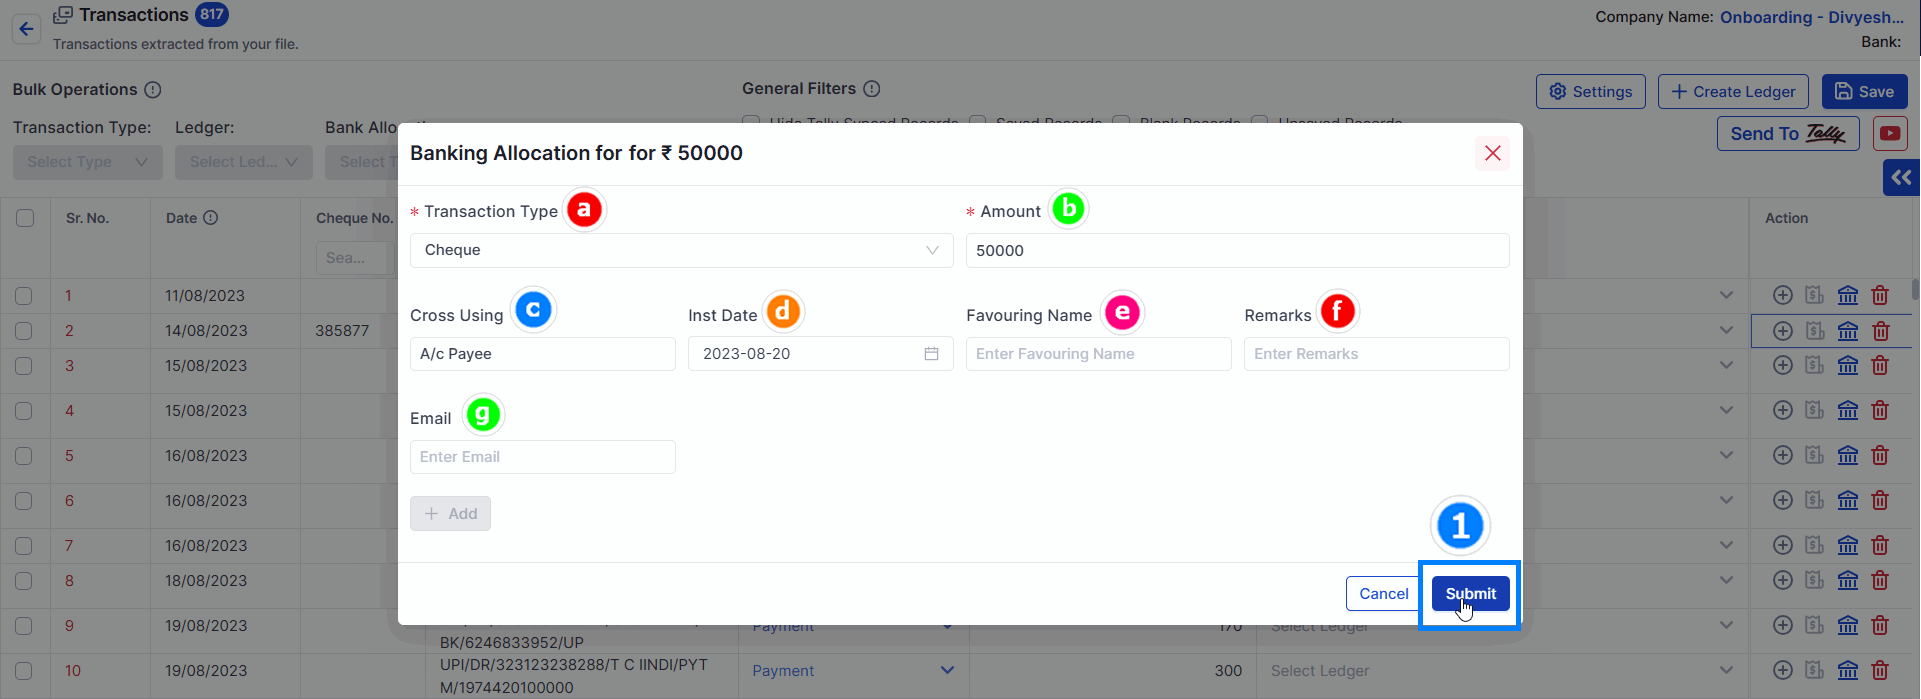
Transaction Type Fields:
(a) Transaction Type: By default "Cheque" is selected. you can choose option like eFund Transfer or Other.
(b) Amount: Transaction amount.
(c) Cross Using: Account payee name.
(d) Inst Date : Instrument Date.
(e) Favouring Name: This is where the name of the payee or beneficiary is entered..
(f) Remarks: A field for adding notes or comments about the transaction..
(g) Email: A field for entering an email address.
By default the Transaction Type would go to Cheque
All fields are not compulsory to fill.
Other Method to use
- Amount can split into two or more parts : There are two ways to split the amount.
Method 1
- Split same amount into two or more part
- For example : Payment of Total Amount 50000= 42372.88 Taxable amount + 7627.12 GST
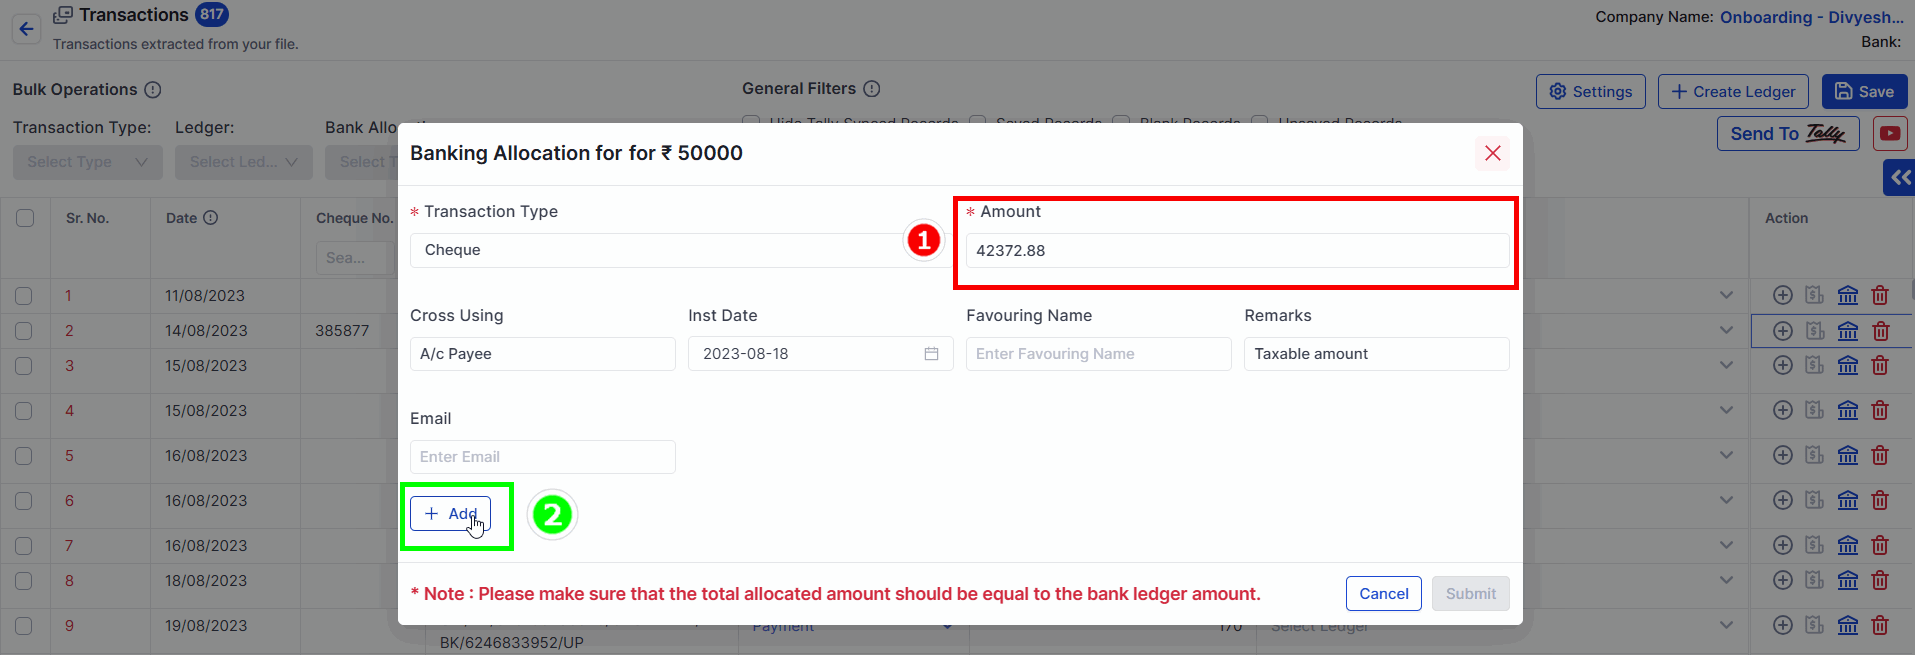
1. Change amount
2. Click on add
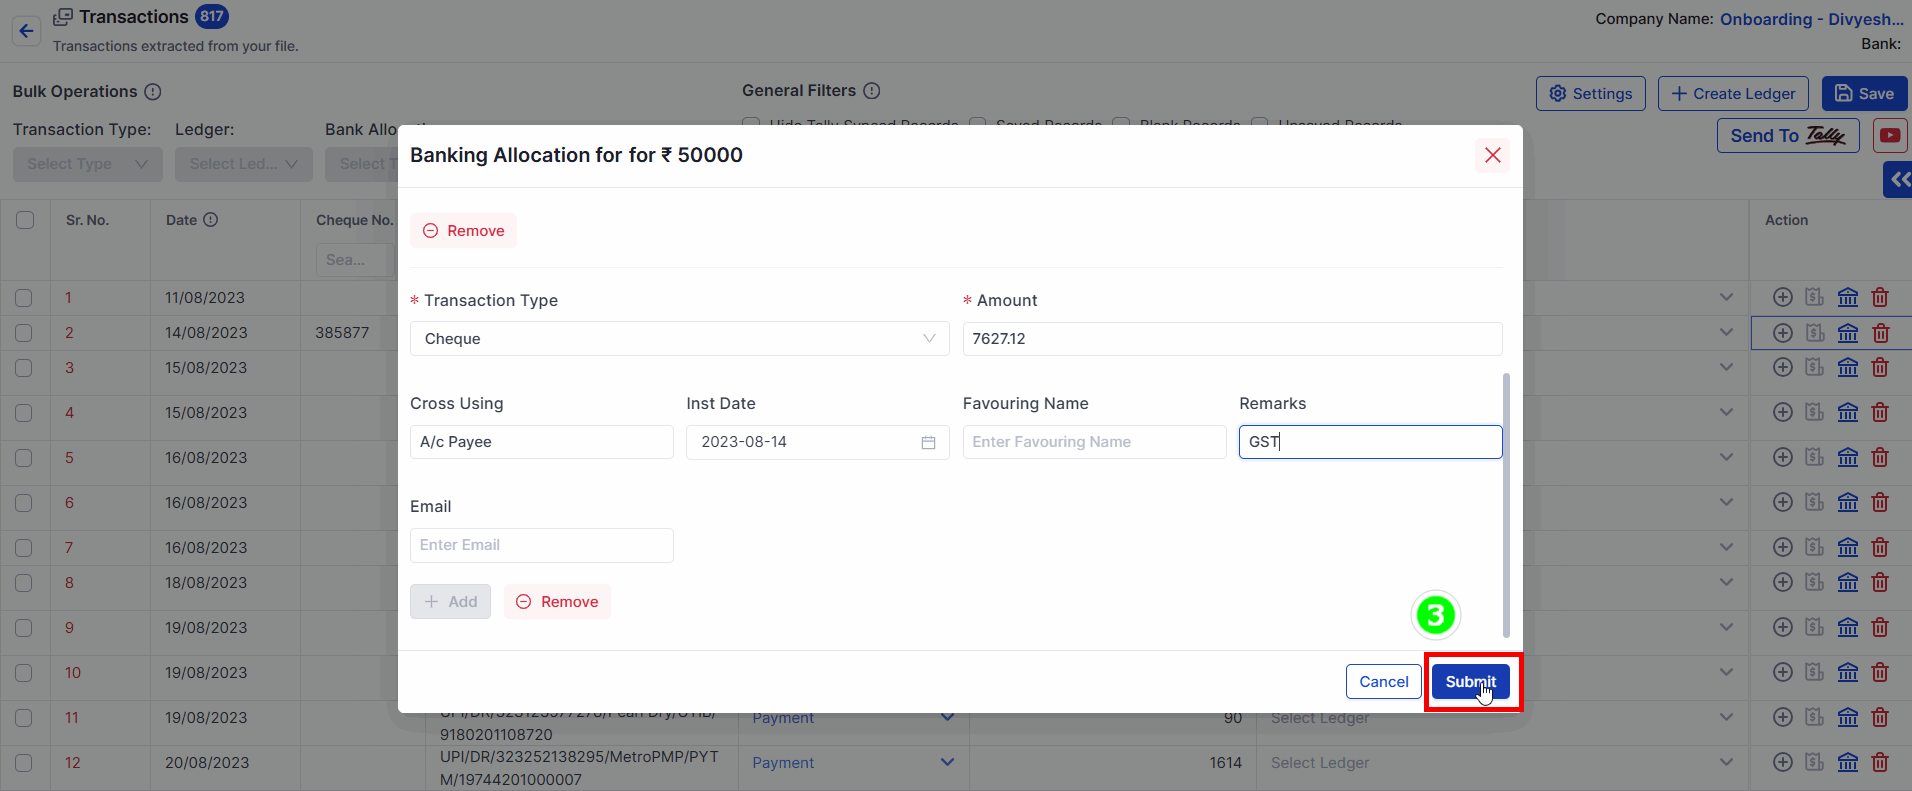
- Difference amount will be auto fill
Note: You can change other settings also
3. Click on Submit
Method 2
- Split same amount by adding deducted charges amount
- For example : amount received after TDS
- Payment of Total Amount 50000 + 250 TDS
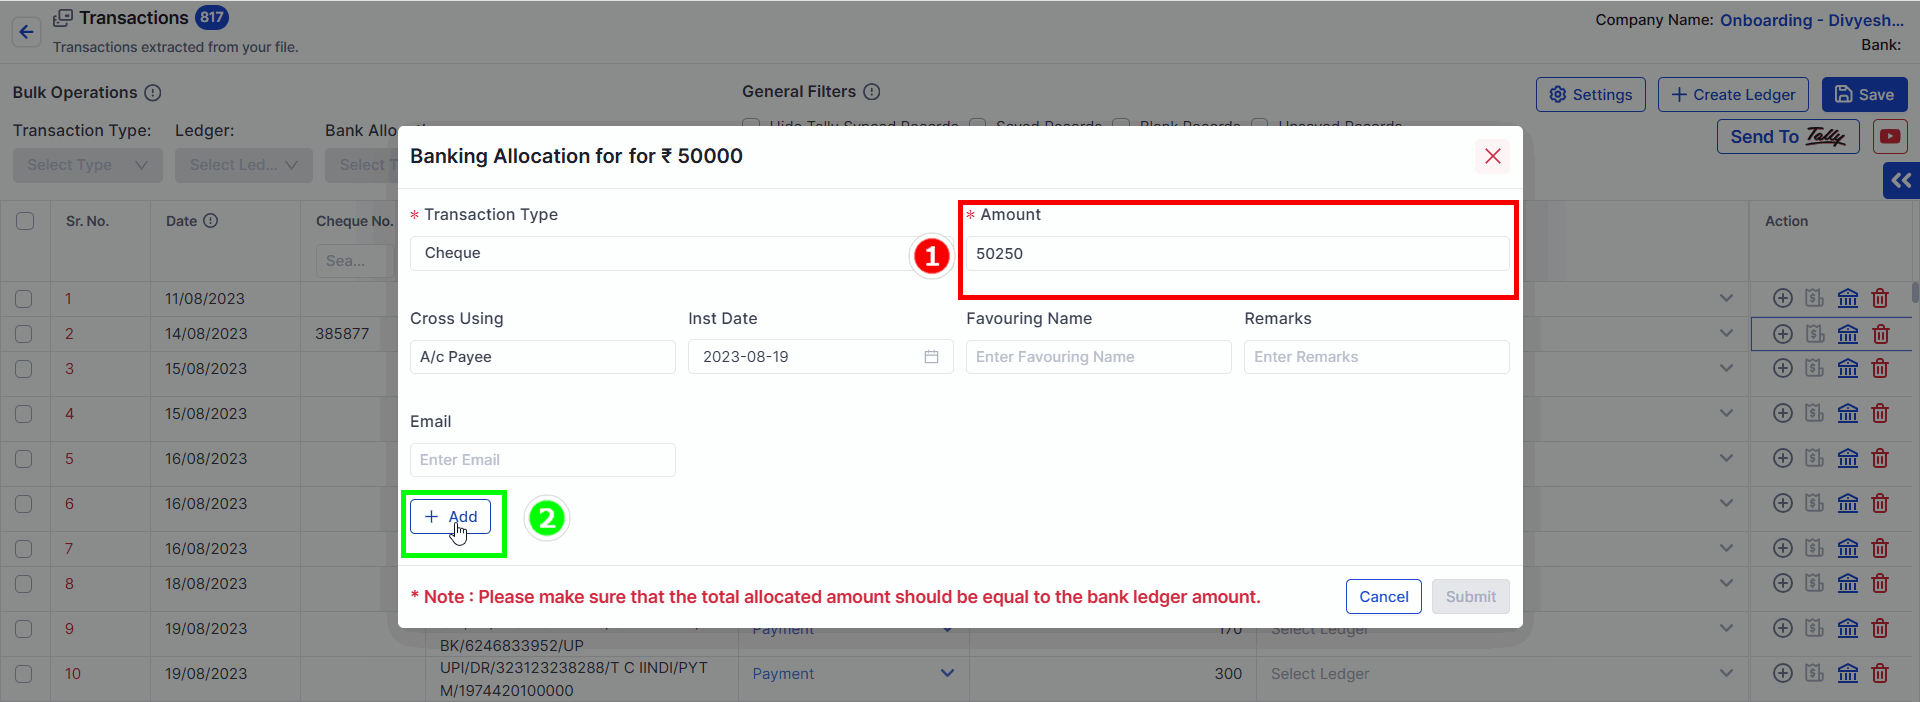
1. Change amount
2. Click on add
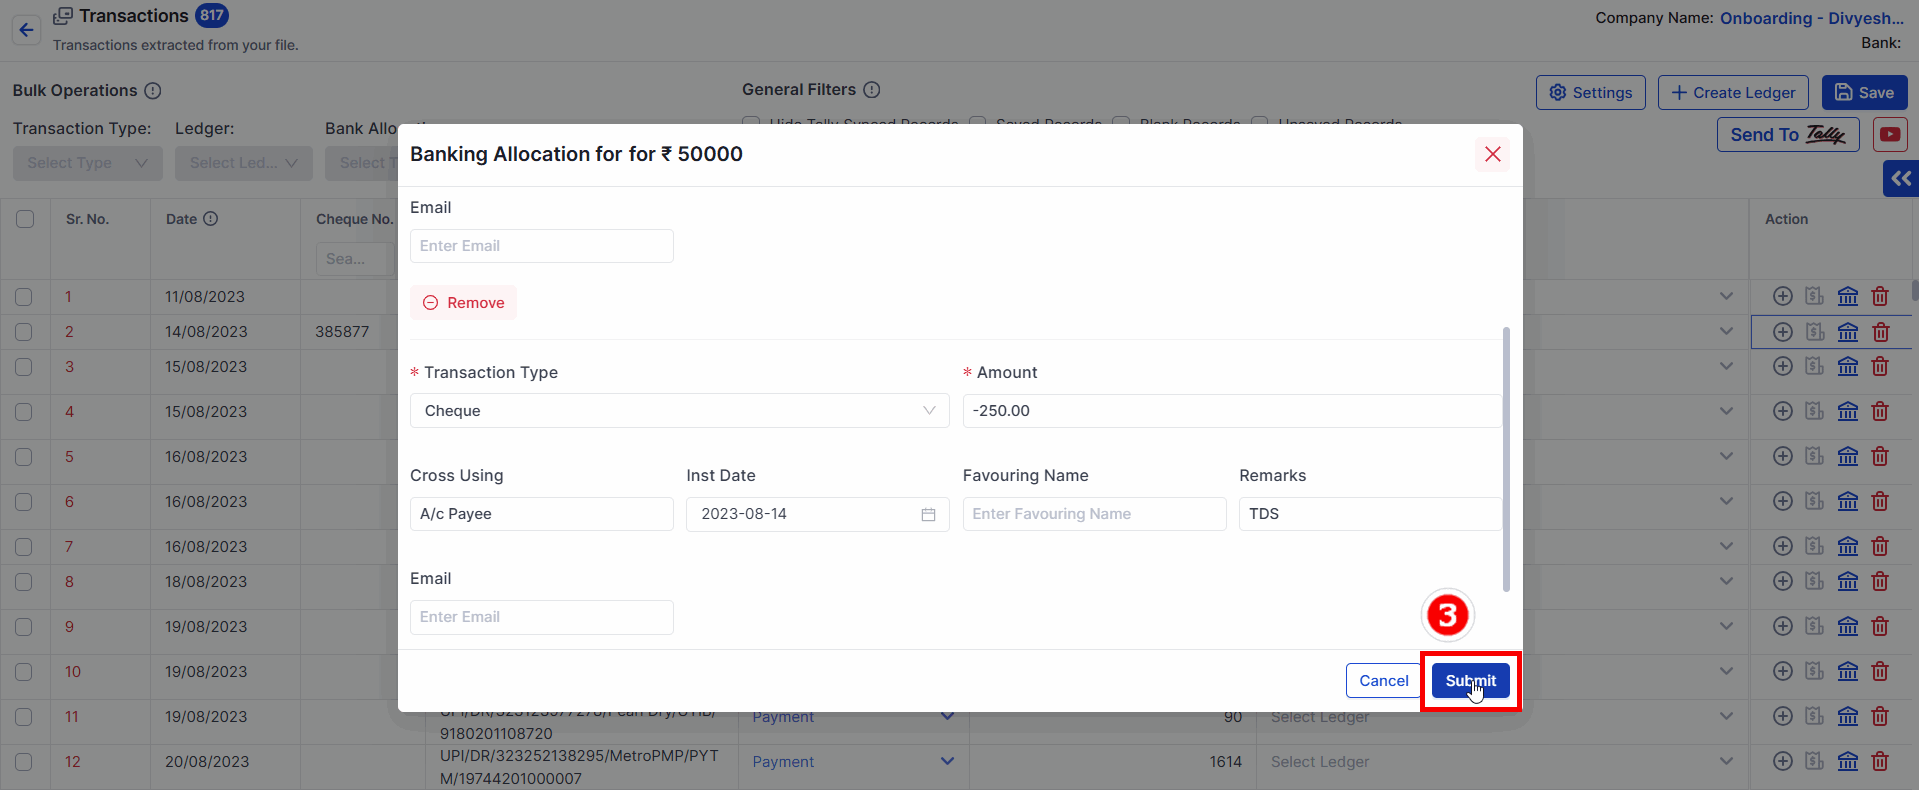
- Difference amount will be auto fill
Note: You can change other settings also
3. Click on Submit