Use Suvit’s Bill-by-Bill option to settle bills created in Tally. First, sync vouchers from the Suvit desktop app to enable bill-wise settlement.
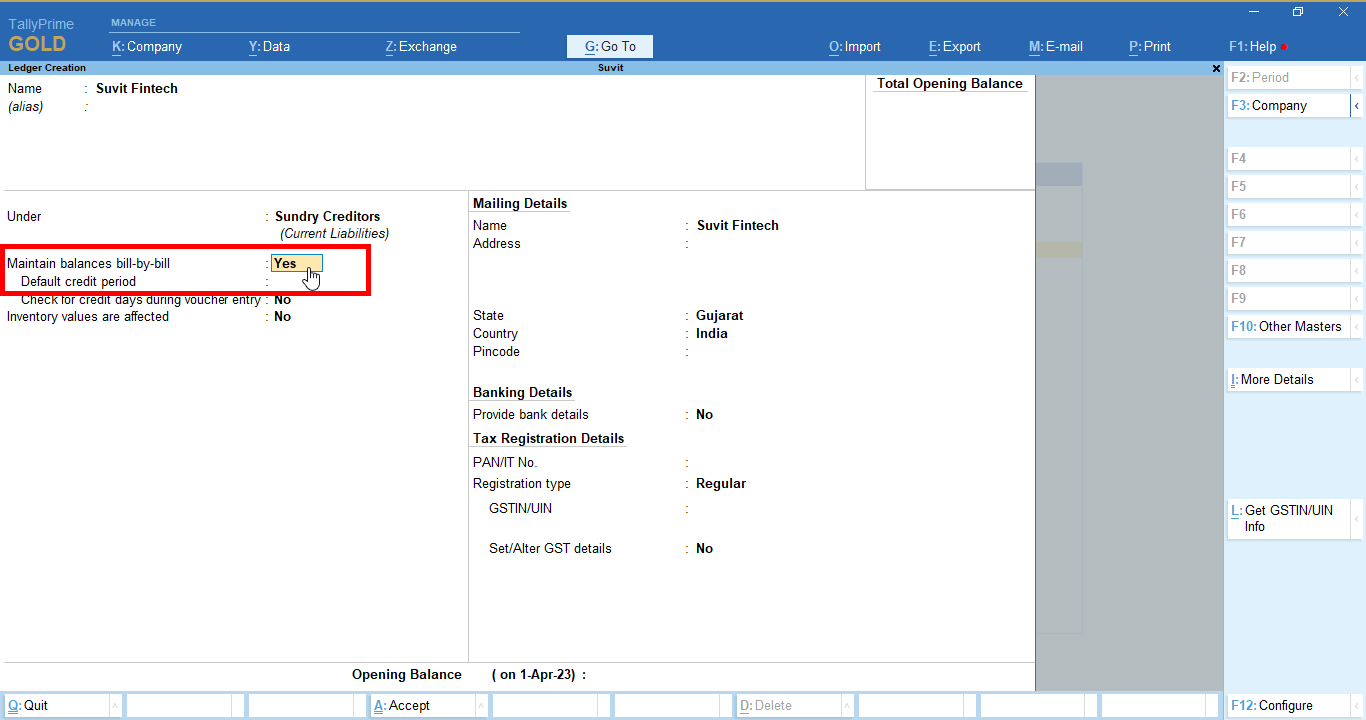
Enabling Bill-by-Bill Option for Accurate Records
Make sure the Bill-by-Bill option is enabled for Sundry Creditors/Debtors ledgers when syncing vouchers in Suvit to ensure accurate transaction records.
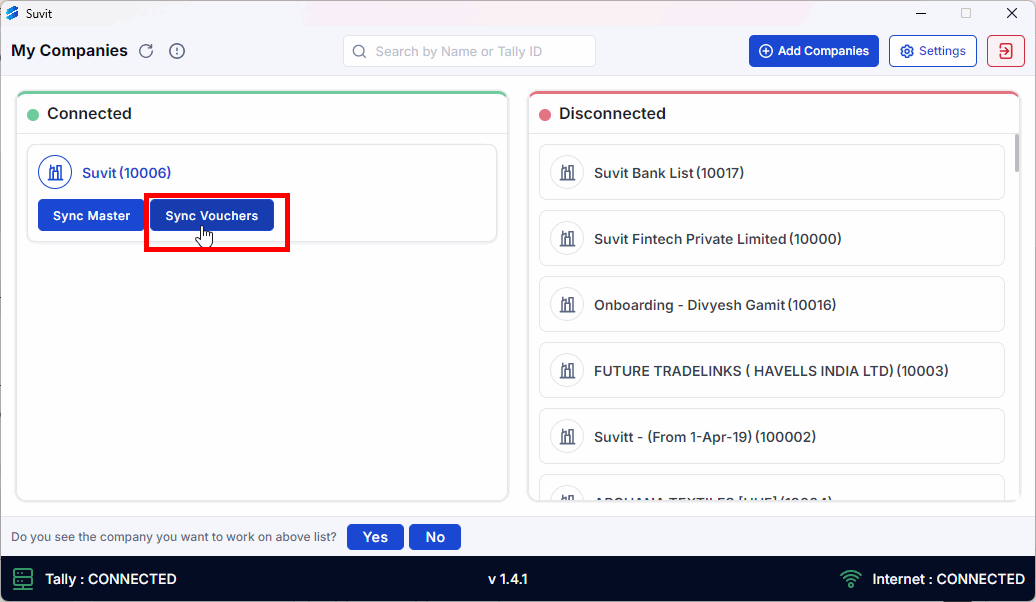
Step 1: Sync Voucher in Suvit
Open the Suvit application and ensure that voucher data is synced properly.
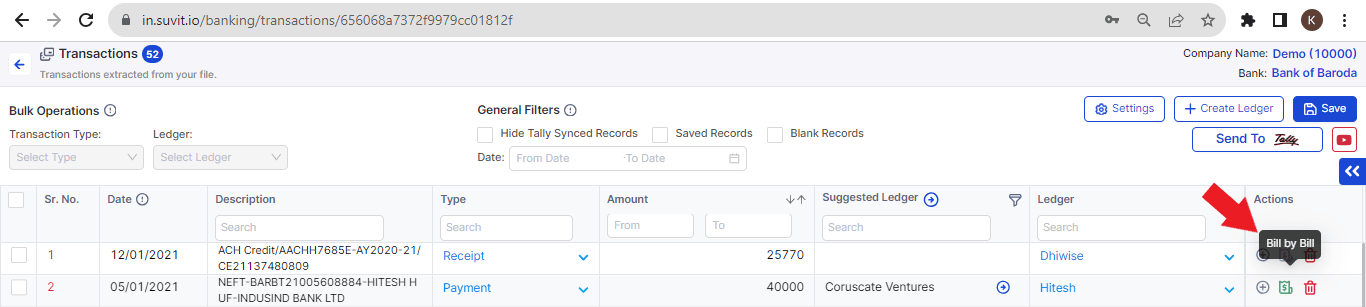
Step 2: Select Ledger
After syncing the voucher , select the appropriate banking ledger. The Bill-by-Bill option will activate, showing the relevant entries as displayed in the image above.
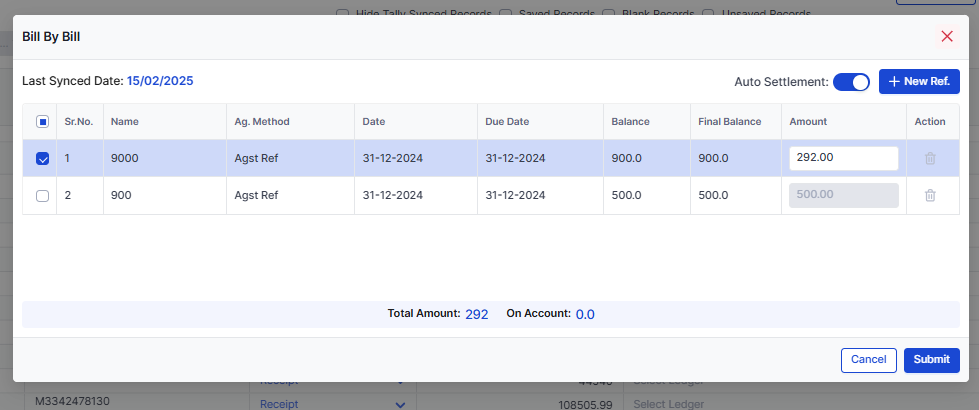
Step 3: Settle Bill Amount
After activating the Bill-by-Bill option, click on it to view the detailed bill information. This step allows you to settle the required bill amount based on the details shown, ensuring accurate transaction management.