How to create party name in bulk using transaction screen
Working with a new company? No need to create Party Names in Tally. Use Suvit’s Auto Ledger feature to create and manage them directly and efficiently.
Transaction Screen
Step 1 - Orange Triangle
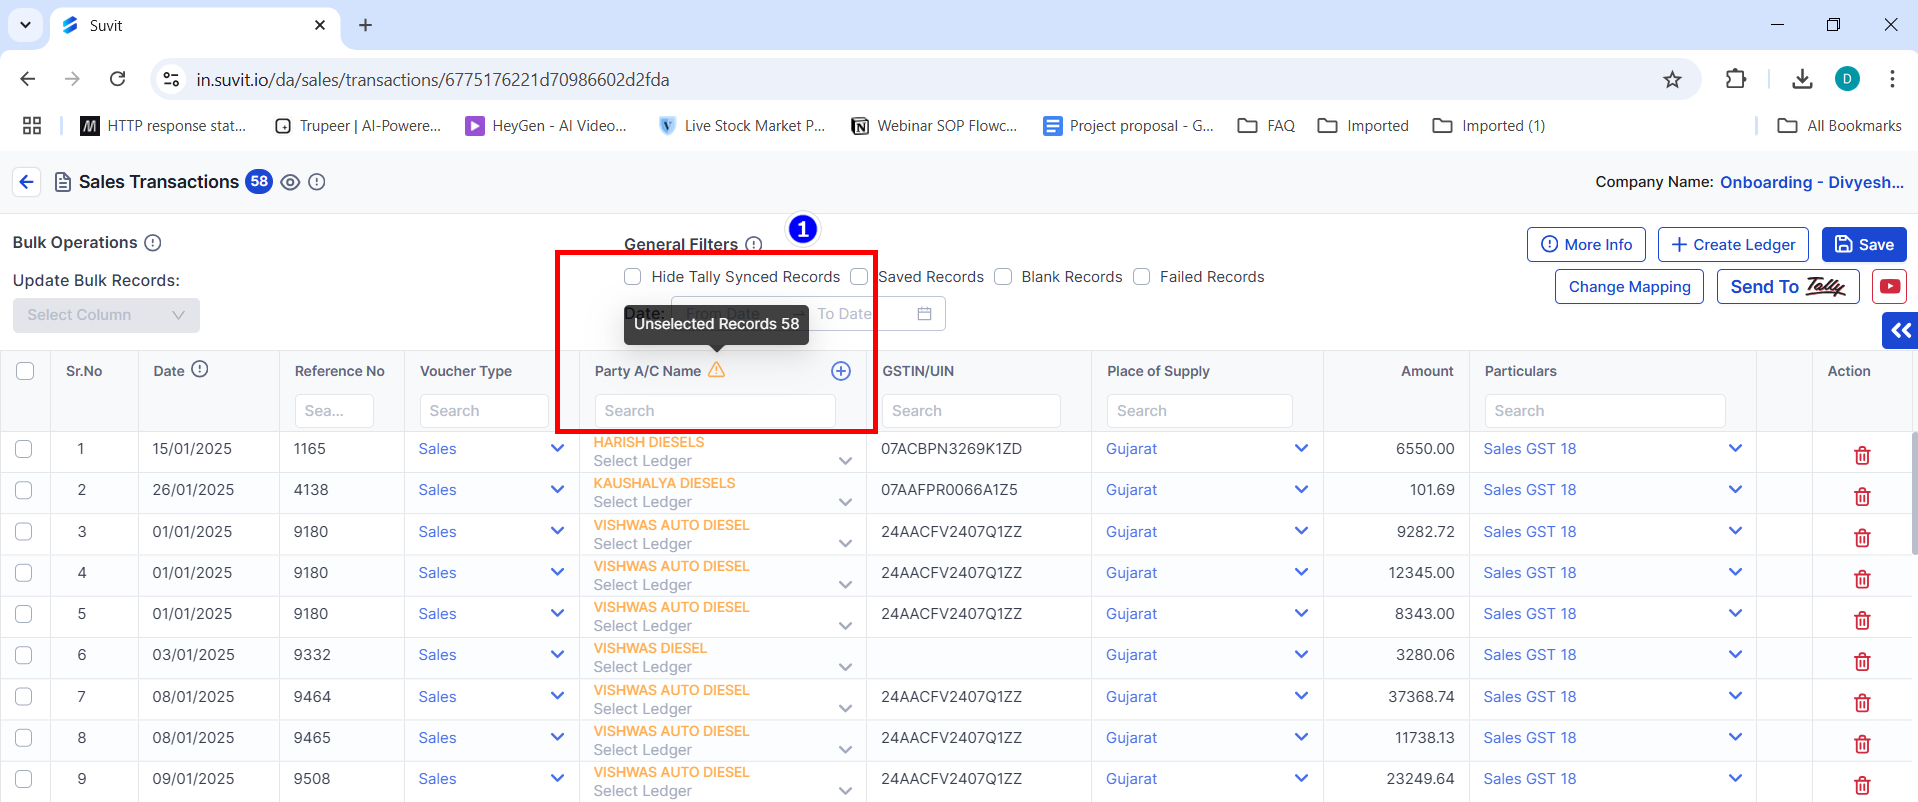
- Data in orange appears due to mainly three reasons:
A. Name in Excel Sheet is Different from Name in Tally

B. Ledger Sync is Pending
- If names are the same, Ledger Sync might be pending.
[How to Sync Ledger? Click Here]
C. New Party Name List
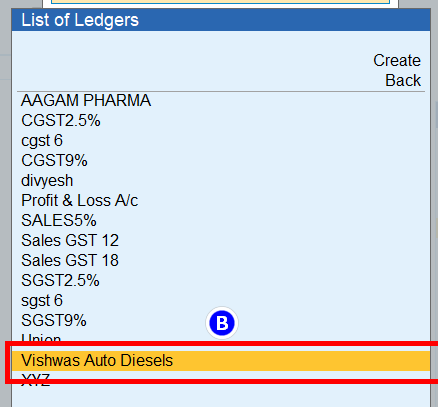
Step 2 - Plus Icon
- Click on the Plus Icon to create the party names shown in orange.
Always cross-check the spelling in Tally and the Excel sheet.
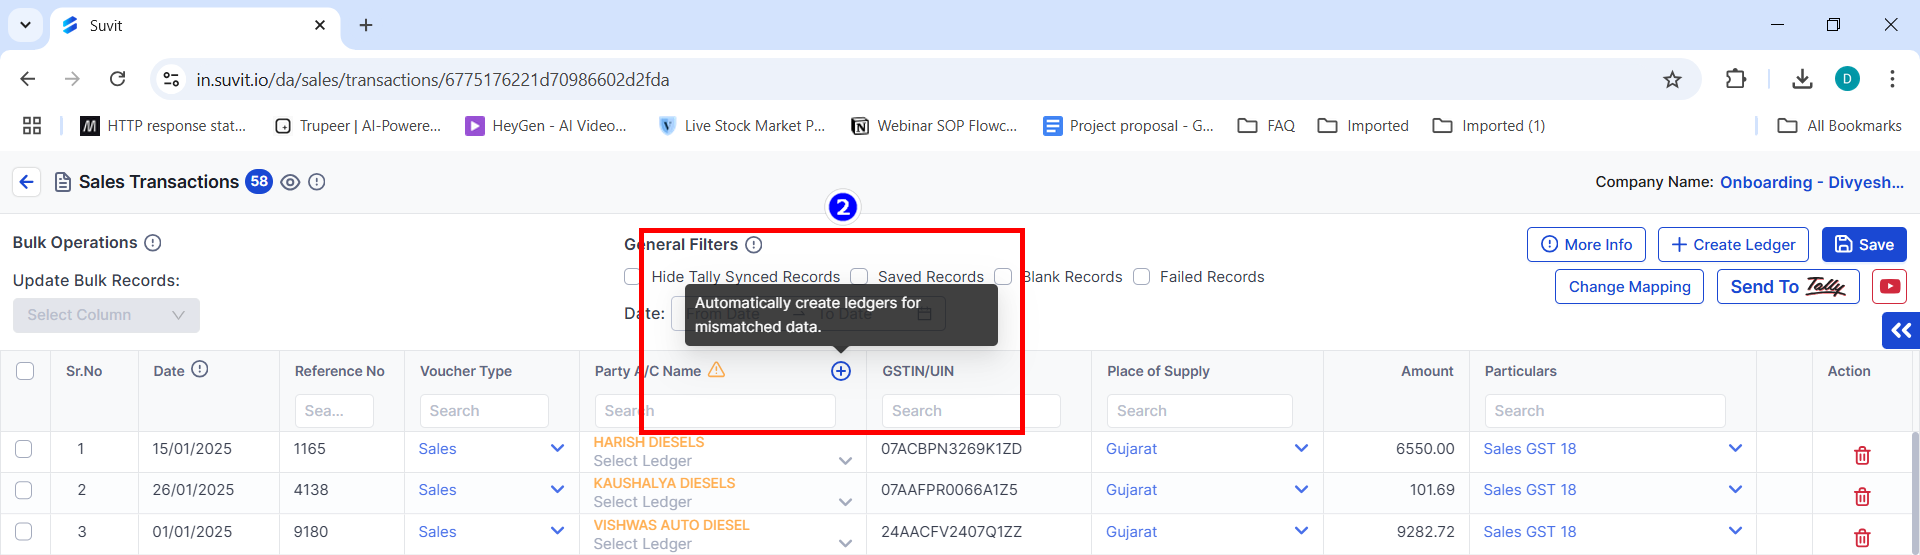
Step 3 - Create Auto Ledger
You will get the option to create a Party Name:
A. Create Without Review
- This option is not recommended. It will create a Party Name directly.
B. Review Before Creation
-
This option allows you to review and modify details such as Under Type, Bill by Bill (On/Off), and other changes.
-
If the Excel sheet contains a GST Number that is mapped, you can create a Party Name using the GST Number with the following options:
C. Trade Name
- A trade name may also be called a "Doing Business As" name.
D. Business Name
- This appears on legal documents and government forms.
Then, click on the Create Button.
Step 4 - Ledger Transactions
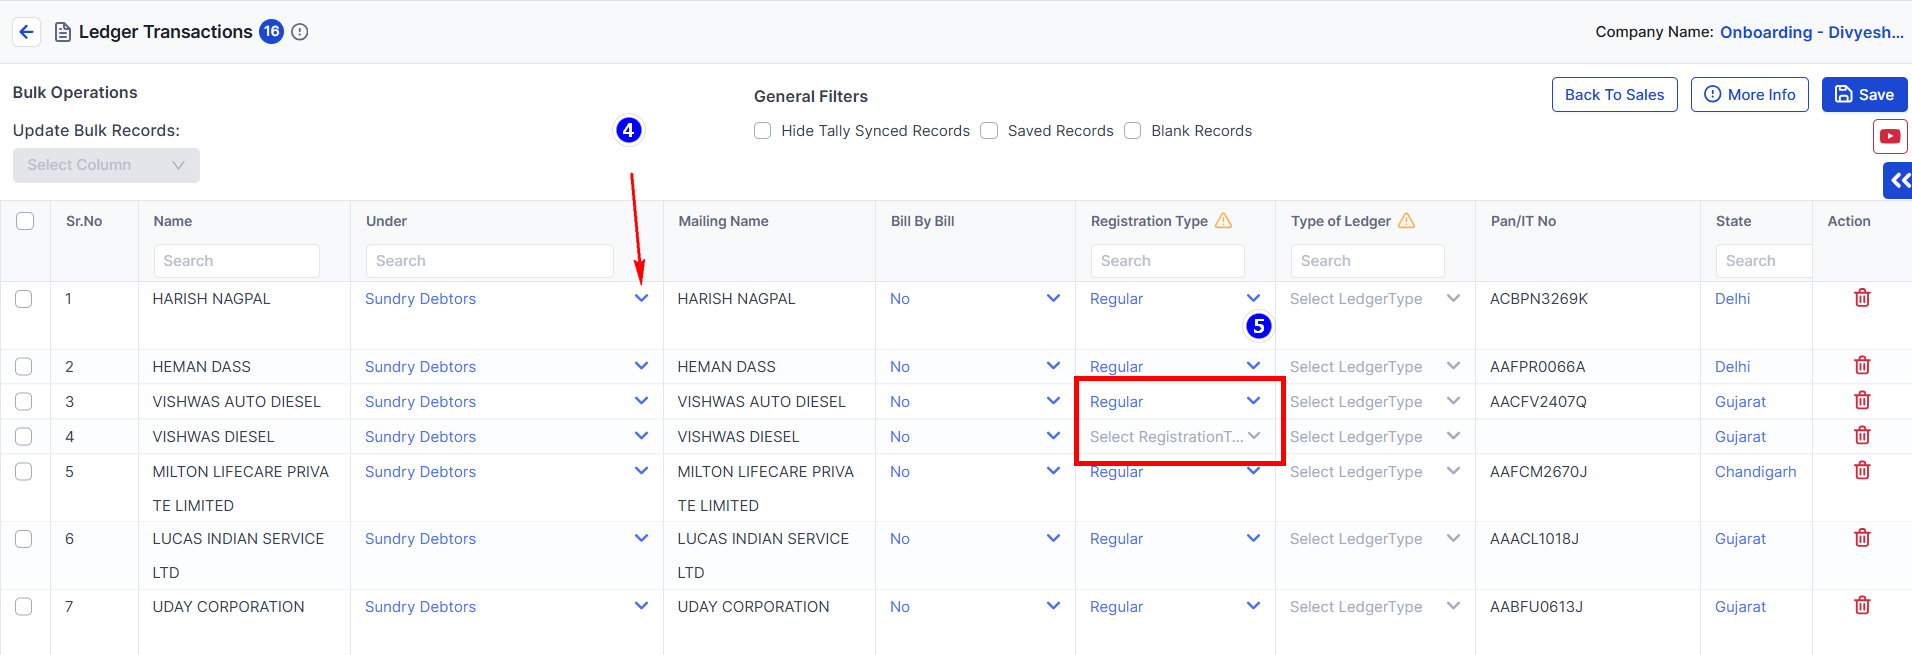
- 4: Party Names are ready to be created.
- From here, you can change the Under Type of the Party Name.
- 5: If you create a Party Name using a GST Number, it will fall under Regular Registration Type. If it is created without a GST Number, the Registration Type will be empty (you can change it to Regular, Unregistered, etc., as needed).
Step 5 - Save
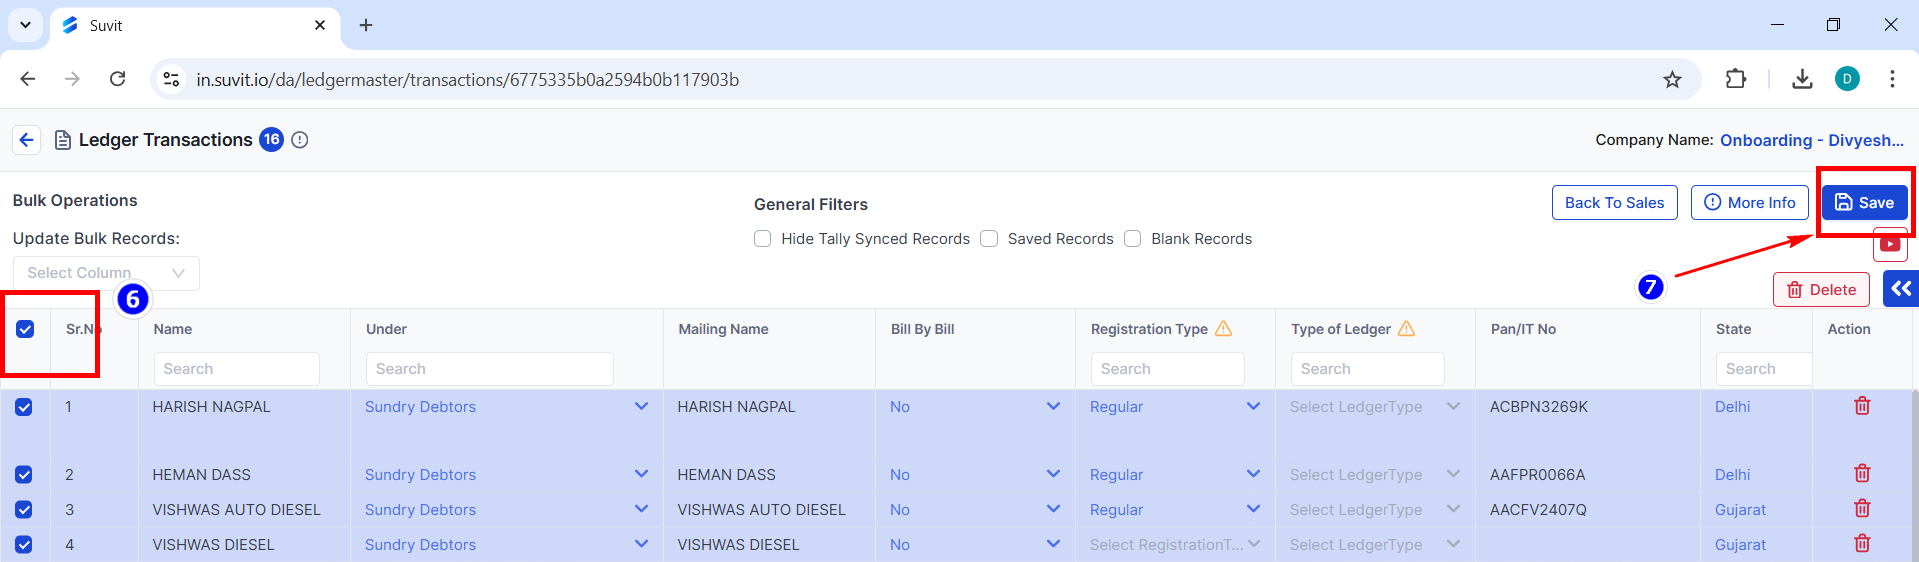
- 6: Select all your data.
- 7: Click on Save to save it.
Step 6 - Back to Sales
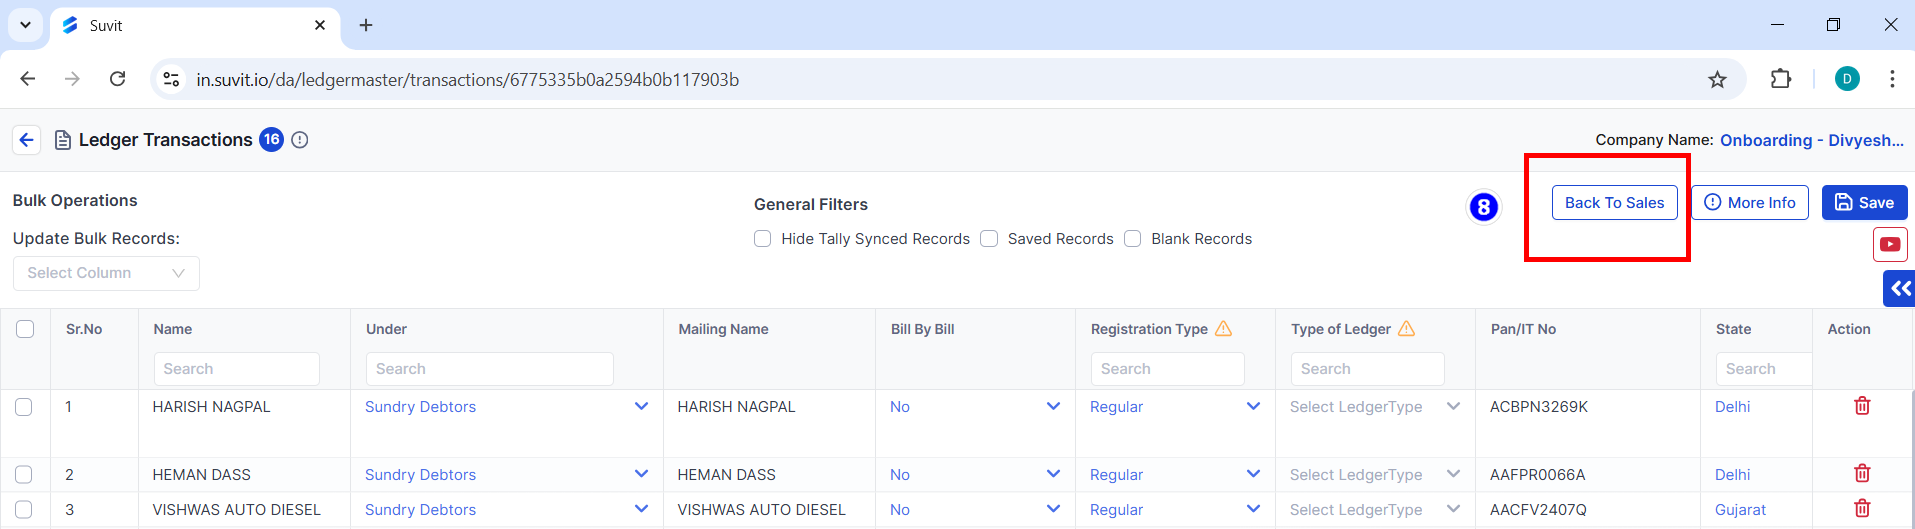
- 8: Click on Back to Sales.
At least one bill/transaction must be sent from the Sales/Purchase module to Tally to create all Party Names in bulk.