GSTR-1 Reconciliation & Voucher Entry (Simplified Guide). This guide explains how to check differences in GSTR-1 and Sales Register and how to fix mismatches by adding missing vouchers directly from Suvit.

Go to the Month View under GSTR1 > Transaction.
→ You’ll see differences in Total Invoice, Taxable Amount, and Tax Amount for each month.
→ This helps you quickly identify which months have mismatched or missing data.
→ Click on Desired Month to check the Transcation.

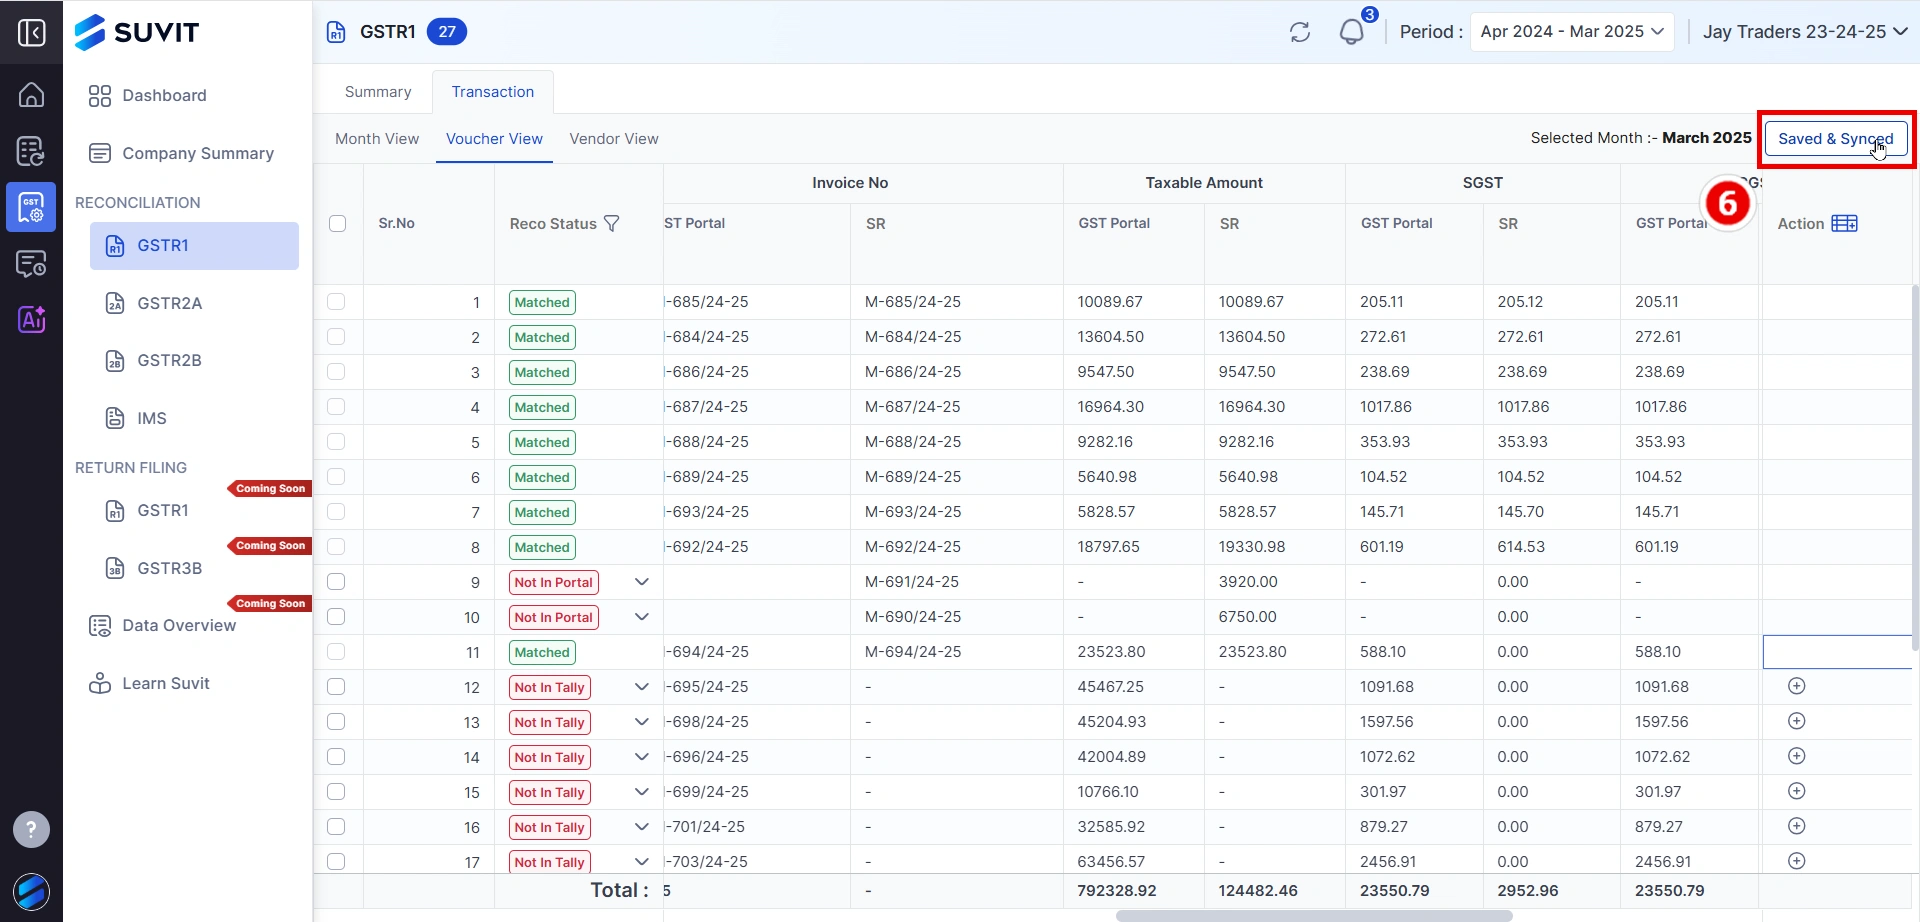
Use the Reco Status filter in Voucher View.
You can filter vouchers by:
→ Matched
→ Manual-Matched
→ Partially-Matched
→ Not In Tally
→ Not In Portal
Helps focus only on problematic entries.

→ This lets you manually create missing entries right inside Suvit.

A popup form will appear with the following:
→ Voucher No., Date, Party Name, GSTIN
→ Item Details:
→ Item Name, Ledger, HSN, Quantity, Rate
→ Ledger Details:
→ Add Sales Account & Tax Ledgers like SGST, CGST
→ Double-check all amounts before saving.
Click the Save & Close button at the bottom of the form.
→ This saves your entry and closes the popup.
→ Now the entry is matched and synced with your records.
→ This will update your match status from "Not in Tally" to "Matched".
→ Keep doing this for all missing records.
That’s it! You’ve now matched missing invoices by creating vouchers from within Suvit — no need to go to Tally manually.