How to Use Discount, TDS, Cess, and Other Charges in Suvit
Suvit is updated regularly for smoother performance. Always use the latest version to ensure a better experience and access to the newest features.
Overview
Suvit allows you to manage discounts, TDS, cess, and other charges (e.g., freight or additional expenses) by mapping these fields from your Excel sheet and linking them to the appropriate ledgers in Tally. Follow the steps below to ensure smooth handling.
Step 1 - Prepare Your Excel Sheet
Ensure your Excel sheet includes the following columns:
- Invoice Date
- Reference Number (or Supplier Invoice Number)
- Party Name
- Taxable Amount
- Particulars
- Discount (if applicable) It should be in Minus ( - )
- TDS (if applicable)
- Cess (if applicable)
- Freight or Additional Charges (if applicable)
- SGST/CGST/IGST
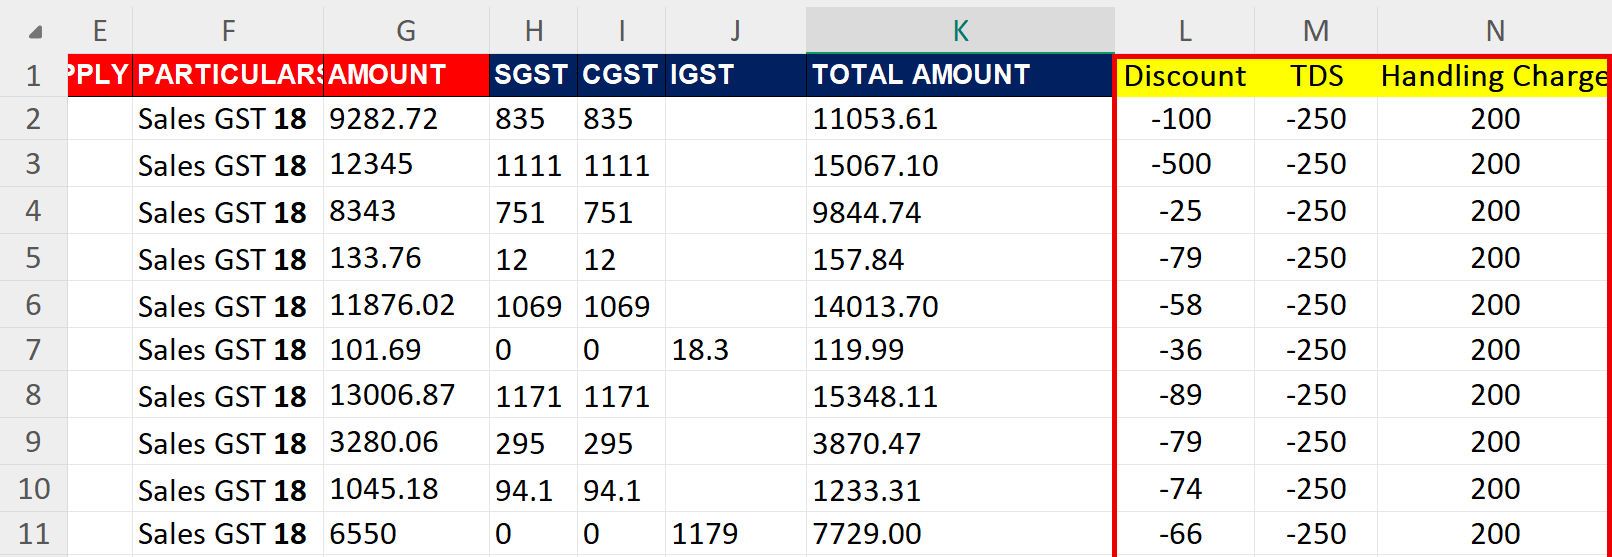
A negative sign (-) should be used to indicate amounts being subtracted (like discounts or returns) in your Excel sheet.
For example: if you have a ₹100 discount, it should be entered as -100 (not 100).
This is the standard way to represent negative values in spreadsheets and ensures that calculations are performed correctly. When you use -100, Excel will automatically subtract ₹100 from any relevant totals.
Step 2 - Upload Your Excel Sheet
- Go to the Upload Data section in Suvit.
- Select the relevant module (e.g., Purchase Excel or Sales Excel).
- Upload your prepared Excel file.
Mapping fields
Stage 1 & 2
- **Stage 1: Map Basic Fields**
- **Reference Number (or Supplier Invoice Number)**
- **Stage 2: Duties & Taxes Mapping**
- Map the **Duties & Taxes** ledger. If your Excel sheet contains SGST, CGST, or IGST values, ensure they are mapped correctly for automatic or manual calculations.
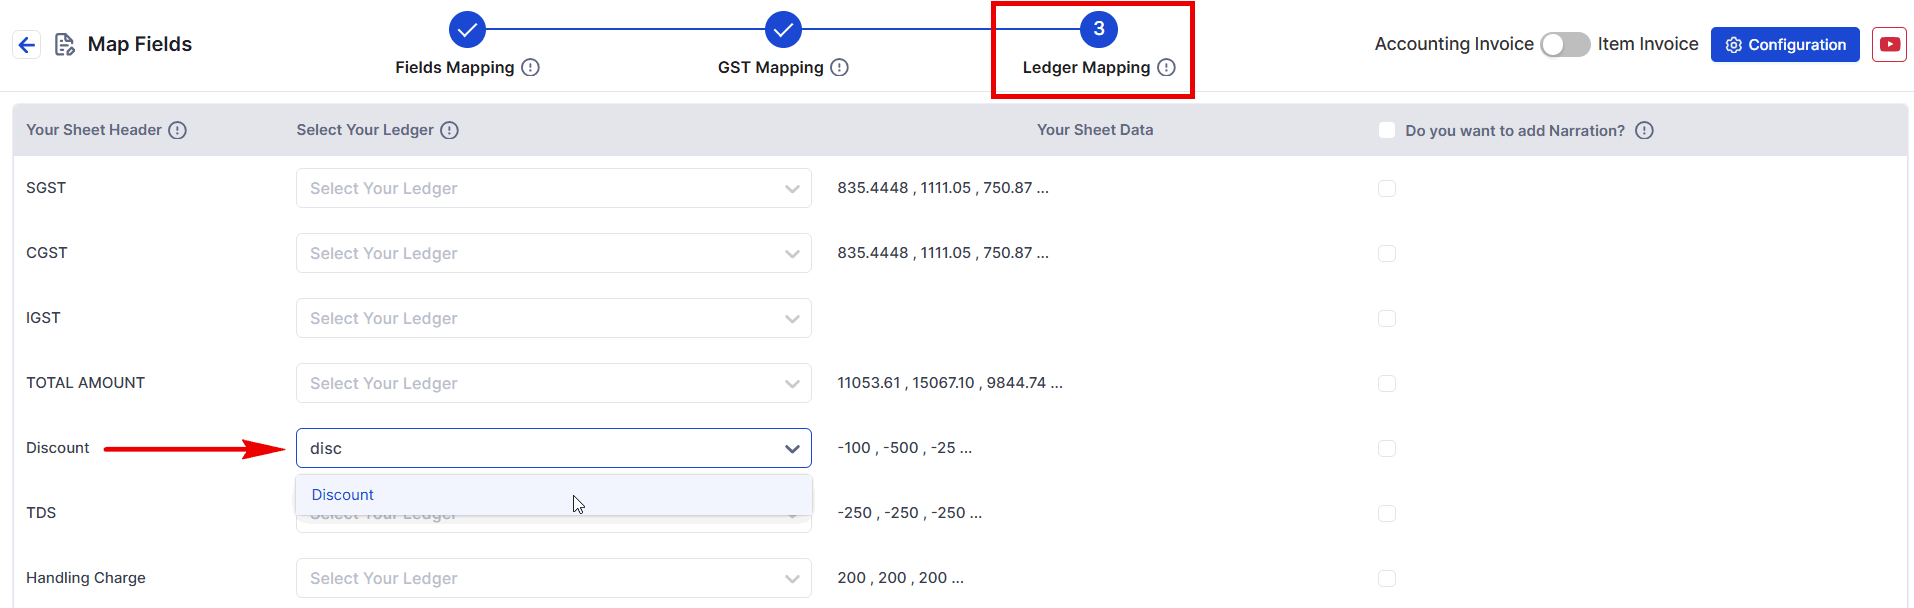
Stage 3: Map Additional Fields
Mapp Discount, TDS , Cess and all of type of other charges in 3rd stage.
- Simply click the desired cell then search and select the ledger name
-
Discount:
- Match the Discount column to the respective Discount Ledger in Suvit.
-
TDS (Tax Deducted at Source):
- Map the TDS column to the corresponding TDS Ledger in Tally.
-
Cess:
- Ensure the Cess column is mapped to the relevant Cess Ledger in Suvit.
-
Other Charges (e.g., Freight, Additional Costs):
- Map any other charges (e.g., freight, miscellaneous costs) to the appropriate ledgers, such as Freight Ledger or Miscellaneous Ledger.
Step 4 - Save & Proceed
- Click Save & Proceed to finalize the mapping process.
Note
- Make sure all fields (e.g., discount, TDS, cess) are included as individual columns in the Excel sheet before uploading.
- Ensure the corresponding ledgers for Duties & Taxes, Discount, TDS, and Cess are created in Tally prior to exporting from Suvit.
- For any mapping errors, refer to Suvit's help documentation or contact support.