Learn how to upload, verify, and process Purchase/Purchase Return invoices using Suvit’s OCR automation for seamless data entry and synchronization with Tally.
You can easily upload purchase invoices in Suvit using PDF or image files. Follow the steps below to upload your invoice and map it to Tally.

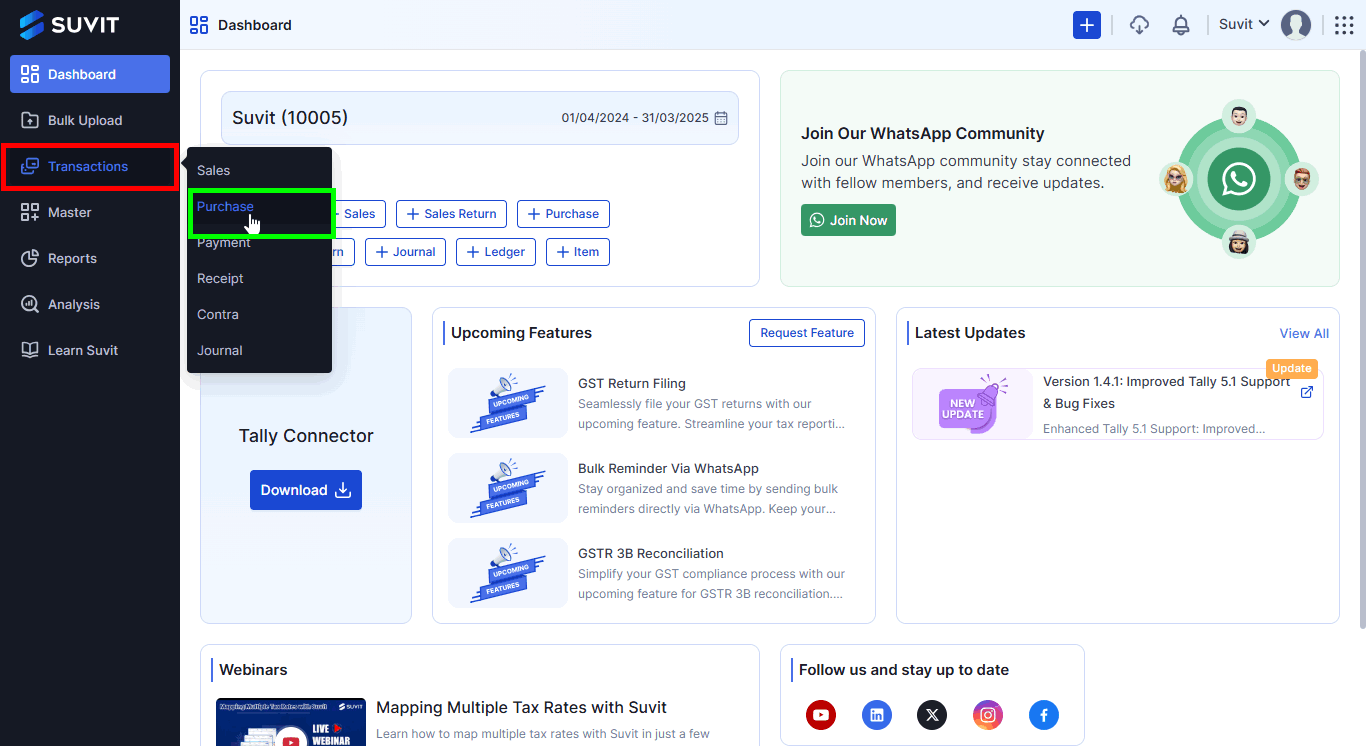
→ Click on the Transactions icon from the left menu
→ Hover on Purchase under the Transactions tab
→ Click on Purchase
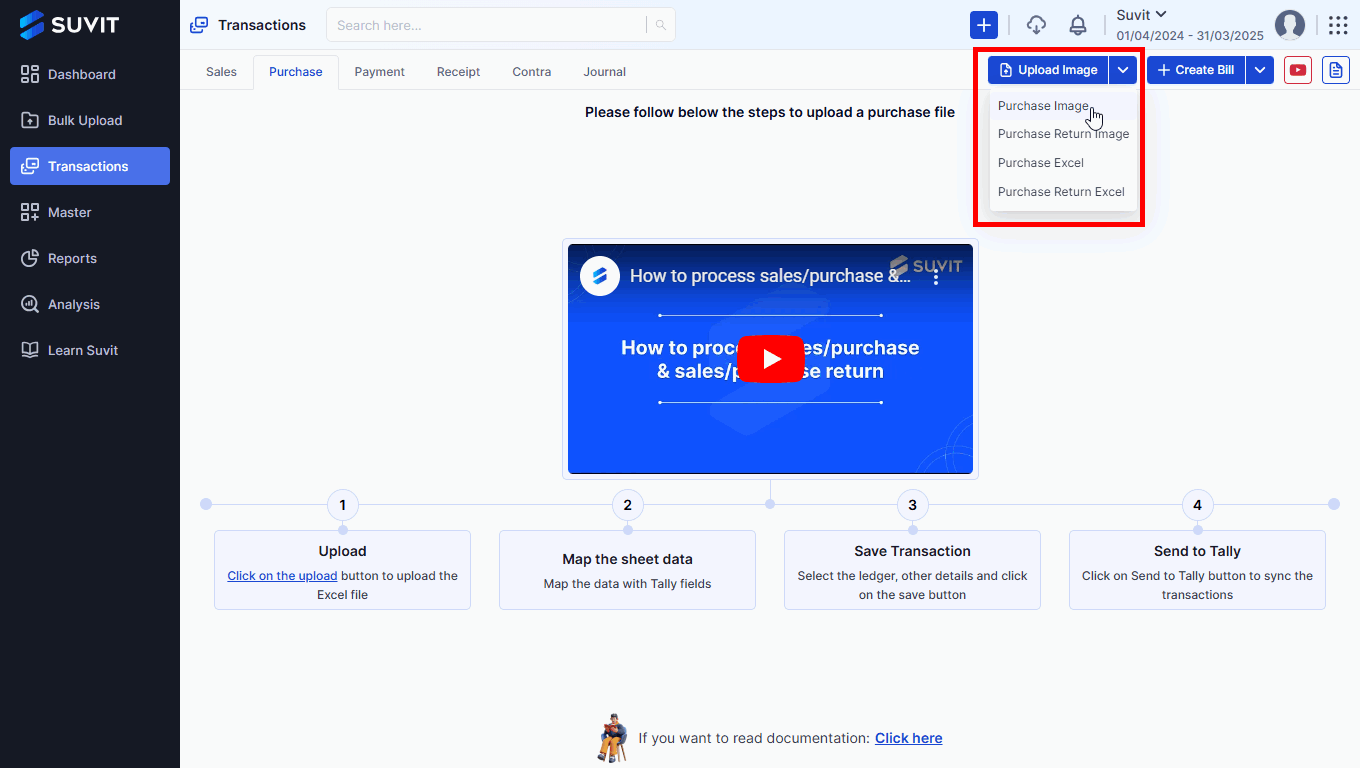
→ On the top-right corner, click on Upload Image
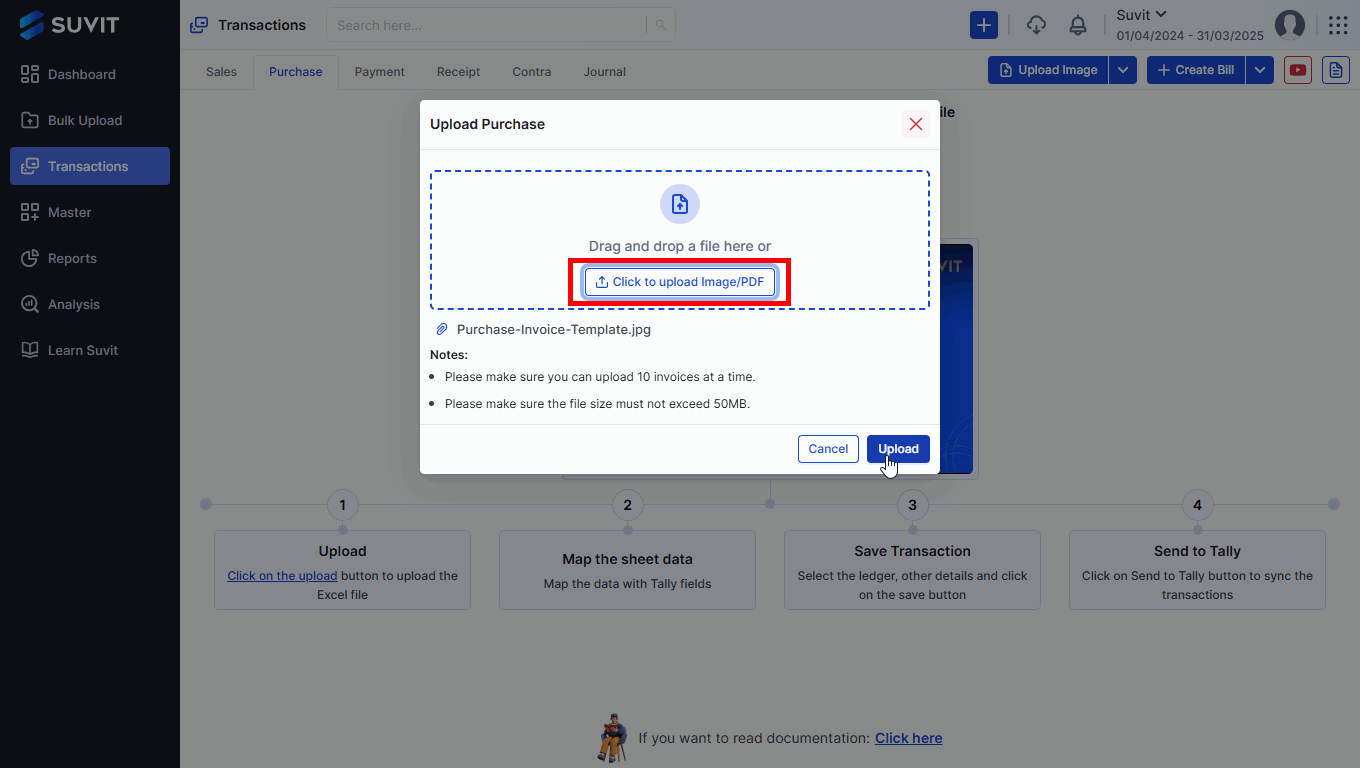
→ Either drag & drop the file or click Click to upload Image/PDF
→ After the file loads, click Upload
→ After upload, you will see the list of invoices
→ Click on the invoice row to edit or verify the data
**Note:**
 Fields from the uploaded purchase invoice will be automatically detected and matched with your purchase details. You can review and correct any errors here.
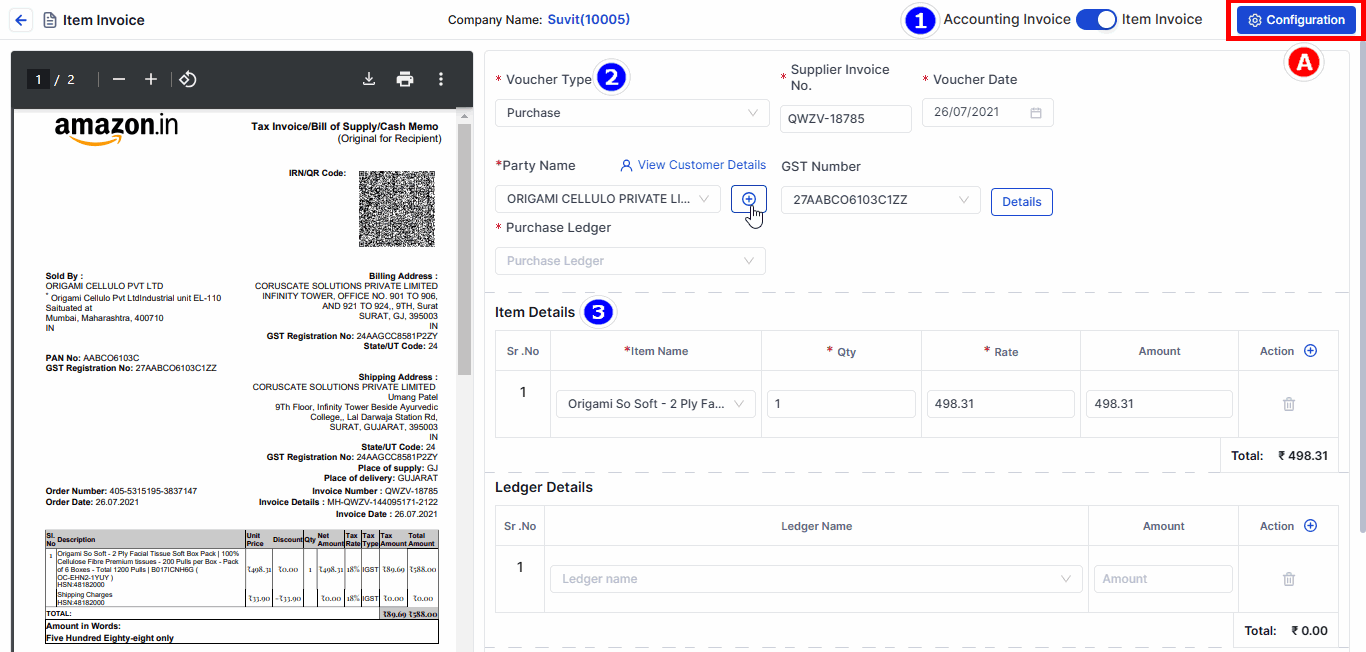
1. Review and Select Invoice Type
2. Fill in Invoice Details
3. Add Item Details
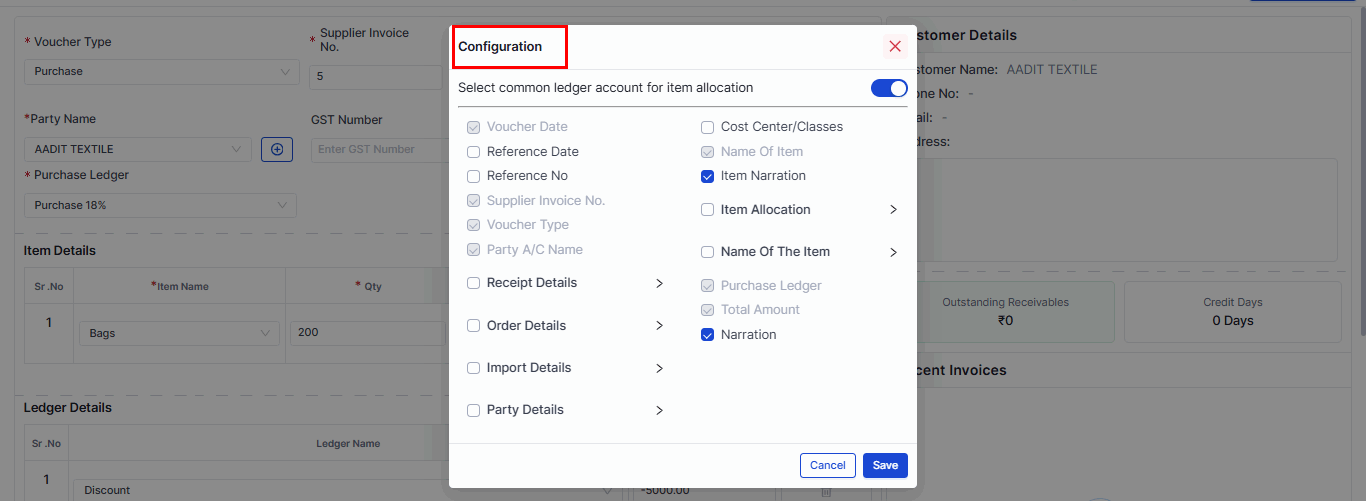
- Use the **Configuration Window** to select the fields displayed during voucher entry.
- Fields include **Voucher Date**, **Supplier Invoice No.**, **Item Narration**, etc. Save the changes once done.
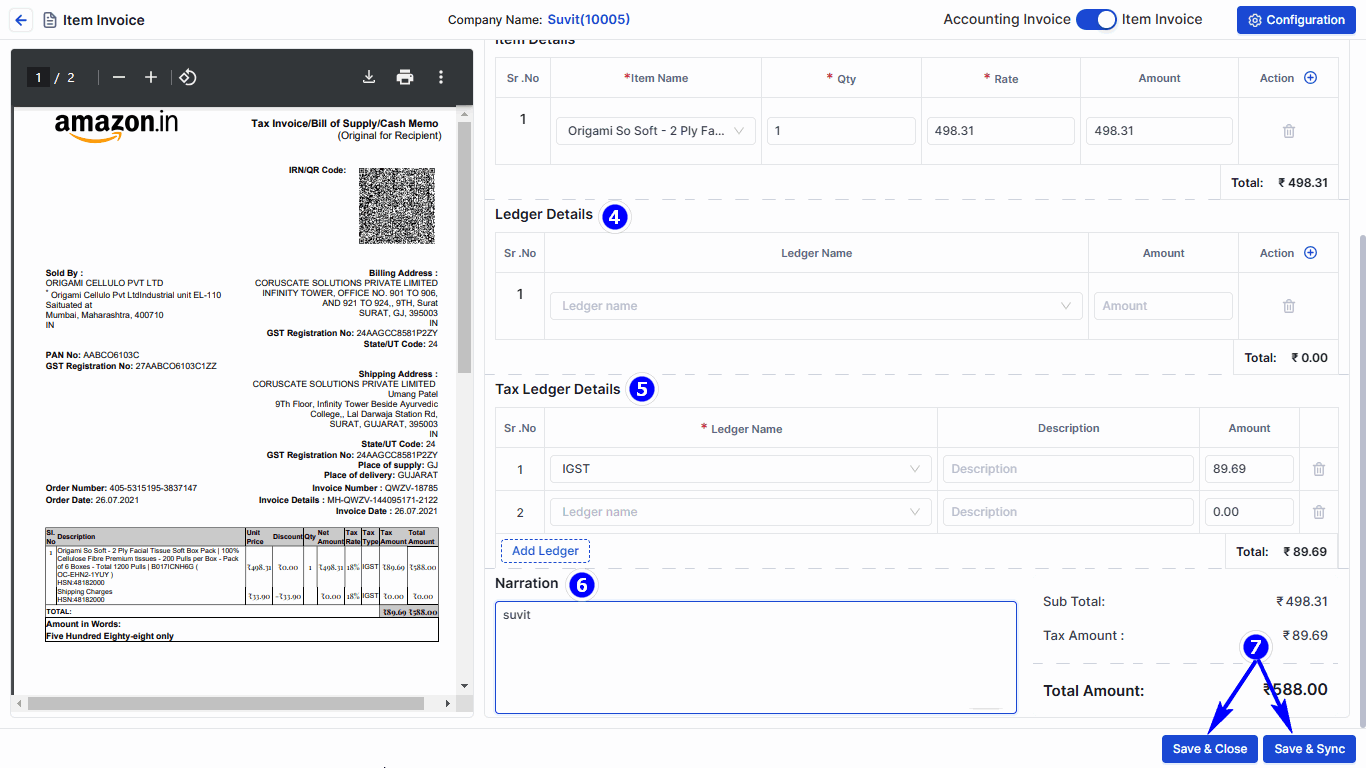
4. Edit Ledger Details
5. Add Tax Ledger Details
6. Review Narration and Totals
7. Save and Synchronize
**Important:**
- Ensure the Suvit Tally Connector is open during synchronization.
- OCR efficiency for capturing purchase data is 50–80% during the initial entry .