Single GST with respective tax ledgers
A step by step guide to map the data where Single GST rate is applicable with respective GST ledgers defined in tally. Read on to know more about the process.
Single GST with Respective Tax Ledgers
- The data you have is containing a single GST % as shown in the image below, and you want to post the tax amount in the respective % wise tax ledgers.
Follow the Steps:
Step 1
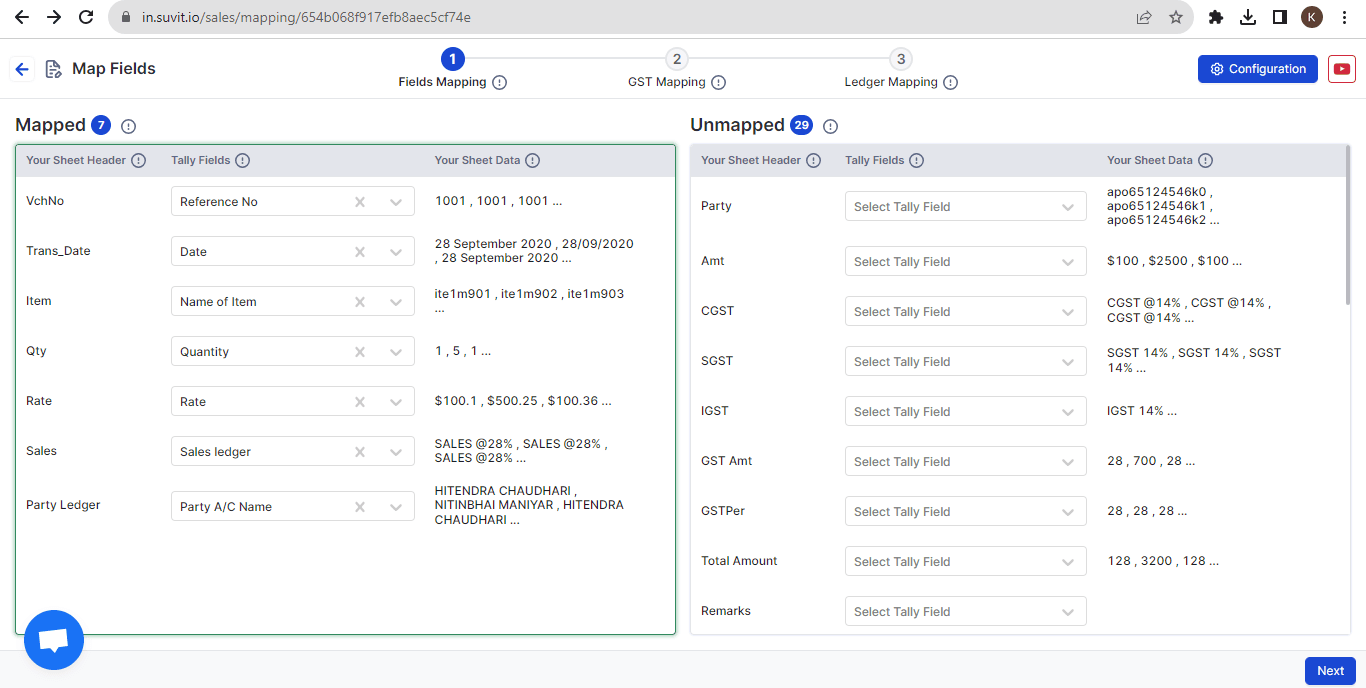
- As you upload the sheet and click on "Complete," the following mapping screen will appear.
- Suvit will automatically map fields, and the rest will be shown in unmapped. You need to cross-check once if the auto-mapping was correctly done or else you can make necessary changes as per the requirement.
Step 2
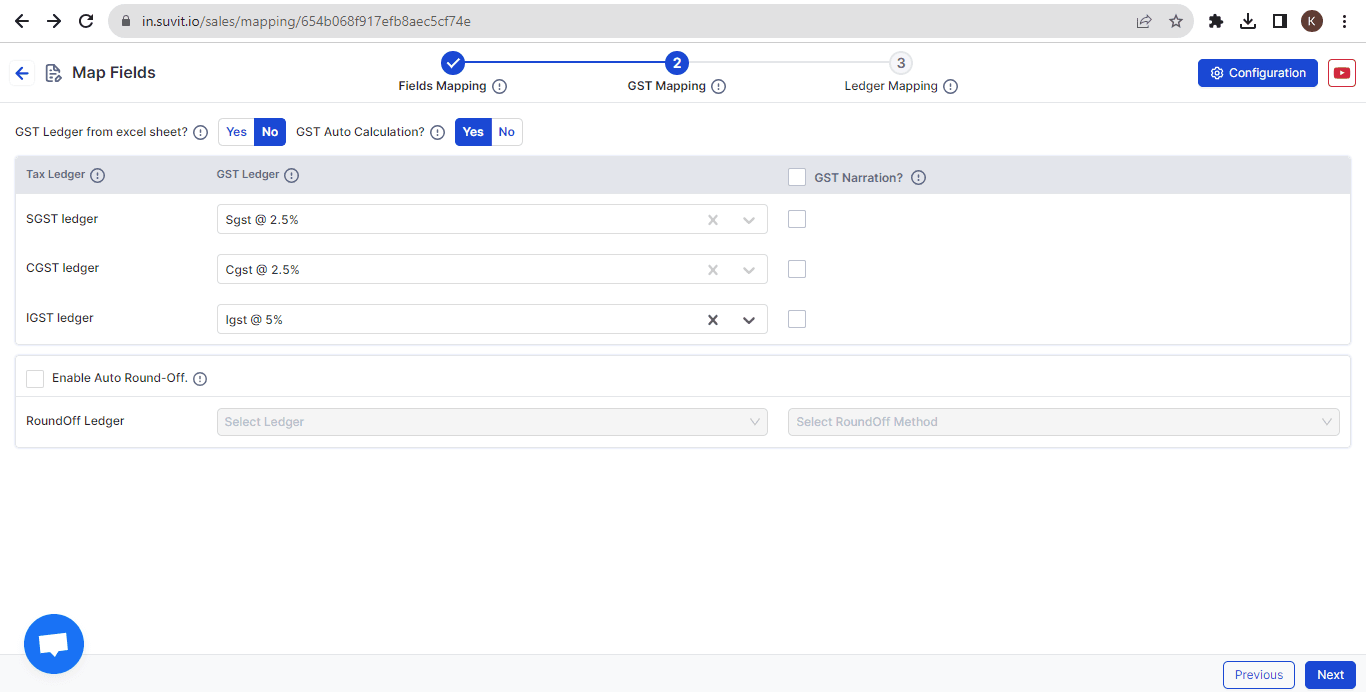
- In the GST mapping, you need to map the required tally GST ledgers (In this case, 5% GST data) as per your data available. Refer to the image below in case you require the GST calculation automatically.
- The GST % must be set in your Sales ledger or Stock item in Tally, only then will it be automatically calculated on the amount you have selected in "Fields mapping."
Step 3
- As seen in the above image, all the transactions are of 5%, so in tax ledger mapping, SGST @ 2.5%, CGST @ 2.5%, and IGST @ 5% tax ledgers of Tally will be mapped.
Follow this for AUTO GST calculation
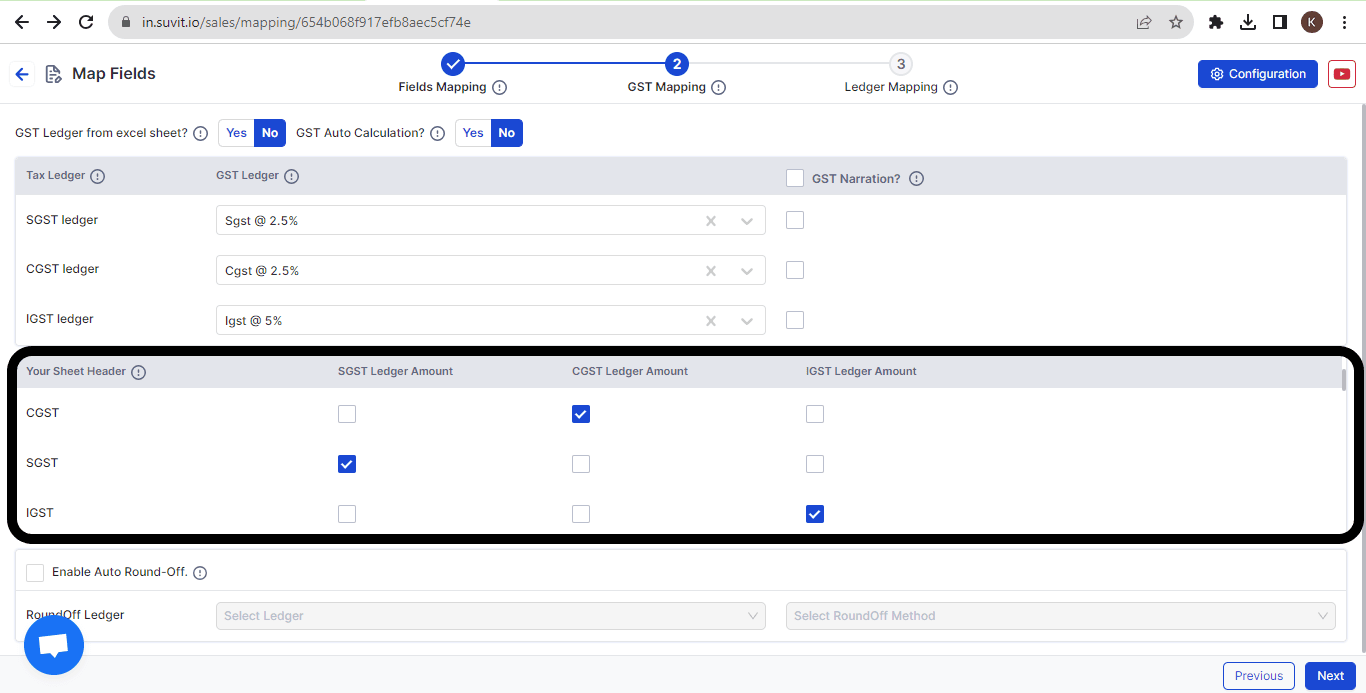
- If you require the GST amount as per mentioned in your Excel sheet, please refer to the below screenshot. The "GST Auto Calculation" must be selected as NO, and a new section will open as highlighted in the image below:
-After completing the ledger mapping, click on "Save & Proceed." The transaction screen with your data will appear. Review and ensure there are no unselected fields. Make any necessary changes and save the data records, then send them to Tally.
Follow this for Manual GST Calculation
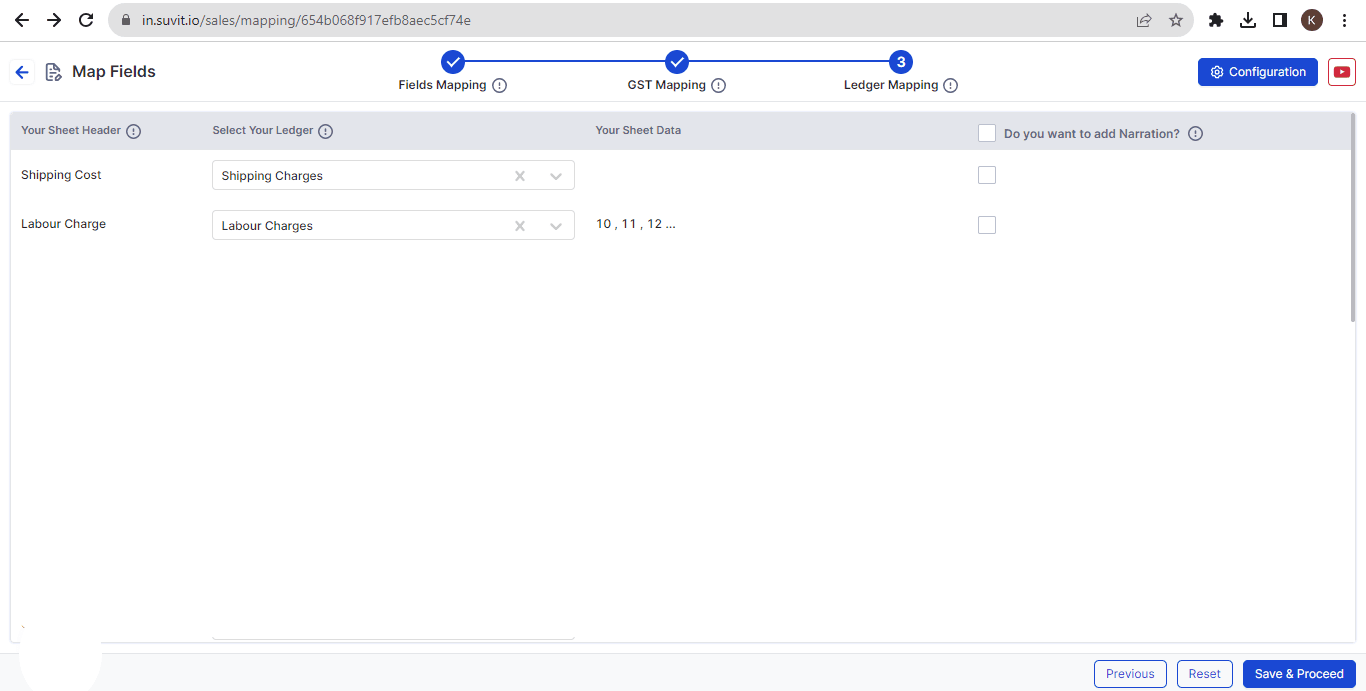
- As you click on Next, the "Ledger Mapping" section will open. If you have any additional ledgers to be mapped apart from the GST ledgers, kindly select them here. Refer to the image below for understanding:
![4As per sheet calc.png]
- After completing the ledger mapping, click on "Save & Proceed." The transaction screen with your data will appear. Review and ensure there are no unselected fields. Make any necessary changes and save the data records, then send them to Tally.