⚡Quick & Easy: Upload Your Zerodha (Tradebook) Sales Sheet to Suvit
Learn how to process the Zerodha (tradebook) Stock/Share Excel sales sheet in Suvit, including Sheet Preparation, Uploading to Suvit & Mapping Data
🔍 Overview
This guide will help you format your Zerodha Sales Excel Sheet and upload it to Suvit including mapping the Order Number and Order Date fields.
📝 Notes
Make sure there is only Sales (sell) data in excel sheet. Purchase (buy)data can be removed using filter)
📝 Preparing the Excel Sheet
Step 1 - Remove Unwanted Data
🗑 Delete unnecessary data from the Zerodha Excel sheet before proceeding.
- 📅 Modify the Trade Date Format using the steps below:

- Select the Trade Date column. Navigate to Data → Text to column
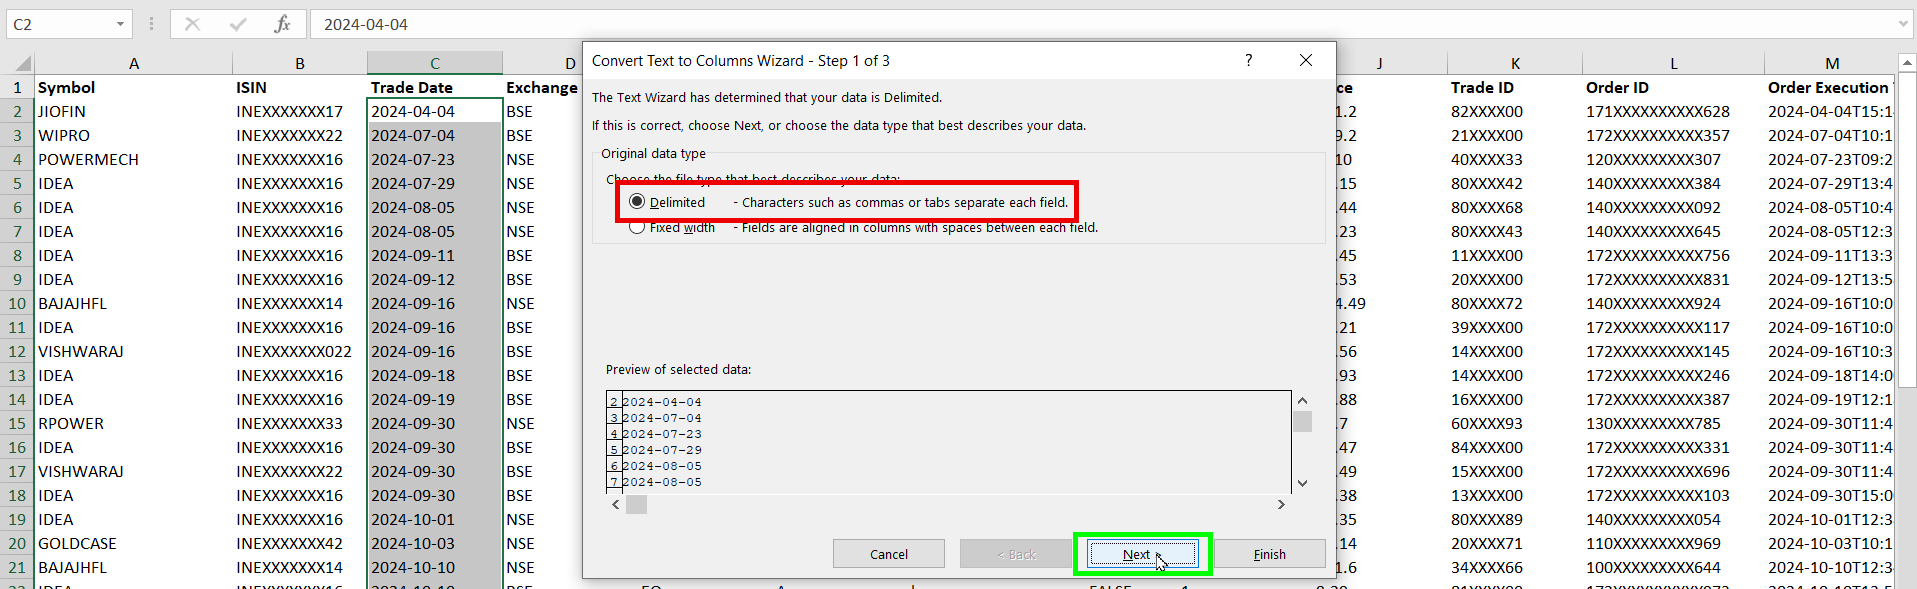
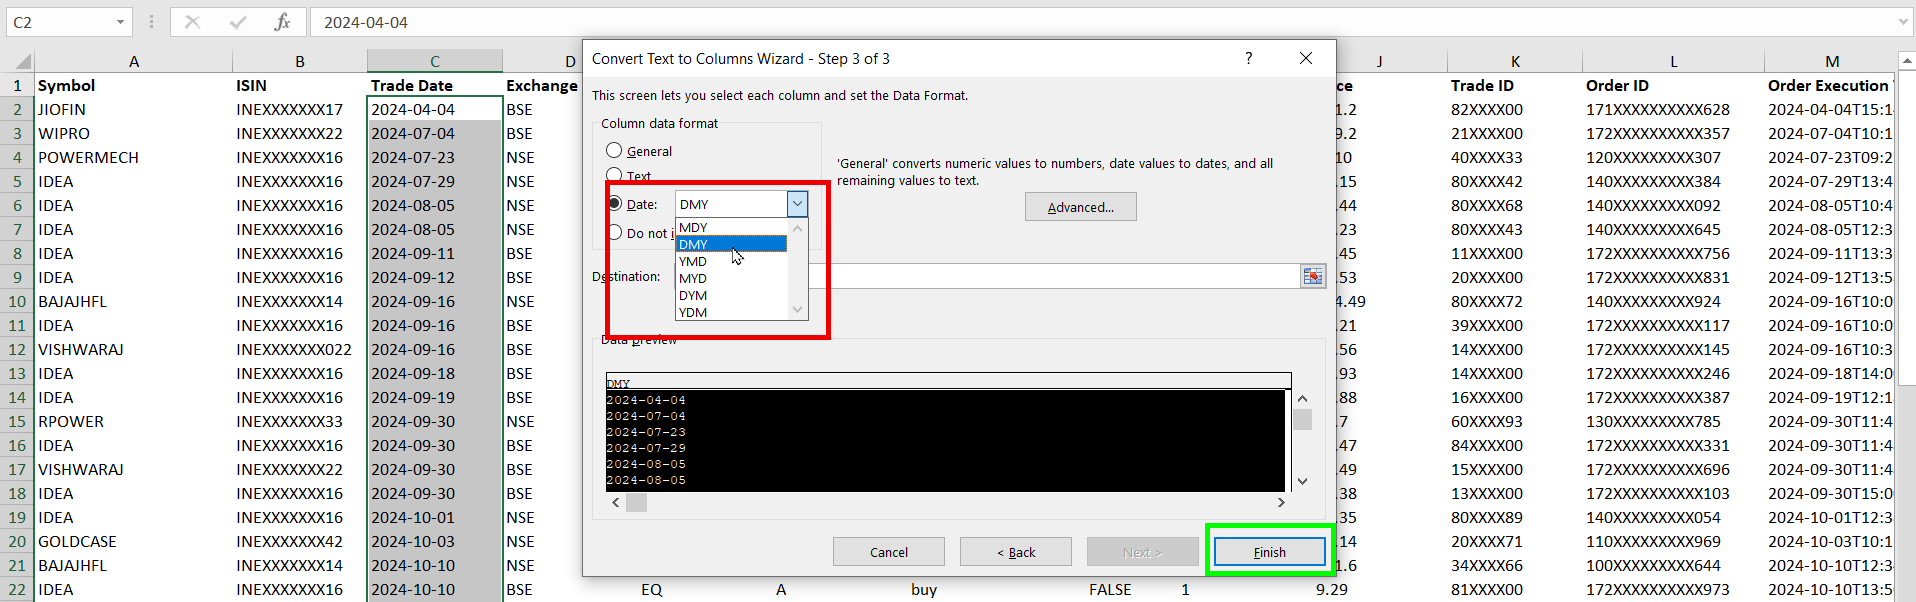
- Choose DMY (Day/Month/Year) as the format and click Finish.
⏳ Modify the Order Execution Time Format using the steps below:
- Select the Order Execution Time column.
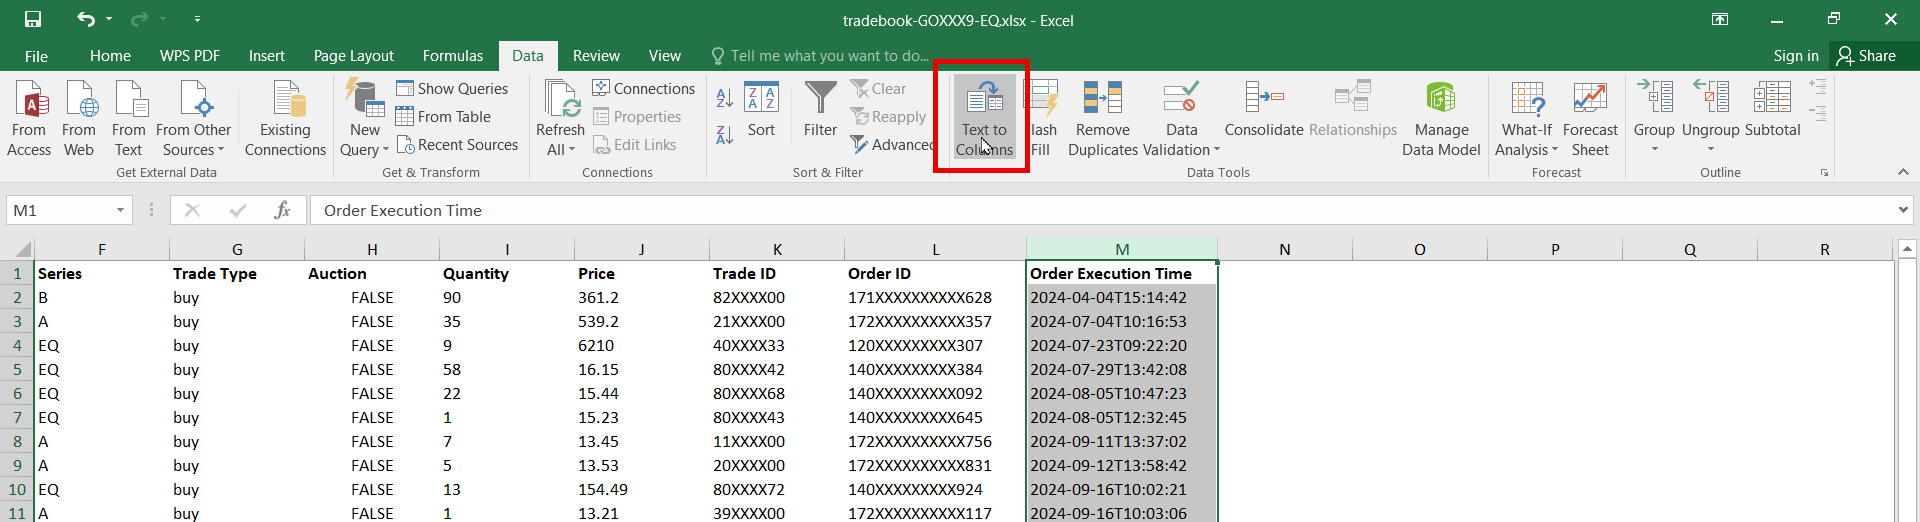
- Navigate to Data → Text to Column
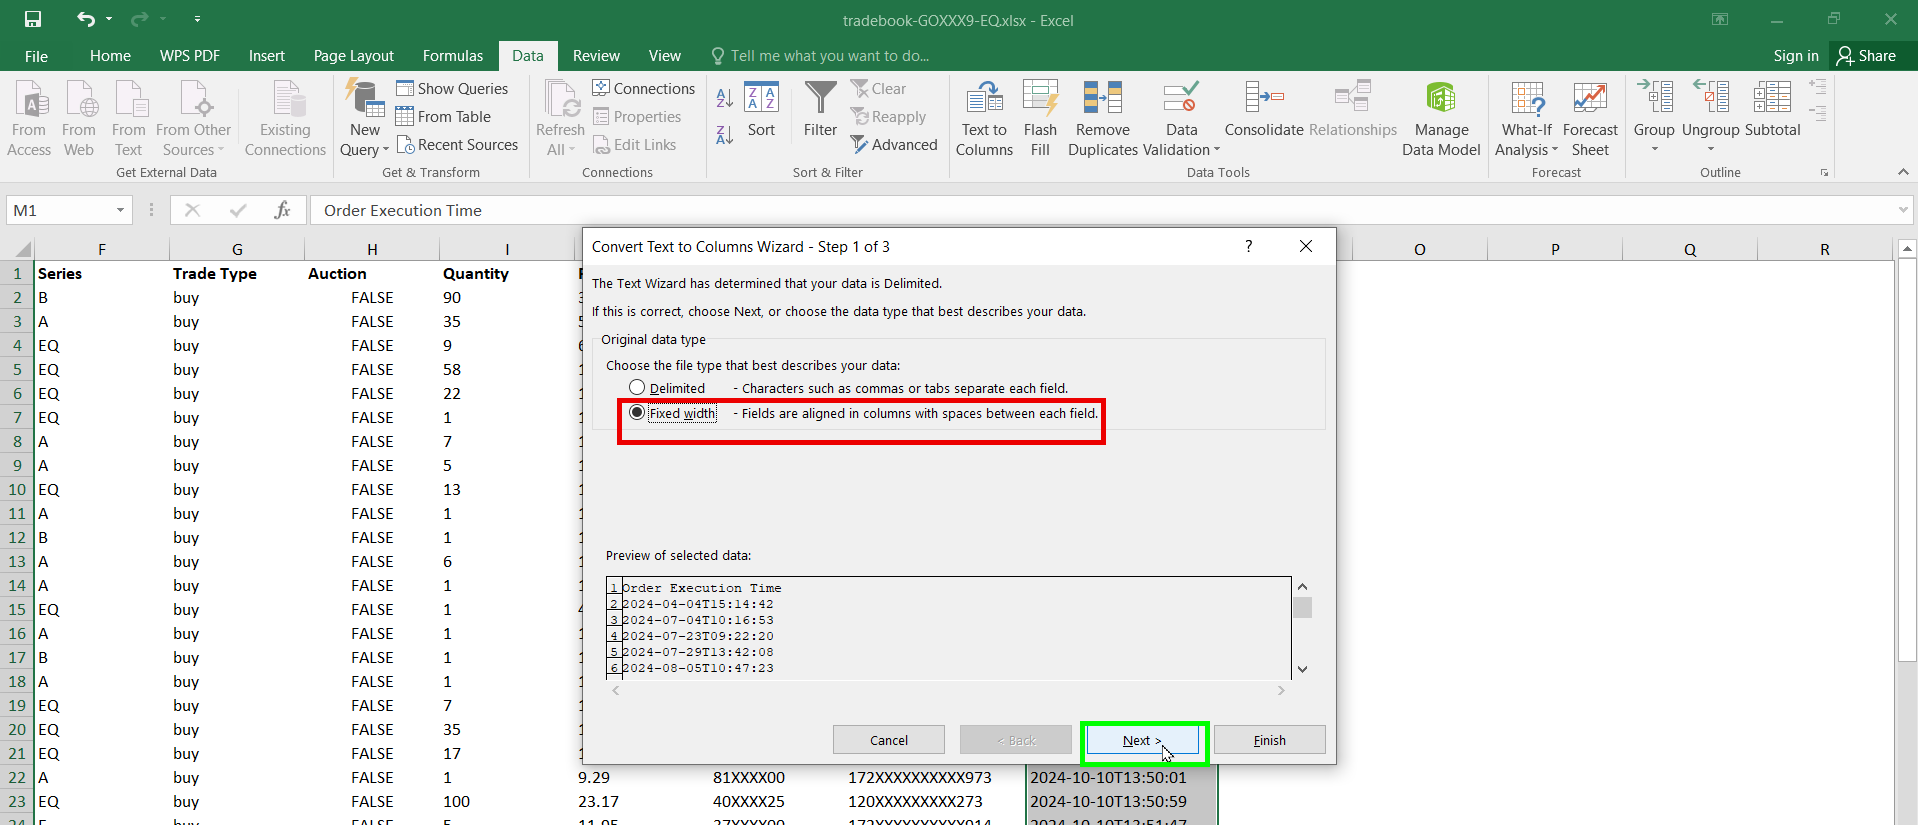
- Select Fixed Width → Next.
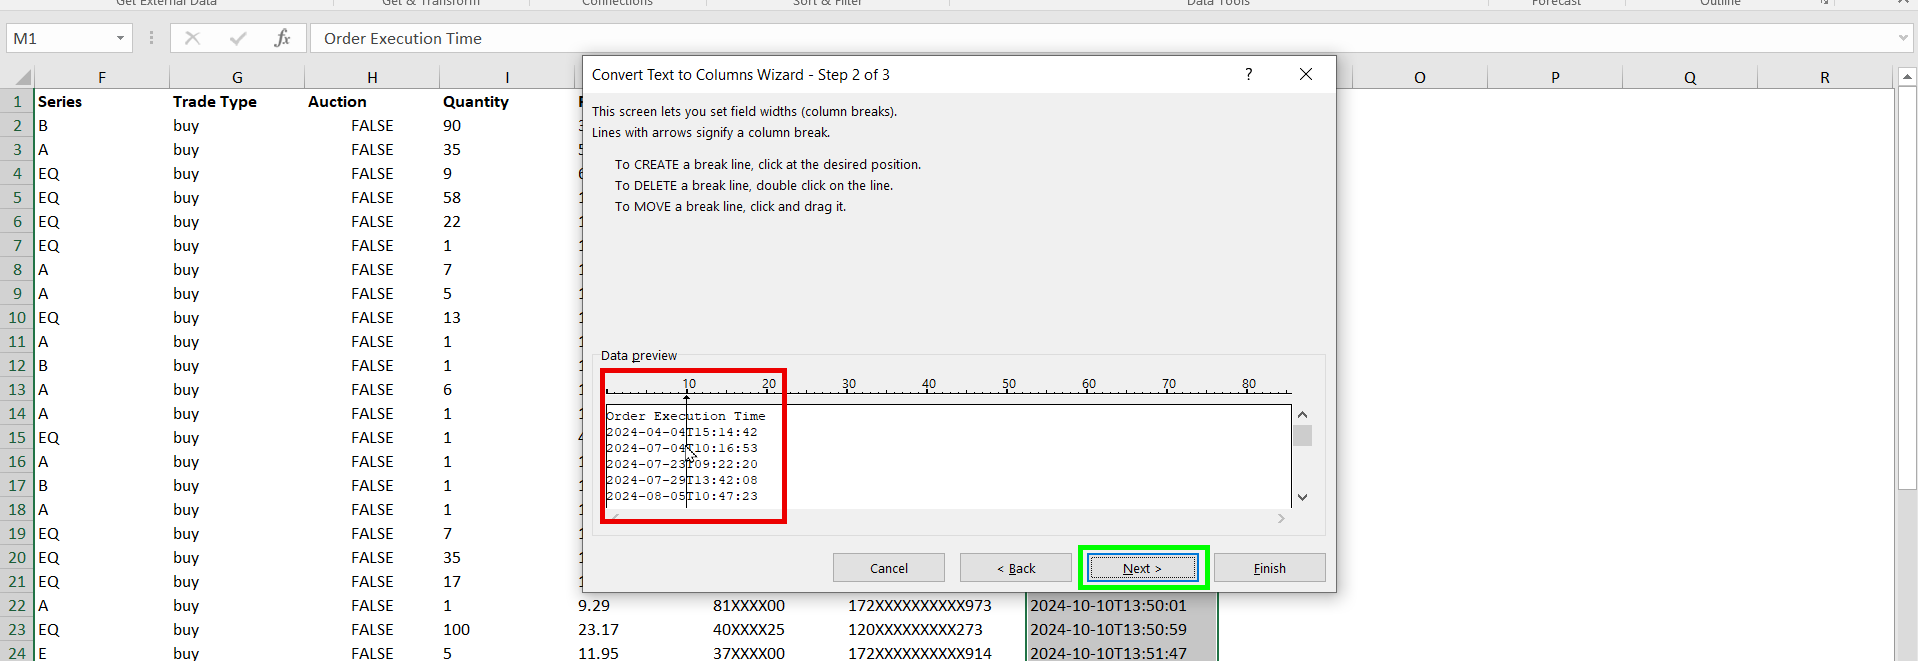
- Select Separator and format as DMY (Day/Month/Year).
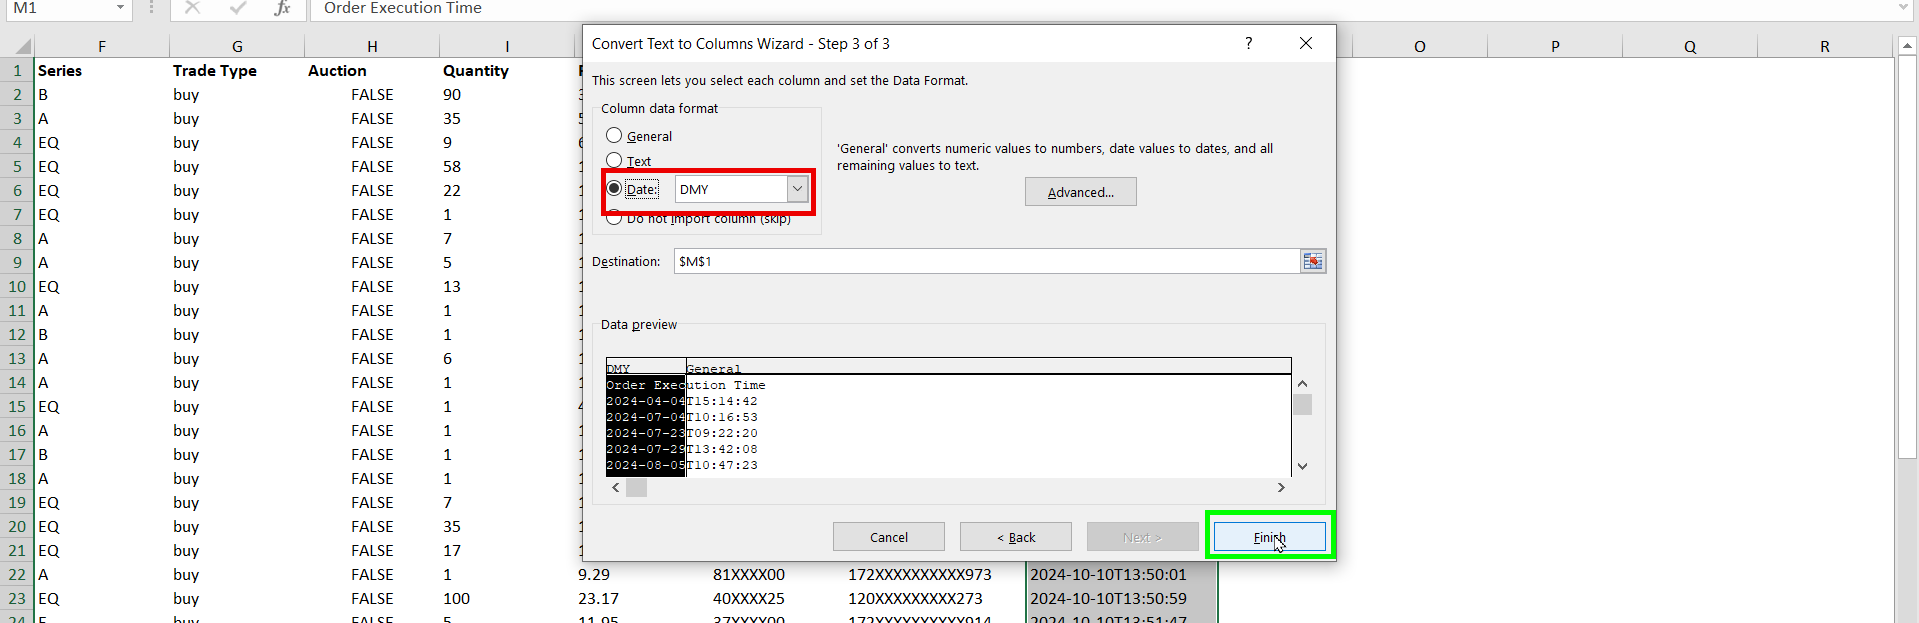
- Choose DMY (Day/Month/Year) as the format and click Finish.
Step 4 - Add Required Details
✅ Before saving, add:

💾 Save the Excel Sheet.
📤 Uploading the Sales Sheet in Suvit
Step 5 - Upload the Excel Sheet
- Login to Suvit.
- Click on Explore Now under Data Entry Automation.
- Select Sales and click on Bulk Upload.
- Select and upload the prepared Zerodha Excel sheet.
Step 6 - Enable Order Number & Order Date (If Required)
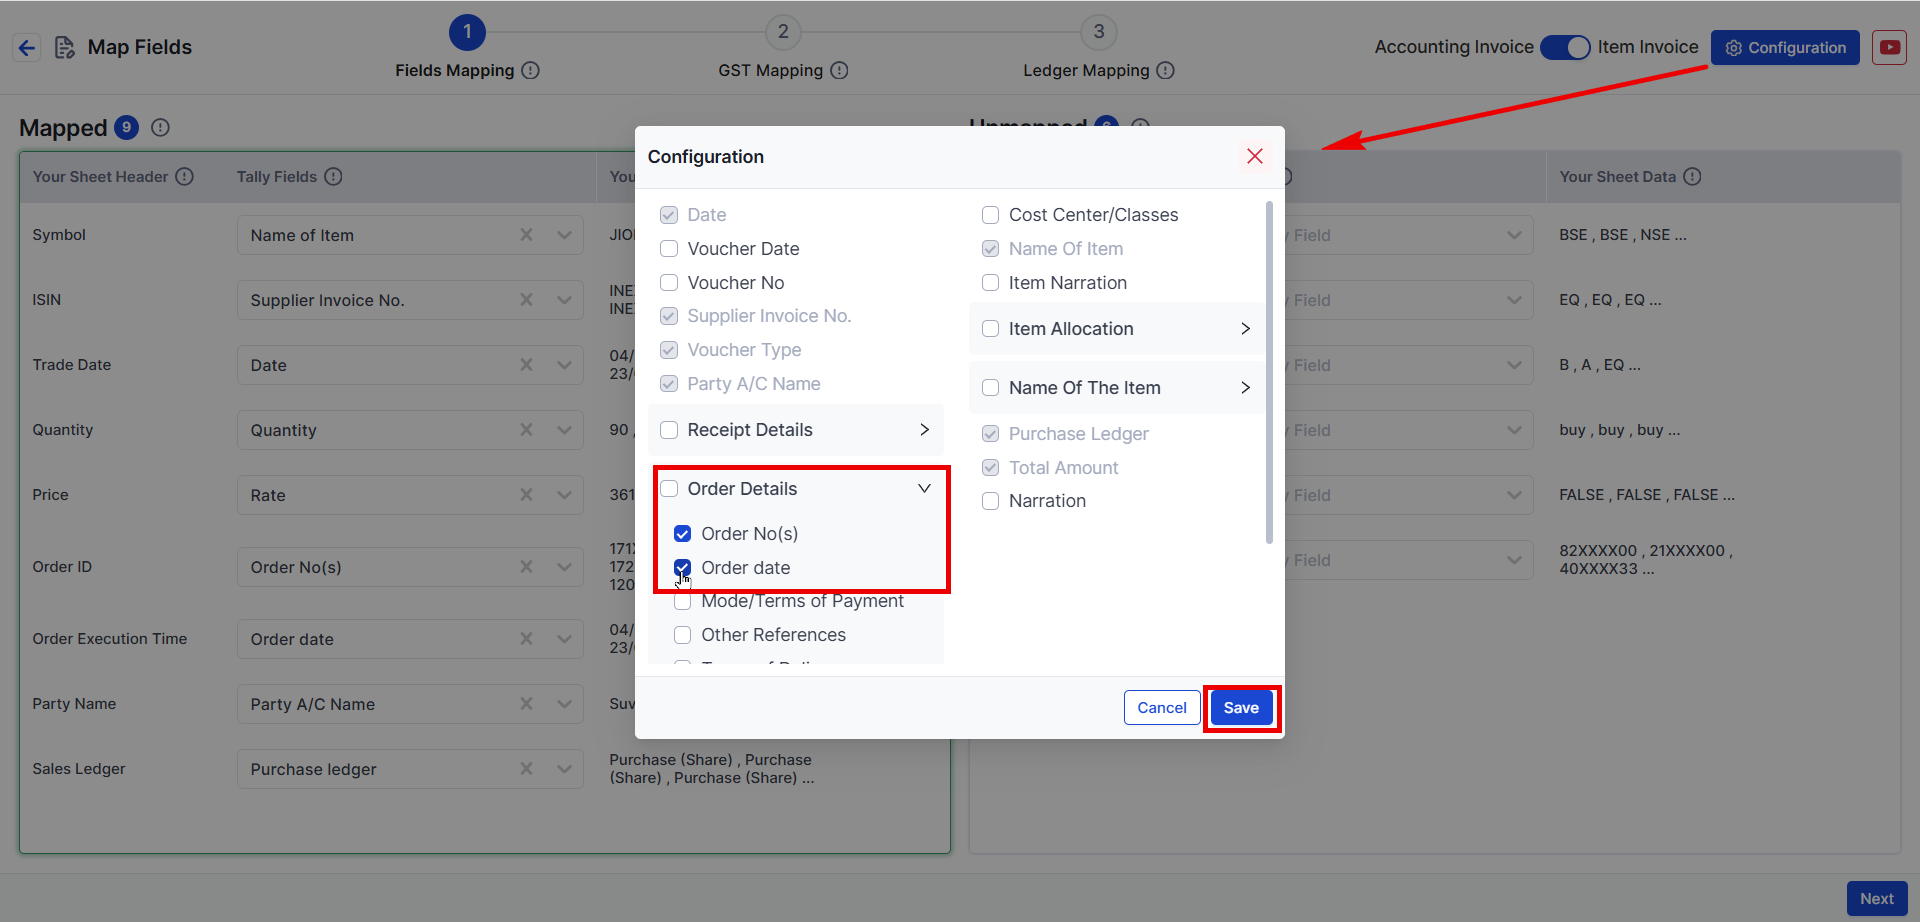
- Go to Configuration → Enable Order Number and Order Date.
🔄 Mapping Process
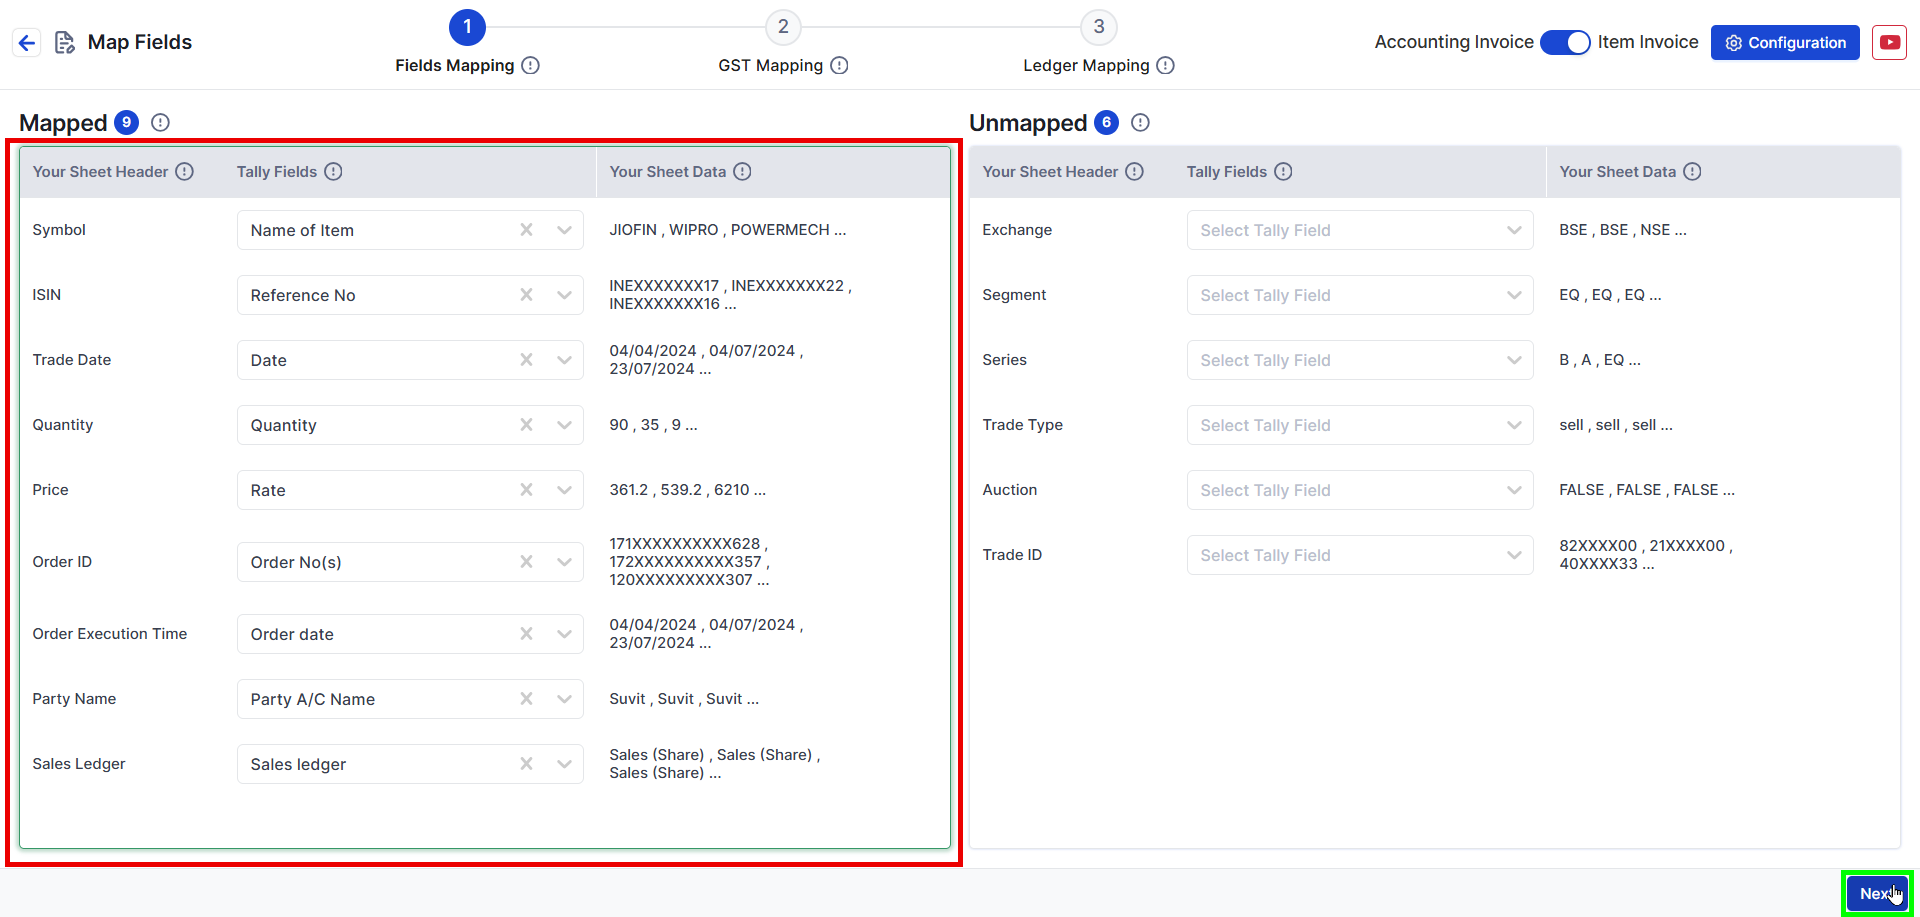
Step 7 - Field Mapping
- Map all necessary details under Field Mapping.
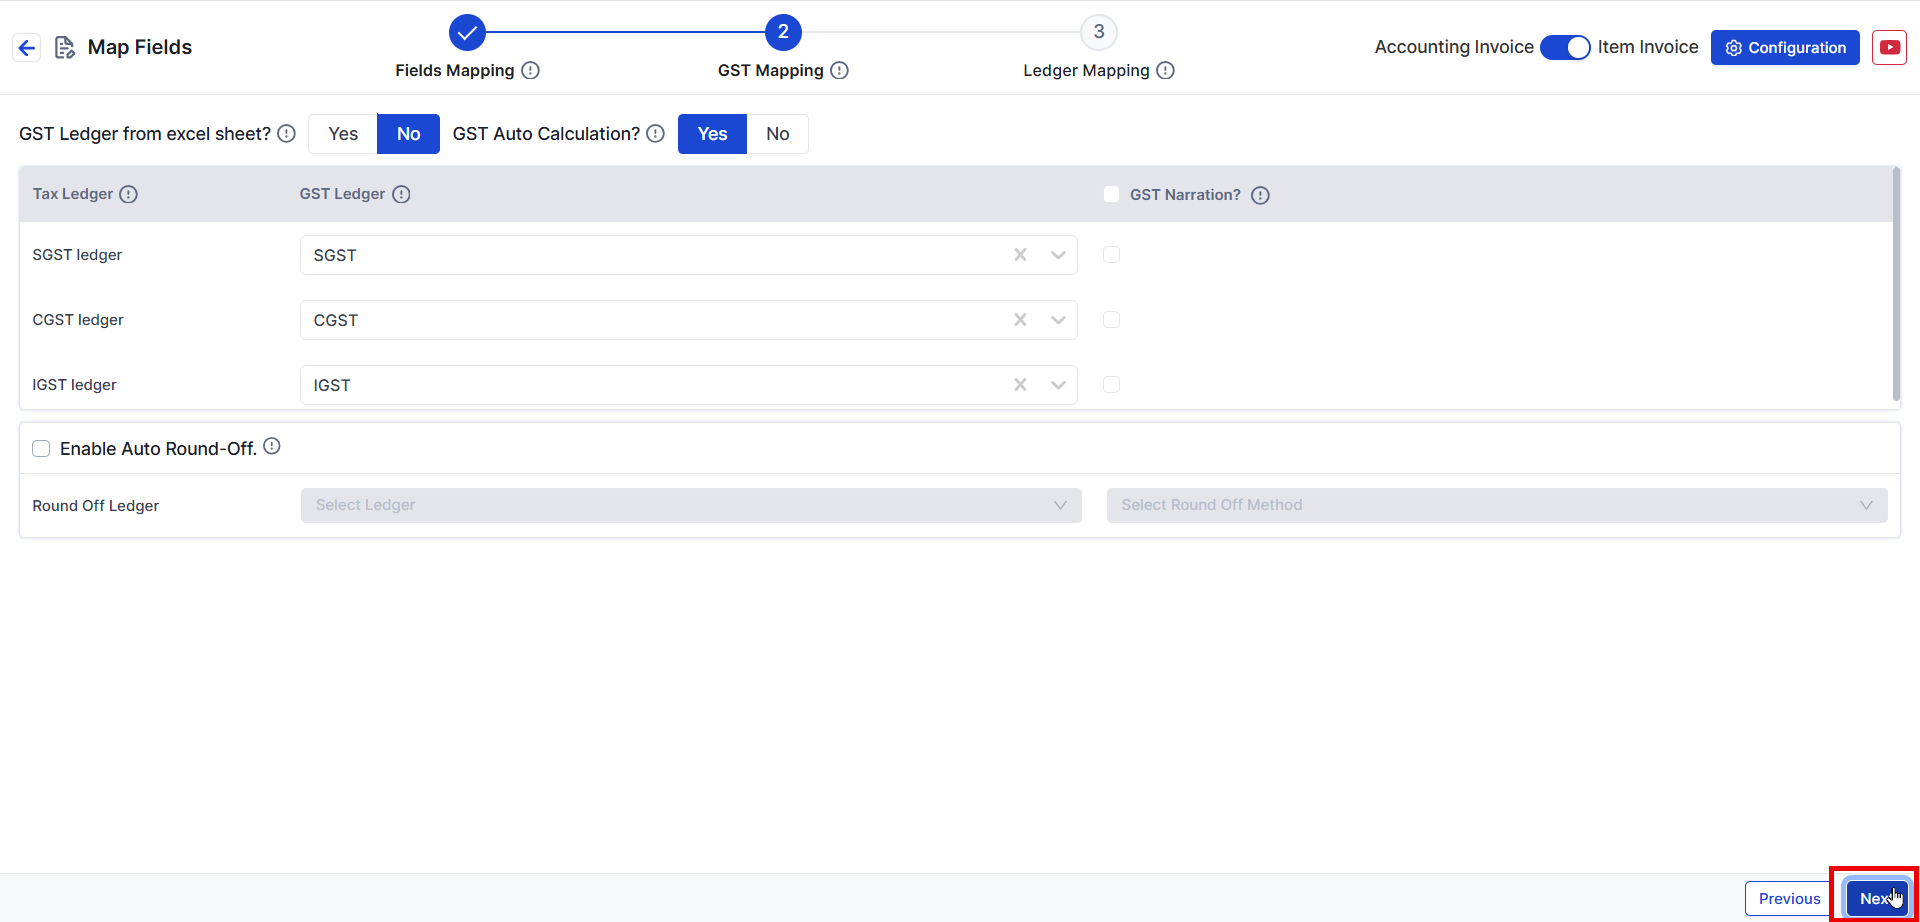
Step 8 - GST Mapping
✅ No changes required Changes can be done if required. Click Next.
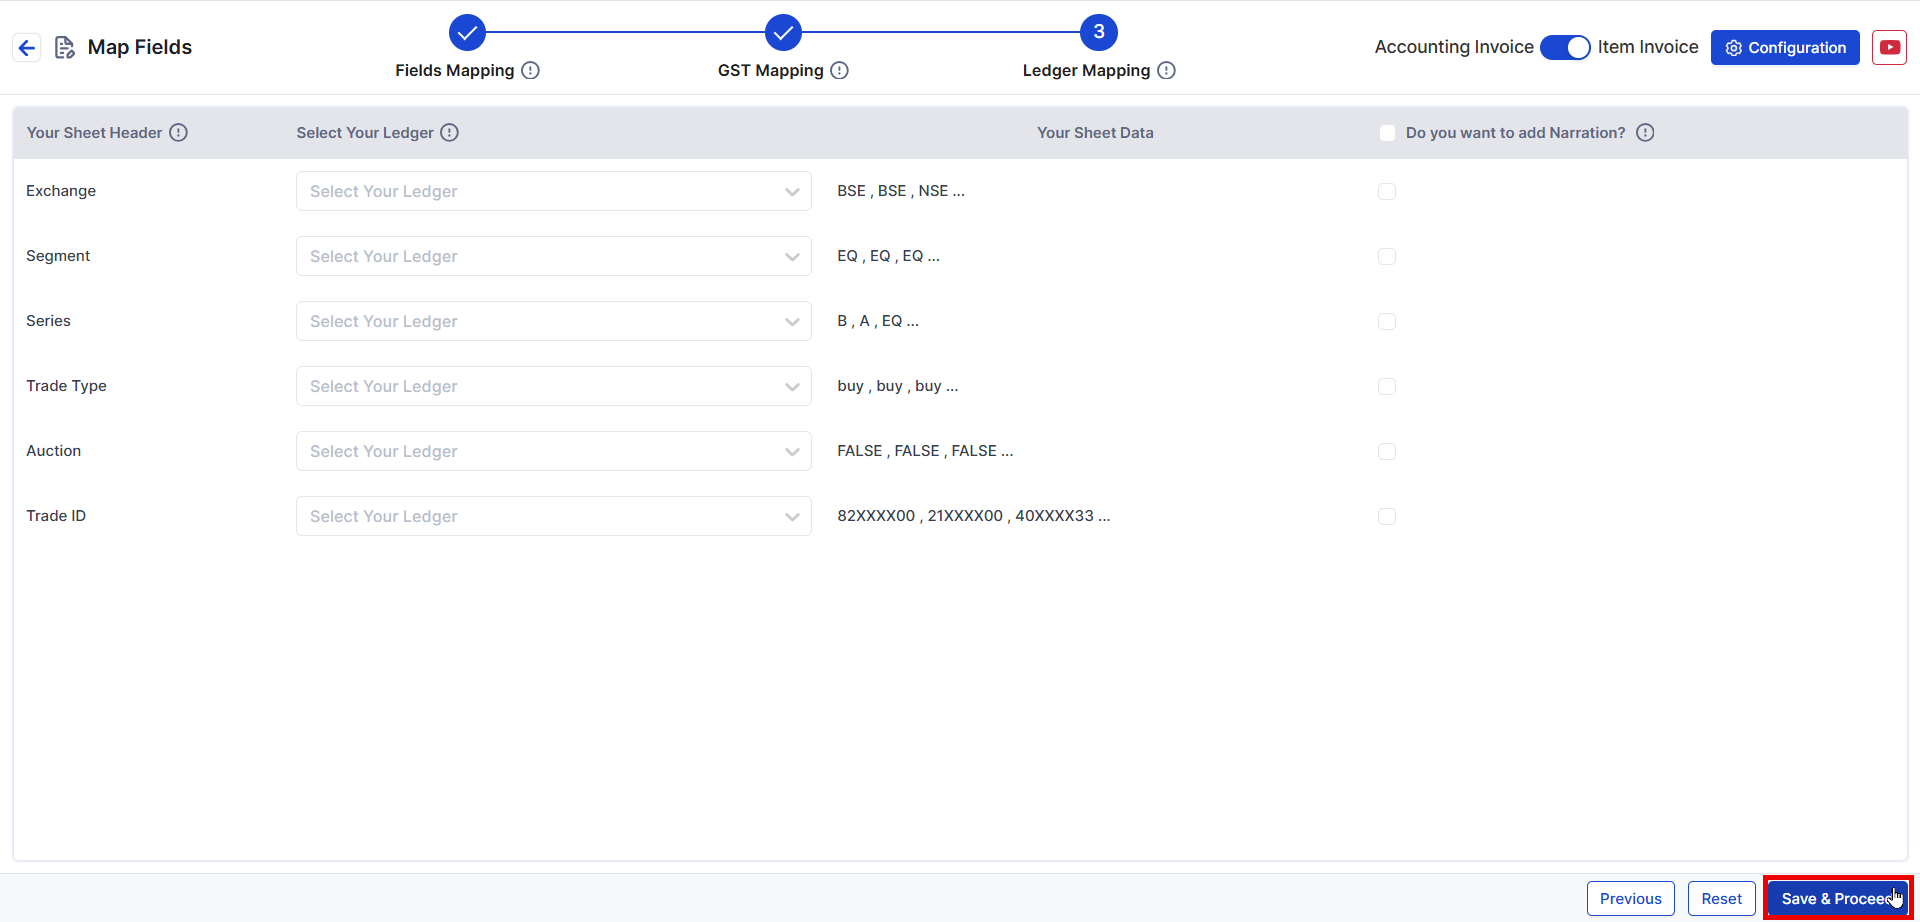
Step 9 - Ledger Mapping
- Map other charges such as Sales Charges, Delivery Charges, etc., if required.
✅ You have successfully uploaded the Zerodha Sales Excel Sheet with Order Number & Order Date! 🎉