Suvit helps manage financial data by syncing journal entries with item details to Tally. Ensure your data includes item names, quantities, and amounts

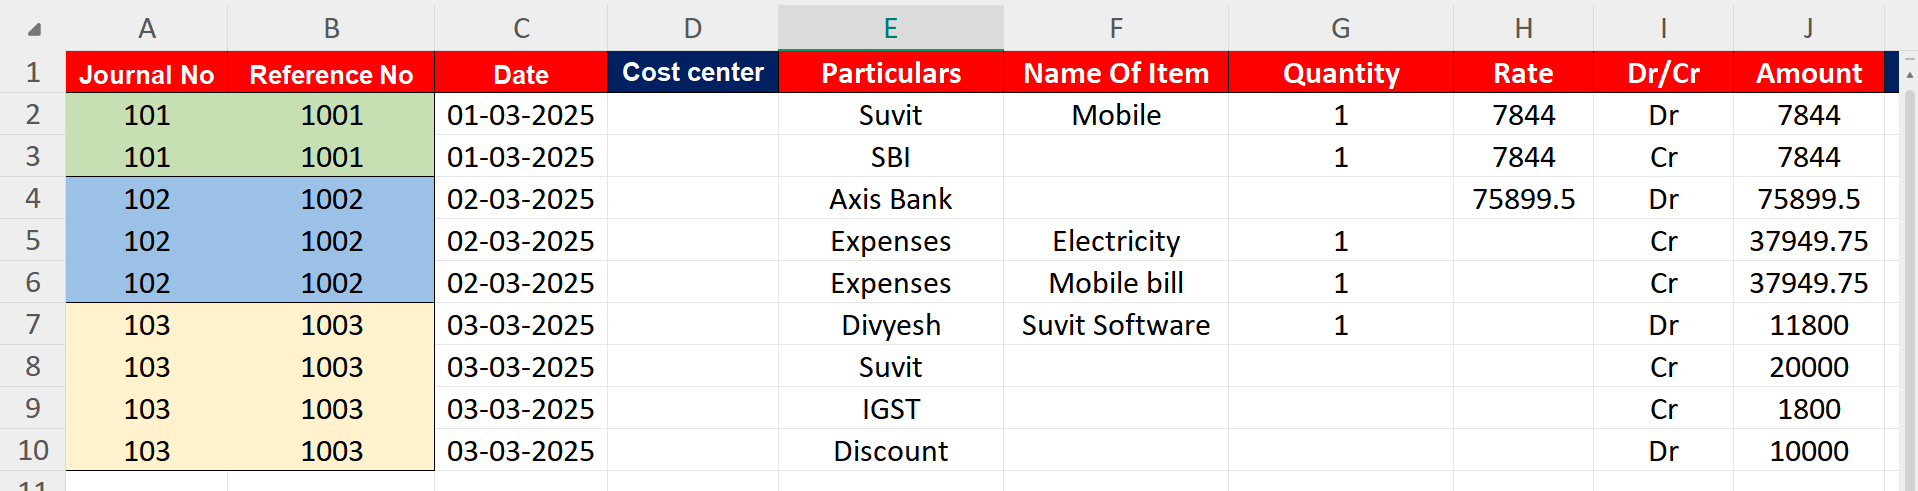
⇒ **You need at least 9 types of data in your Excel sheet for mapping:**
⇒ **Not Mandatory list**
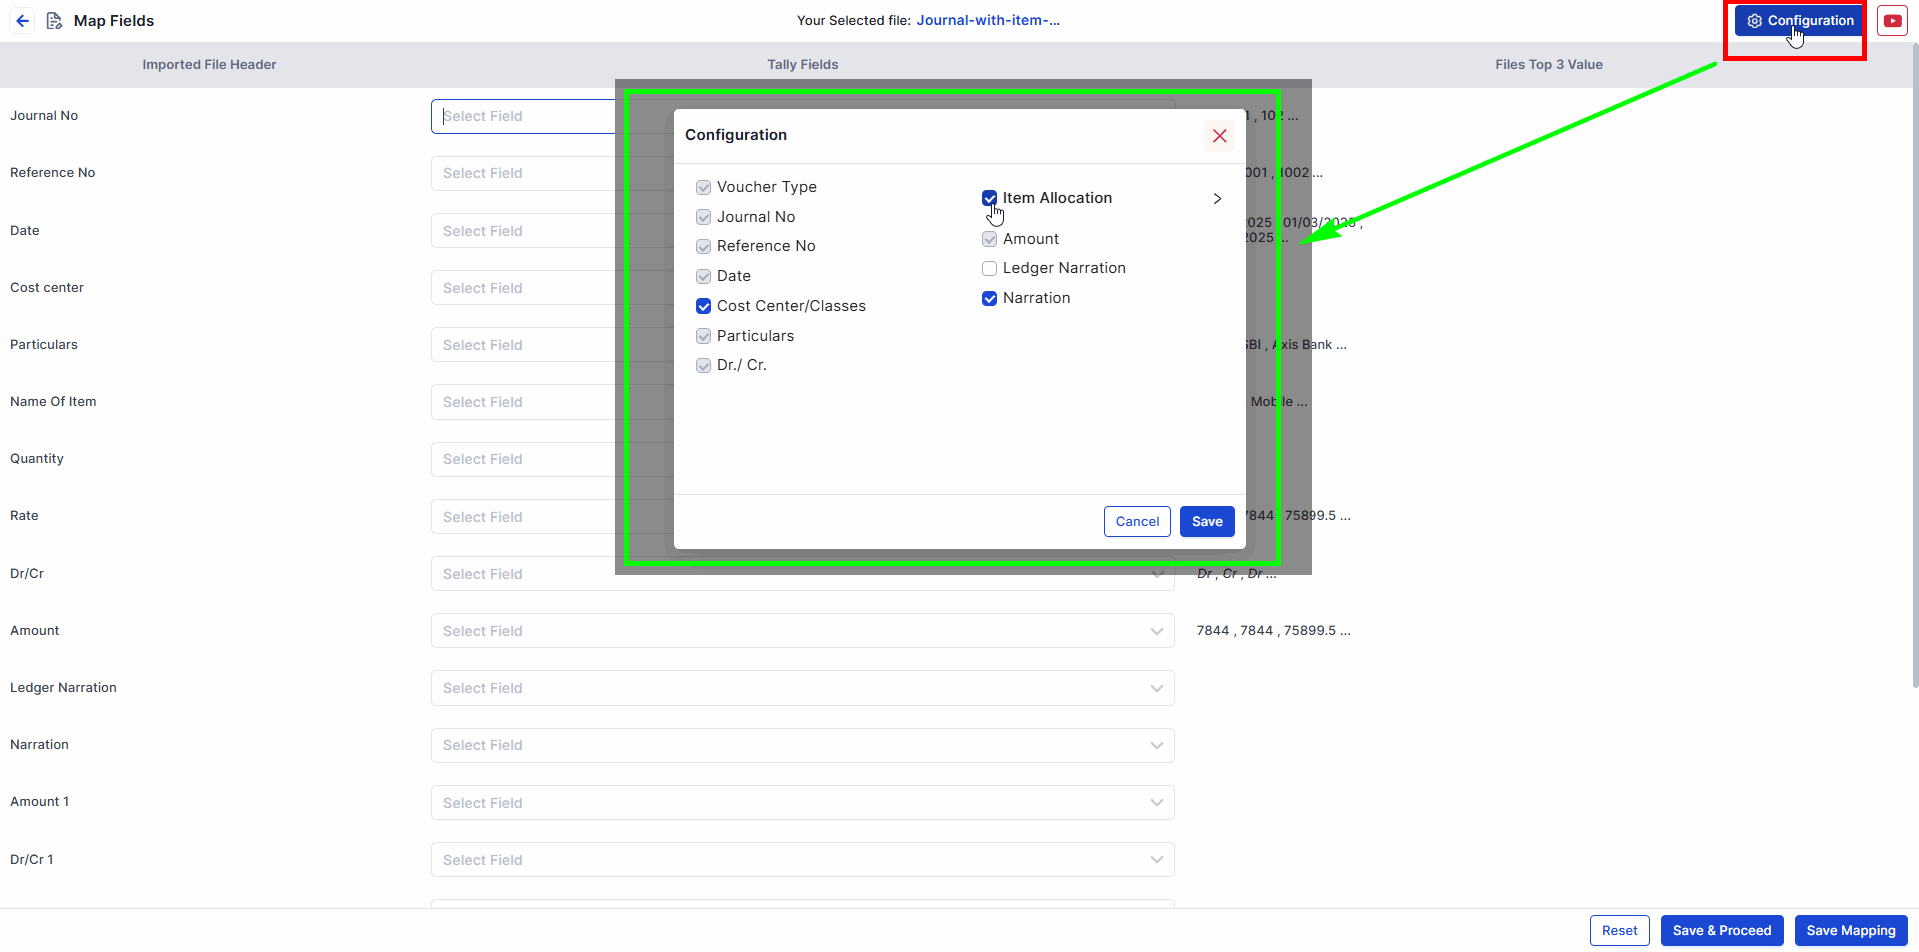
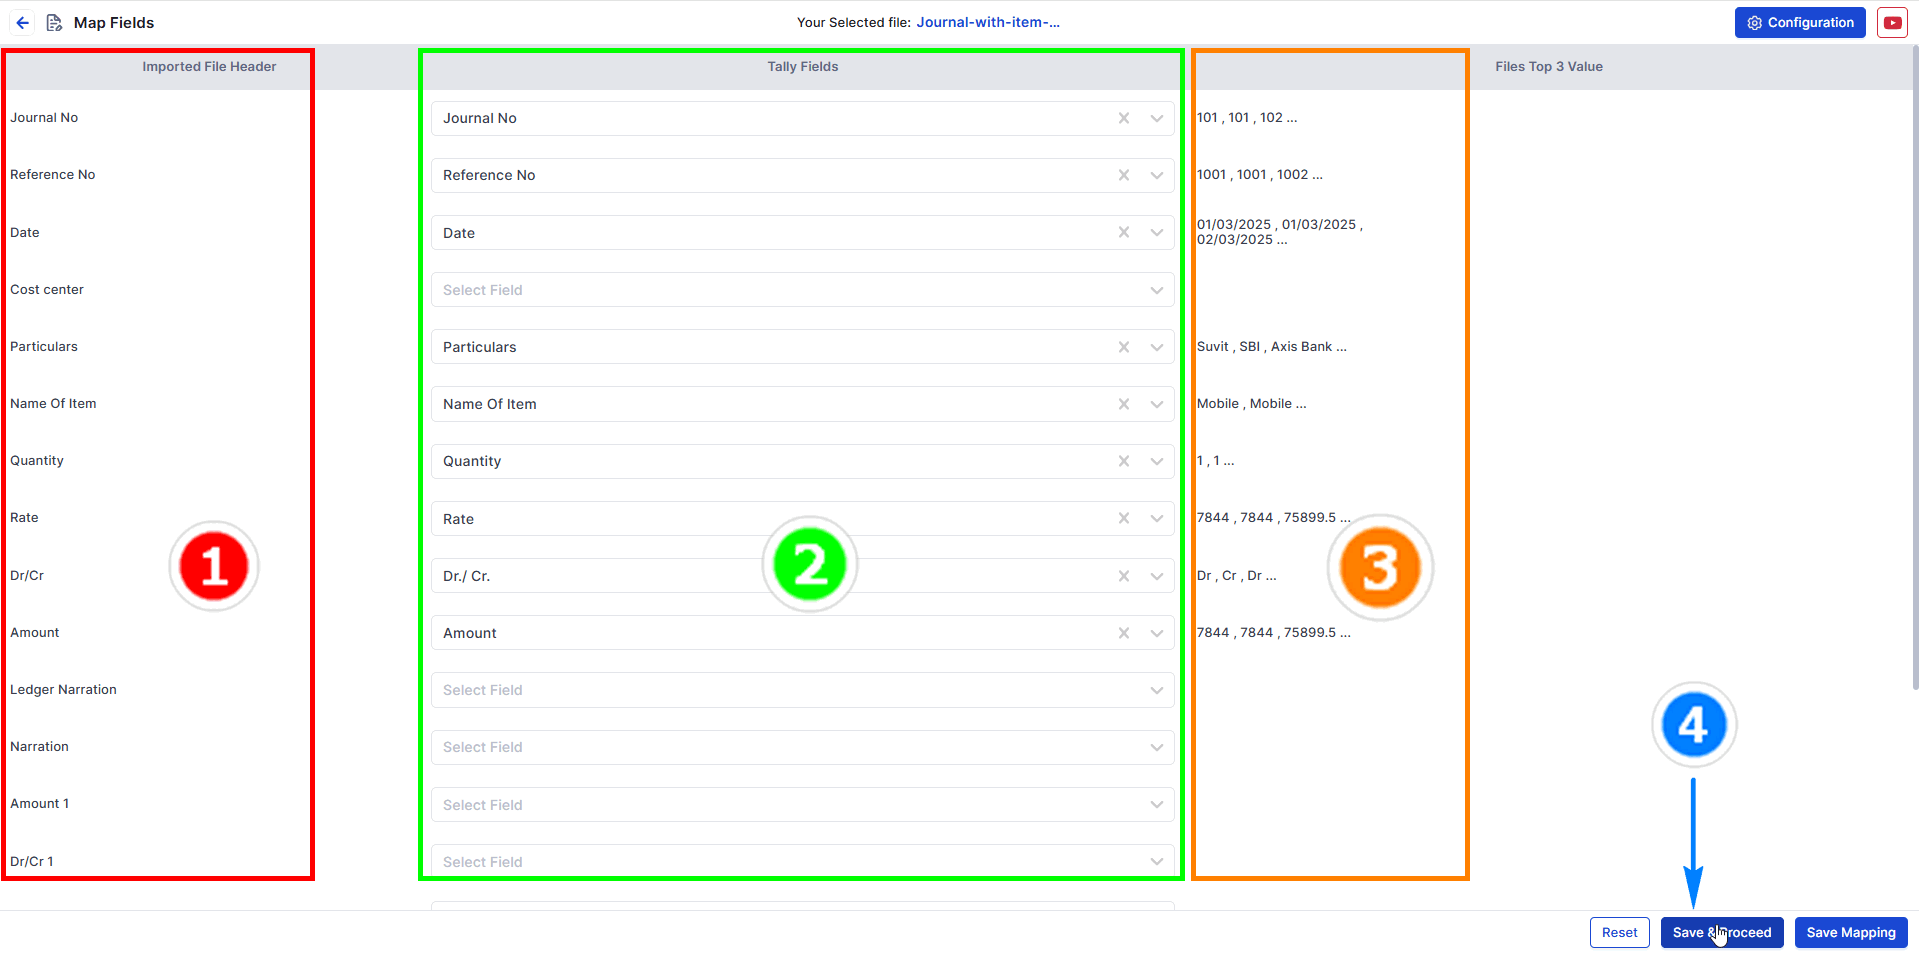
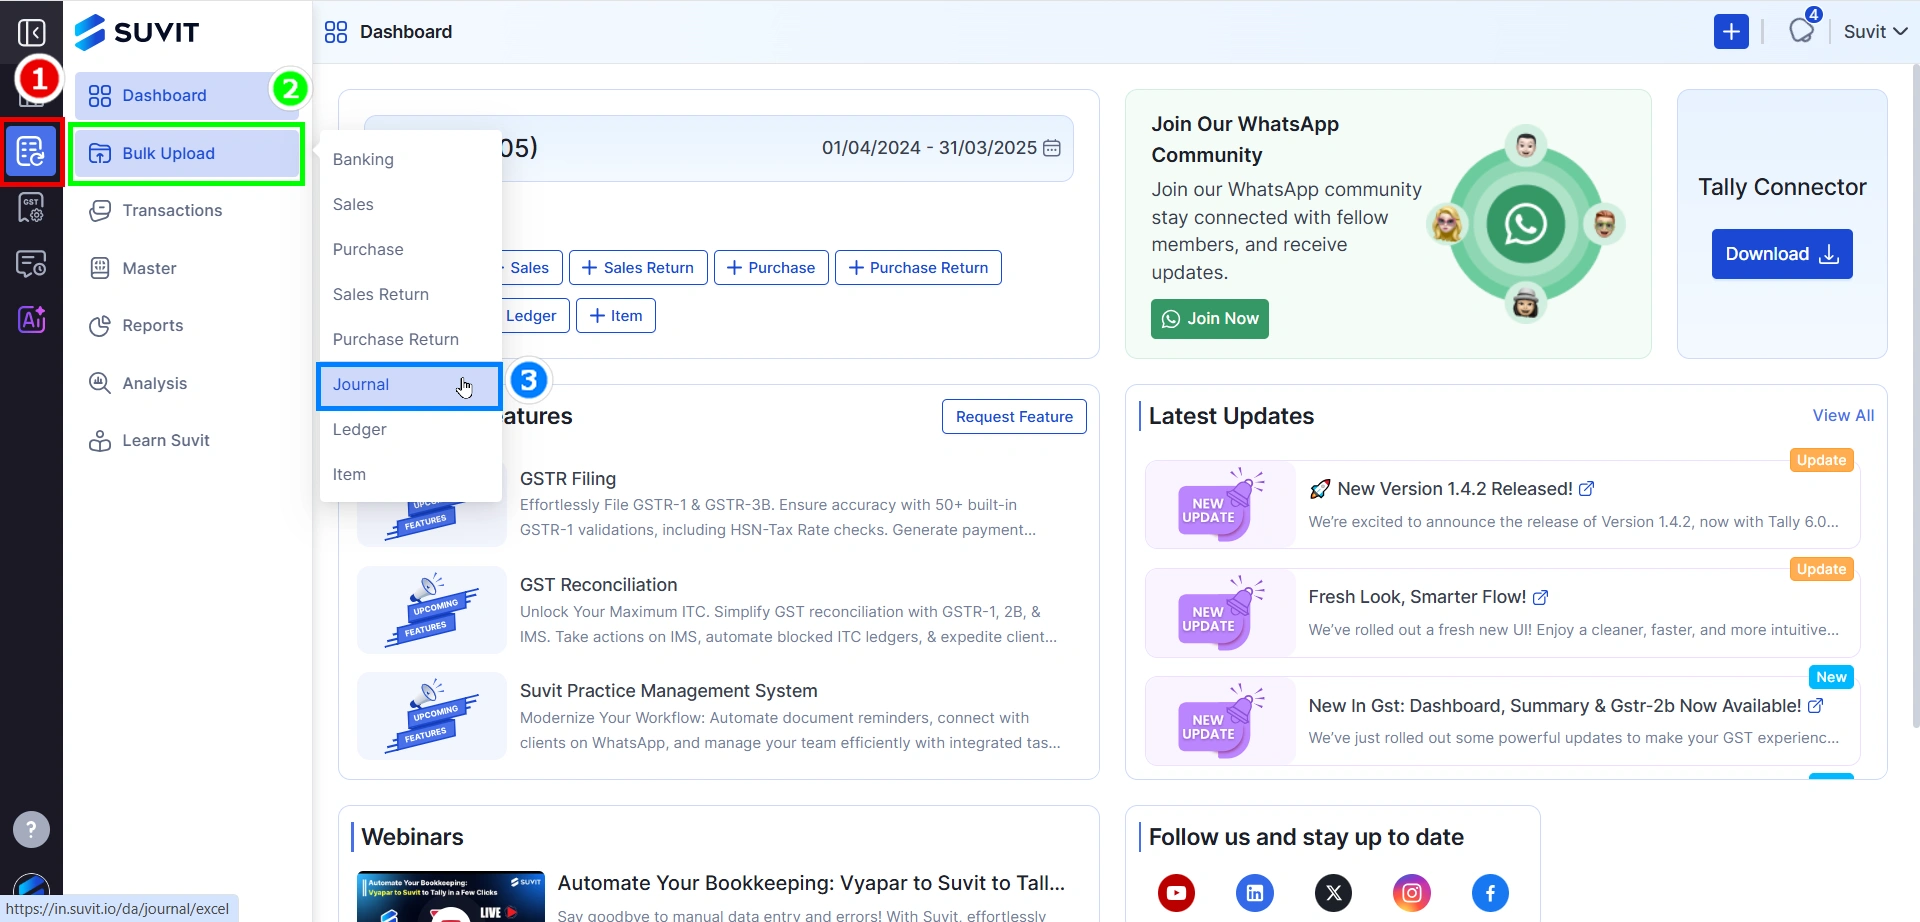
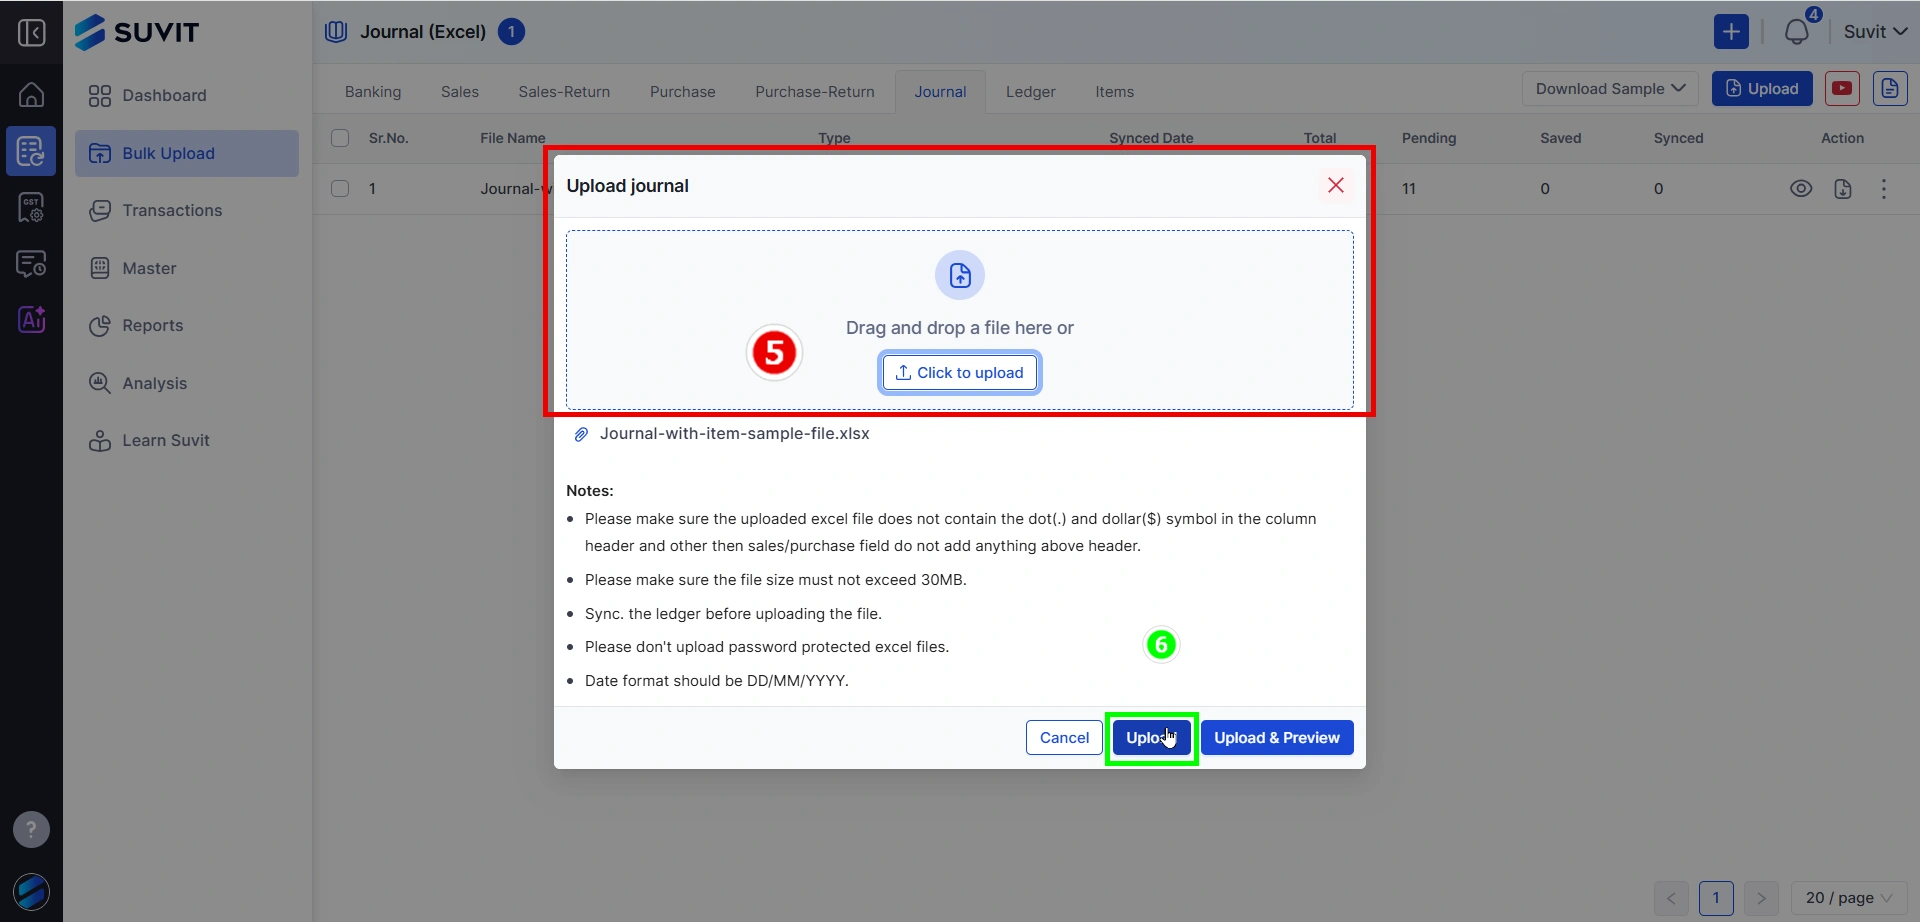
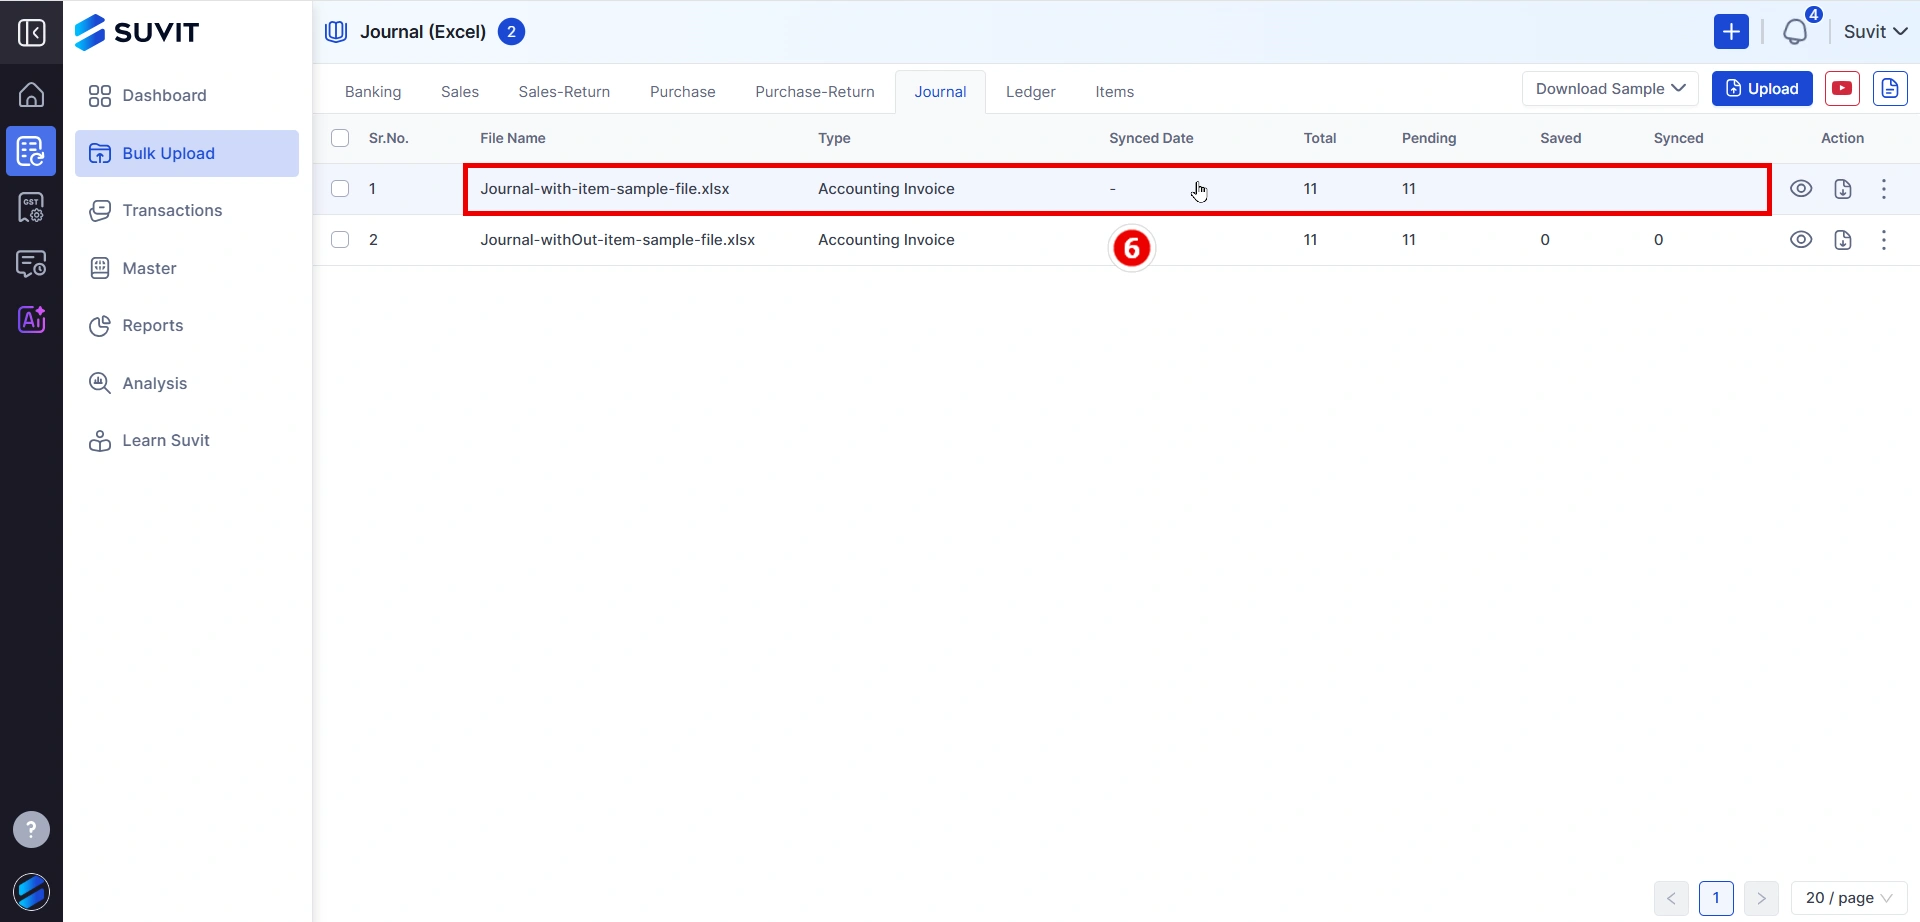
After uploading your spreadsheet, you will need to access the Mapping Screen in Suvit: