Follow this step-by-step guide to manage, update, and transfer journal data from Suvit to Tally. Upload your Excel sheet, map fields, and sync entries.
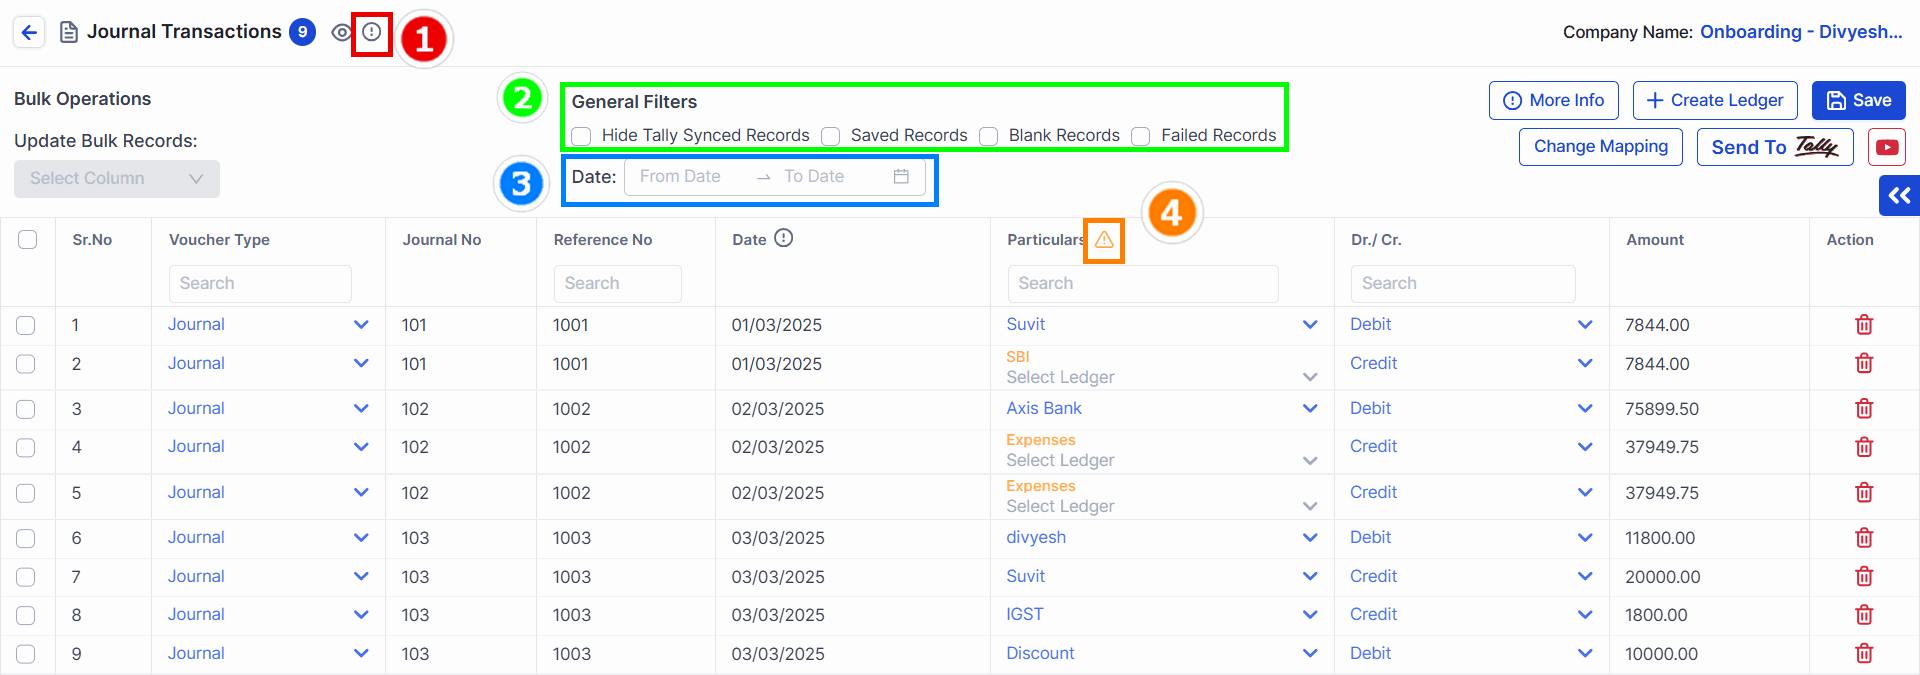
The informative "i" button will show you the number of total transactions and the total number of invoices.
General Filters: Here, you can use three different filters.
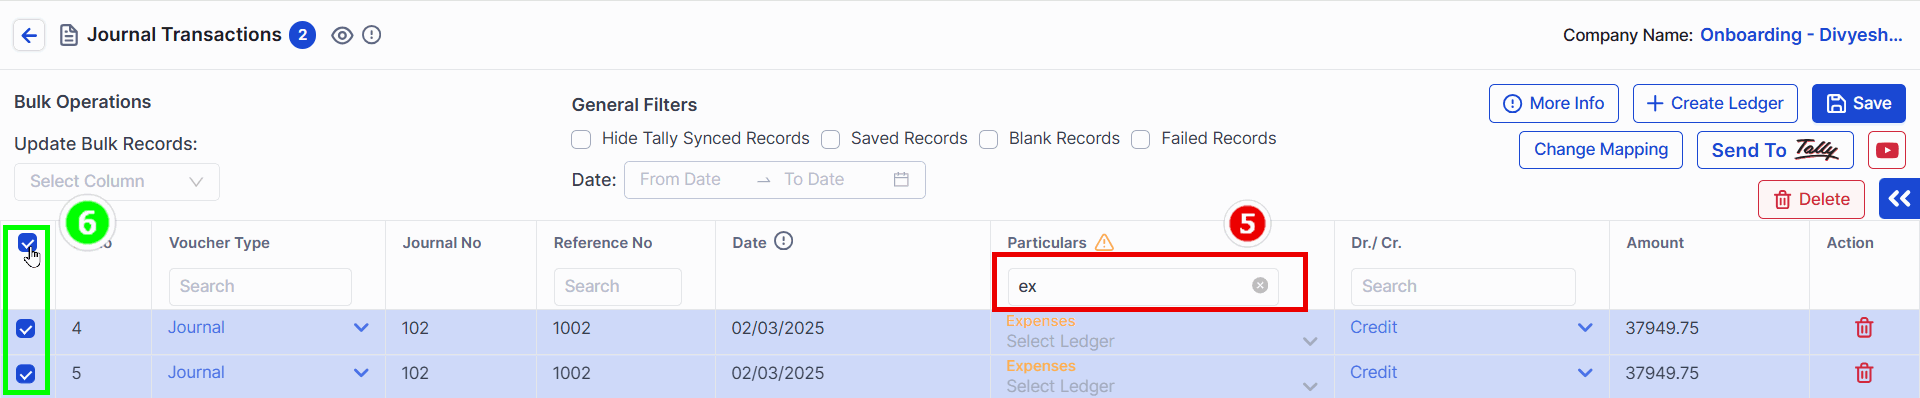
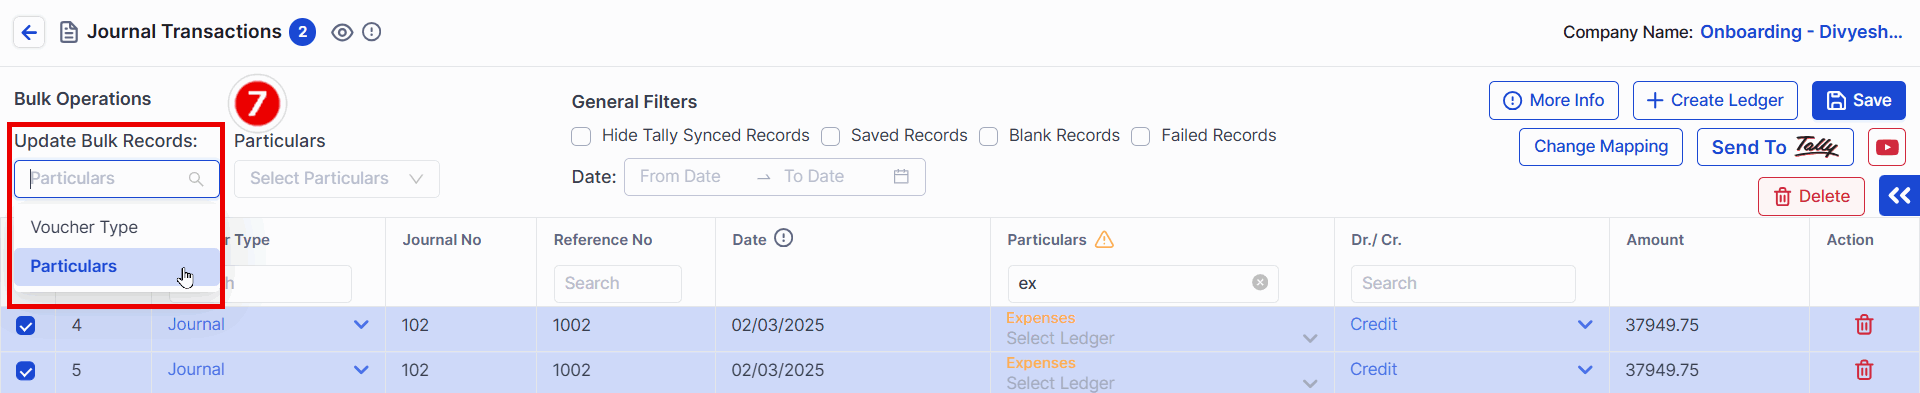
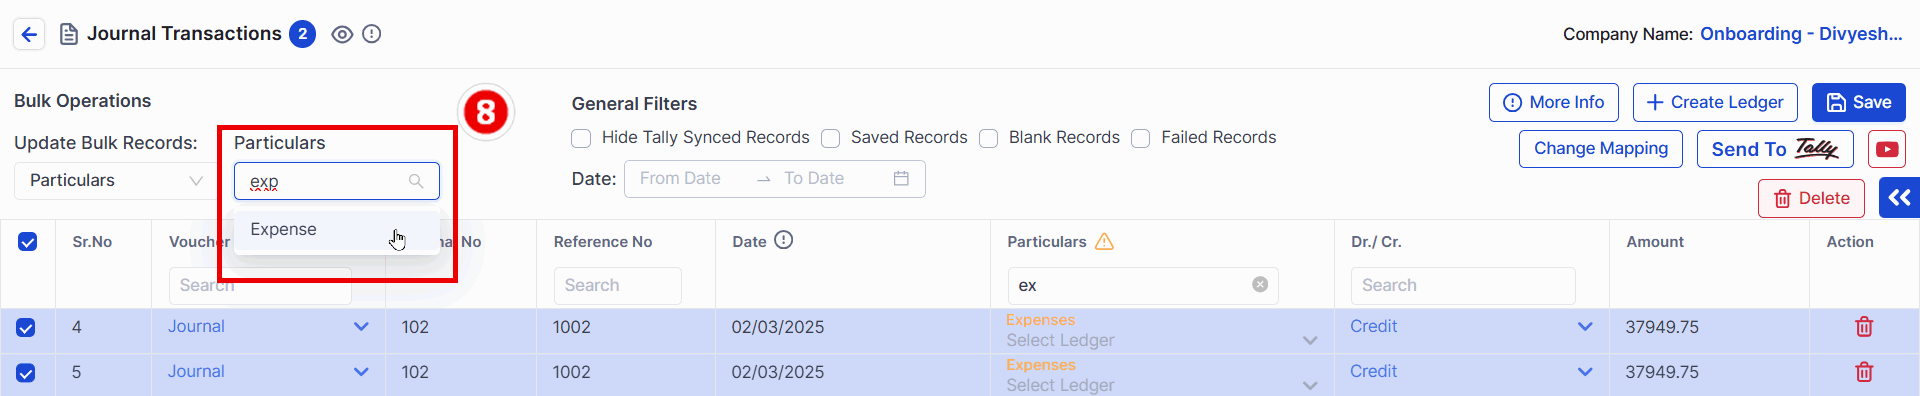
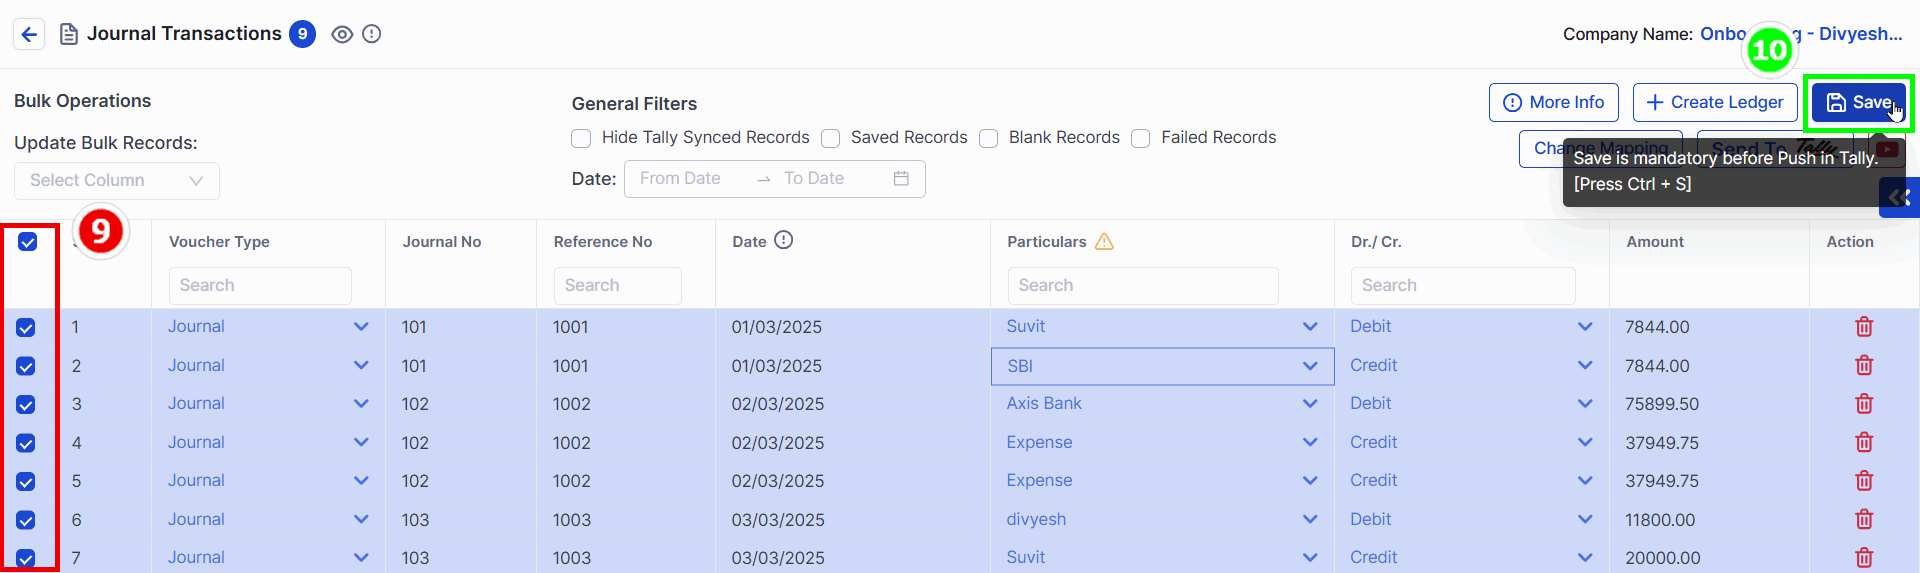
Select Transaction: Choose individual or bulk entries to send to Tally.
After selecting the transactions, click on the Save button.
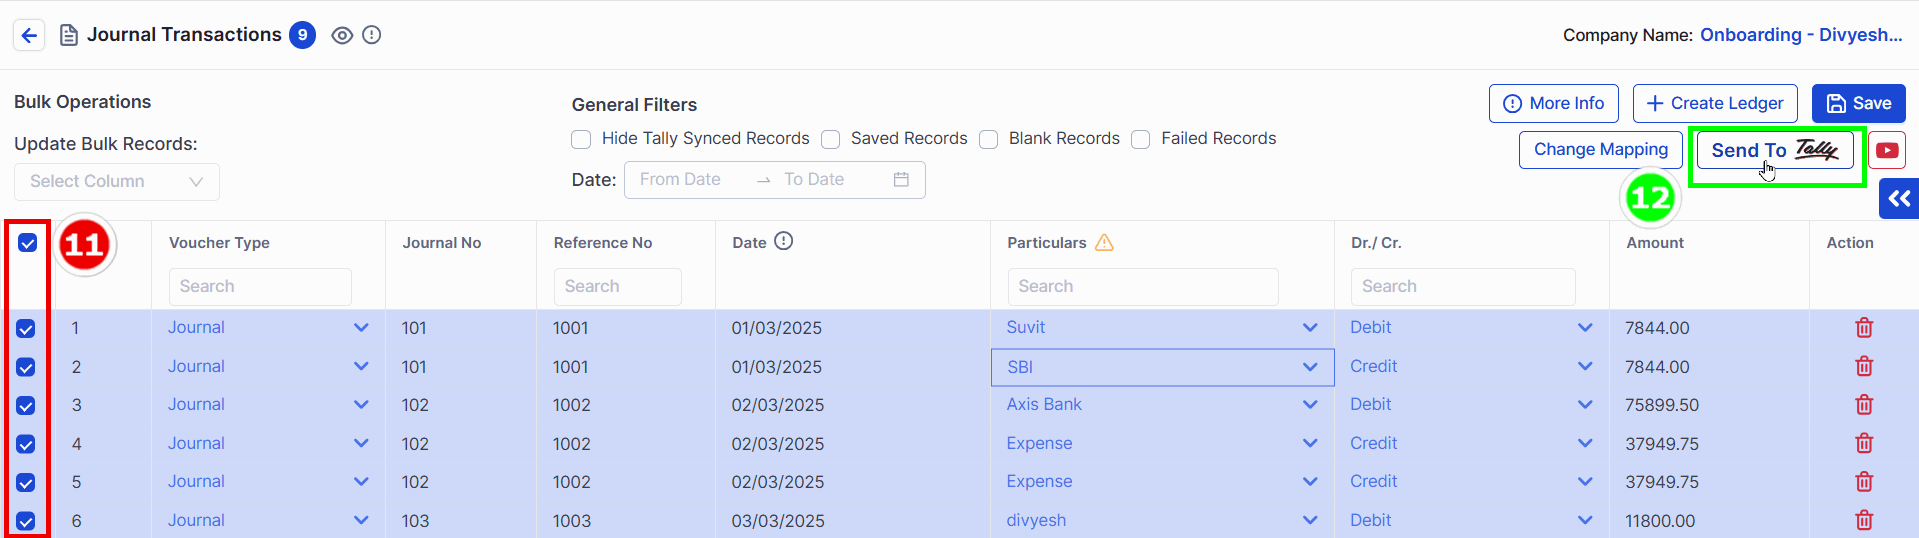
Re-Select Transaction (if needed) : Choose individual or bulk entries to resend.
Click Send to Tally to push the data.