In Suvit, Sales/Purchase Excel data is auto-mapped using keywords and past patterns. Learn how to make the most of the Auto Mapping feature in this guide.
Auto-Mapping is Suvit’s smart assistant that automatically connects your Excel sheet to Tally. It reads your column names and suggests the right fields — so you don’t need to do everything manually. Even better? Suvit remembers your choices for next time!
Once you upload your Purchase or Purchase Return Excel sheet, the next screen is the Mapping screen. Here’s how it works:
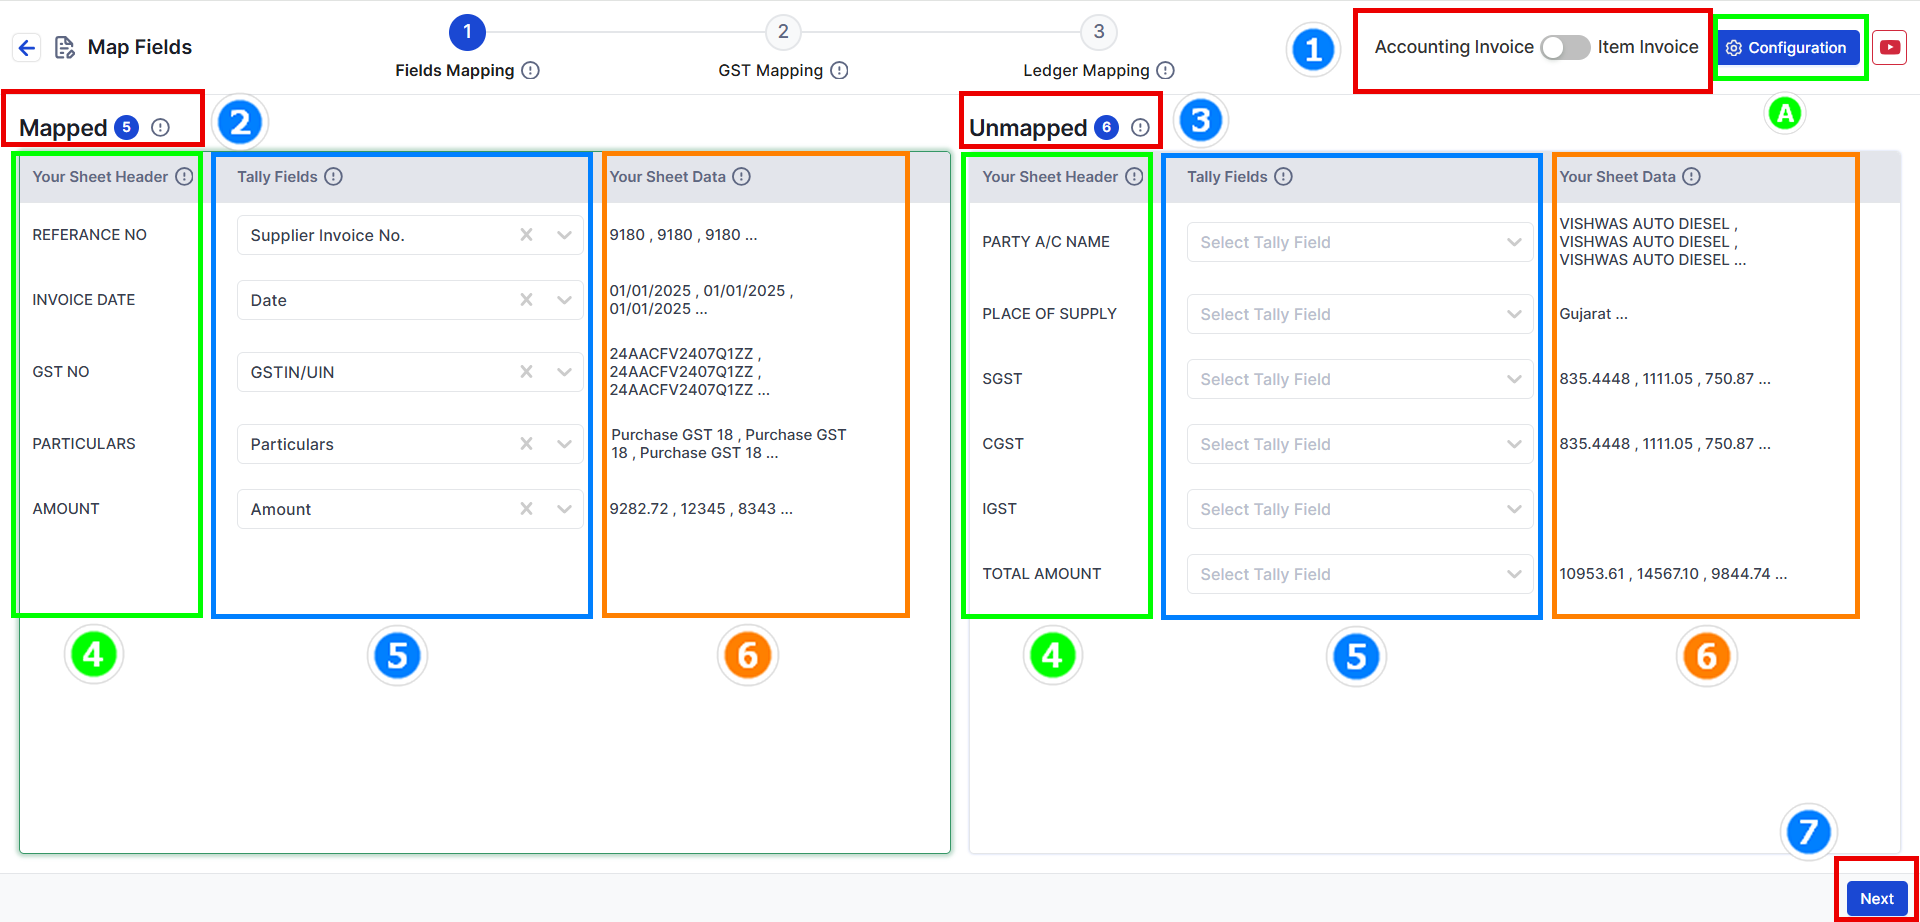
Here’s what you’ll see:
→ Choose your Data Type: With items or without items? For this example, we select Without Item.
→ Mapped Fields: Suvit auto-matched these with Tally.
→ Unmapped Fields: You need to select matching Tally fields for these.
→ Your Sheet Header: These are your Excel column titles.
→ Tally Fields: These are Tally’s fields — link them to your columns.
→ Your Sheet Data: Shows 3 sample rows from your Excel to double-check everything.
→ Click Next to move to the GST Mapping step.
You can also map special fields like:
→ Voucher Date & Number
→ Party (Buyer or Consignee)
→ Invoice Date, Carrier Name, Lading Number, etc.
→ Even Export Details, Tracking Number, Vehicle Number, and Cost Centres
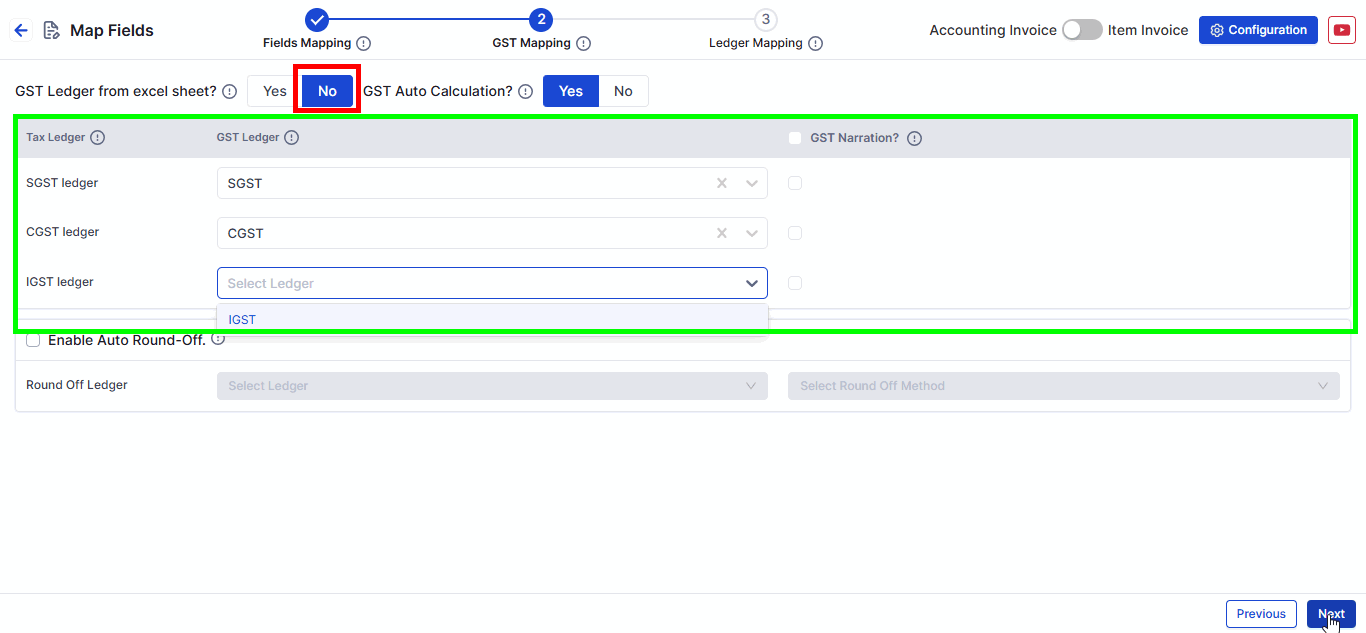
→ If set to No, choose the Tally GST Ledger manually from the dropdown.
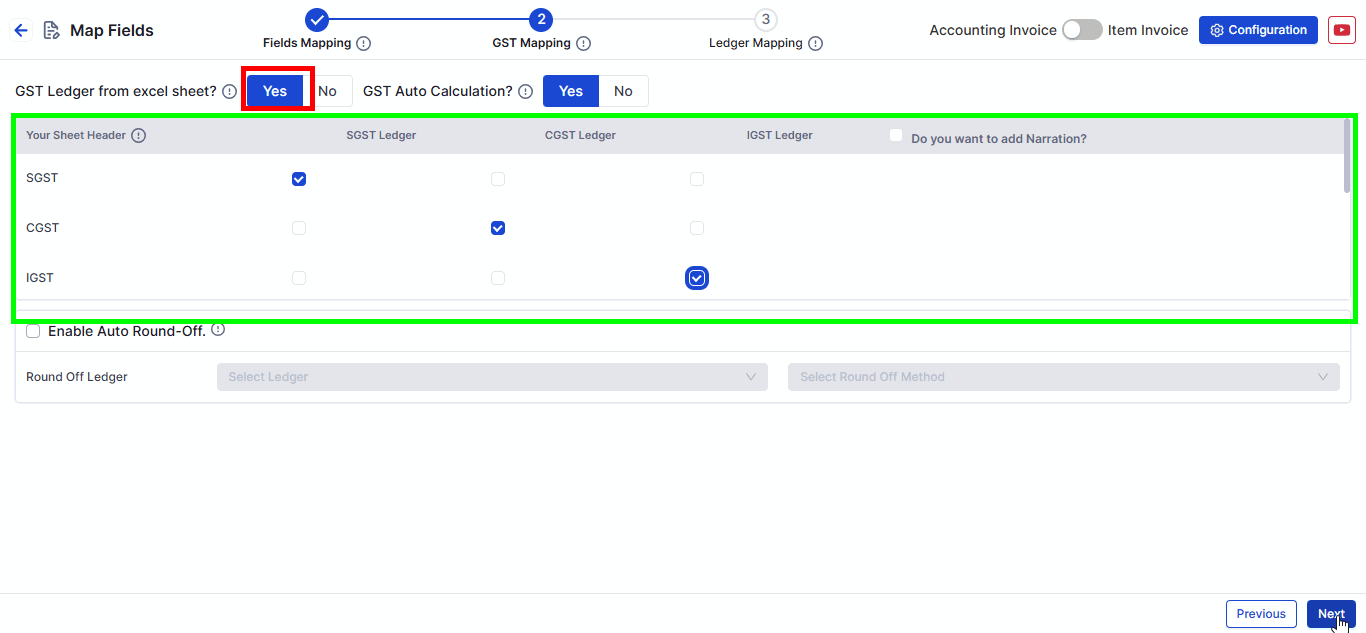
→ If set to Yes, link the column that contains GST Ledger names (from Excel).
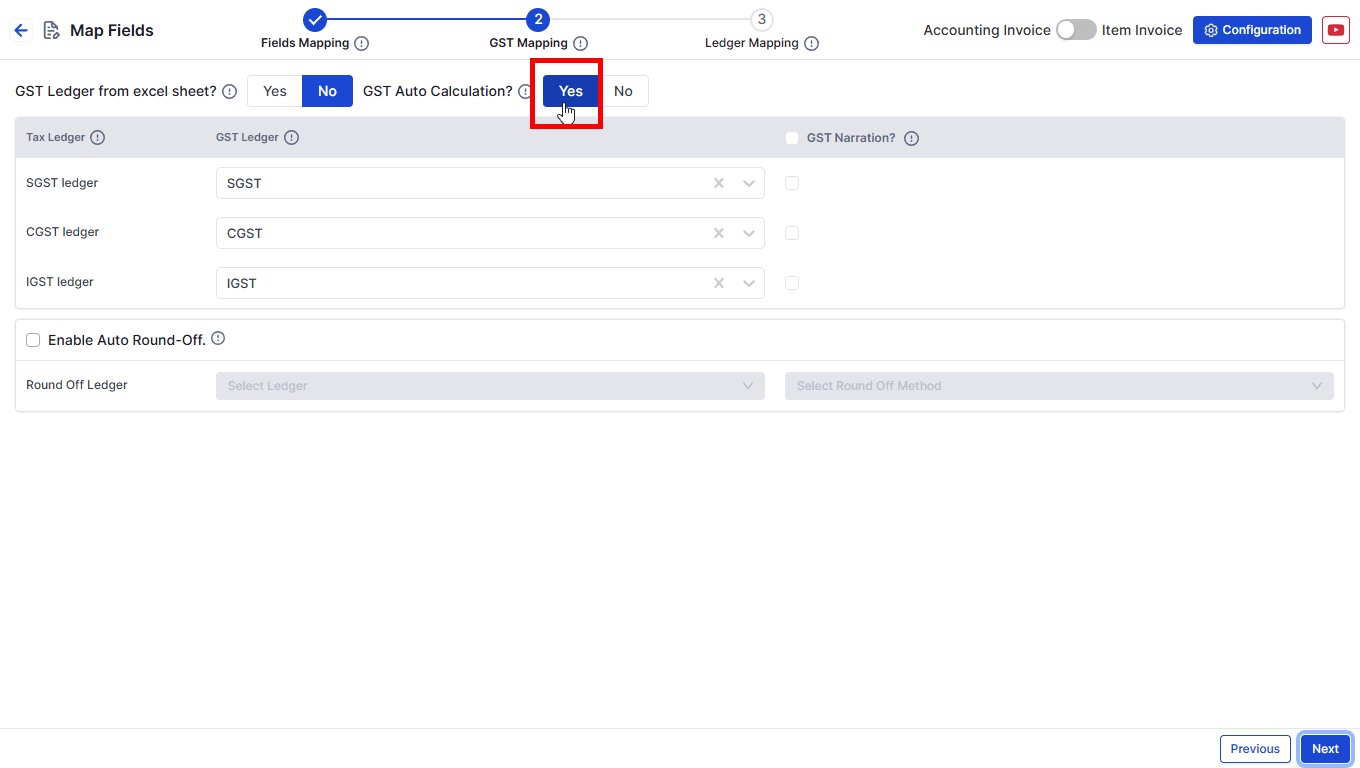
→ If set to Yes, Suvit calculates SGST, CGST, and IGST using the settings already in Tally.
→ Learn how Tally decides GST rates: Learn More
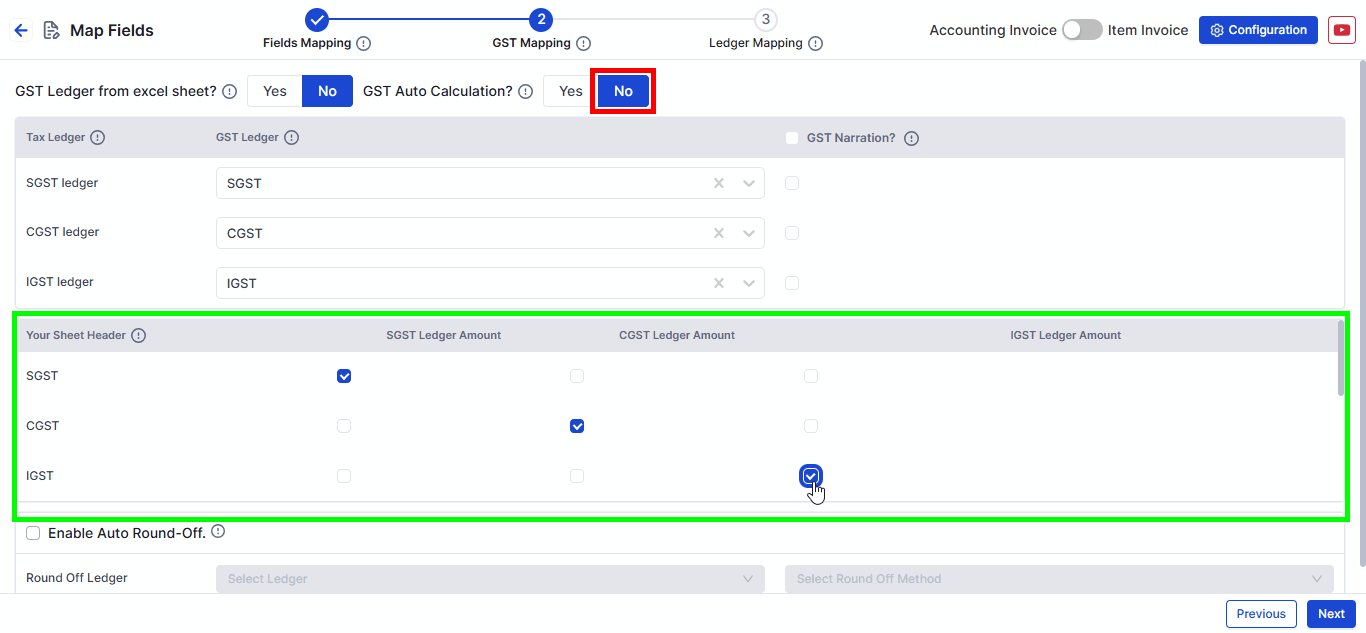
→ If set to No, Suvit picks GST amounts from the Excel sheet.
→ You can even match the values and add a narration for reference.
📌 Note: Mapping SGST, CGST, and IGST is mandatory.
You can also map **Round-Off Ledger** if needed.
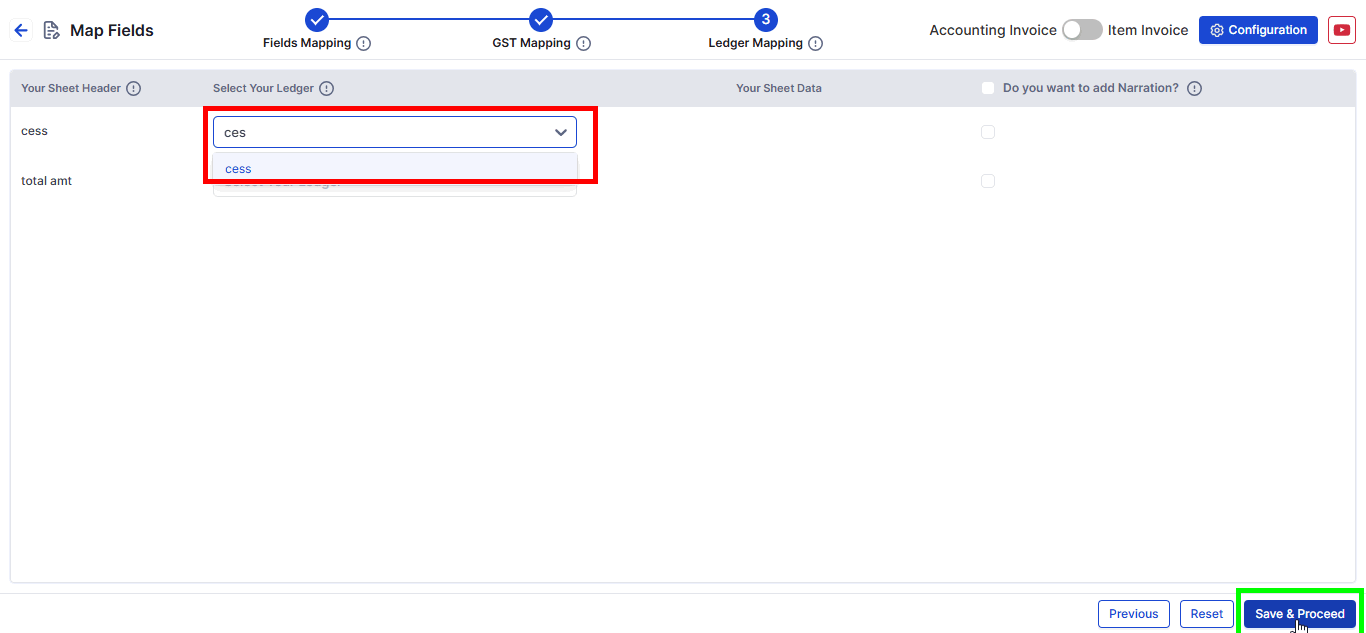
→ Round-Off
→ Discount
→ Freight / Delivery Charges
→ Choose the right Excel column and the matching Tally ledger.
Want to know how to send your mapped purchase data to Tally?