How do we process or push Purchase/Purchase return data to Tally
After mapping the purchase data, the next screen will display it in an Excel-like format, allowing you to review all details.
Save & Send Data to Tally
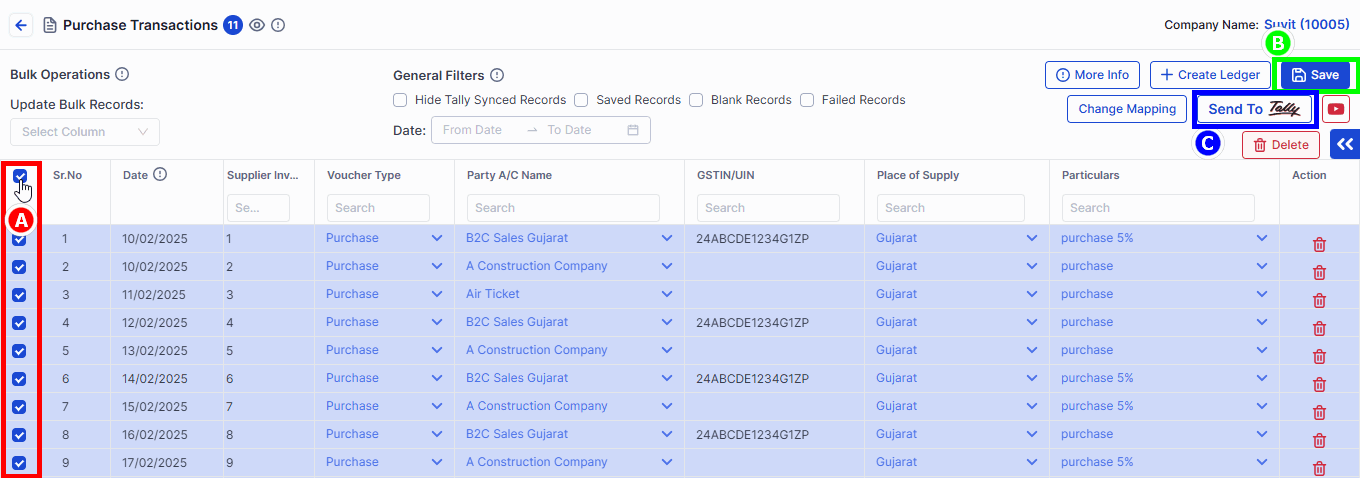
- A→ Select your Purchase Transaction (All or Individually)
- B→ Click on Save
- C→ Click on Send to Tally button to send the purchase data into Tally.
**Instruction**:Ensure all transactions are properly filled, and caution triangles are cleared before proceeding.
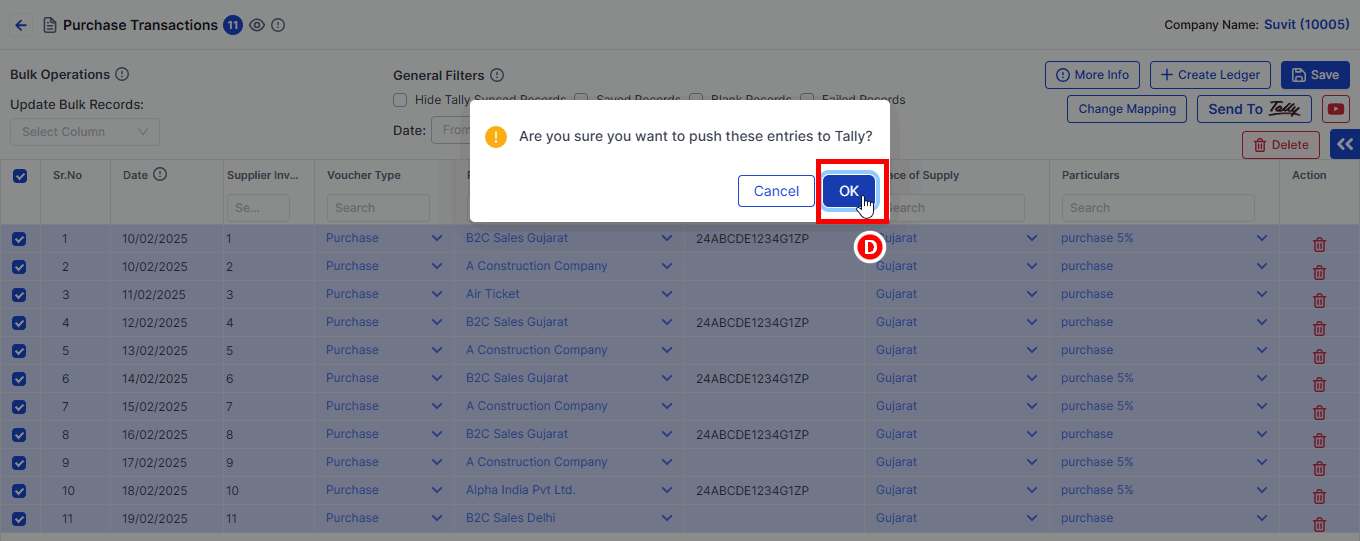
- D→ Click on OK for the confirmation.
**Warning**:Only selected and saved purchase data will be pushed to Tally. Remaining entries can be sent later.
Progress Tracking
**Sending Progress Tracking Data to Tally**
**1** → **Gray Stage** (1st Stage)
- It indicates the process has been initiated
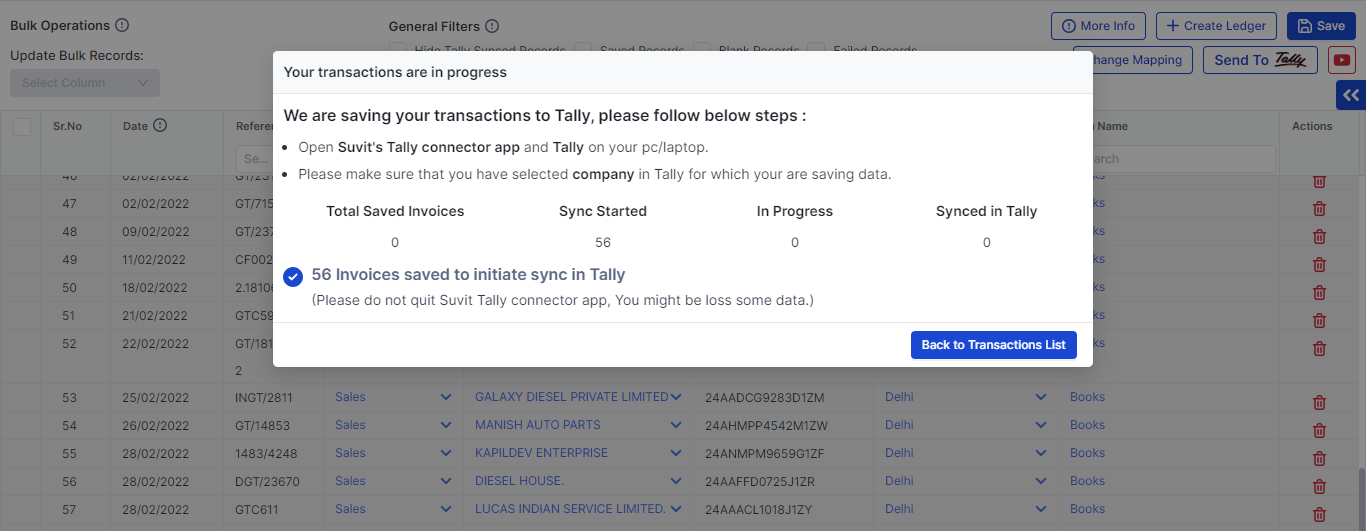
**2** → **Orange Stage** (2nd Stage)
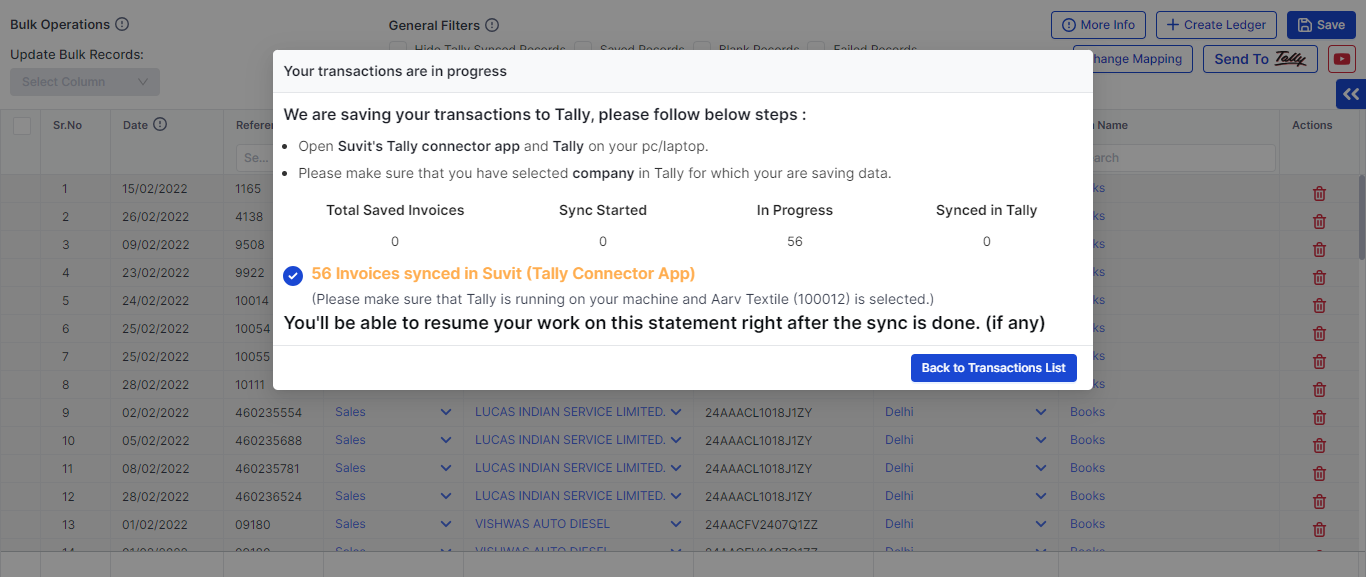
- It indicates the process has started
**3** → **Green Stage** (3rd Stage)
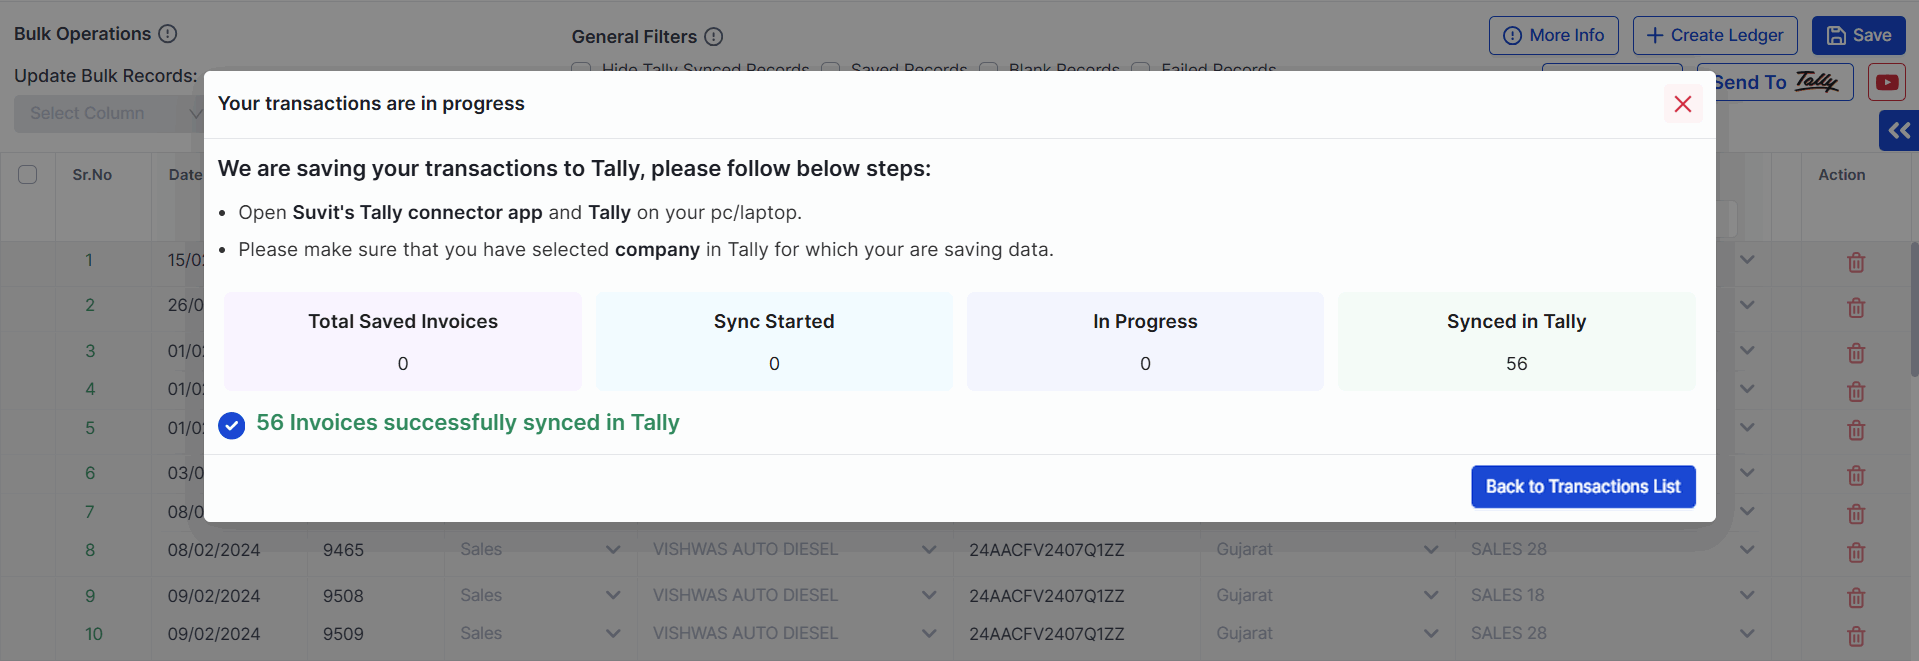
- It indicates that the purchase data has been successfully sent to Tally.
How to Select Mismatched Data and General Filters
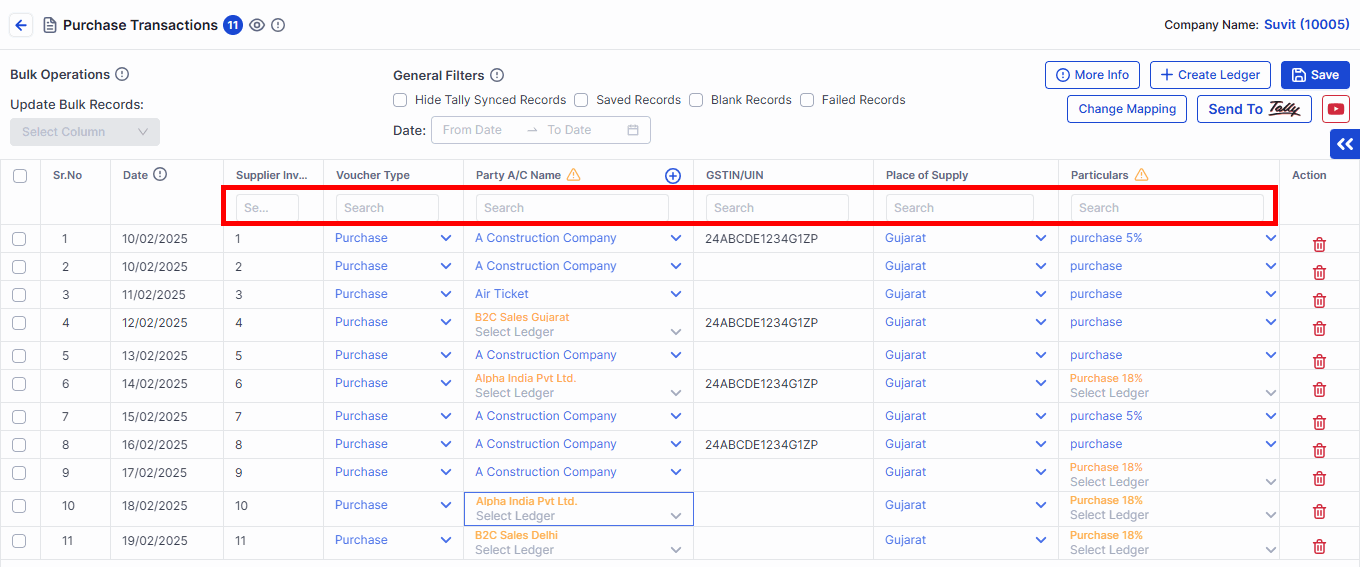
Processing Screen (Purchase Transaction Screen)
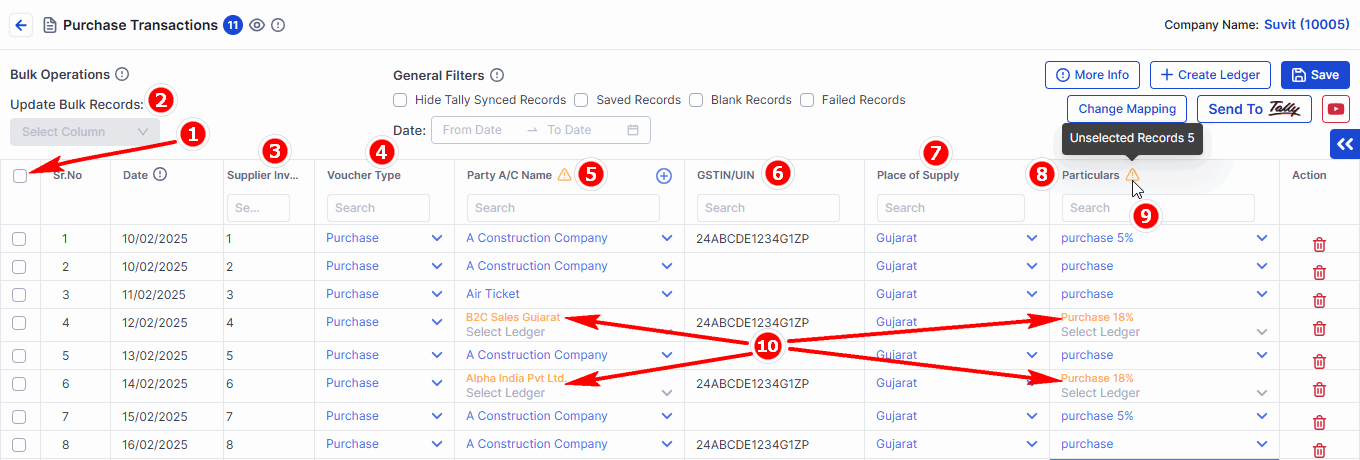
- The process screen will look like the above image.
**Check details here**
**1** → **Bulk Selection**: It will help you select purchase transactions one by one or in bulk.
**2** → **Update Bulk Records**: Used to change or select specific data within the Purchase Transaction screen.
**3** → **Reference No**: As per the Excel sheet, the reference will be displayed here.
**4** → **Voucher Type**: By default, the Purchase voucher type will be selected. It can be changed as required.
**5** → **Supplier Name**: Name of the supplier will be displayed here.
**6** → **GST No**: It will show as per the supplier details.
**7** → **Place of Supply**: If you have selected in mapping, or else it will display according to the dataset in Tally.
**8** → **Particulars**: It will show Purchase Account.
**9** → **Warning Triangle**: Indicates missing details due to spelling mistakes or a new supplier name.
**10** → **Other Details**: Data in orange indicates unselected fields.
**Note**:Words in Blue represent selected ones, while words in Orange indicate unselected or not yet created in Tally.
Error Resolution for Ledger Mismatch
- If you encounter ledger mismatches while pushing purchase data to Tally, follow these steps:
Step 1 : Check Existing Ledgers
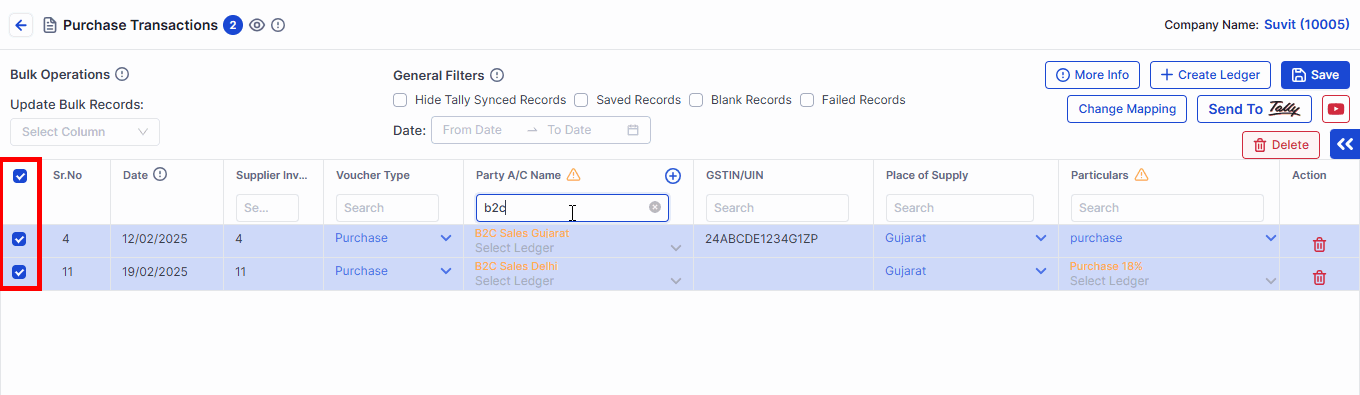
- Select the records in bulk.
- Use Bulk Selection to update and correct these entries.
Step 2 : Create Missing Ledgers
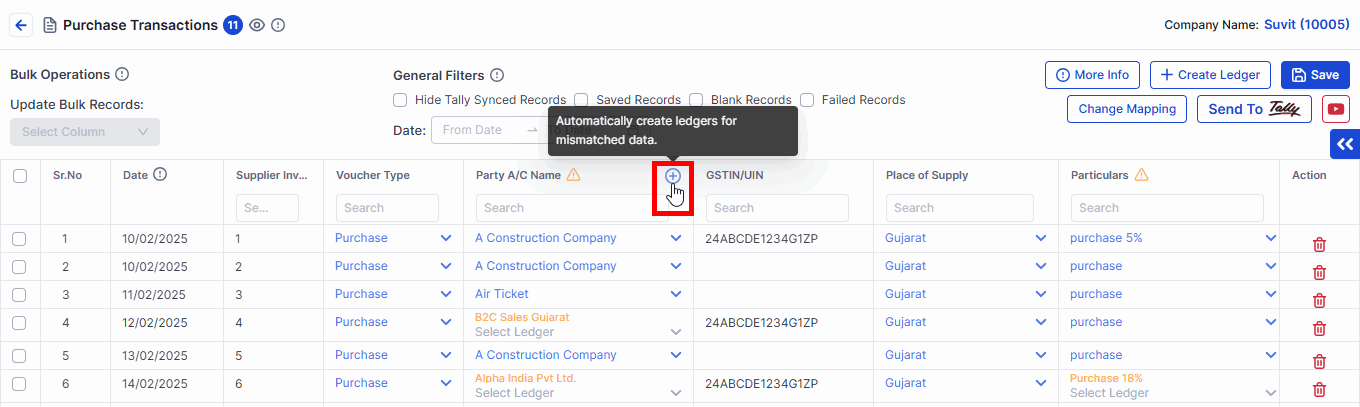
- If the ledgers are missing in Tally, create them instantly by clicking the "+" button next to the supplier name.
- For detailed steps, Click Here.
General Filters
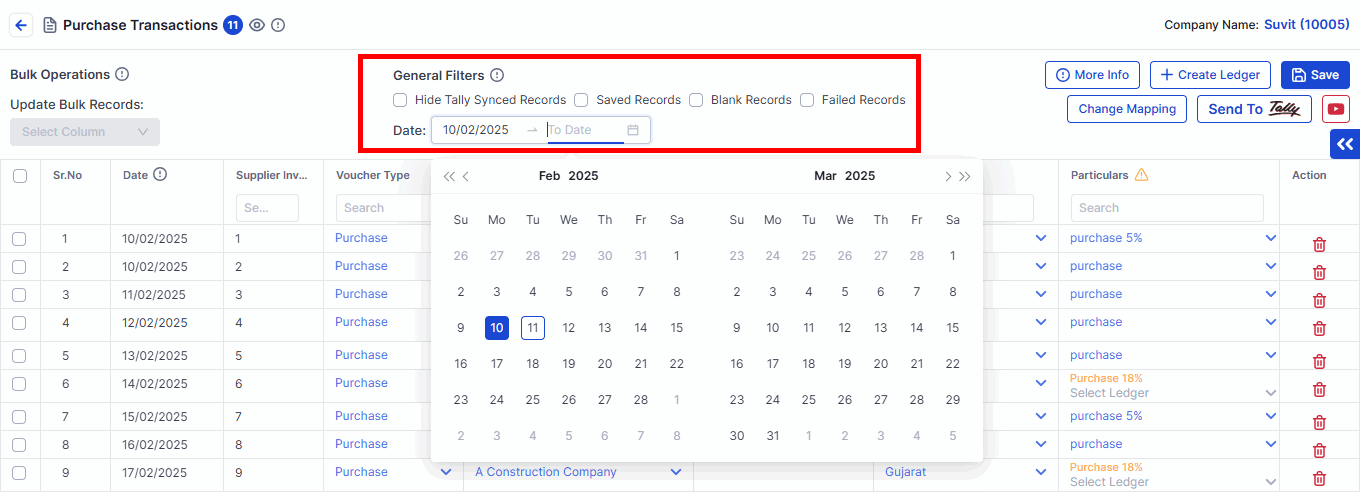
- The purchase transaction screen offers various filters to efficiently manage data. You can filter records to Hide Tally-sent data, Blank entries, Saved records, Failed records, and also sort by Date Learn More.
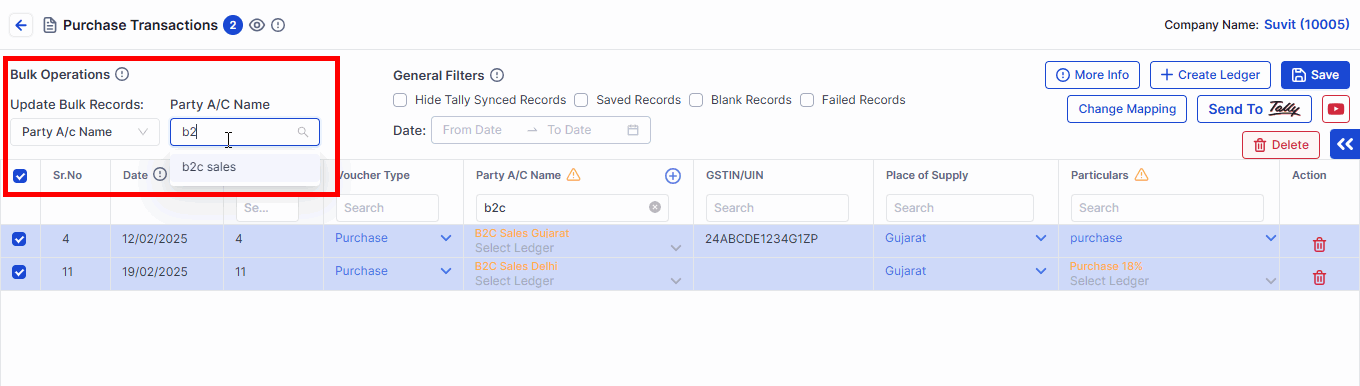
Bulk Operations
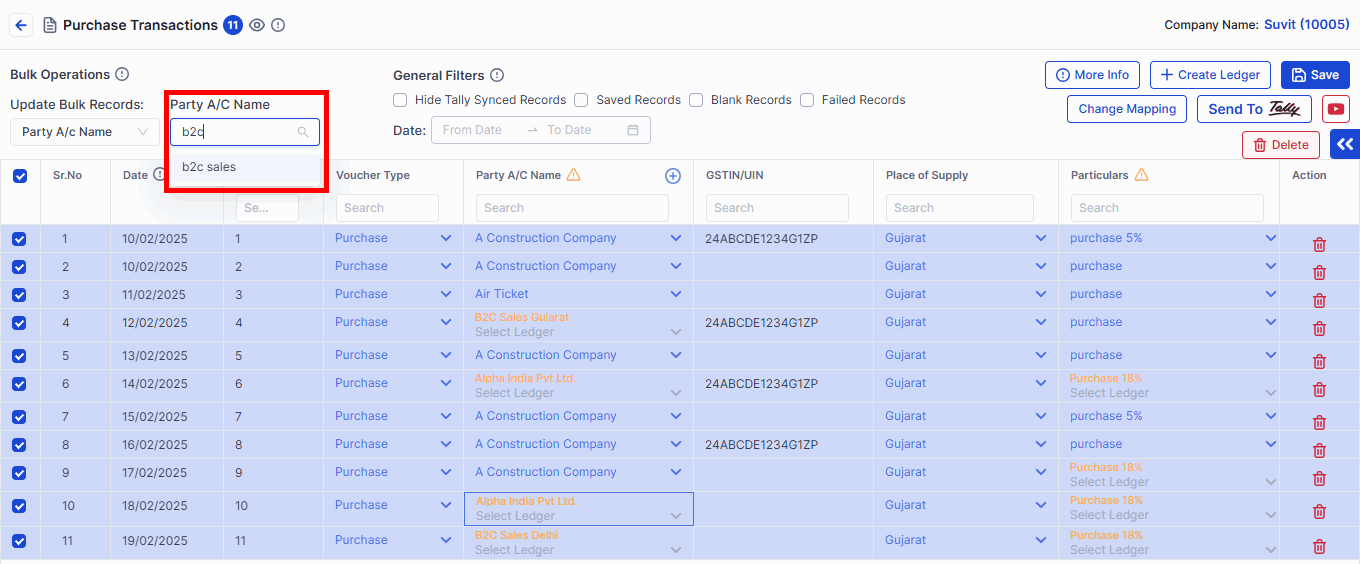
Step 1 : Update Bulk Records
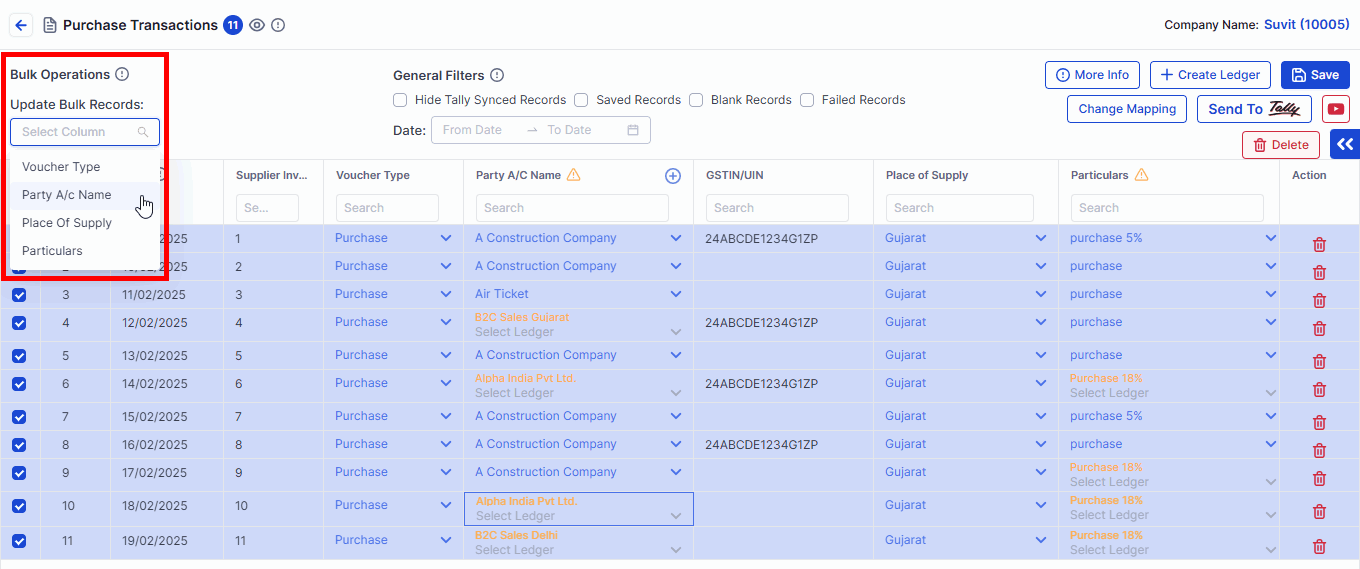
- Use Bulk Update to modify Voucher Type, Supplier A/c Name, and Particulars (Purchase Account Ledger).
- Bulk operations help with searching, filtering voucher types, and selecting purchase account ledgers.
- You can select multiple records for quick actions like filtering, updating, or pushing purchase data to Tally.
Step 3 : Cross-Check and Verify
- Search for Bill numbers or specific supplier names.
- Verify GST numbers and the Place of supply for accuracy.
You may find this useful:
- Learn more about creating ledgers and stock items from the Purchase Transaction Screen.