Learn to use the Auto Mapping option in Suvit’s Bulk Upload for Sales/Purchase. This feature simplifies field mapping for faster, error-free data upload.
Auto-mapping is Suvit's smart helper! It automatically matches your Excel sheet data to the right Tally fields. Once you map things once, Suvit remembers it for your future uploads.
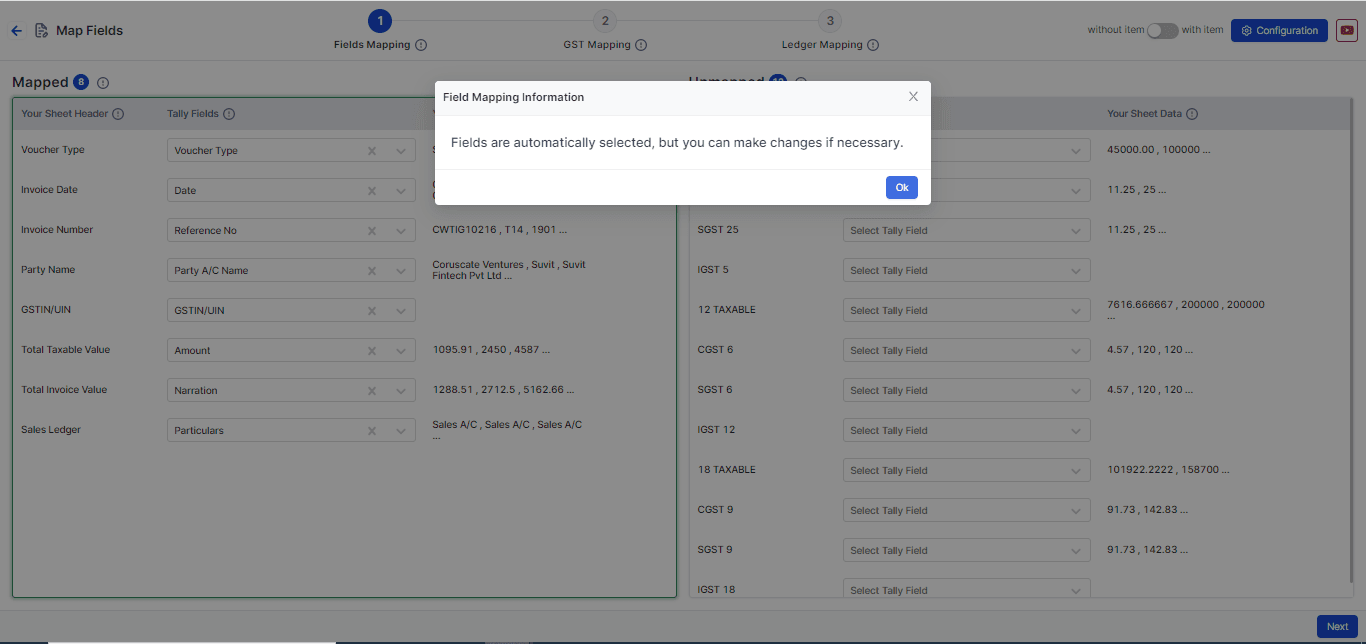
First, choose whether your data has items or not.
→ For example, choose Without Item if there are no product details.
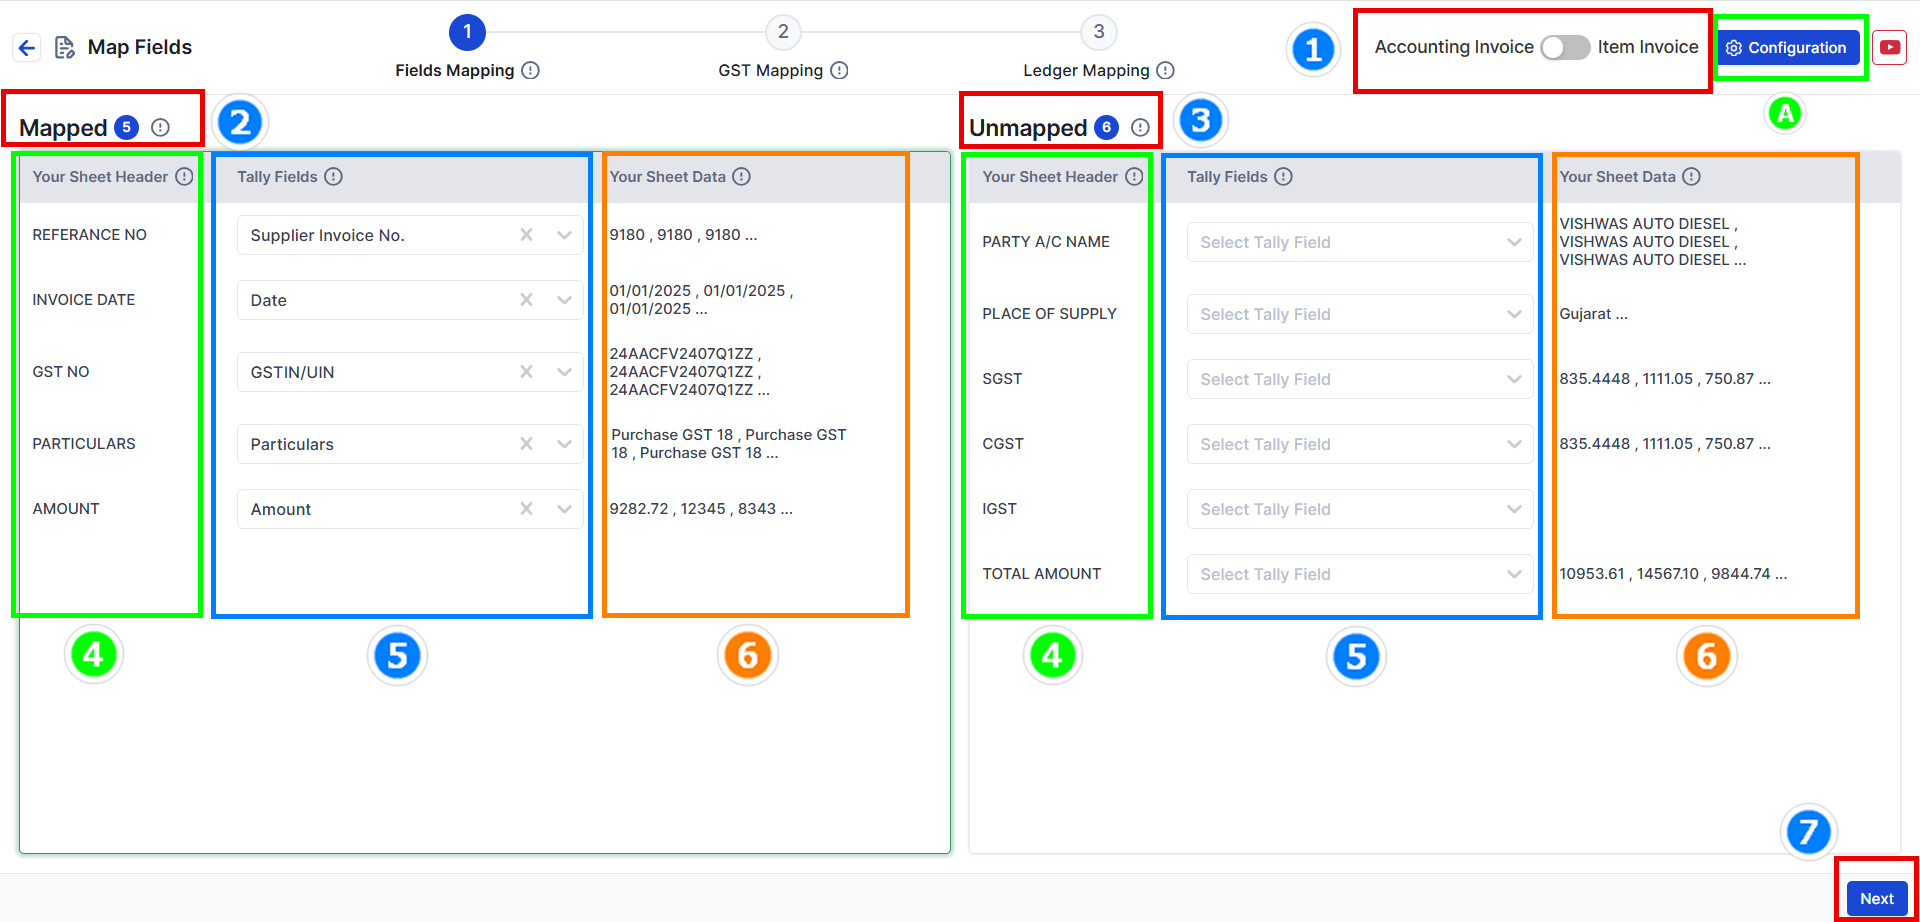
Here's what you’ll see:
→ Mapped Fields – Suvit found a match for these.
→ Unmapped Fields – You need to match these with the correct Tally field.
→ Your Sheet Header – These are your Excel column titles.
→ Tally Fields – These are from Tally. Match them with your data.
→ Your Sheet Data – Shows sample values to help you double-check.
→ Click Next to go to GST Mapping.
In this section, you can also map:
→ Voucher Date & Number
→ Party (Buyer or Consignee)
→ Invoice Date, Lading No., Shipping No., etc.
→ Even Cost Centres and Dispatch Details
Suvit will auto-fill this based on your last upload if available!
→ Choose your Tally GST Ledger from a dropdown.

→ Match the column from Excel where GST Ledger Name is written.
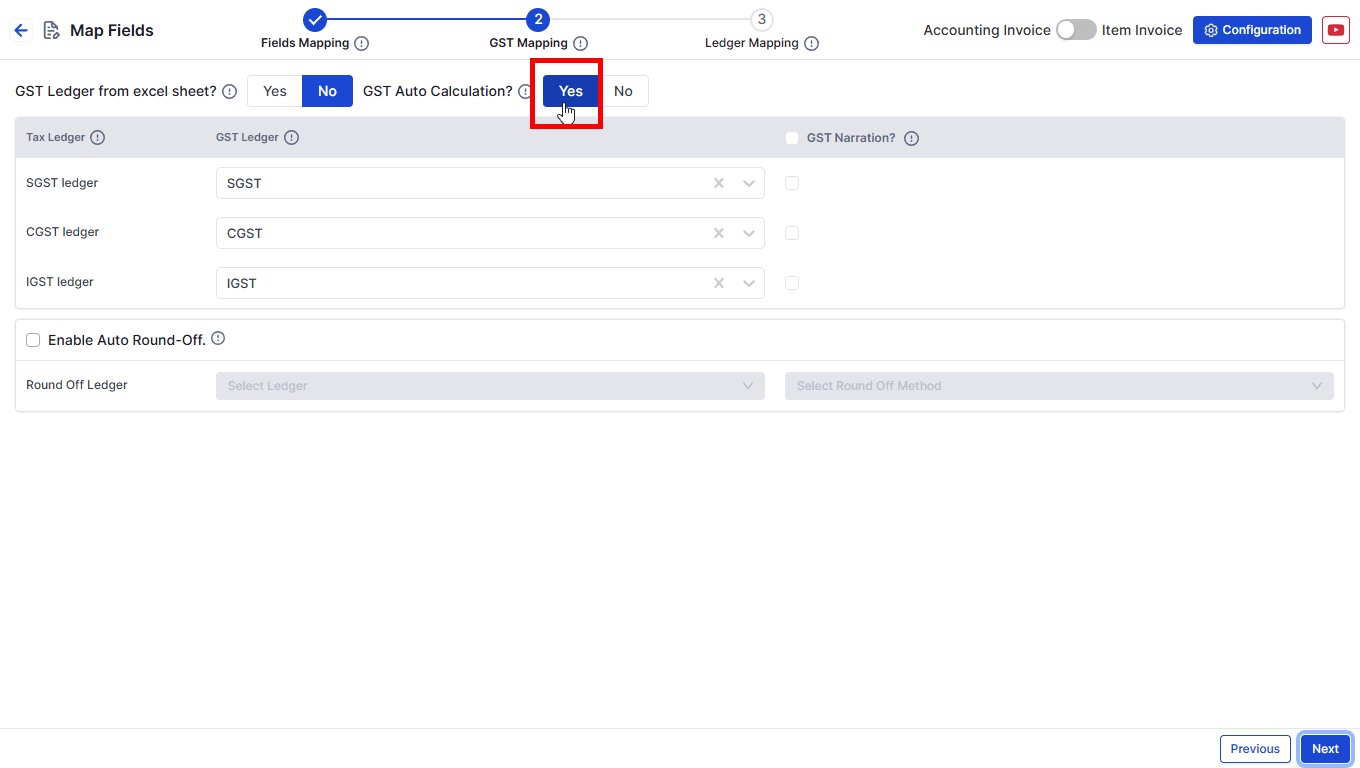
→ If set to Yes, Suvit calculates SGST, CGST, and IGST on its own from Tally settings.
→ Tally uses a rate priority system for GST calculation: Learn More
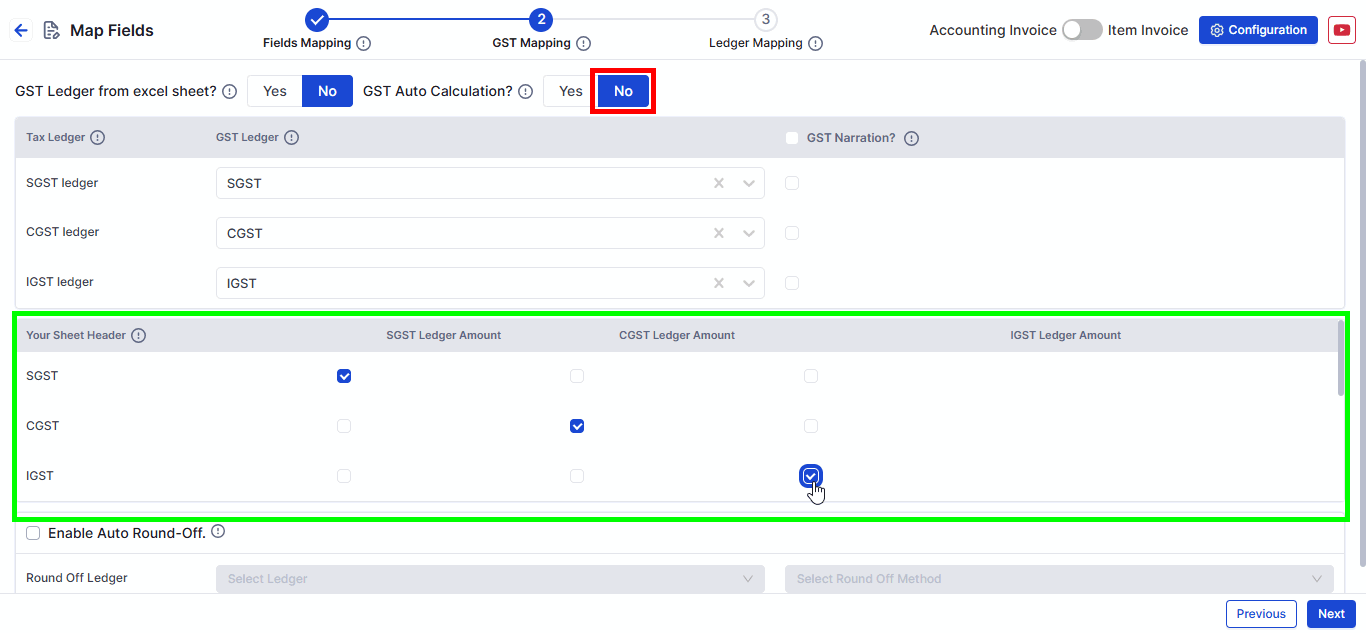
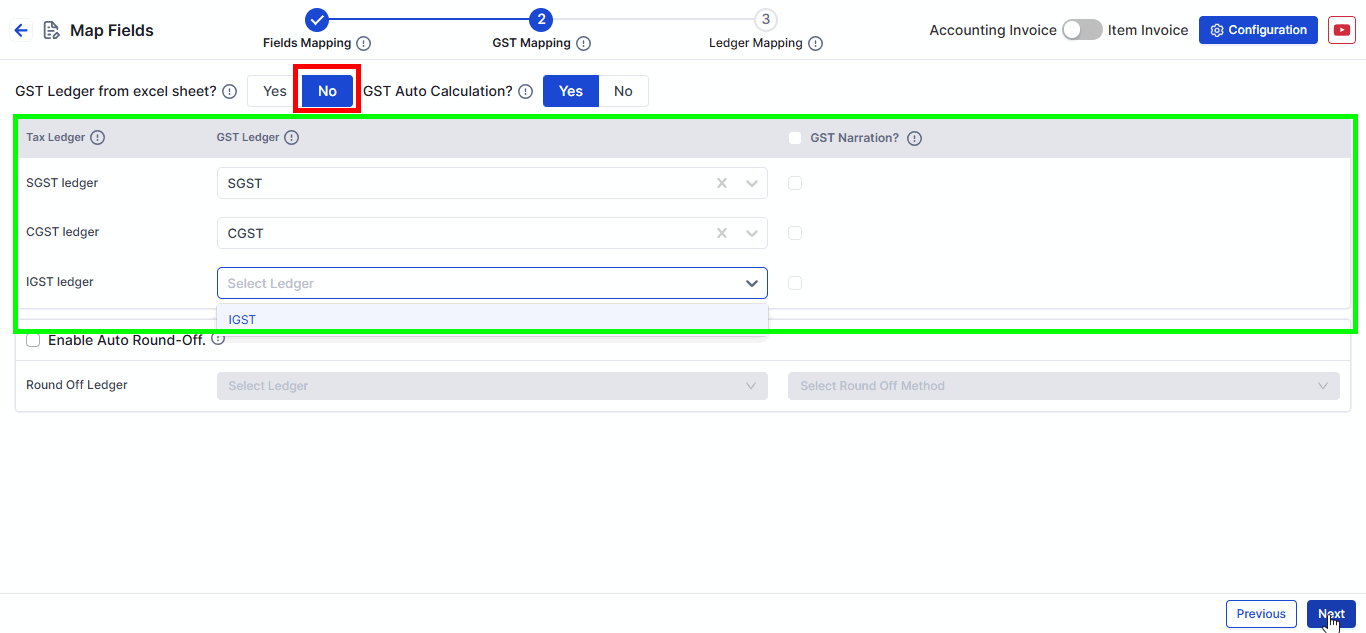
→ If set to No, Suvit picks GST values from the Excel file.
→ It uses that data to fill duties & taxes and lets you add narrations if needed.
**Note**: SGST, CGST, and IGST Tax Ledgers must be mapped. You can also map the Round-Off Ledger.
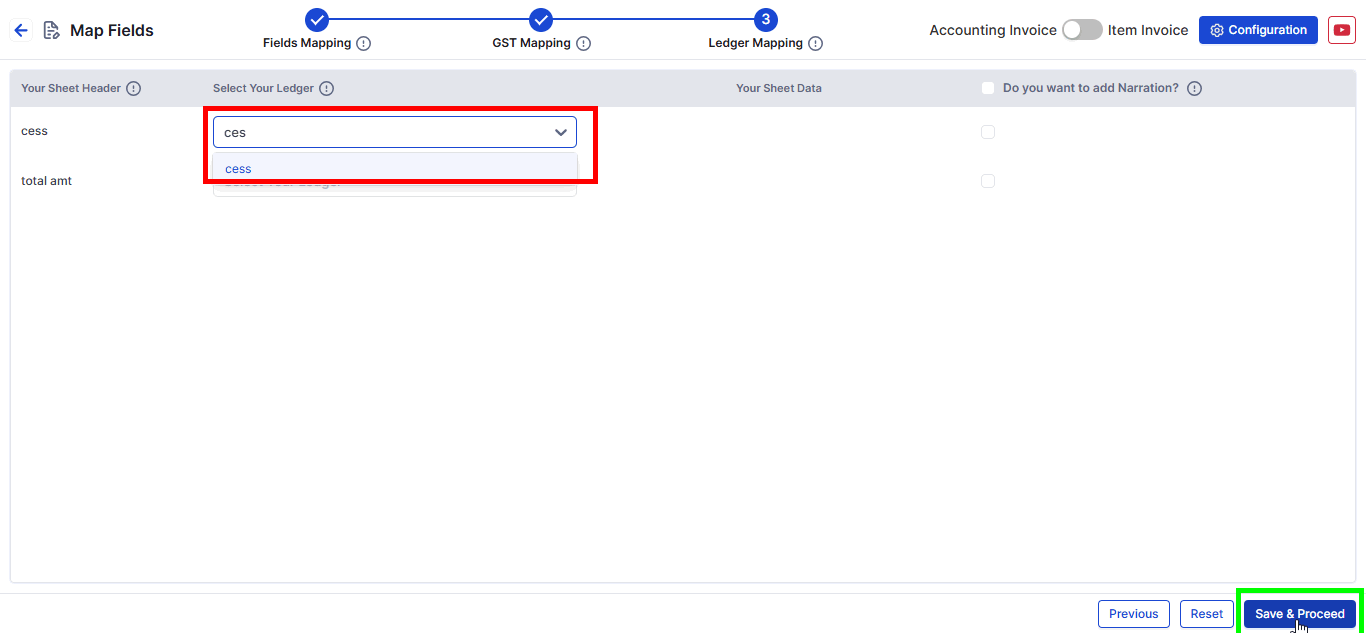
This is where you link other columns like:
→ Freight Amount
→ Discounts
→ Round-off
Once done, click Save & Proceed. You're ready to push to Tally!