How do we process or push Sales/Sales return data to Tally?
After mapping these next screen will let you see your data in excel kind of form, where you can see all details.
🖱️ Step-by-Step: Save & Send to Tally
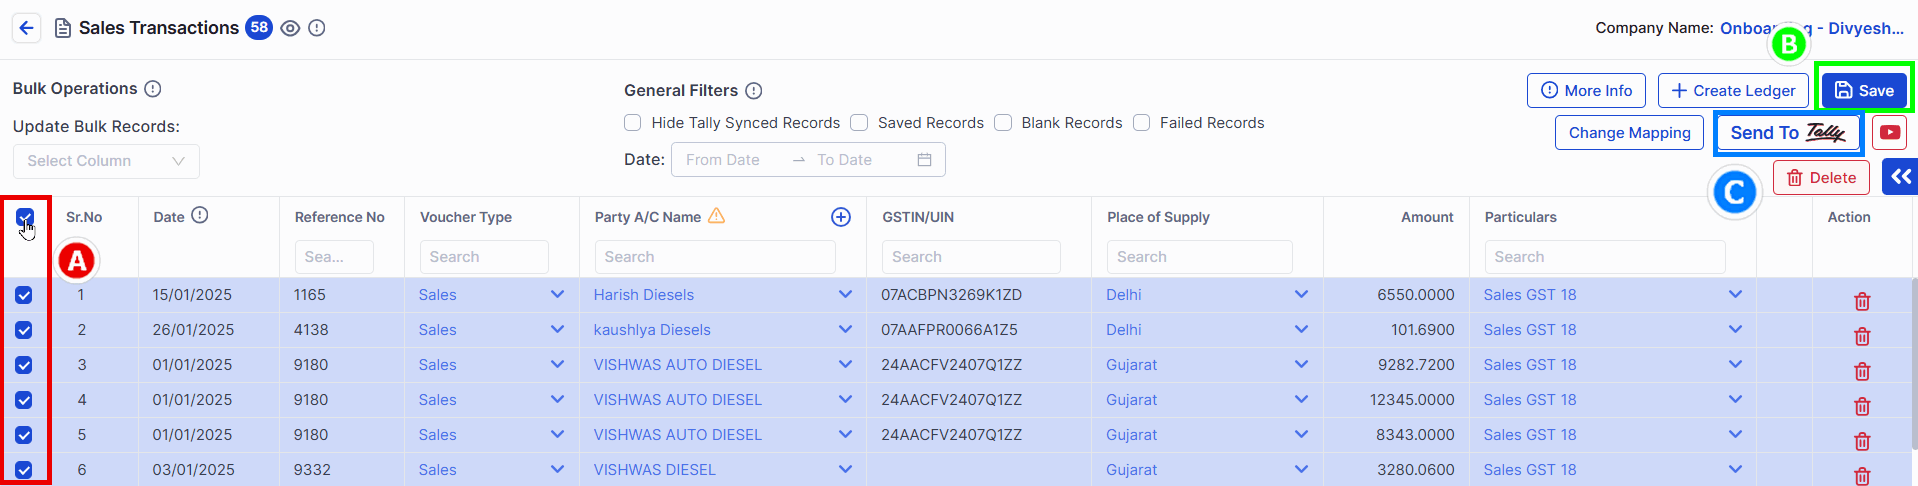
- A → Select your transactions (choose all or one by one)
- B → Click the Save button
- C → Click Send to Tally to send data into Tally
**Instruction**: Make sure all your entries are correct and no caution triangles are left behind before sending!

- D → Hit OK when the system asks for confirmation
**Warning**: Only the data that you selected and saved will go to Tally. You can send the rest later.
📊 Progress Tracking – How Do I Know It’s Working?
**Sending Progress Tracking Data to Tally**
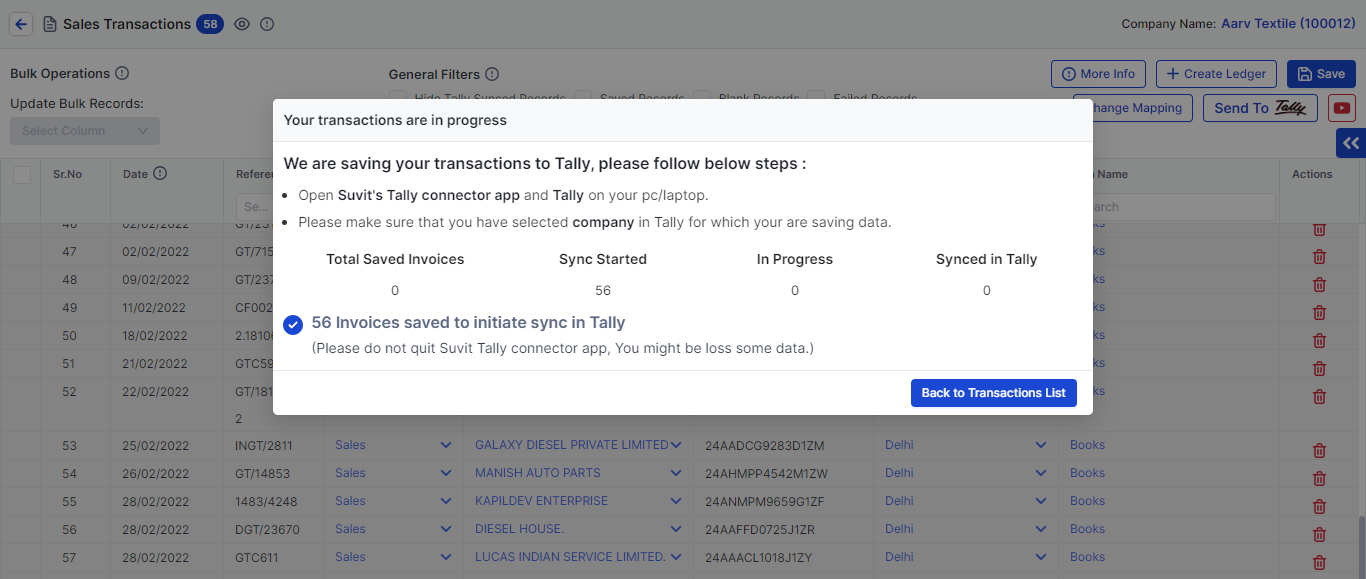
**1** → **Gray Stage** (1st Stage)
- It indicates the Process has been initiated
**2** → **Orange Stage** (2nd Stage)
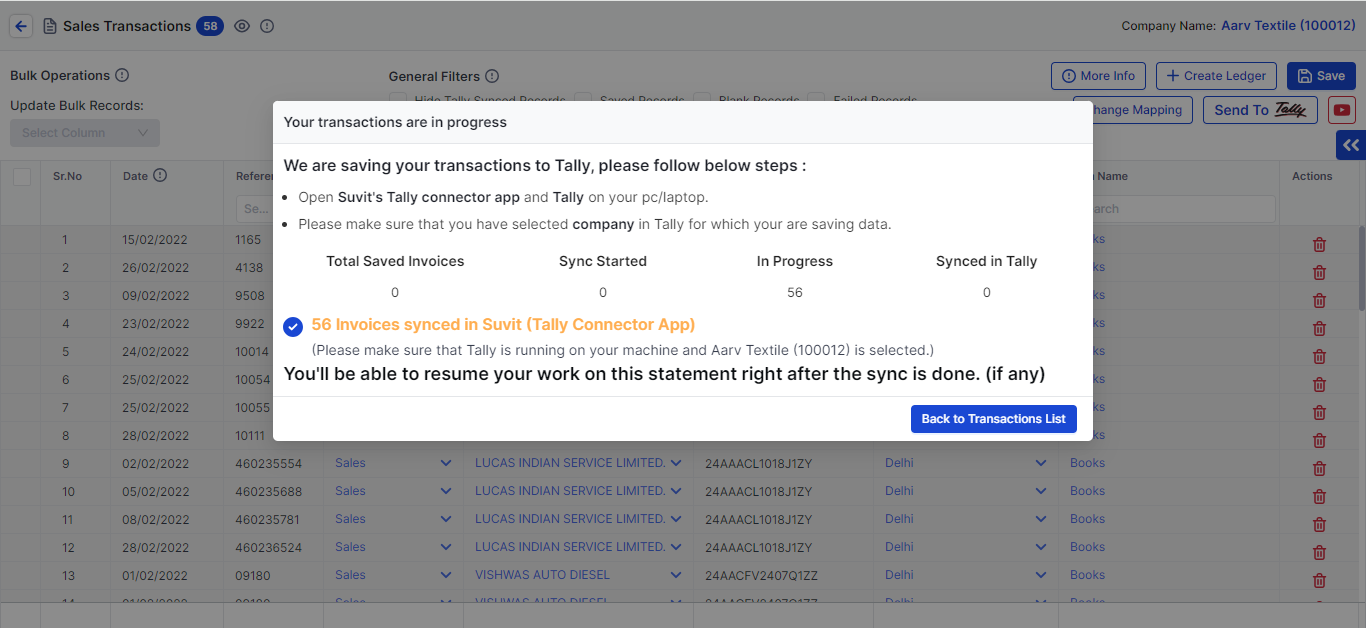
- It indicates the Progress has been started
**3** → **Green Stage** (3rd Stage)
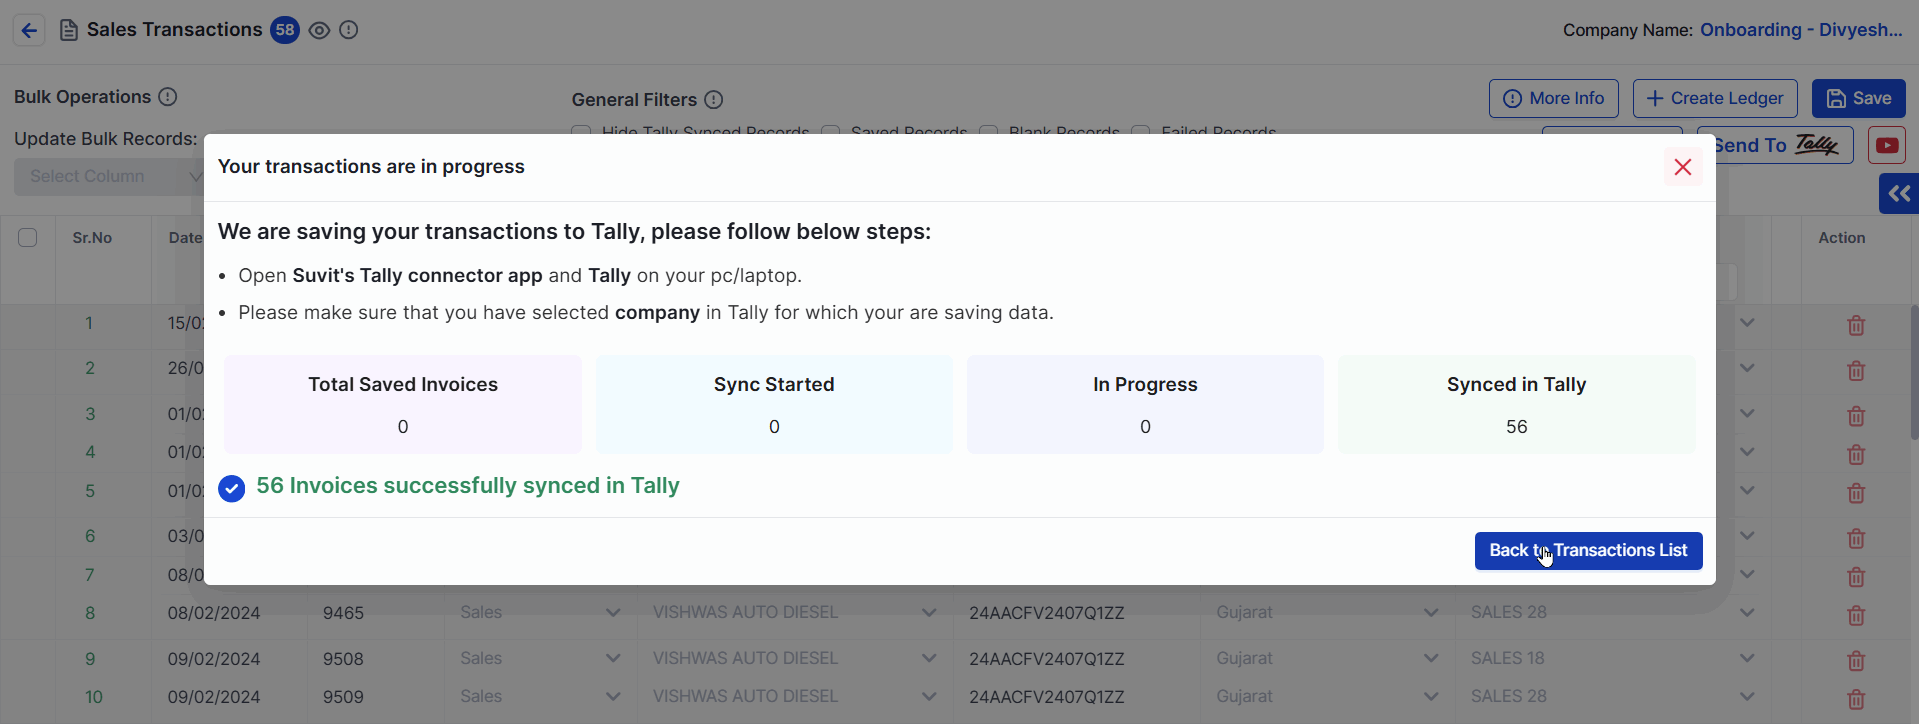
- It indicates that Data has sent Successfully to Tally
🔍 How to Work with Filters and Mismatched Data
📋 Processing Screen
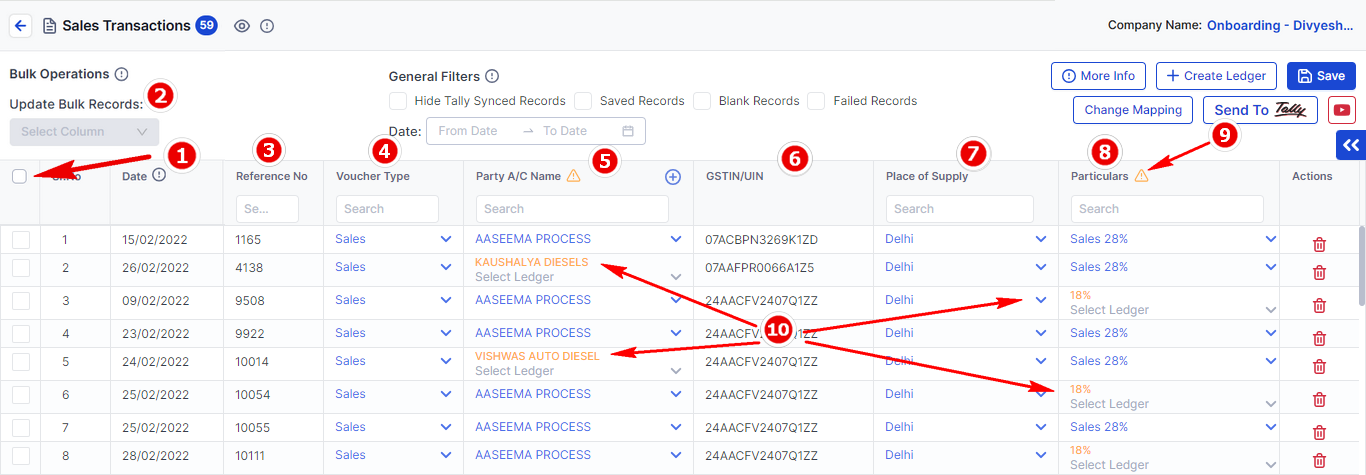
This is where you’ll see all your uploaded transactions.
**Check details here**
**1** → **Bulk Selection**: It will help you to select the transaction one-by-one or in bullk.
**2** → **Update Bulk Records**: It is used to change or select specific data with in the Transaction screen.
**3** → **Reference No**: As per the excel the reference will been seen here.
**4** → **Voucher Type**: By default Sales voucher type will be selected. It can be changed according to the requirement.
**5** → **Party Name**: Name of the party will be seen here.
**6** → **GST No**: It will show as per the party name detail.
**7** → **Place of Supply**: If you have selected in mapping or else it will dsplay according to the data set in tally.
**8** → **Particulars**: It will show Sales Account.
**9** → **Warning Triangle**: It indicates that few details have been not selected because of spelling mistake or new party name.
**10** → **Other Details** Data in orange indicates that it not selected.
**Note**: Blue = All Good, Orange = Not Done Yet / Not Found in Tally
🧾 Fixing Ledger Mismatches
Step 1: Bulk Check Records
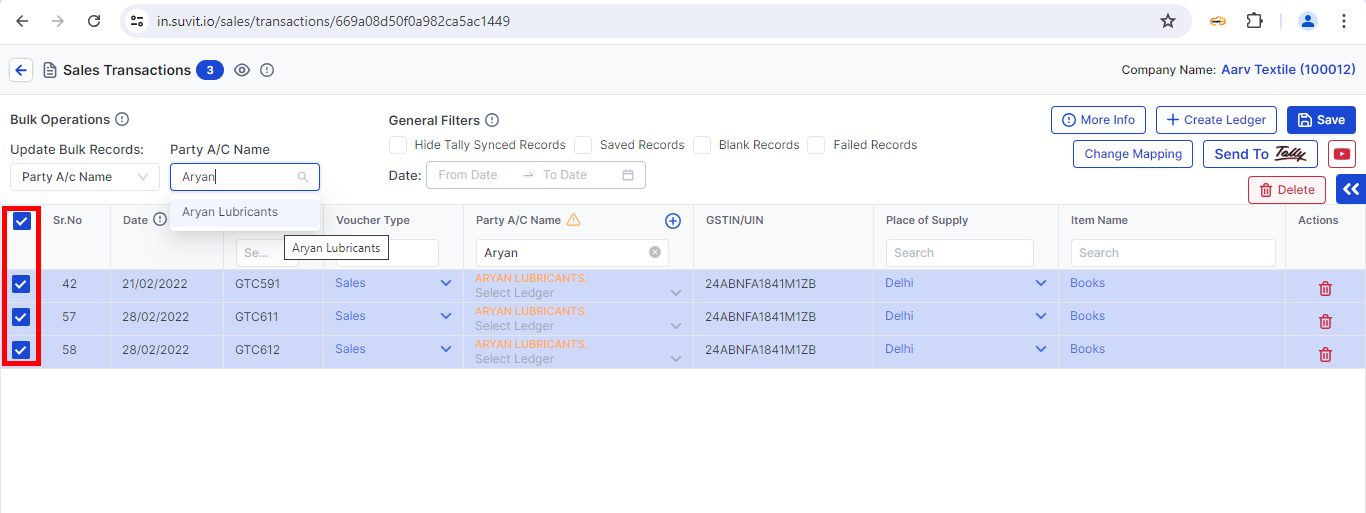 → Select the records you want to fix
 → Use Bulk Update to fix them together
Step 2: Create Missing Ledgers
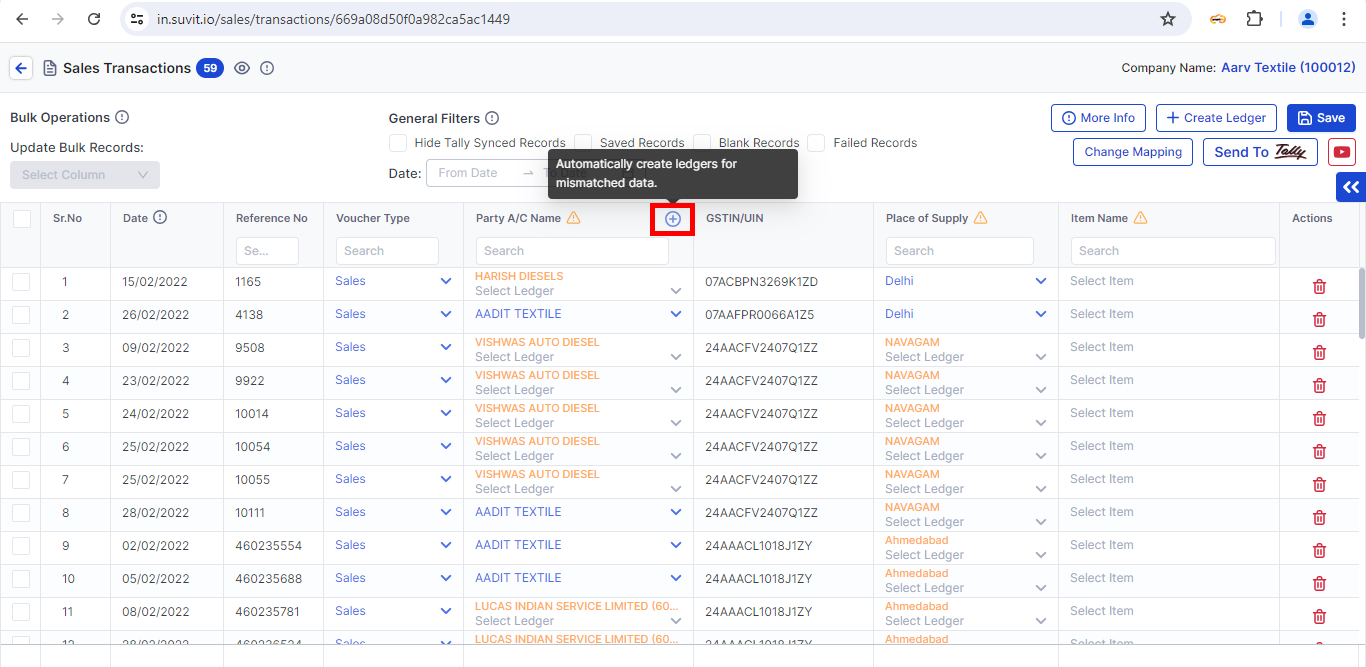
→ Click the “+” button next to the party name to add a new ledger
→ For detailed steps, Click here
⚙️ General Filters
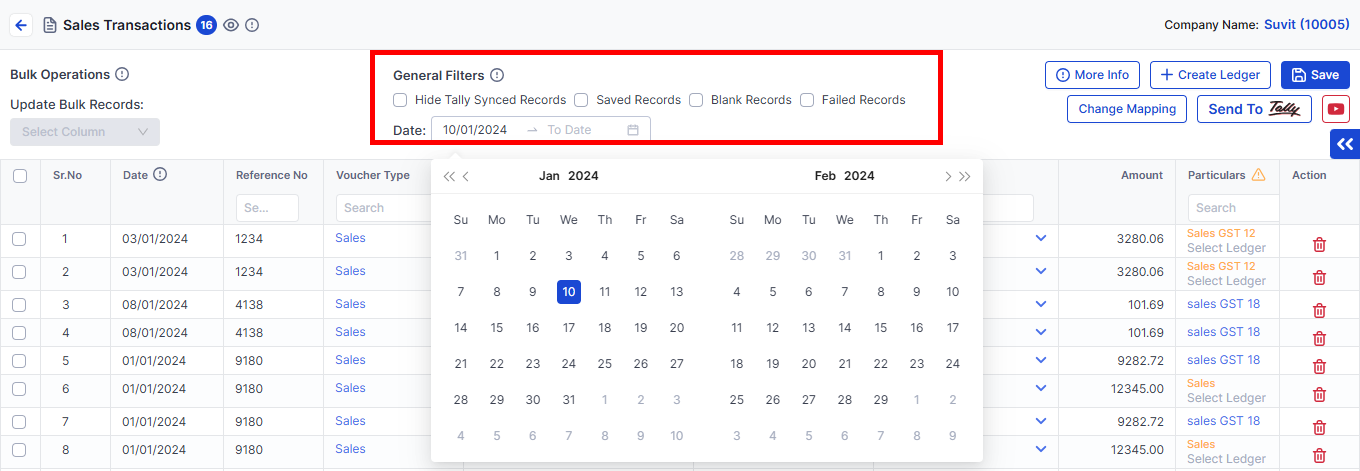
You can use filters to:
→ Hide data already sent to Tally
→ View blank, saved, or failed records
→ Filter data by date range
Learn More
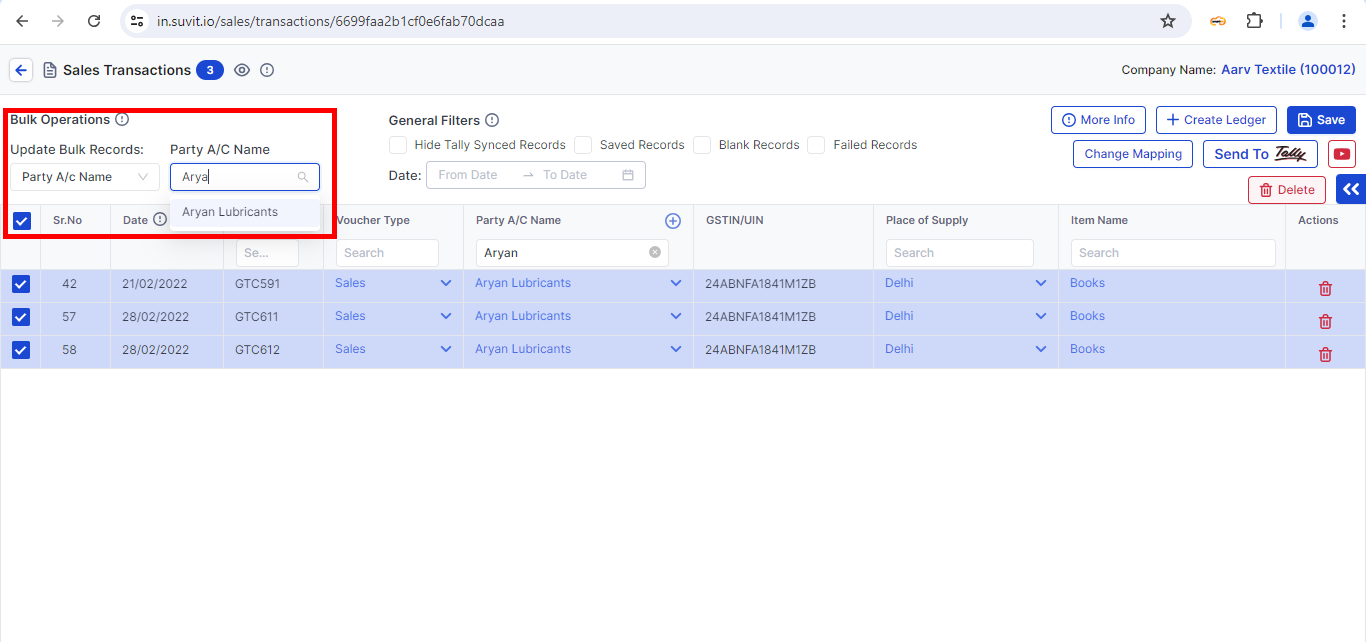
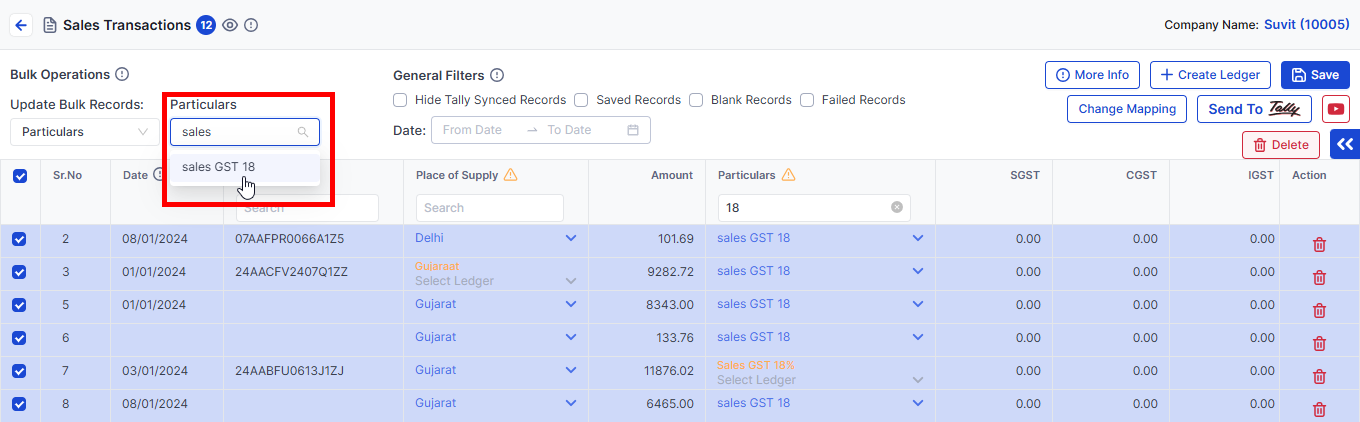
🔄 Bulk Operations – Make Changes Faster!
Step 1: Update Multiple Records
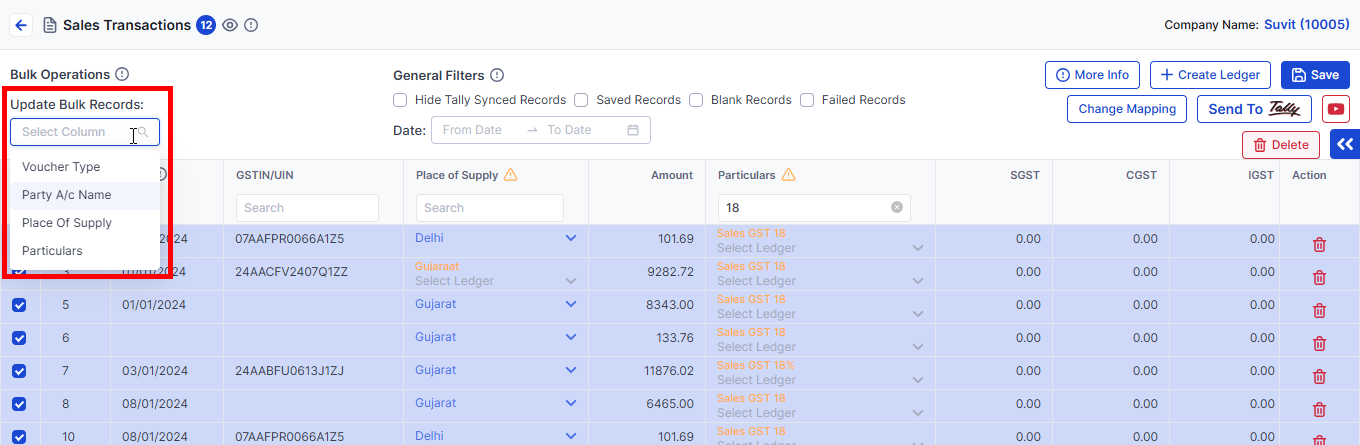
→ Use Bulk Update to change:
→ Voucher Type
→ Party Name
→ Particulars (Ledger)
→ Helps with:
→ Choosing voucher types
→ Setting ledgers
→ Selecting many entries at once
Step 3: Final Check
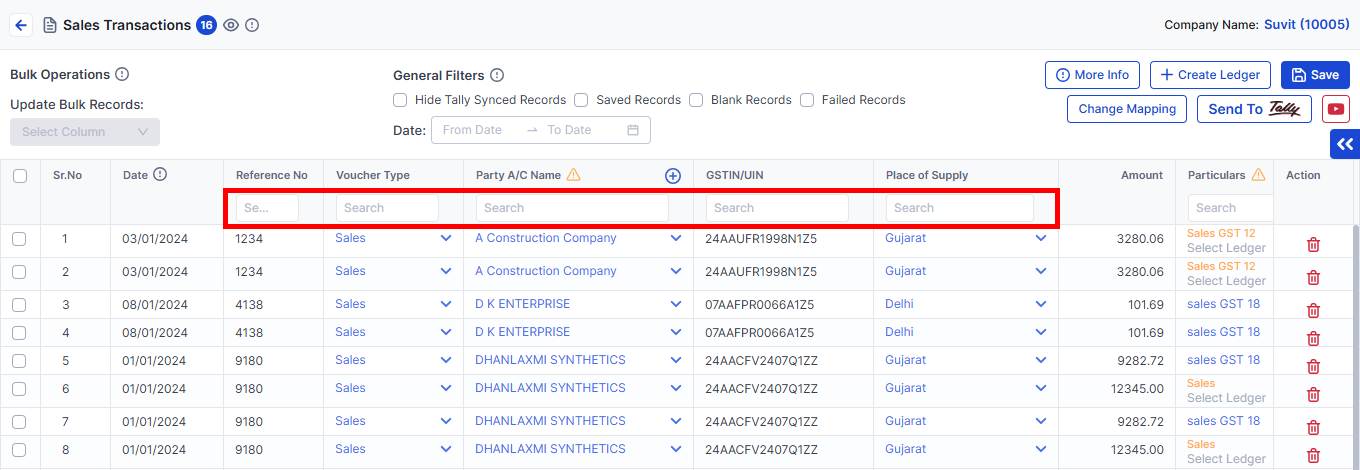
→ Search by Bill No. or Party Name
→ Verify GST No. and Supply Location
✅ You May Also Like
- Learn how to create ledger & stock item from the Sales screen Learn more