Common Taxable Amount with Multiple Horizontal GST Ledgers
Import sales data from Excel to Tally via Suvit with shared taxable amounts and separate taxes like SGST and CGST. Modify, upload, and map key details.
Instructions

- A. If you have sales excel sheet which looks like below image. In which Taxable amount is common for (B) different Duties & Taxes amount.
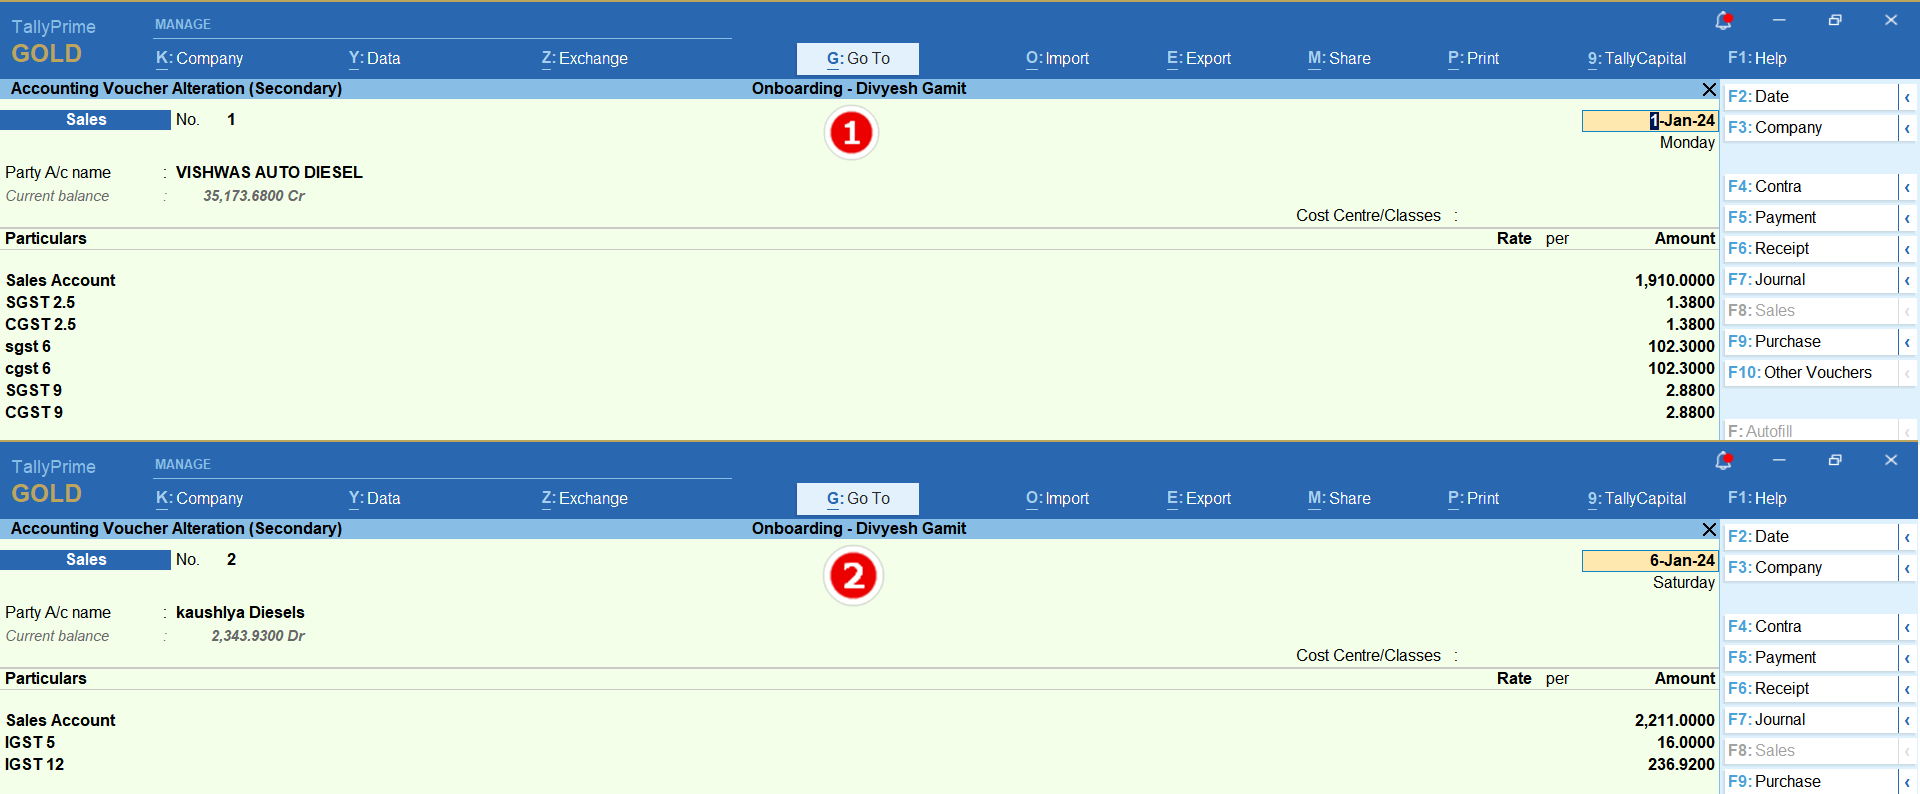
- 1 & 2 Sample entry in Tally with such data
Steps to follow
Sheet Modification Click Below
--> Excel Sheet Modification
- A. Common Taxable Amount for each Bill
- B. In excel sheet bifurcated (separates) duties & taxes amount should be there.
- C. Add one row with name Sales/Ledger and enter **Common Sales account** name also known as GST Ledger which will goes to particular.
**Some other data should hvae in Excel Sheet**
- 4. GST number ( Not Mandatory )
- 6. Place of Supply (Not Mandatory )
- 7. Particulars ( Smallest Sales account GST rate name )
How to upload Excel sheet Click Here
Mapping
- Click on file to open Mapping Process
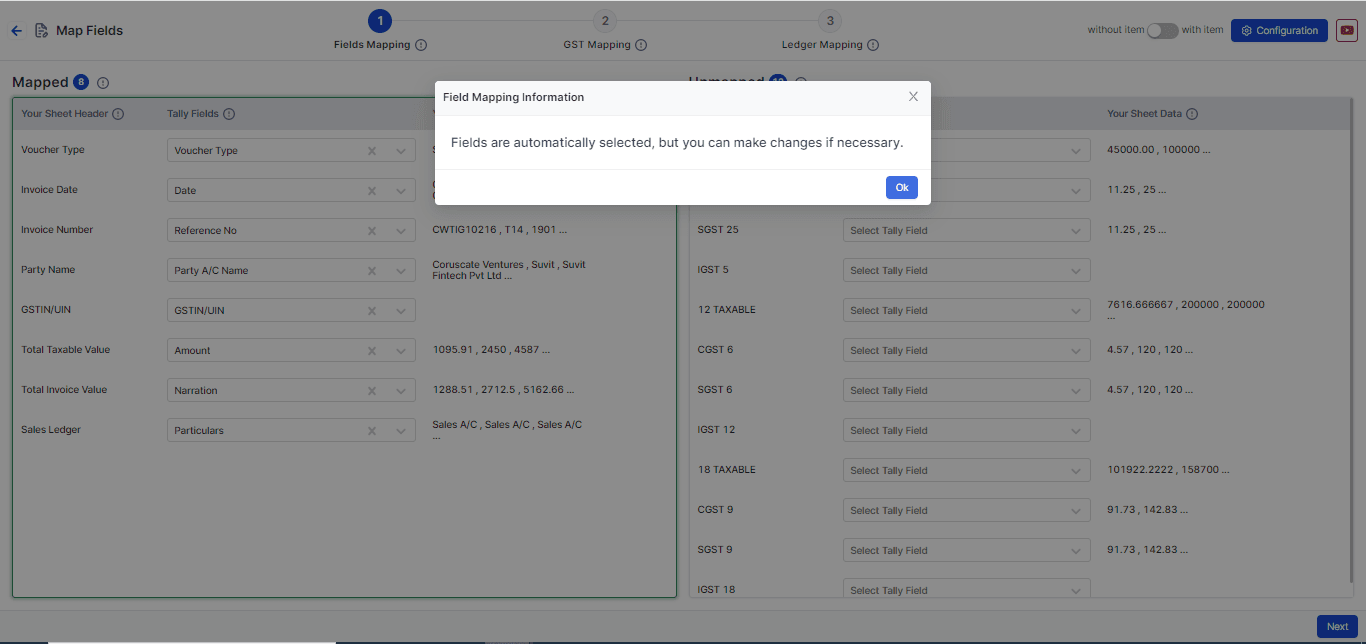
Step 1: Field Mapping
Note: In this sheet you have to map **Smallest Taxable amount** in **Amount**
- As per this sheet we have mapped the GST Tax Rate 5
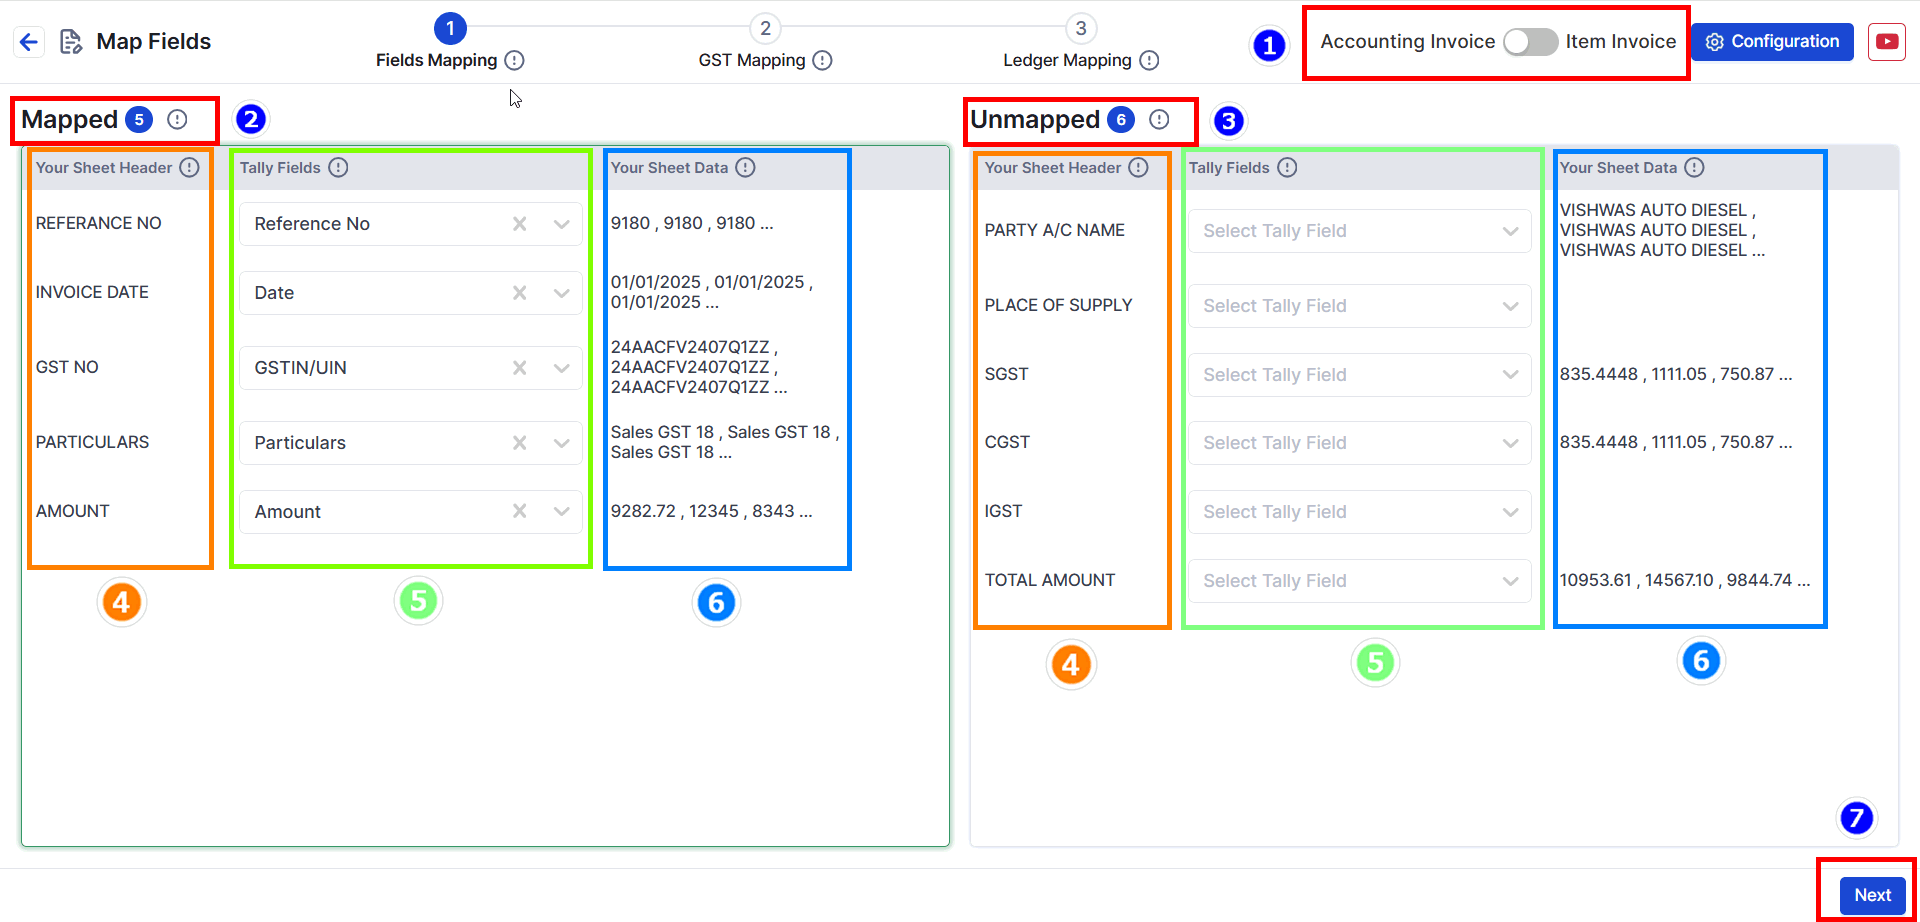
- Choose your data type: Decide if your data has items or no items. For this example, we will choose Without Item (see the image above).
- Mapped Fields: These are fields that the system has matched automatically from your uploaded data.
- Unmapped Fields: These are fields not matched yet. You need to select the right Tally fields for them. (Not all fields need to be matched.)
- Your Sheet Header: The headings from your Excel sheet will appear here. This helps you understand the data easily.
- Tally Fields: These are fields matched with Tally filed. You can change them if needed.
- Your Sheet Data: Shows the top 3 values from your Excel sheet to help you cross-check the data.
- Press Next to go to the GST Matching step
Step 2: GST Mapping (Map Your Tax Ledger).
- Here we will map the Duties & Taxes and its details
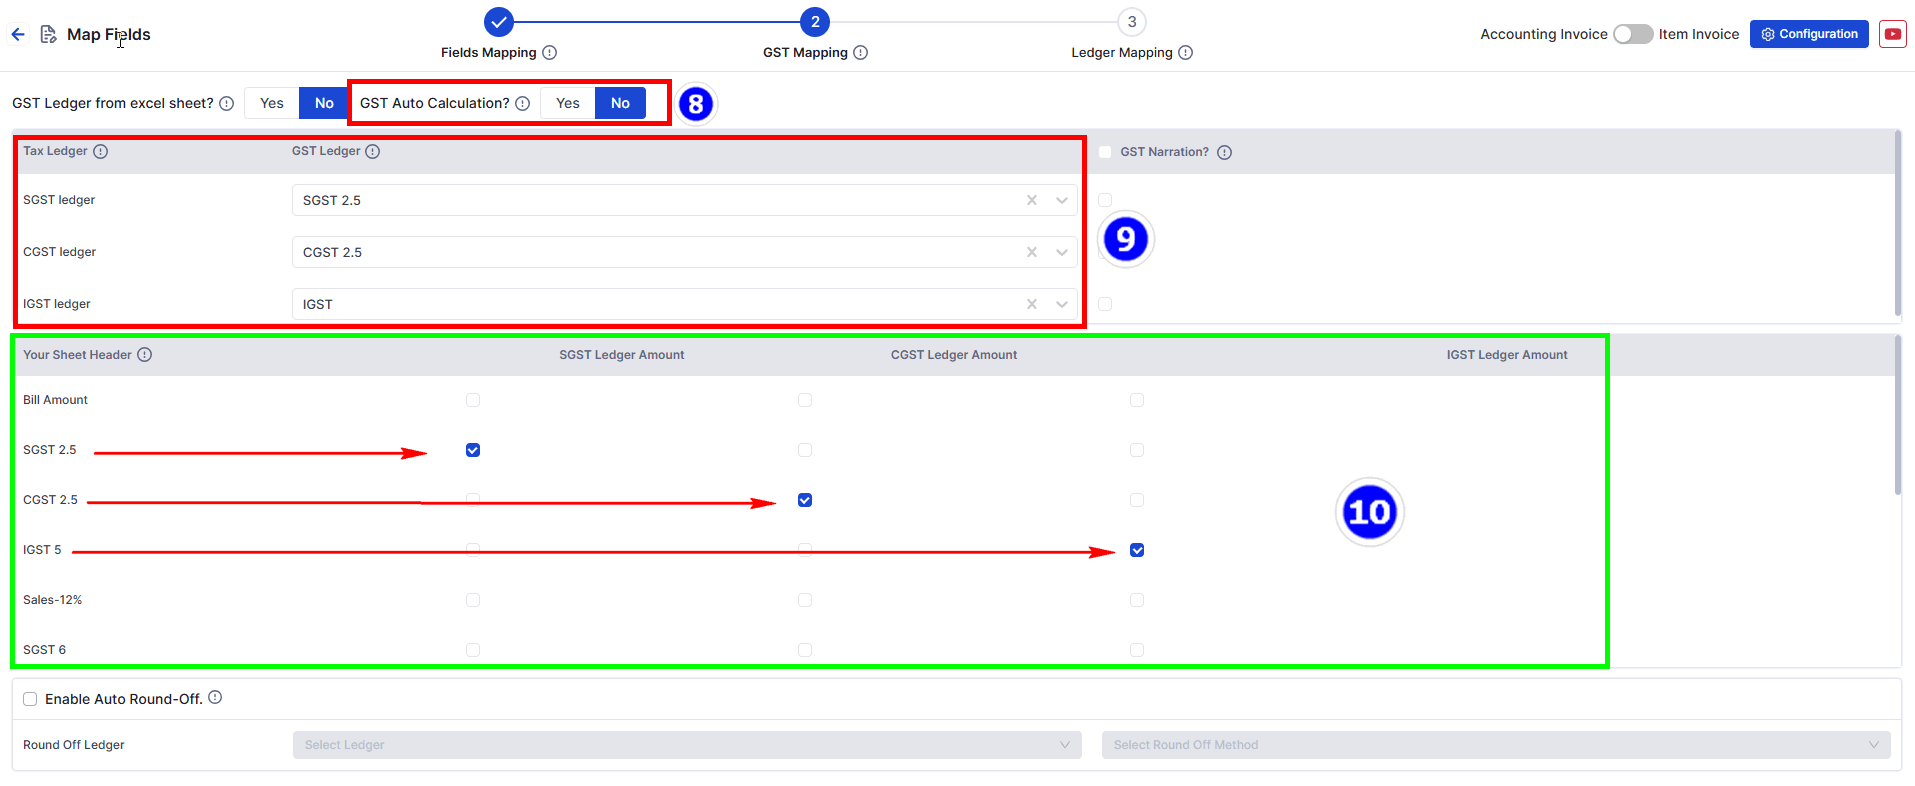
- Change GST Auto Calculation to NO
- Select Duties & Taxes ledger name ( If you have taken SALES GST 5 then select SGST 2.5 , CGST 2.5 and IGST 5 respectively )
- Select Duties & Taxes amount of which you have selected in Step 9
- Click Next for 3rd Stage mapping.
**Note**: SGST, CGST, and IGST Tax Ledgers are mandatory fields that must be mapped. You can also map the round-off ledger from below option.
Step 3: Ledger Mapping
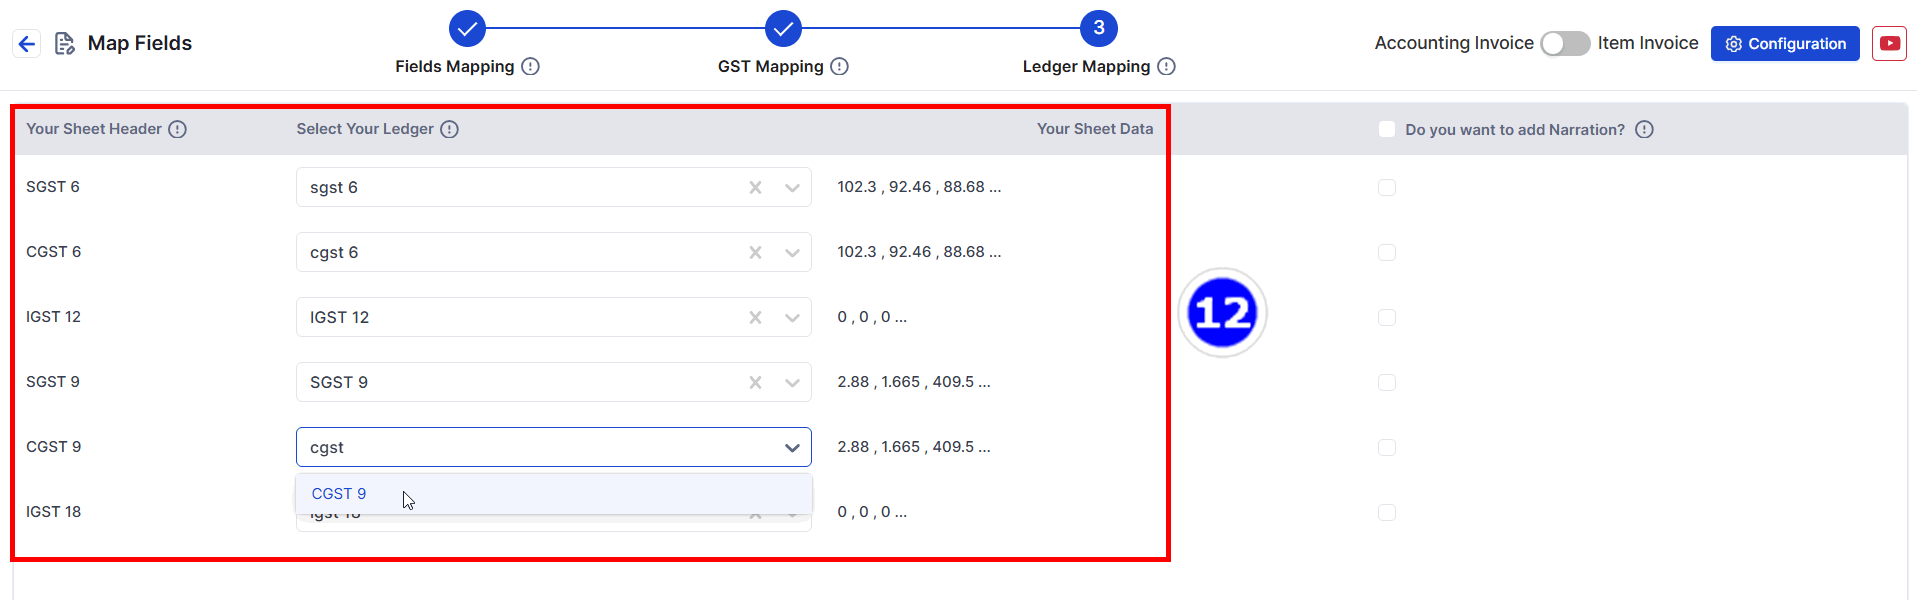
- Select remaining TAXABLE AMOUNT and its DUTIES & TAXES amount in decreasing Order (small to big).
- Click Save & Proceed to move to the process screen.