Uploading Sales/Sales return data through an excel sheet Suvit’s Sales/Sales Return automates sales and return tracking, syncing with Tally to ensure accurate records and reduce manual data entry for businesses.
📤 Upload Sales or Sales Return Data via Excel
This guide is designed to help you upload sales data quickly and correctly using Excel in Suvit.
▶️ Quick Video Tutorial
VIDEO
🔗 Quick Access
🪜 Step-by-Step Instructions
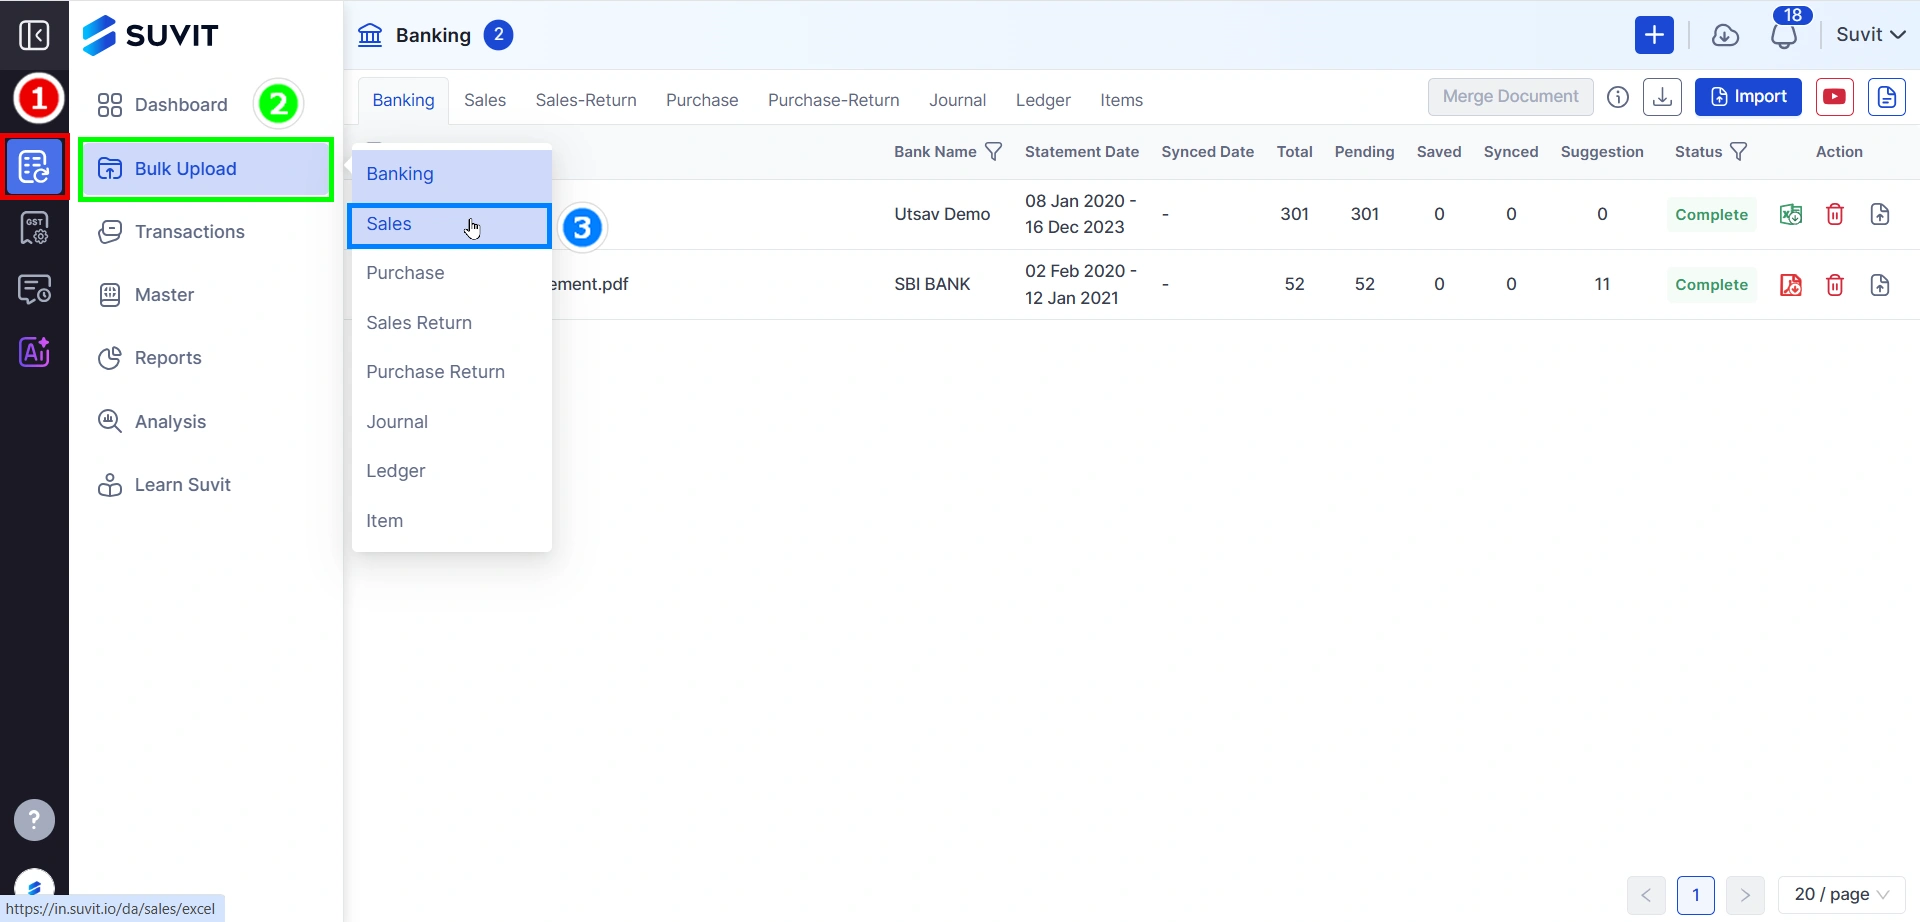
Step 1: Go to Bulk Upload → Sales / Sales Return
From the left menu, click on Bulk Upload .
Then choose either Sales or Sales Return from the dropdown.
- Here we have selected Sales
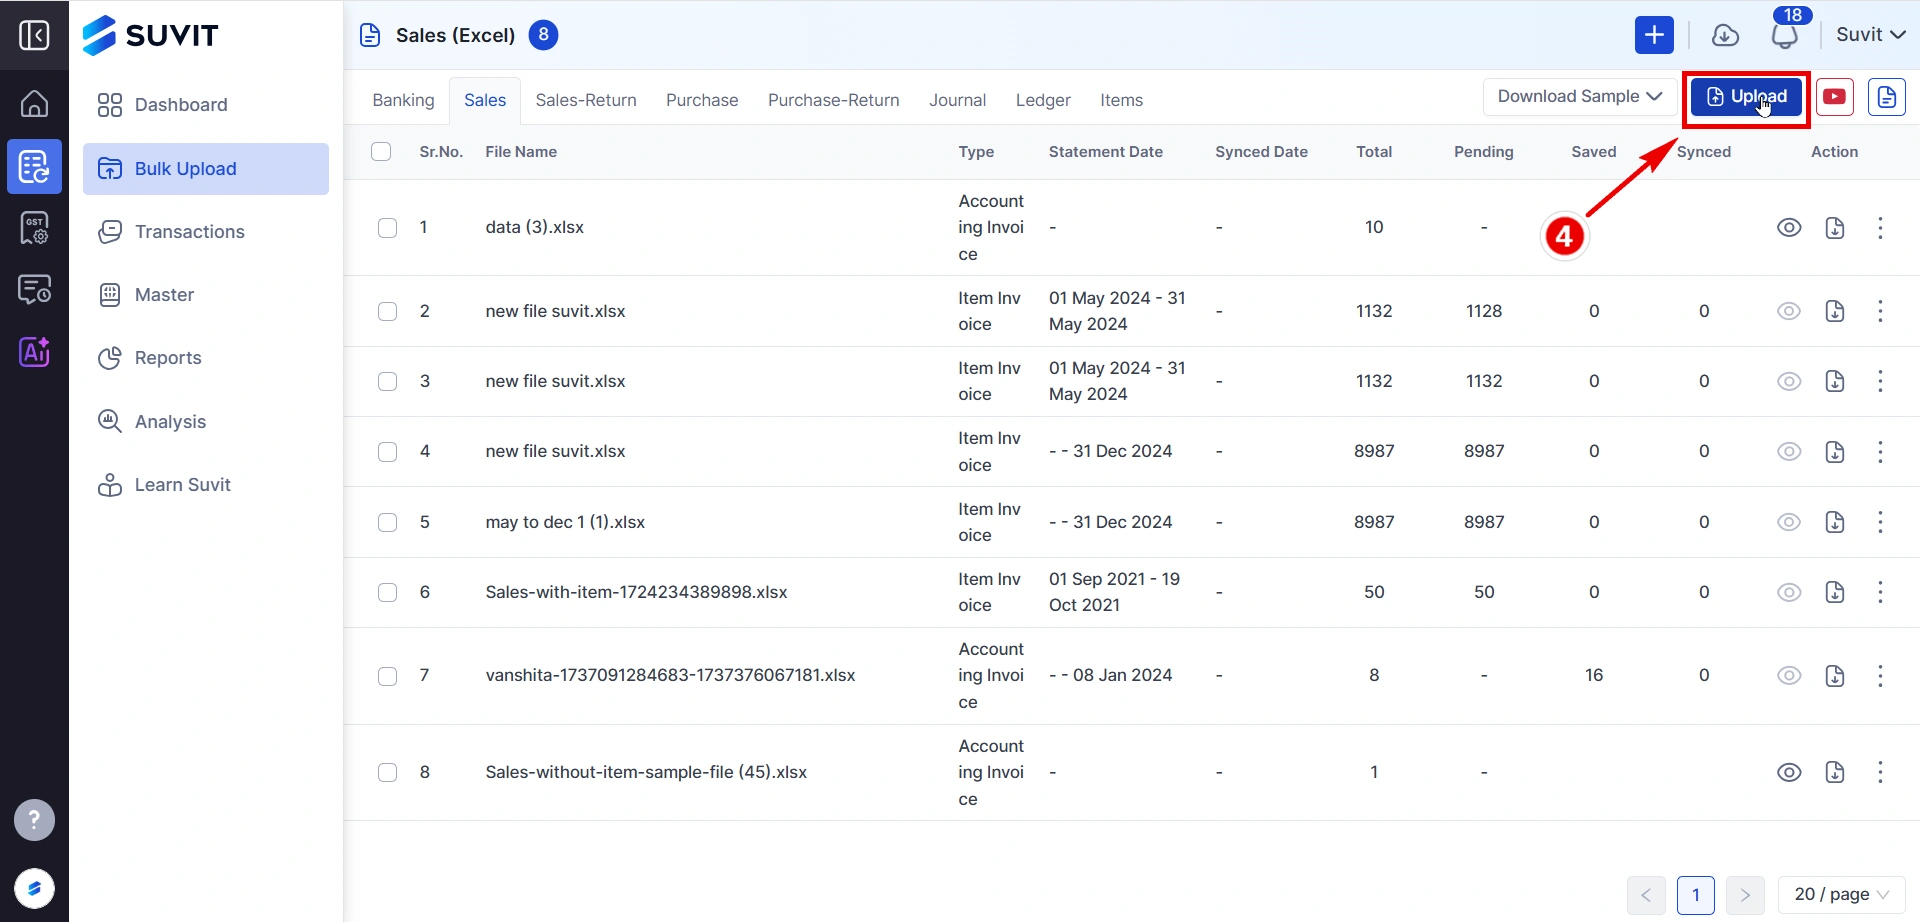
Step 2: Click Upload
Click on the Upload button on the top right corner to add your Excel file.
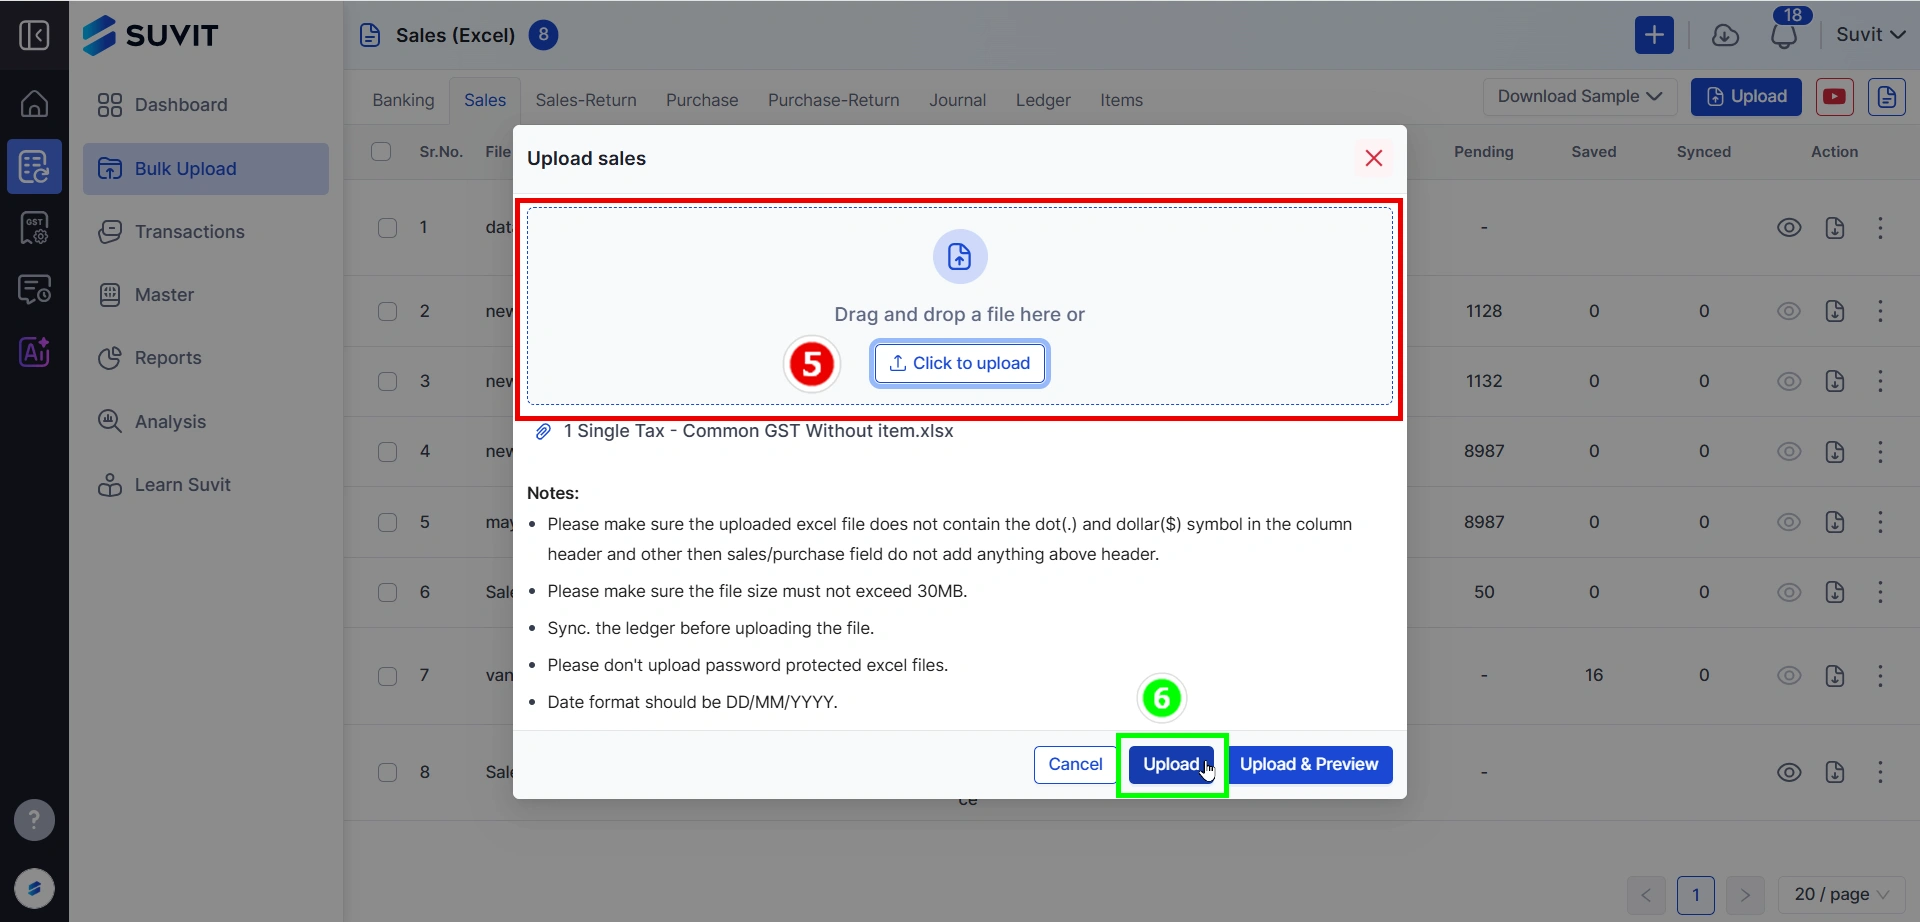
Step 3: Select and Upload Your Excel File
Click "Click to upload" to select your file from the computer.
Make sure:
→ The file does not contain dots (.) or dollar ($) symbols in headers.
→ The file size is under 30MB .
→ The date format is in DD/MM/YYYY (e.g., 05/08/2024).
→ Do not upload password-protected Excel files.
→ You have synced the required ledgers.
Once the file is selected, click Upload to proceed.
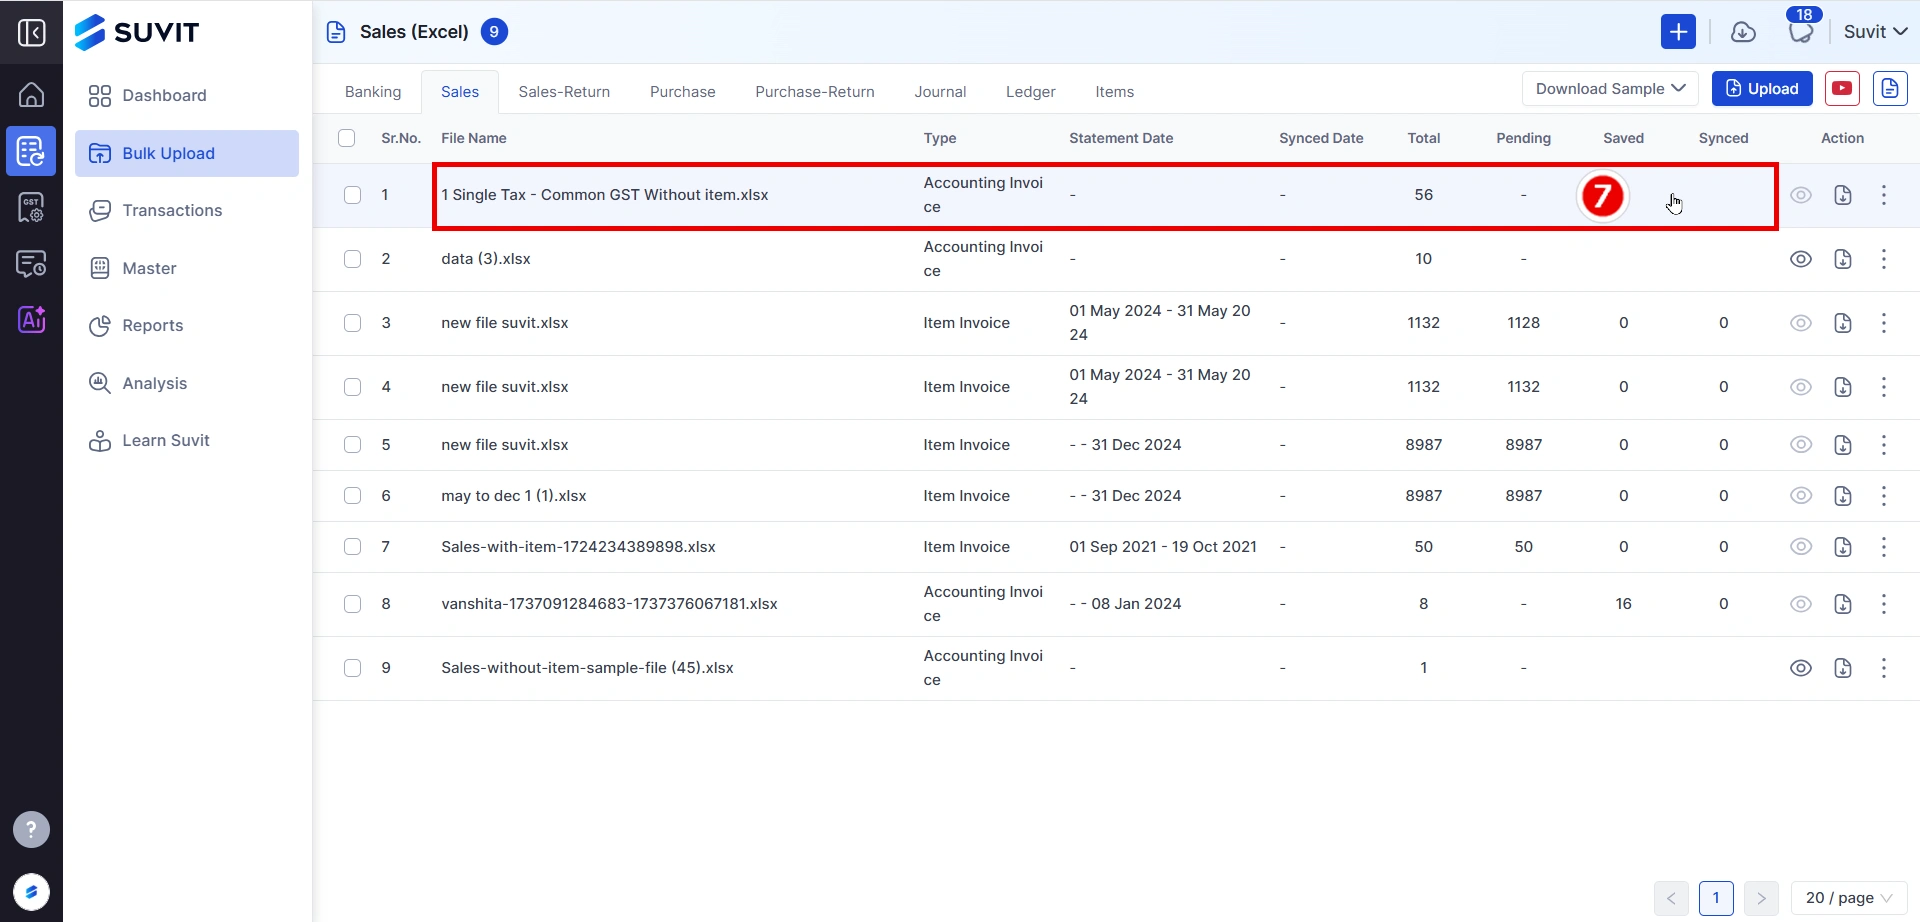
Step 4: File Appears in List
Your file will now appear in the list with its name, type, and transaction count.
This confirms it was successfully uploaded.
💡 Pro Tip for Accountants
Double-check that the Sales Account Ledger is mapped as per your GST rate.
Always sort by Invoice Number A-Z to avoid mapping issues.
📚 What's Next?
Once your file is uploaded:
👉 Head to the Data Mapping Screen by clicking on the uploaded file.
To learn more about mapping: Learn how mapping works
→