Suvit lets you create stock items in bulk. Just prepare your Excel sheet as required and use the "Item" option under Bulk Upload to proceed easily.
Step-by-Step Guide to Upload Stock Items in Bulk
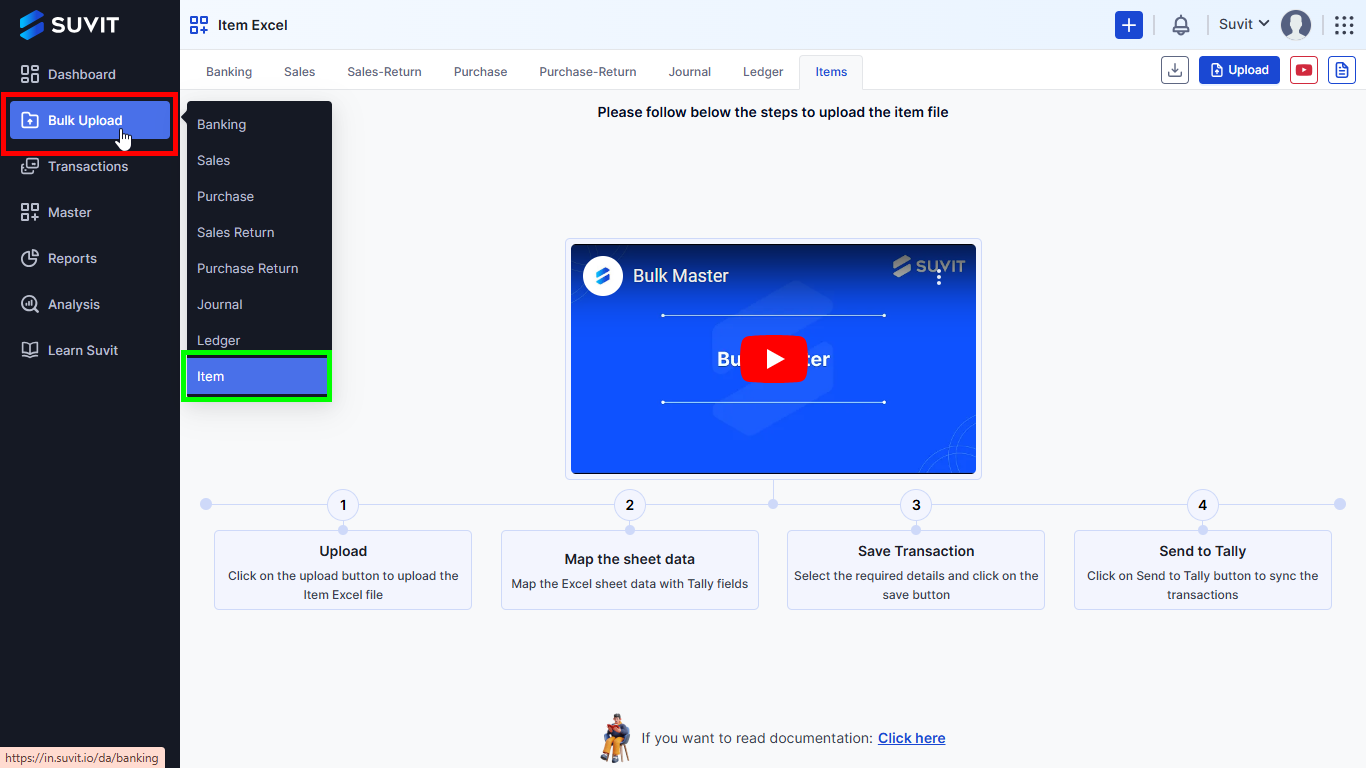
Step 1: Bulk Upload
Go to Data Entry Automation → Bulk Upload → Item.
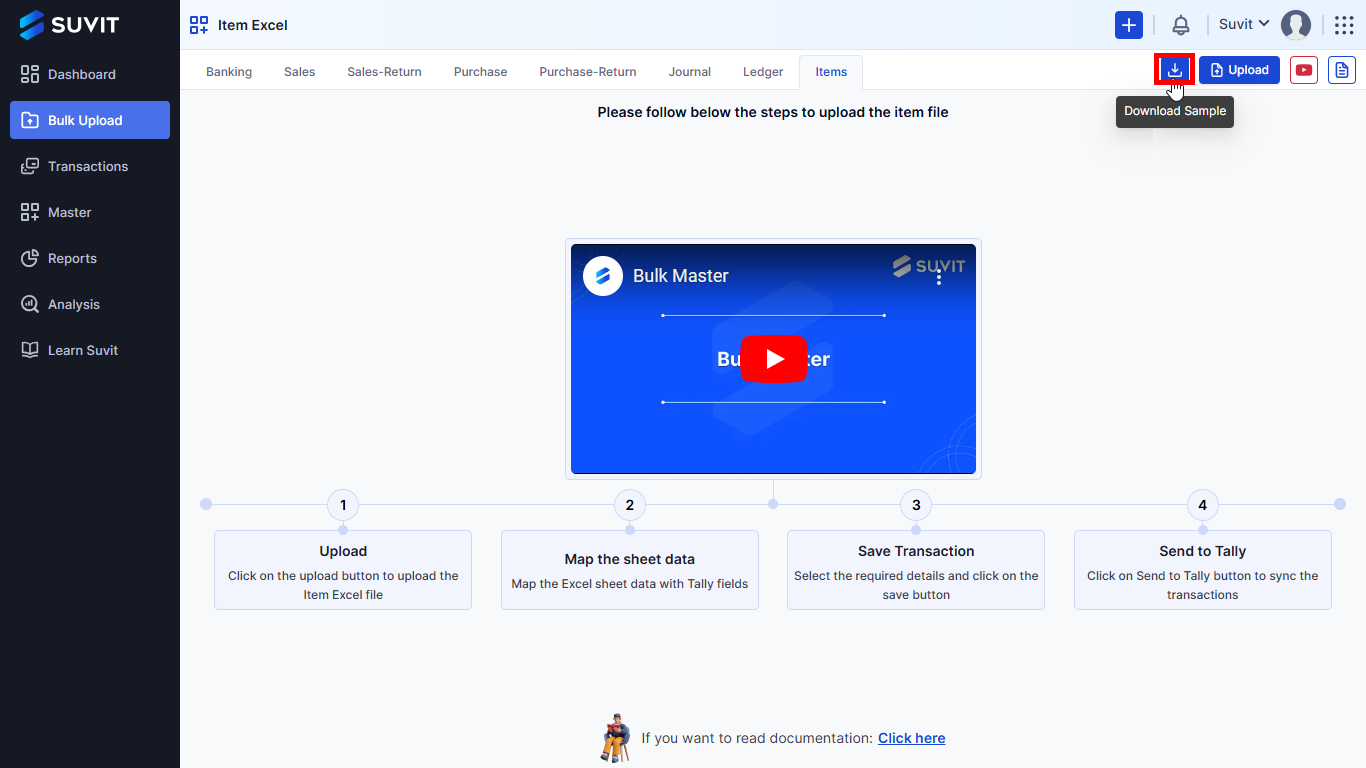
Step 2: Download the Sample Excel Sheet
On the Item Excel page, you will find an option to download a sample sheet or upload an existing Excel file.
Click on "Download Sample" to get the template.
Step 3 Fill in the Required Details
Open the excel sheet, fill in the required details, and save it. "Name", "Under", and "Unit" are mandatory fields to be filled in.
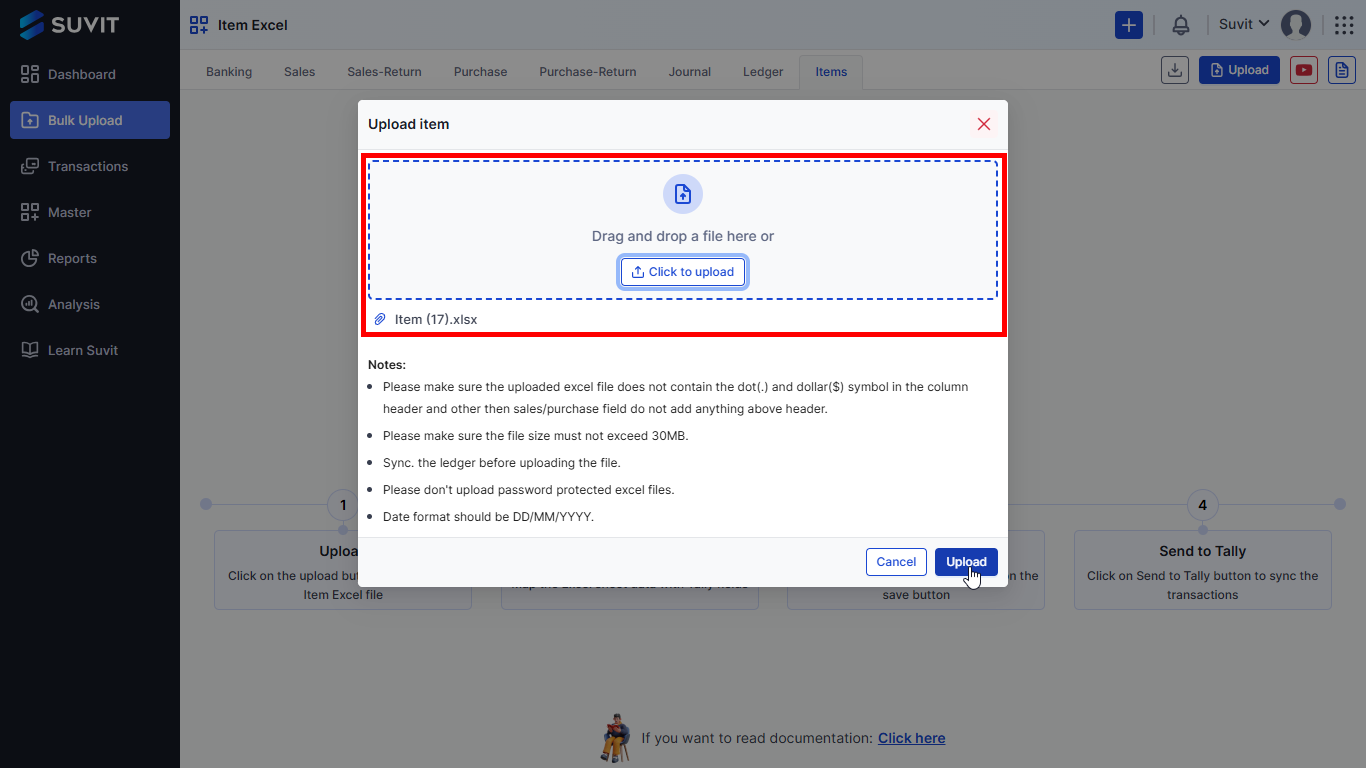
Step 4: Upload the Excel Sheet
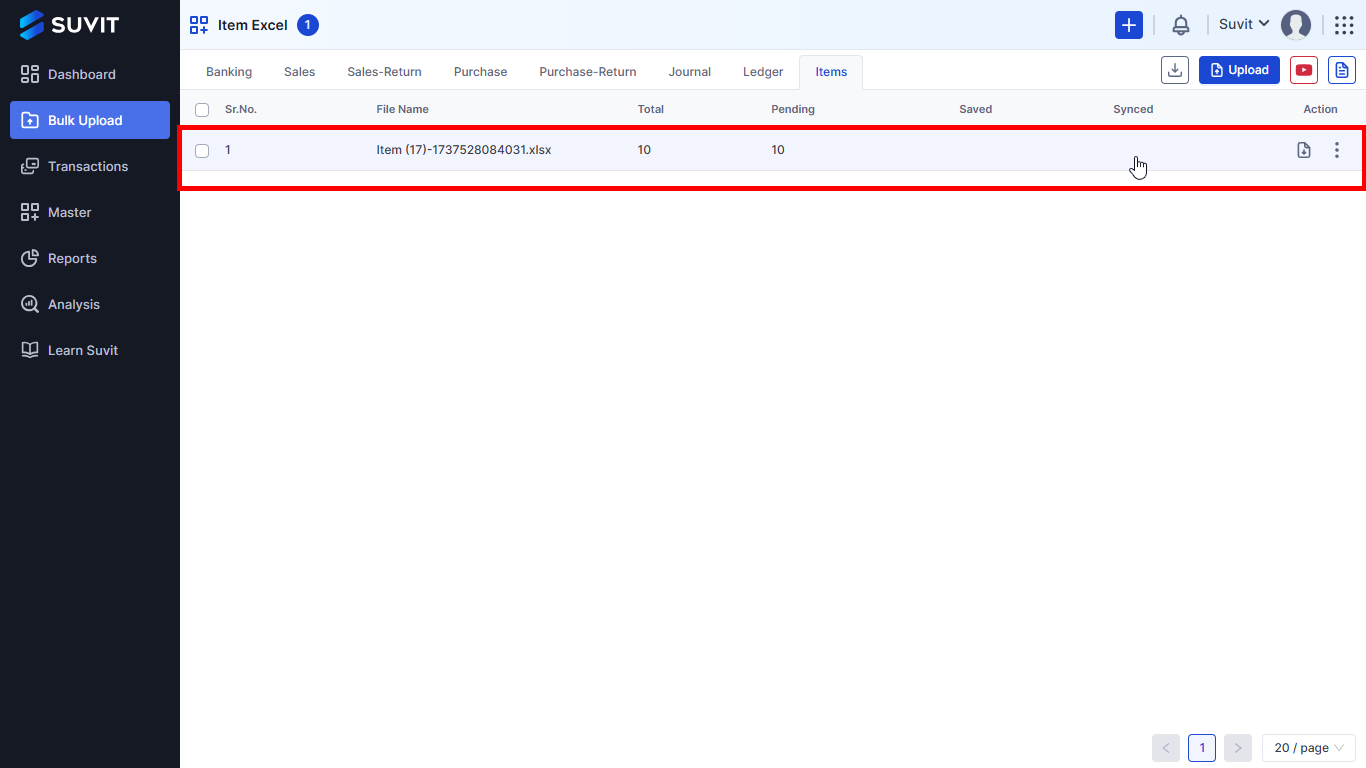
Go back to the Item Excel page, click on "Upload," select the appropriate company, and browse your ledger Excel file for uploading.
If any ledger fails to upload, you will see an error log showing the reason for the failure.
Click on the file for Next step.
Step 6: Map the Fields
Once uploaded, you will be redirected to the Mapping Field page. Here, you need to map the relevant data fields correctly.
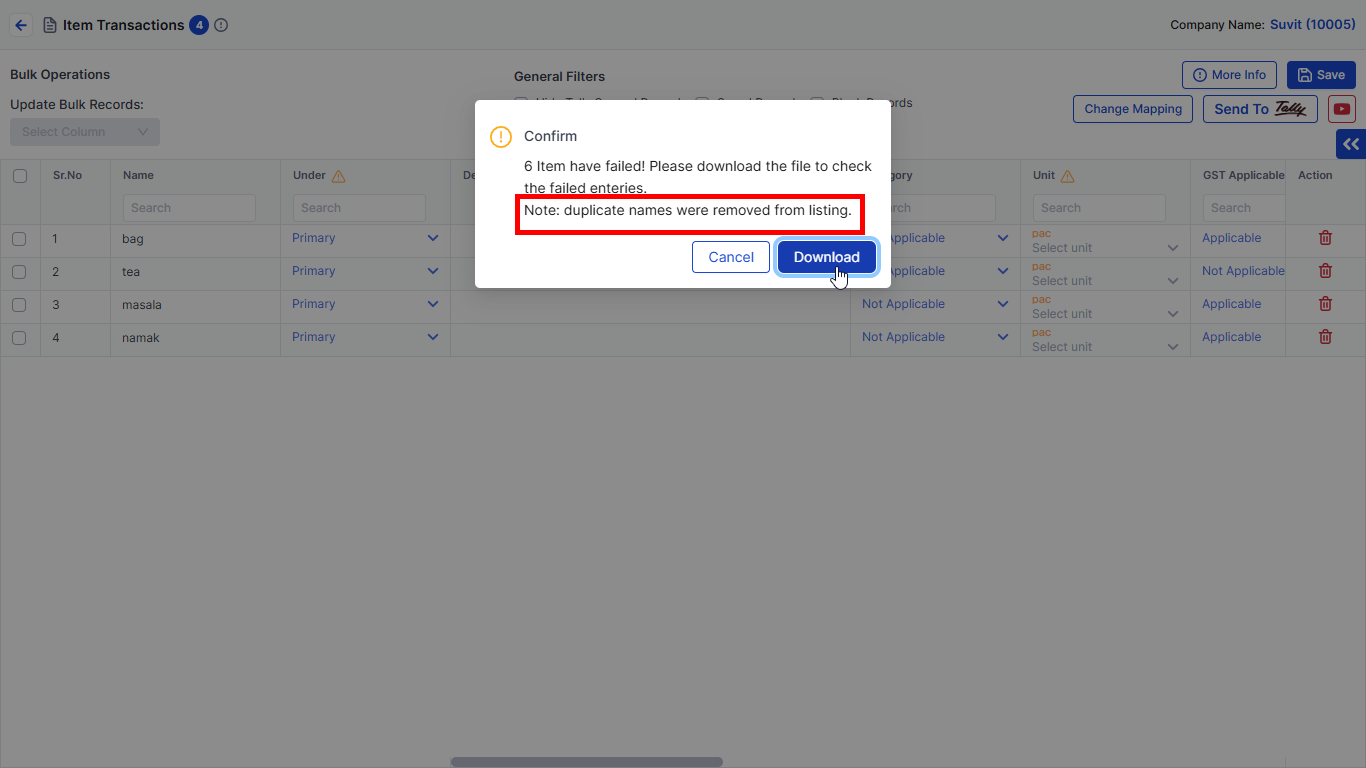
After completing the mapping, click on Save & Proceed, you will get an error popup if there's a mistake in the sheet. You can see the error in the popup or Download excel error ledger log.
Step 7: Check for Remarks
On the item transaction screen, you will get the remark "failed reason".
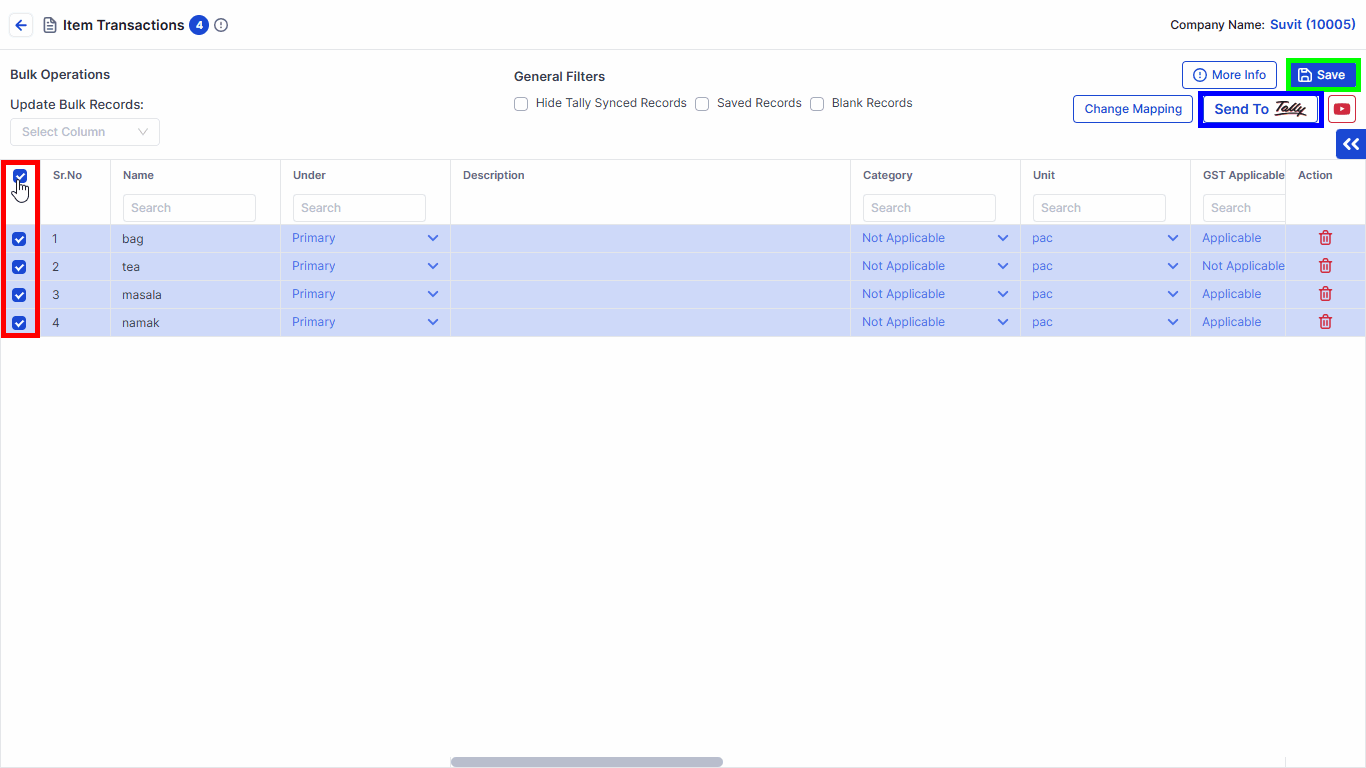
Step 8: Save the Transaction
Go to the Ledger Transaction page, select the record, click Save, then click "Send to Tally" in the drawer's right corner.
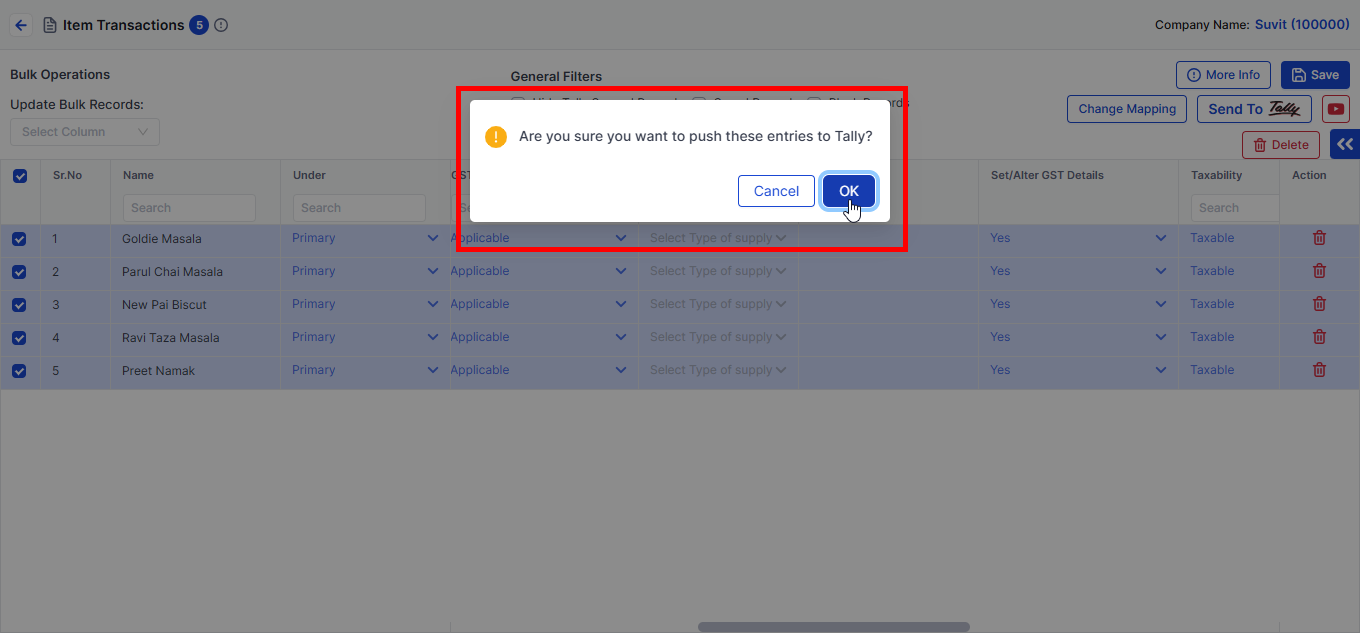
Step 9: Send the Transaction to Tally
A confirmation popup will appear → click OK to proceed or Cancel to stop.
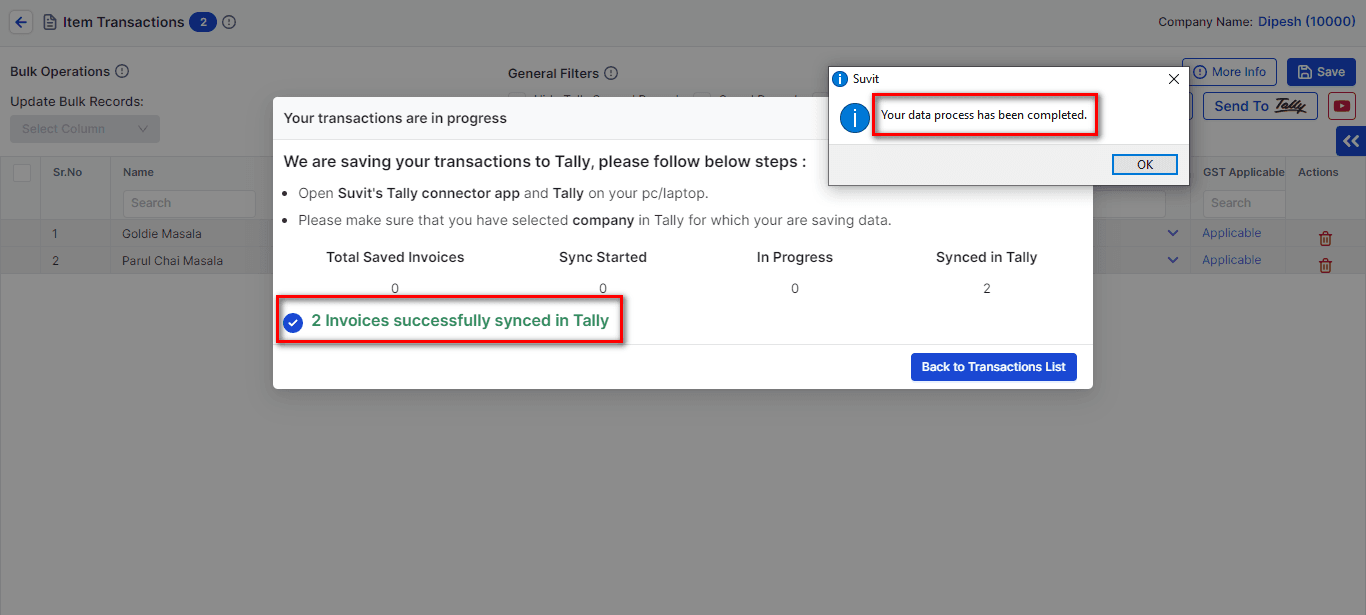
The data synchronization with Tally is complete, confirming successful syncing.
Step 10: Verify in Tally
Check those item ledgers in Tally. You will find that the stock item masters are created in your Tally.