Create Invoice for Purchase and Purchase-Return
Learn how to create Purchase and Purchase Return bills in Suvit. This guide ensures accurate entry and smooth syncing with Tally for efficient processing.
Follow these simple steps to create a purchase bill:
Step 1: Dashboard.

- Click on Data Entry Automation -> Transaction -> Purchase/Purchase Return
Step 2: Create Bill.
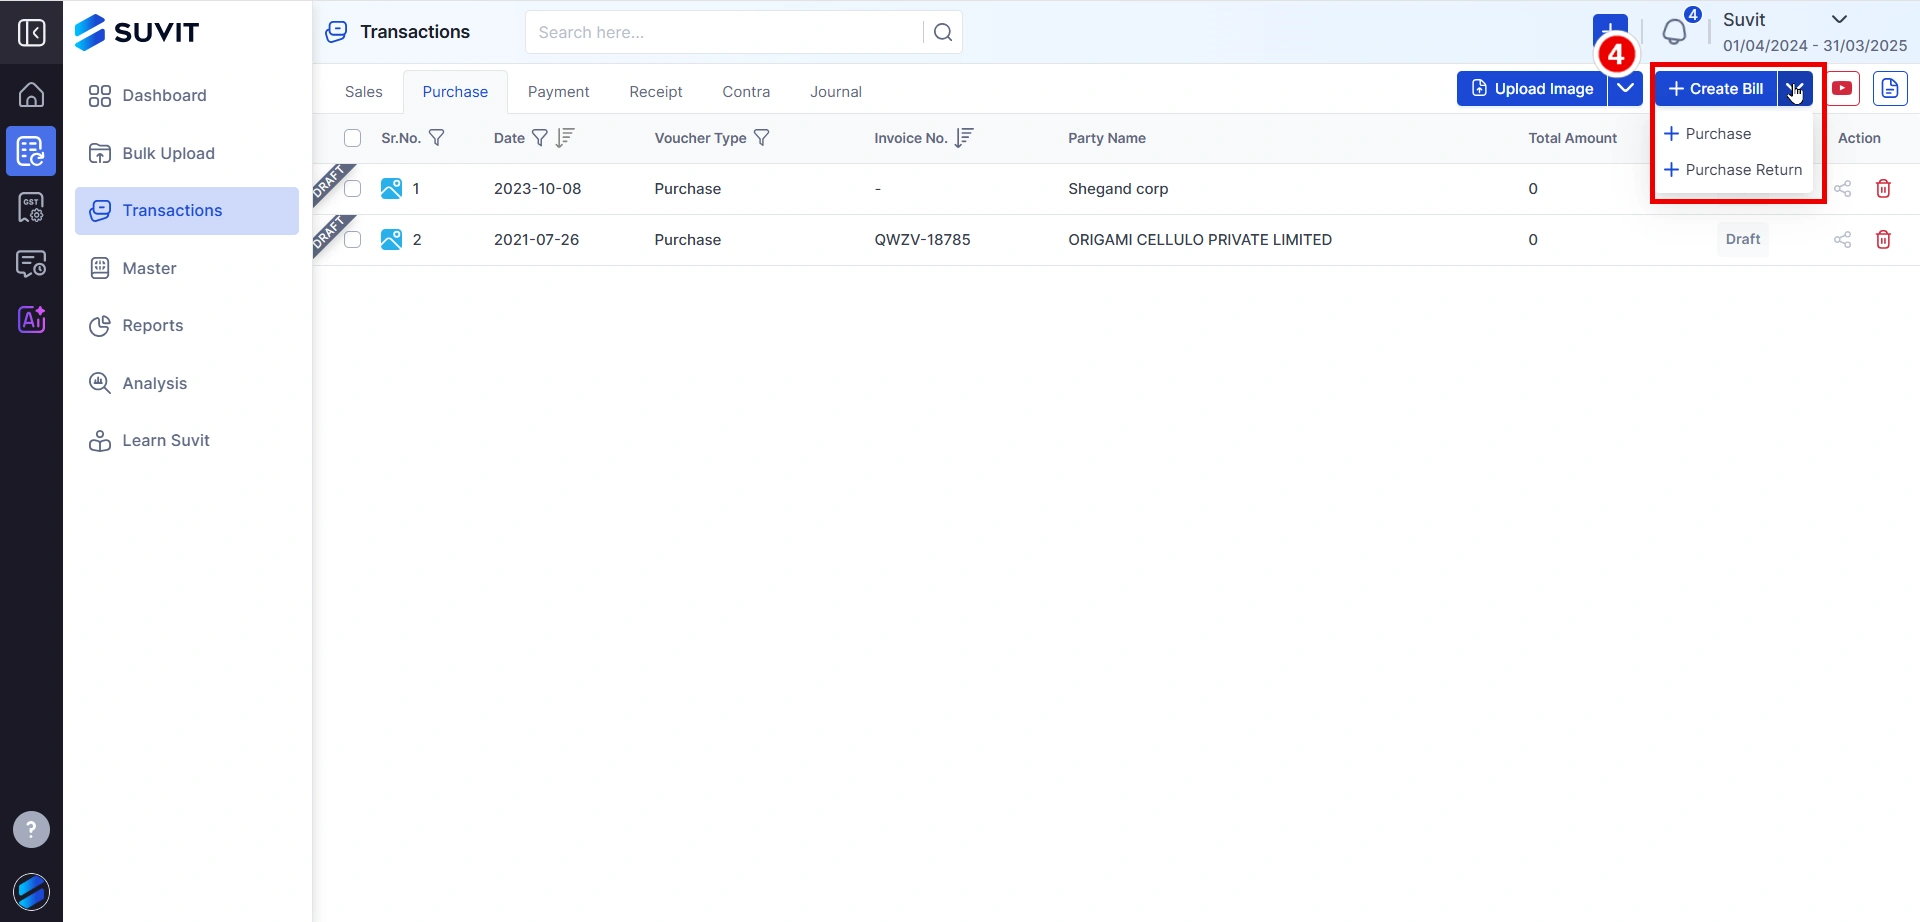
- Click the Create Bill.
- Choose between Purchase or Purchase Return.
Step 3: Invoice Details

1. Item Invoice:
- Toggle between accounting invoice or item invoice based on your invoice.
A. Voucher Details
Type: Choose transaction type (Purchase/Return)
- Invoice No.: Enter invoice number
- Date: Select purchase date
- Party & GST: Enter supplier name and GST
- Ledger: Choose purchase account
B. Item Details
- Sr. No., Item Name, Qty, Rate, Amount, Action: Fields to list and calculate item details.
C. Ledger Details:
- Sr. No., Ledger Name, Amount, Action: Fields for ledger entries.
2. Customer Details:
- Includes customer information such as name, phone, email, and address. Displays outstanding receivables, credit terms, and recent related invoices.
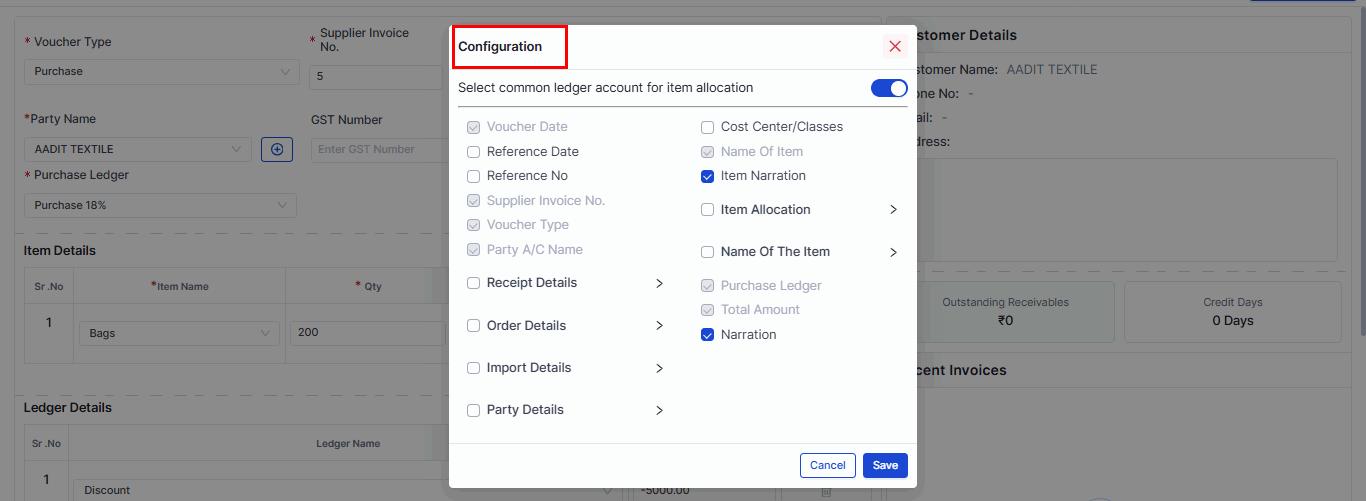
**Configuration Options**
- Use the **Configuration Window** to select the fields displayed during voucher entry.
- such as **Voucher Date**, **Supplier Invoice No.**, **Item Narration**, etc. Save the changes once done.
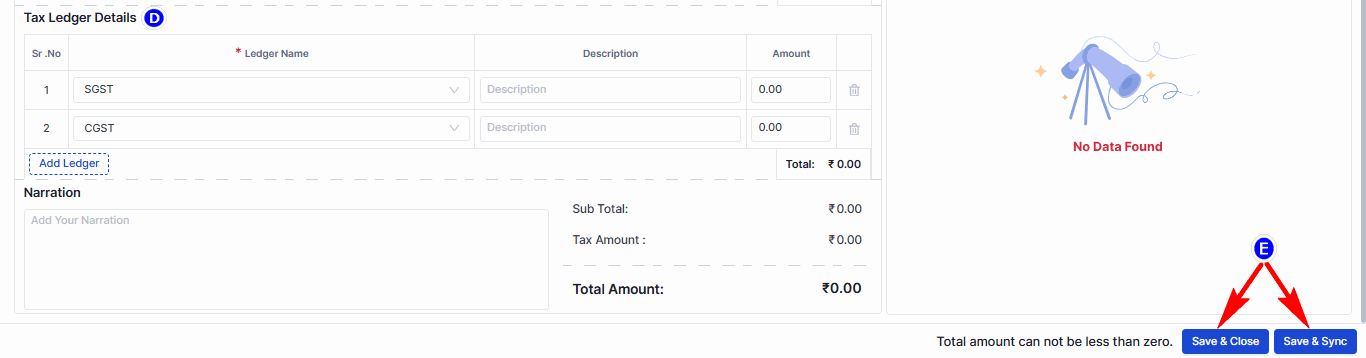
D. Tax, Narration, and Totals: Add taxes, notes, and final amounts.
E. Save the Bill:
- Click Save & Close to save and exit.
- Click Save & Sync to save and sync the bill directly with Tally.
If the transaction fails, check the tally.imp file in the Tally installation folder.
Fields marked with "*" are mandatory.
You may find this useful :
- How to Upload Purchase/Purchase Return Images & Pdf using OCR Learn more