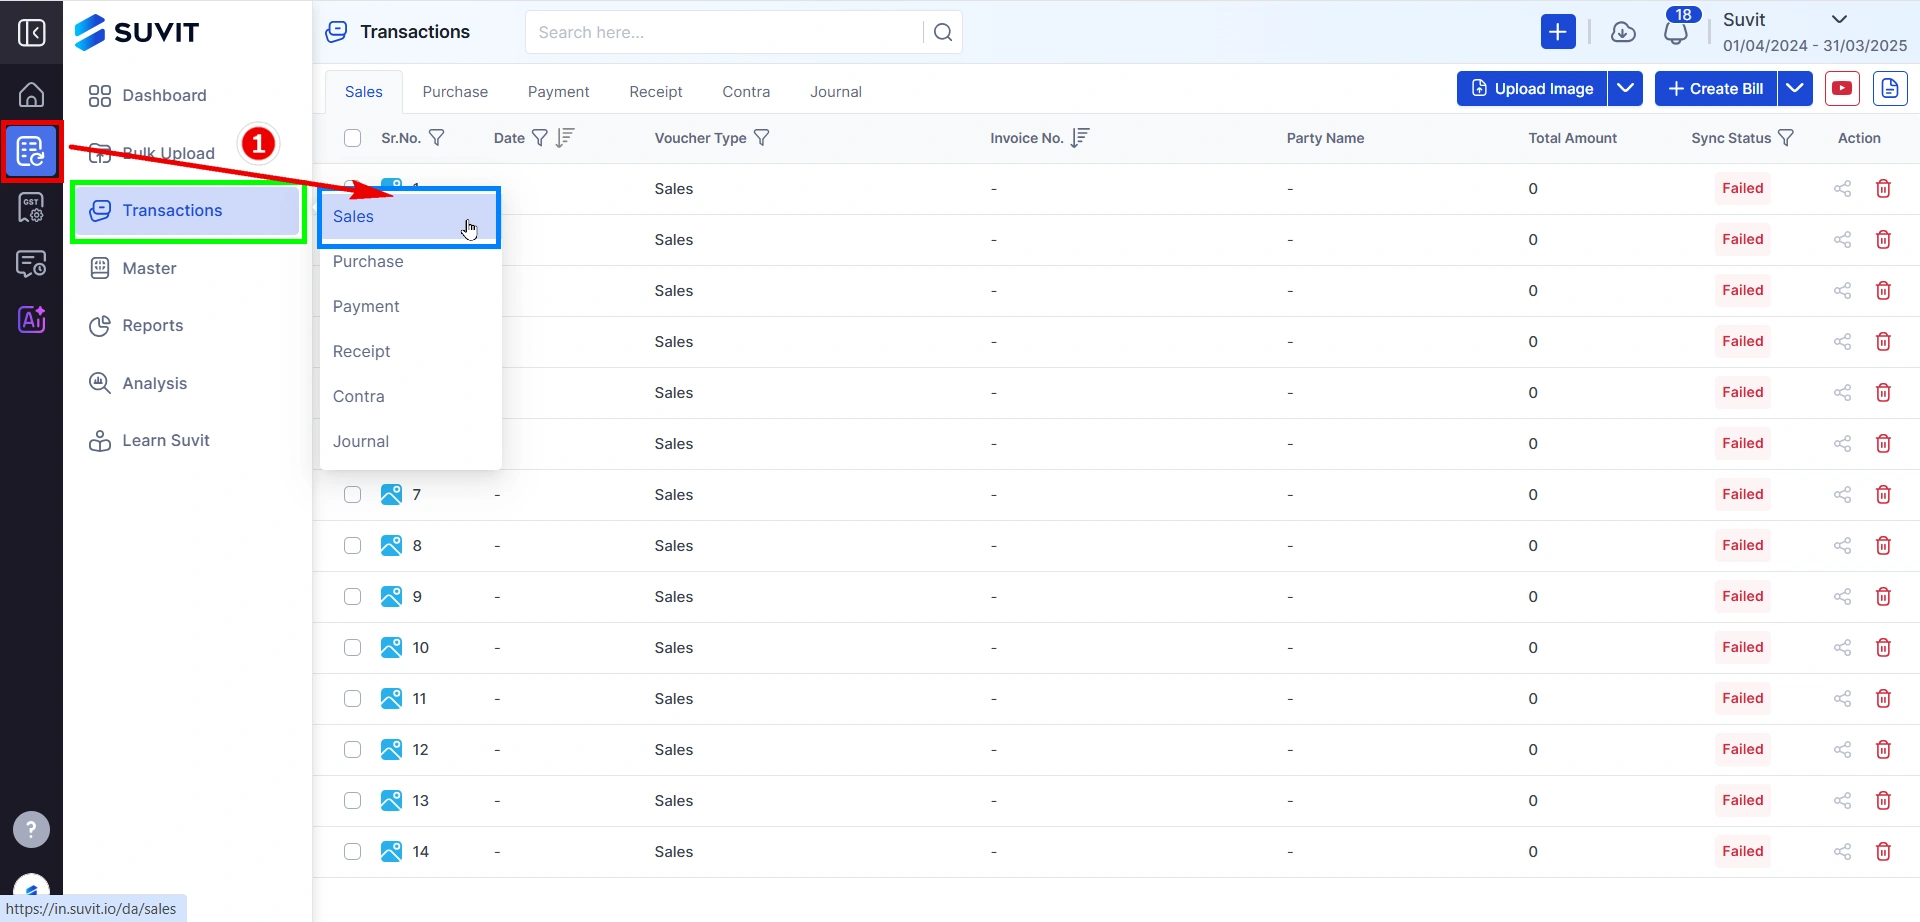
This guide helps you efficiently create Sales and Sales Return invoices in Suvit, ensuring accurate data entry and smooth integration with Tally.
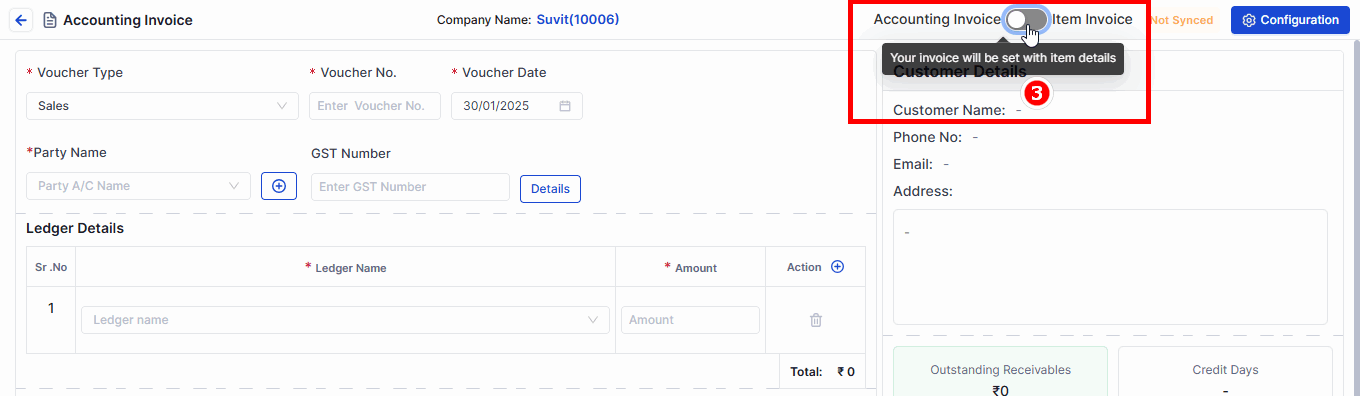
Pick one of the two:
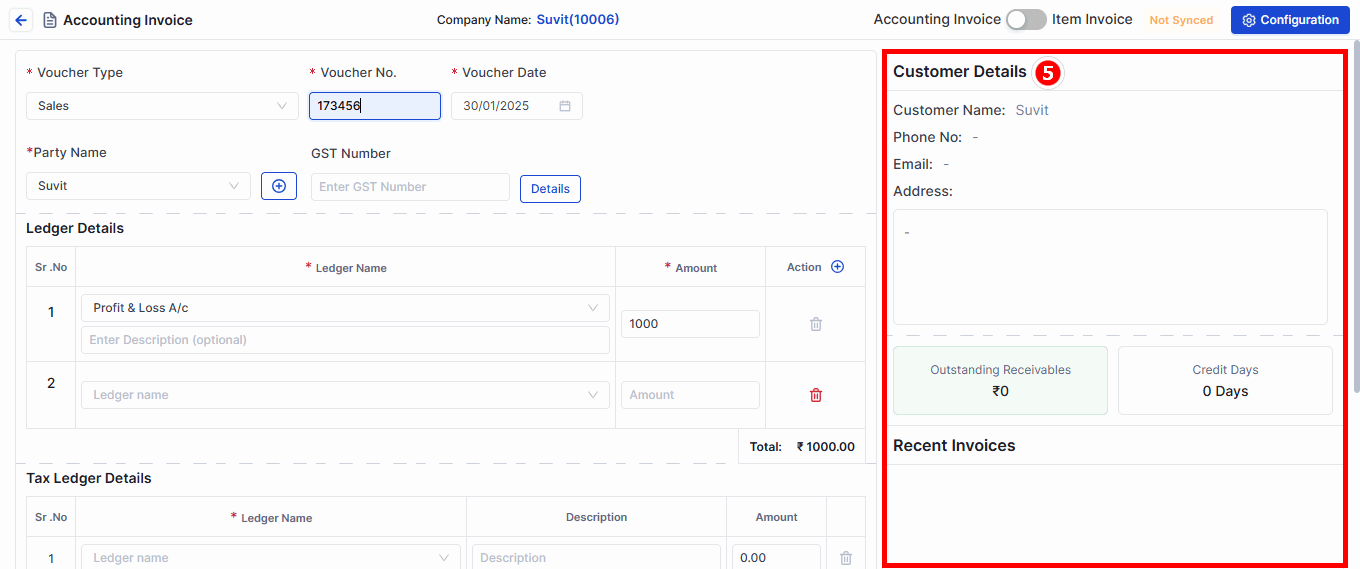
→ Accounting Invoice = Without Stock Items
→ Item Invoice = With Stock Items (use this if you’re selling goods)
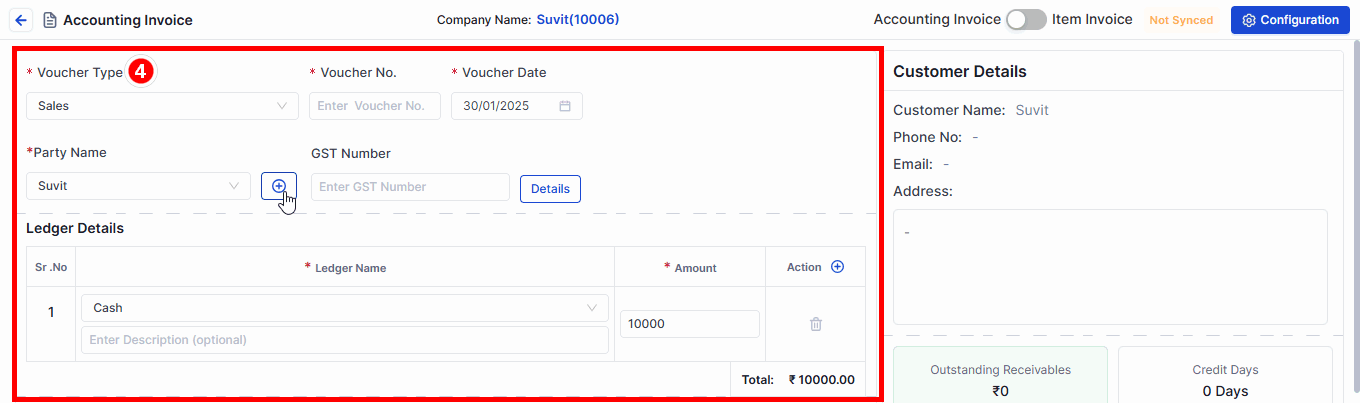
Choose the following:
→ Voucher Type (e.g. Sales)
→ Voucher No. (like invoice number)
→ Voucher Date (date of invoice)
→ Party Name (customer name)
→ GST Details will auto-fill from Tally
→ Ledger Name (like "Sales @ 18%")
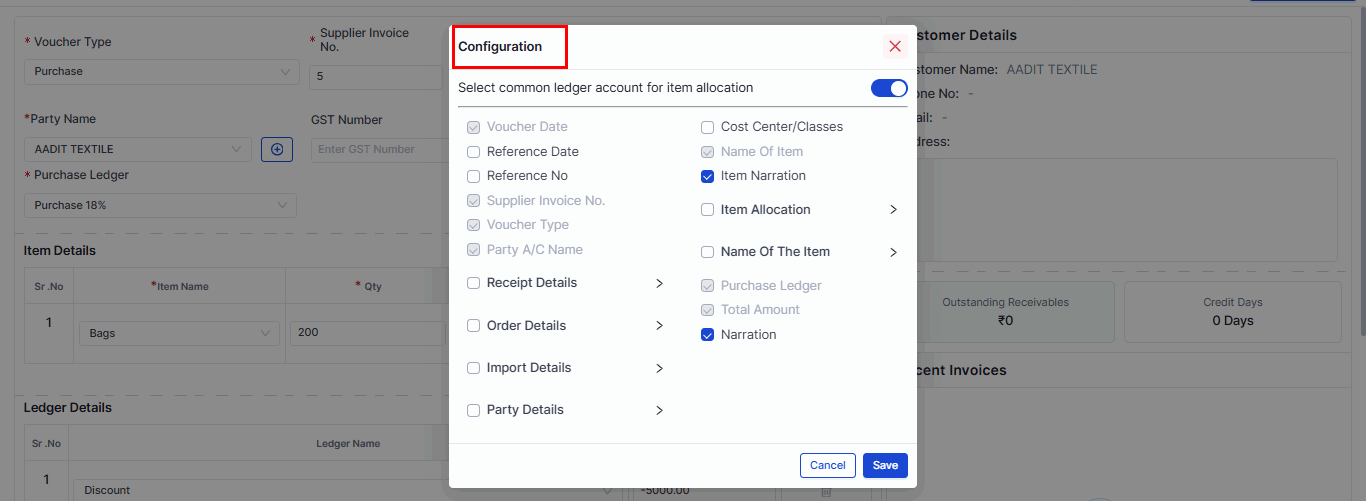
- Use the Configuration window to select the fields displayed during voucher entry.
- such as Voucher Date, Supplier Invoice No., Item Narration, etc. Save the changes once done.
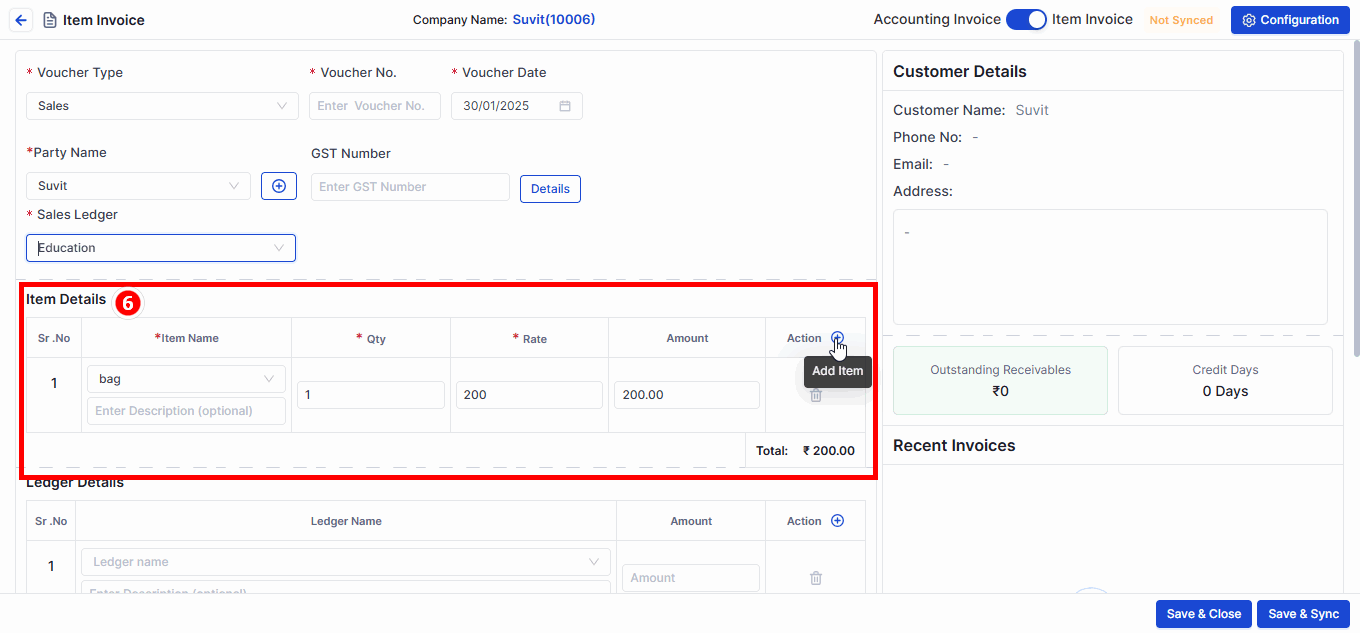
💡 If you have multiple items, just keep adding them one by one!
📌 Fields marked with "*" must be filled in — no skipping!
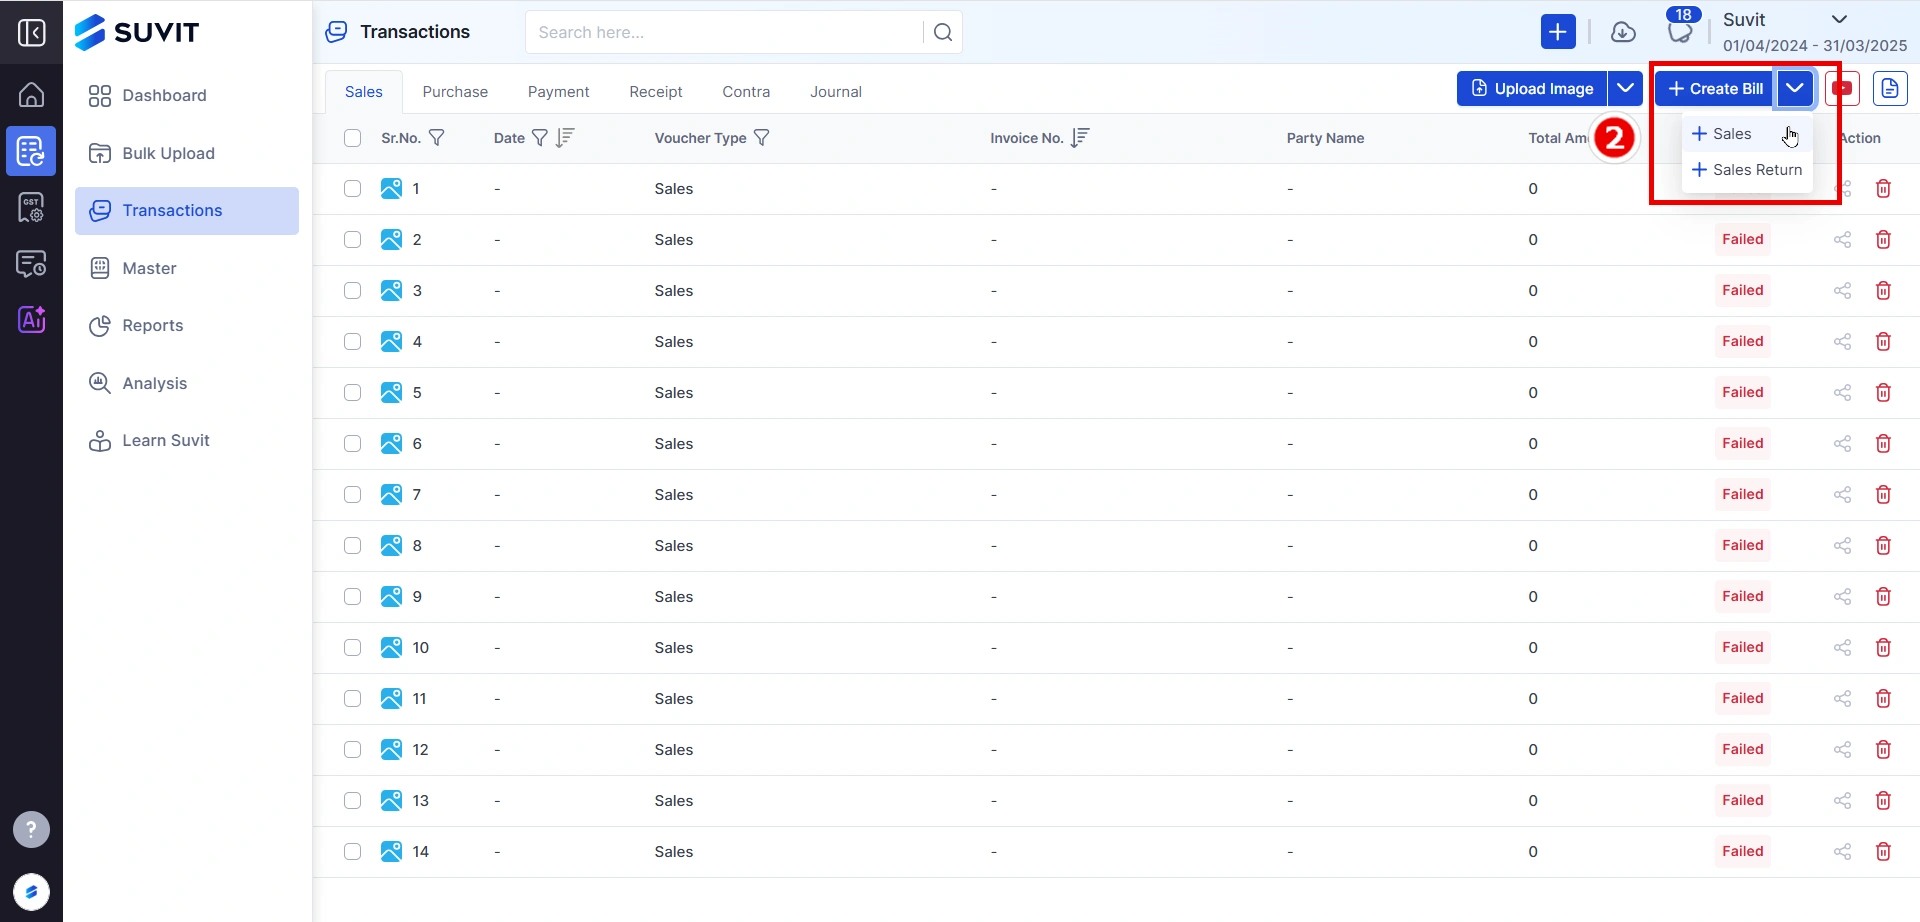
Want to upload Sales/Sales Return bills using images or PDFs?