You can manage your client document efficiently by creating accounts for your clients and providing them with specific access.
Client Management: Creating a New Account
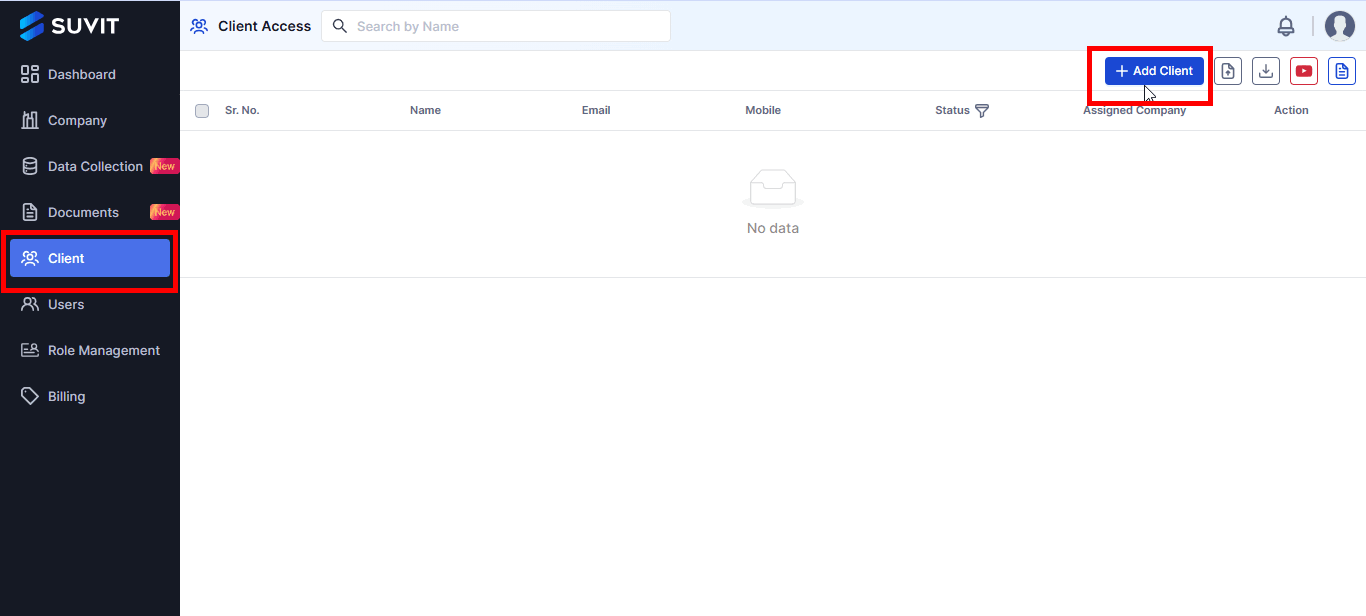
Step 1: Go to Clients Management
Sign in to Suvit with the Primary account (Main Account)
Click on Client from the left menu, then click on "Add Client".
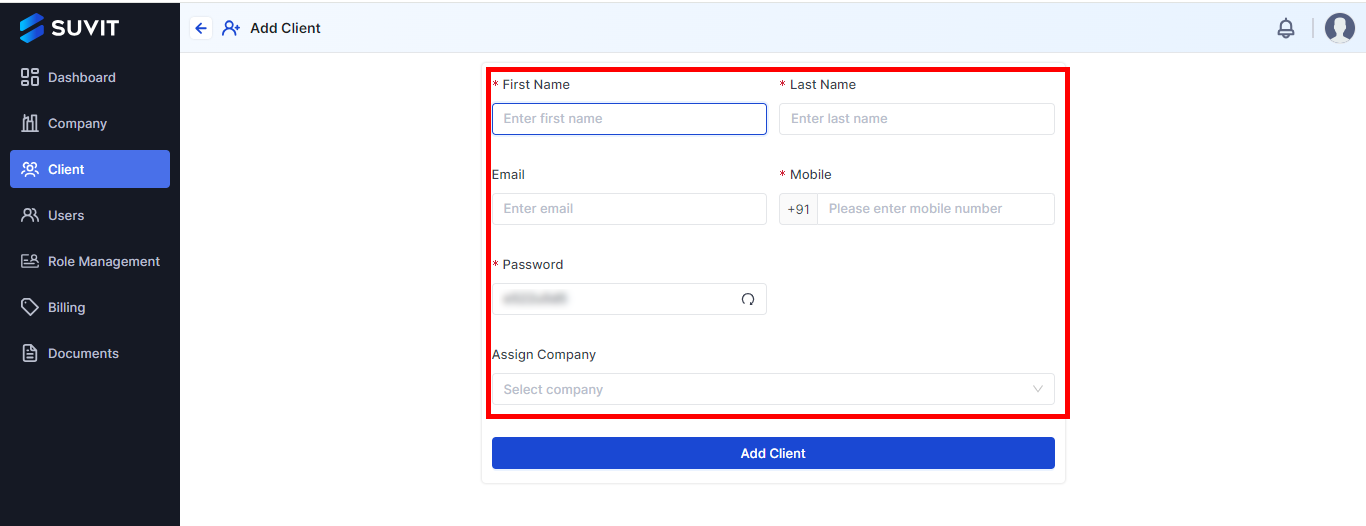
Step 2: Fill in Client Details
In the Add Client page, fill all the details.
First Name/ Last Name: Enter your Client name.
Email / Mobile: Ensure the client’s mail ID and mobile number are unique and the number should be active on whatsApp.
Password: You can keep the system-generated password, or you can type your desired password (Your password can be any combination of letters, numbers, and symbols).
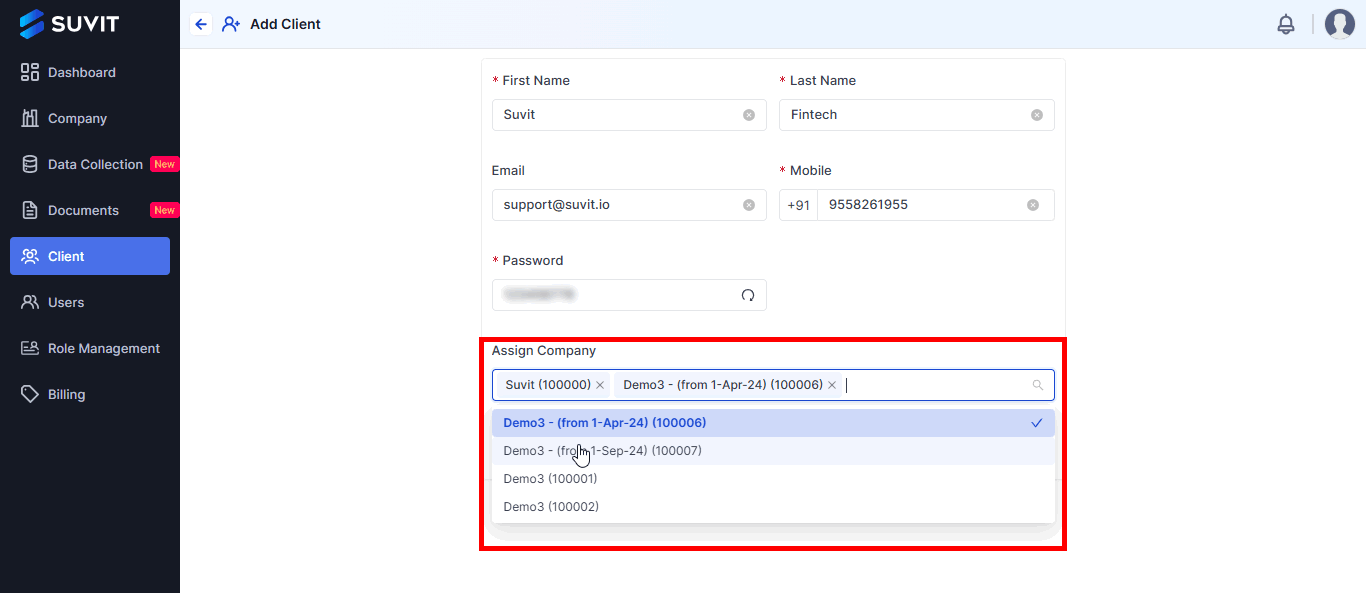
Step 3: Assign Company
You can select the companies you want to assign to your client. (You have the option to select either a single company or multiple companies as needed.)
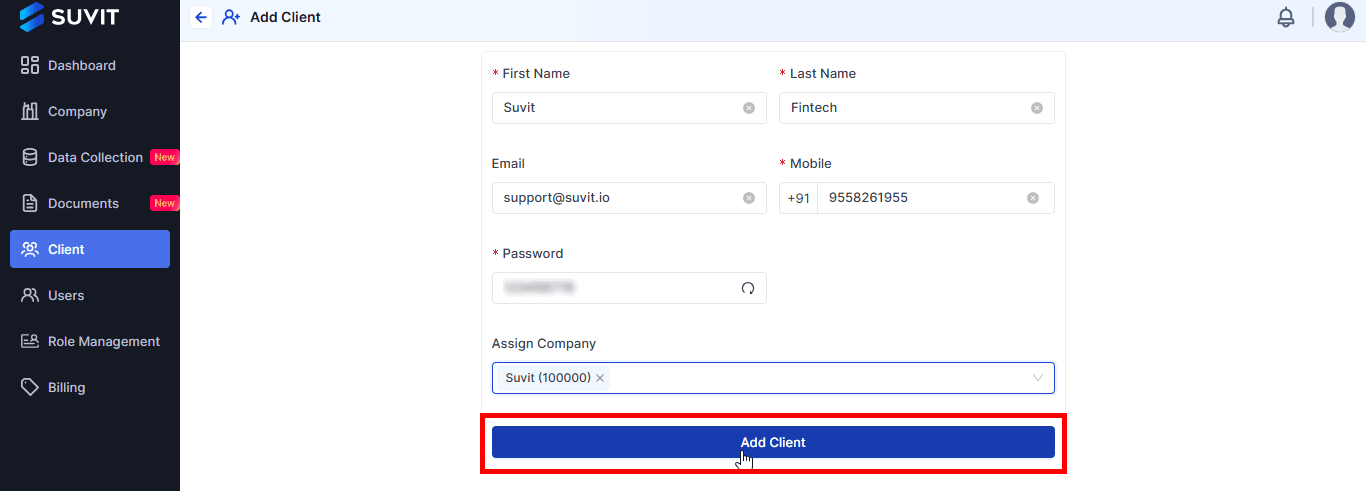
Step 4: Add the Client
Once all details are entered, click "Add Client".
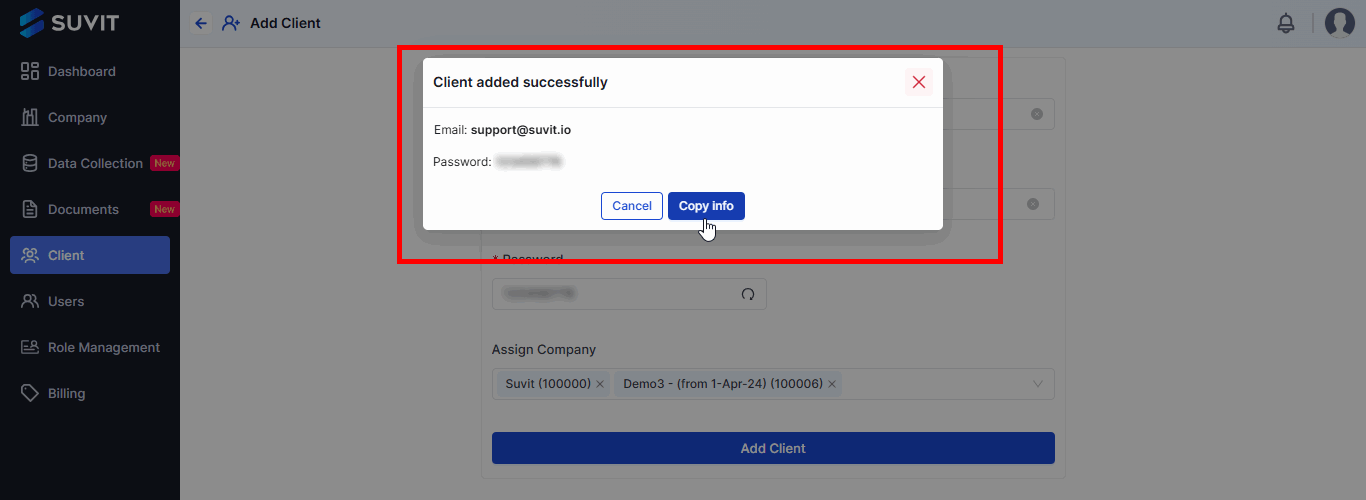
Step 5: Share Client Credentials
A confirmation message "Client Added Successfully" will appear.
Click on Copy Info and share the username and password with your client. Now your client is ready to use Suvit with their credentials.