How to Integrate Vyapar with Suvit in Four Easy Steps
Integrate Vyapar with Suvit in 4 simple steps—enable sync, link accounts, grant access & sync data. Follow the step-by-step guide with images for setup.
Follow the four easy steps
Step 1 - Enable Sync in Vyapar
1. Open Vyapar and select the company you want to integrate.
2. Navigate to Sync, Share, and Backup.
3. Enable Sync to allow data sharing with Suvit.
Step 2 - Link Vyapar with Suvit
1. Login into Suvit. Go to Company
2. Vyapar integration
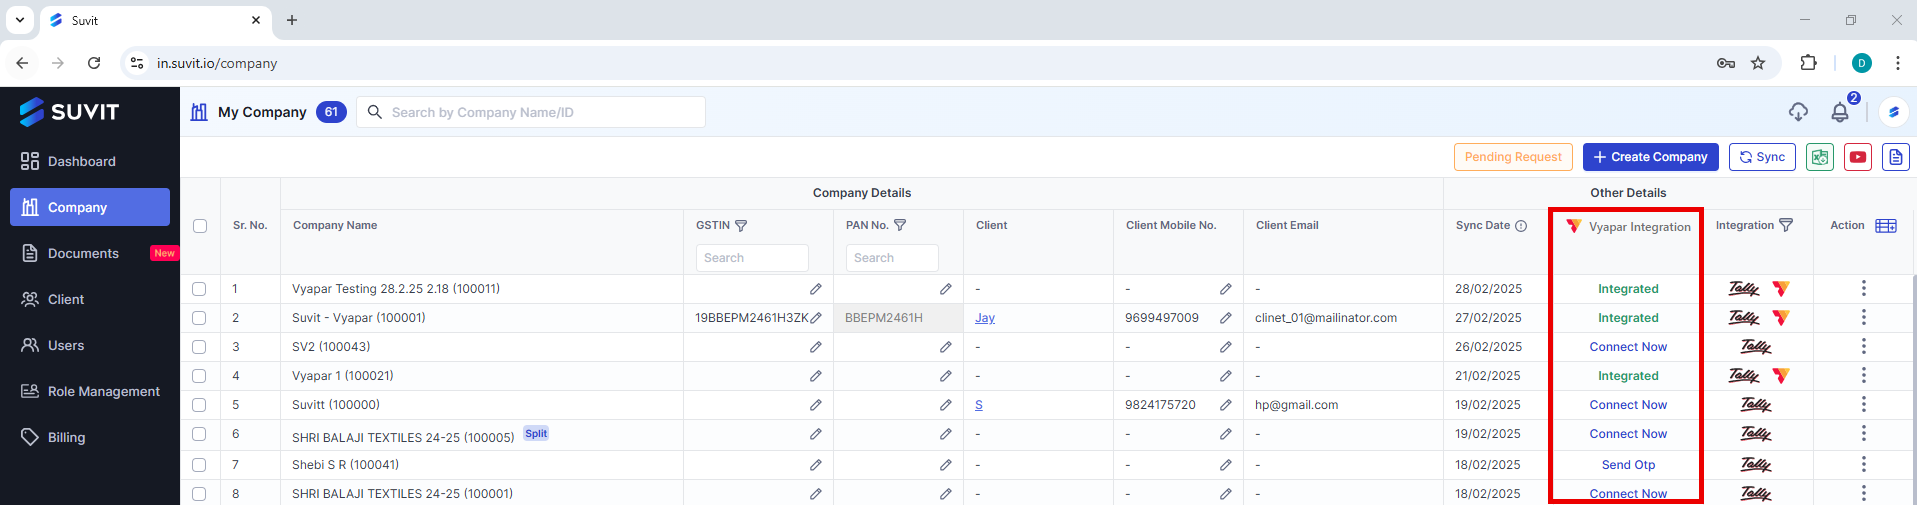
- Under Vyapar Integration click on Connect Now in front of the desired company
3. Enter details
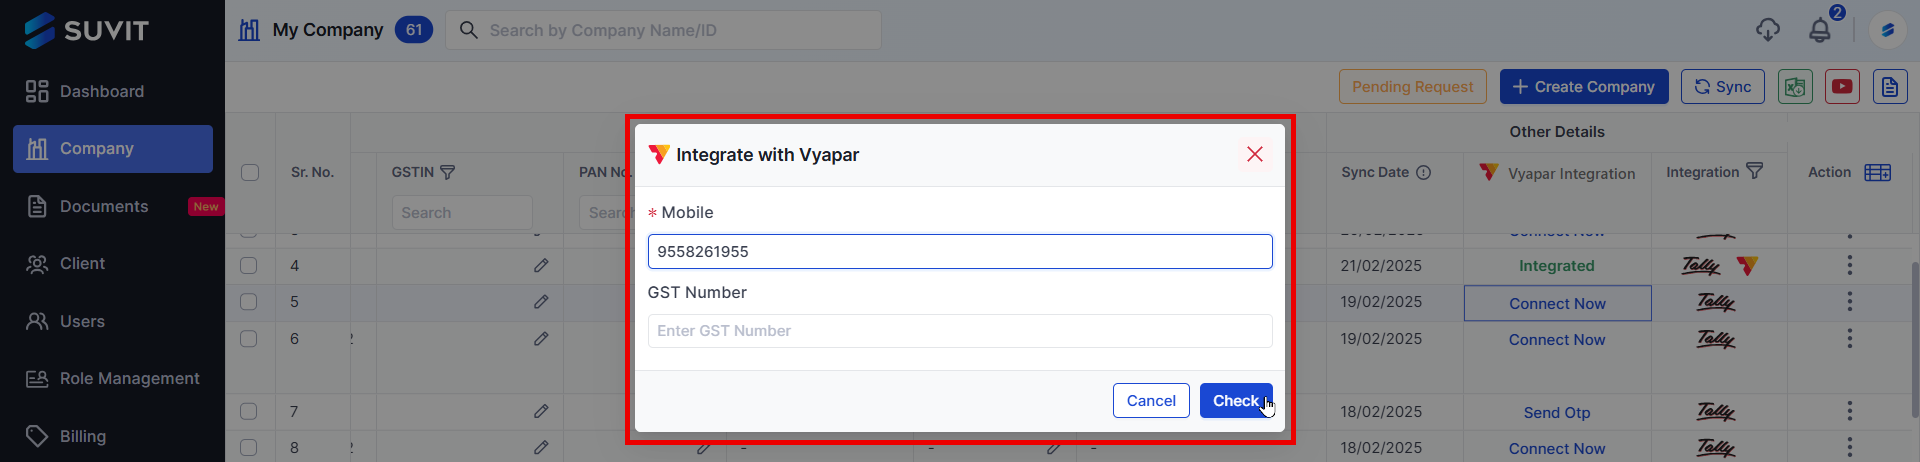
- Enter details related to Vyapar Company → click on Check
4. Send OTP
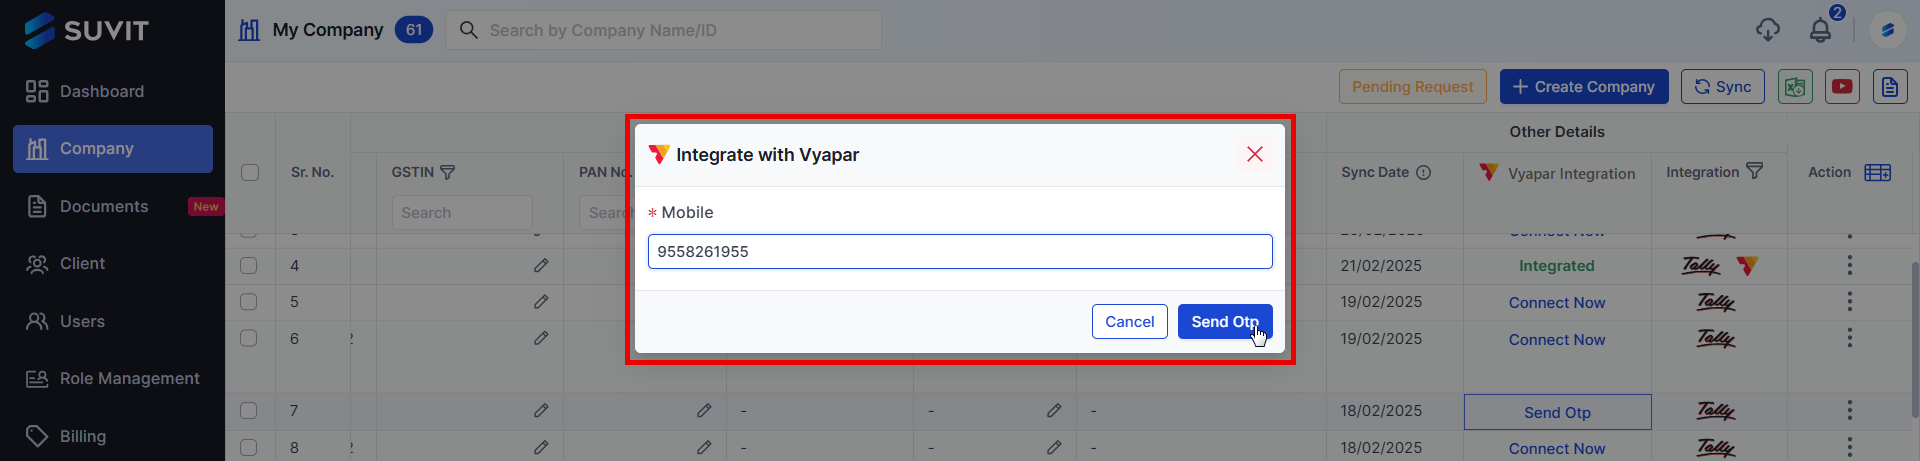
- Click on Send OTP → enter Vyapar registered number → Send OTP
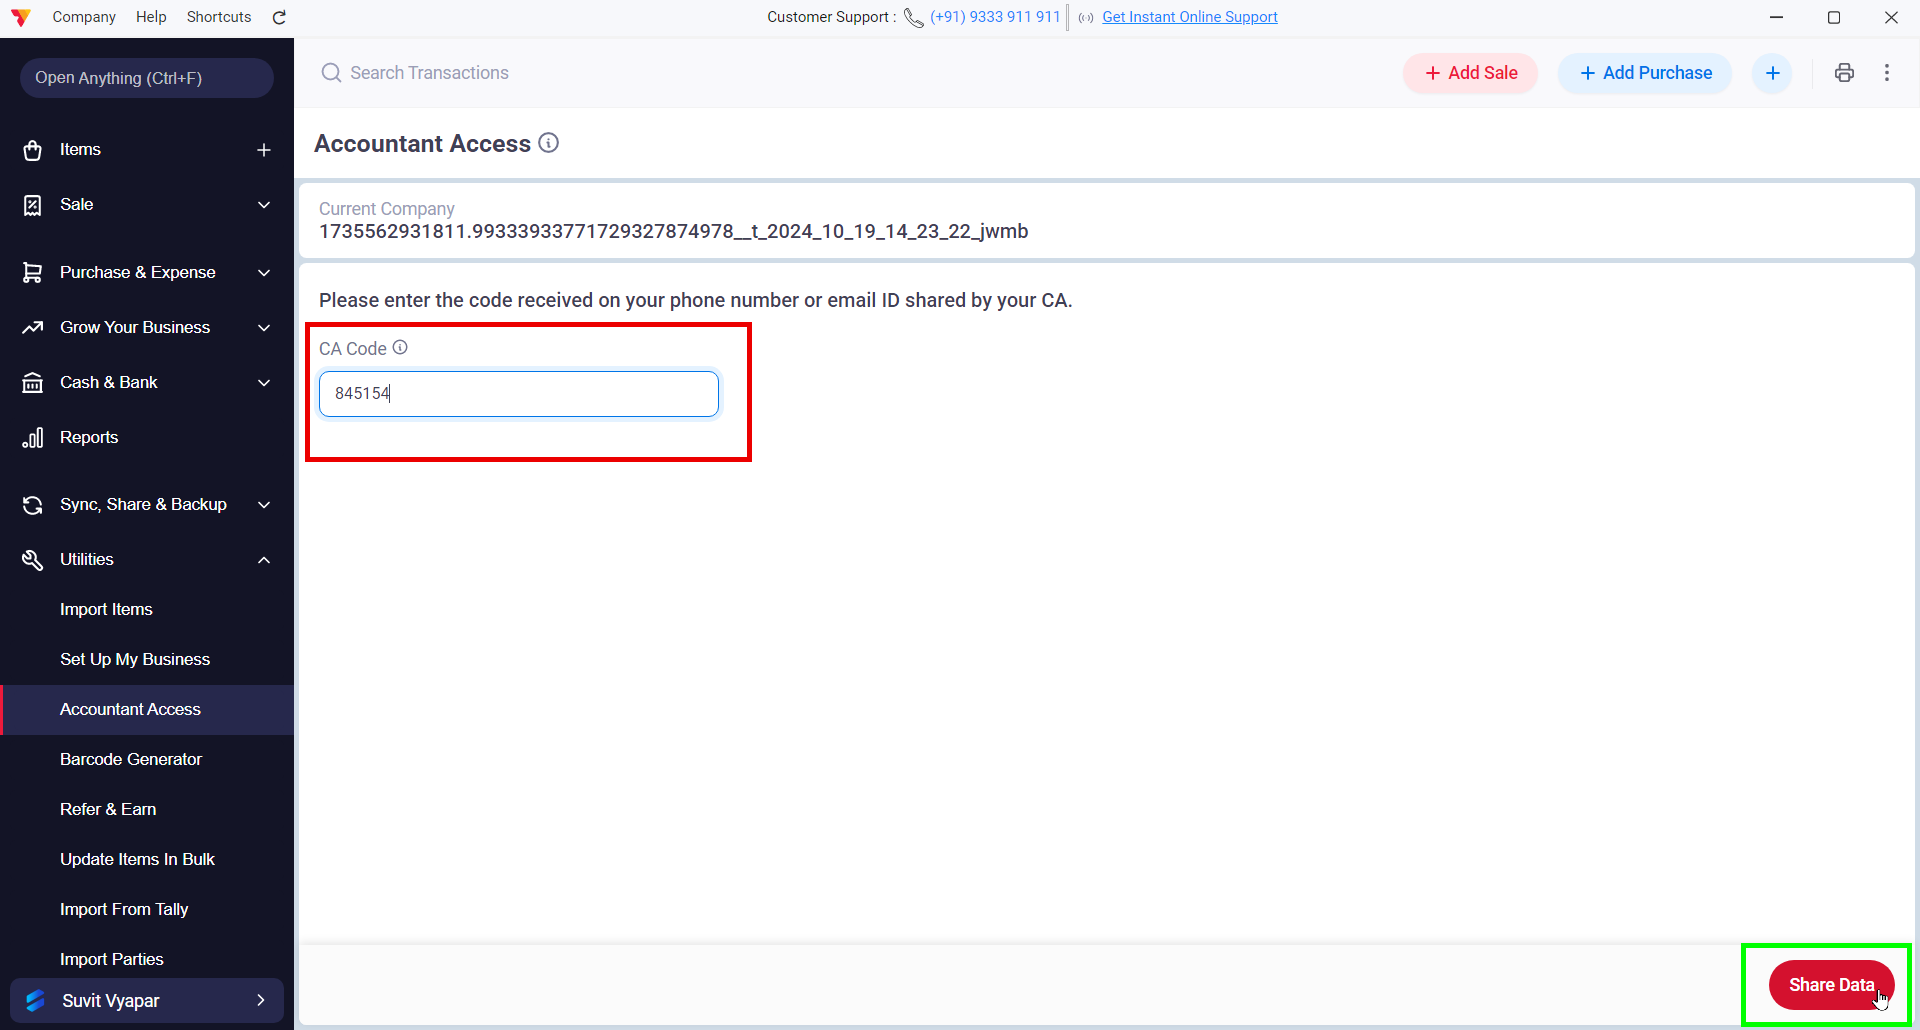
Step 3 - Grant Account Access in Vyapar
1. Go to Vyapar → Utilities → Account Access.
2. Click on Retry.
3. Enter the OTP received and confirm the access. (OTP will be received on WhatsApp)
Step 4 - Sync Data in Suvit
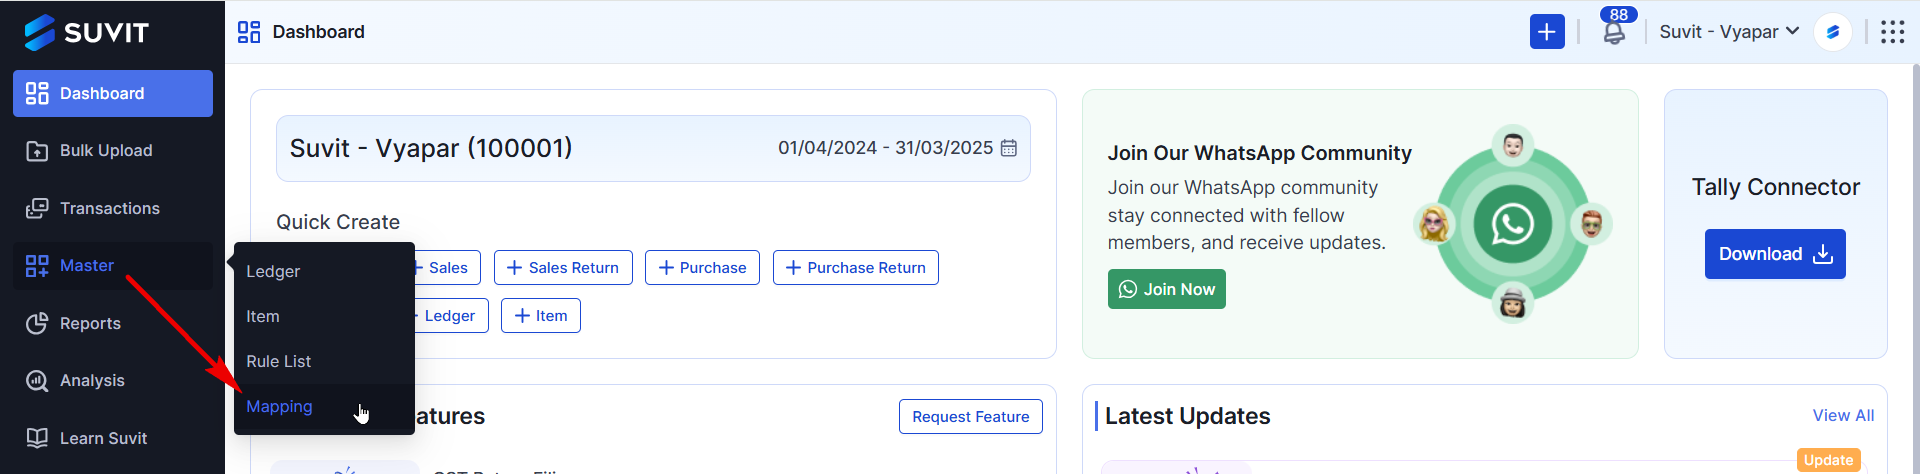
1. In Suvit, navigate to Data Entry Automation → Explore Now → Master → Mapping.
2. Click on Sync.
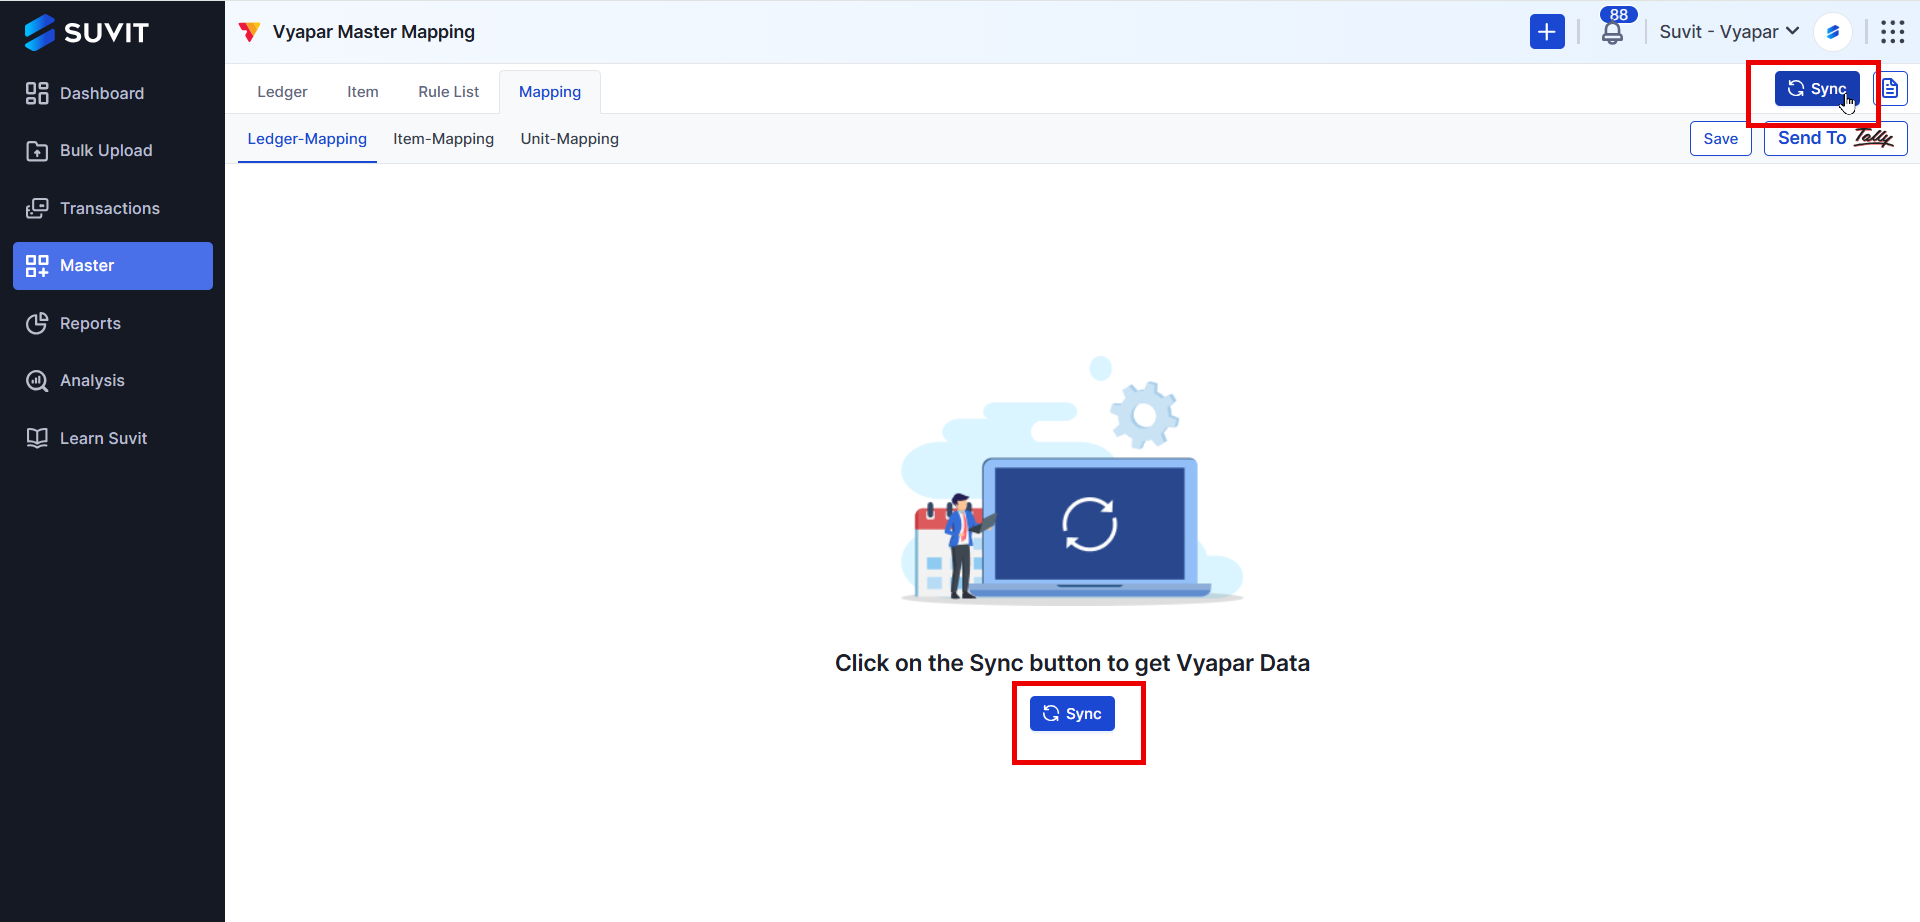
- Wait for a few minutes (depending on the company data size).
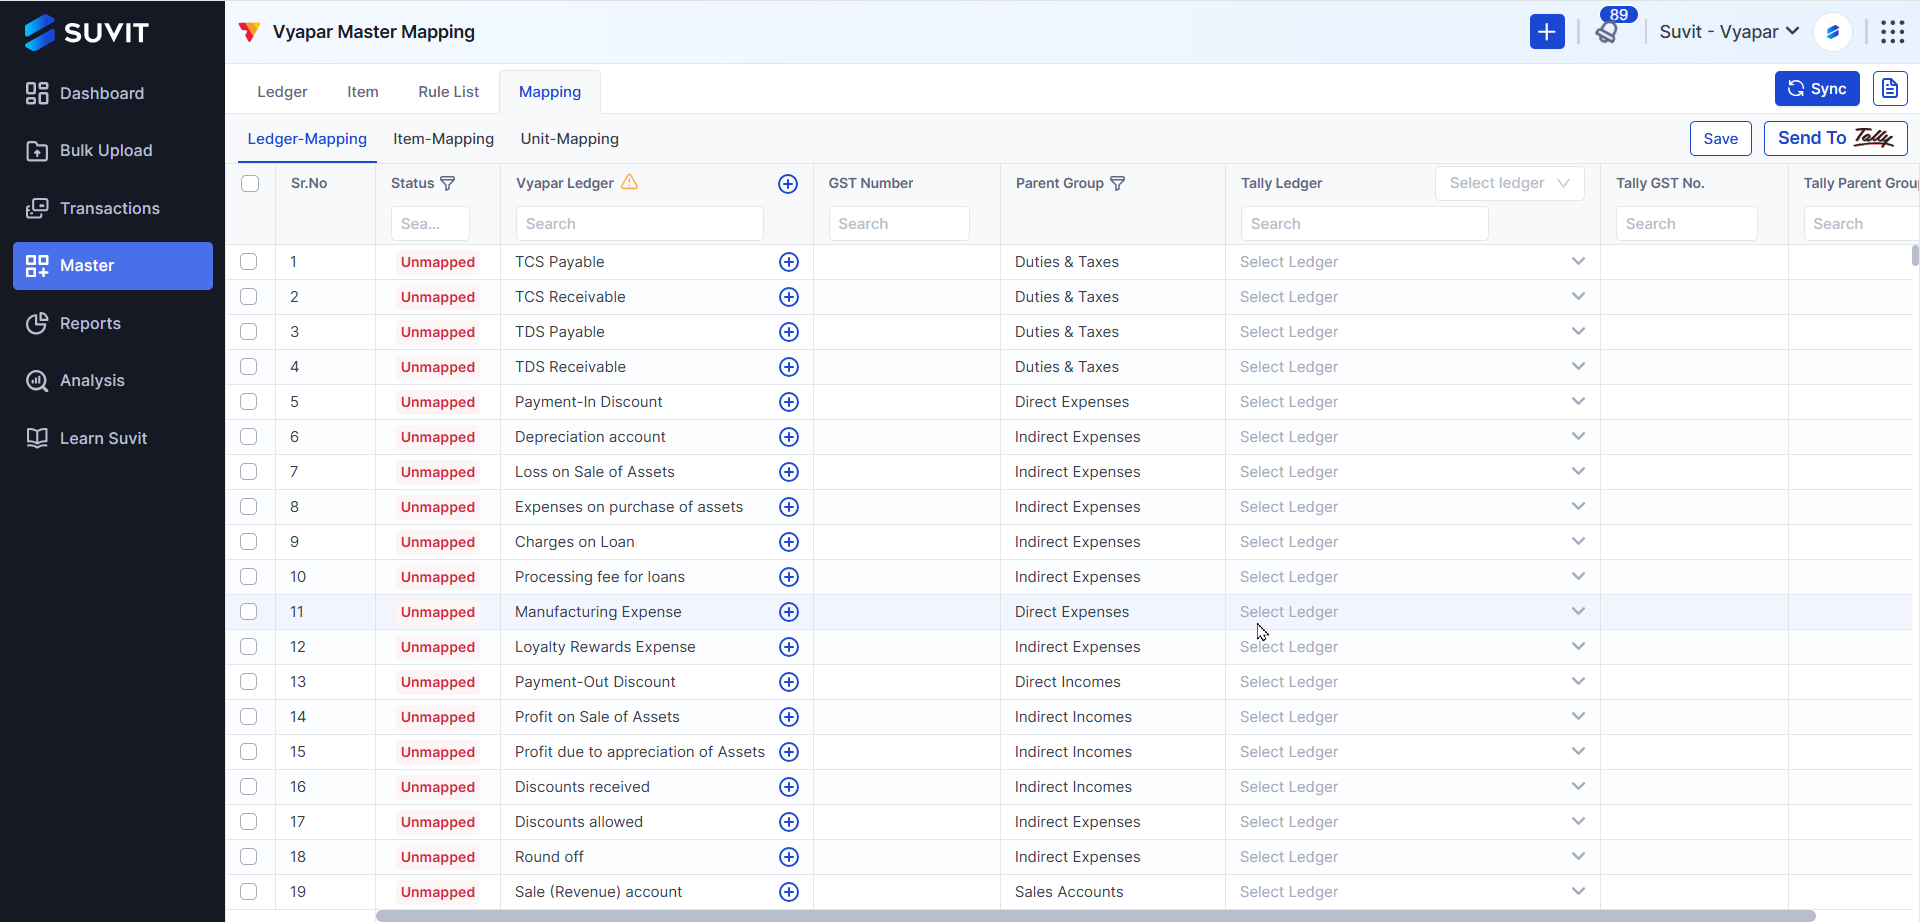
3. Once the sync is complete, your Vyapar data will be available in Suvit.
📝 Notes:
- Ensure that the company in Vyapar matches the one selected in Suvit.
- OTP will be sent via email or WhatsApp, depending on your Vyapar login method.
- The initial sync may take several minutes if the company has a large amount of data.
🔗 Next Step:
➡️ Mapping Vyapar Data in Suvit