After uploading a journal Excel sheet in Suvit, map the data to Tally-required fields. This guide helps you complete the journal mapping process smoothly.
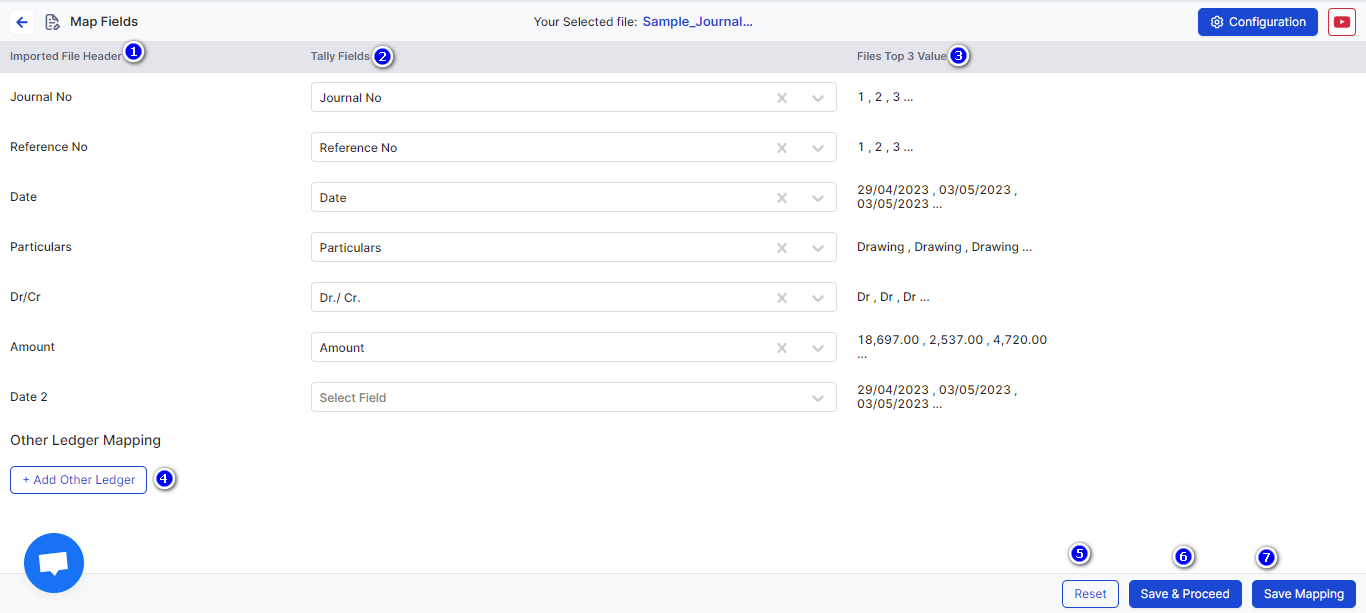
Excel Headers
→ Suvit shows the column names from your uploaded Excel sheet.
Assign Tally Fields
→ Link your Excel columns with the correct Tally fields. → Example: → Journal number → Reference no → Invoice value / Total value → Amount
Top 3 Values from Sheet
→ Suvit shows top 3 sample entries to help you confirm the match is correct.
→ If no data shows up, check your Excel format — something might be off.
Other Ledger Mapping
→ You can also map extra fields like: → Round-off → Discount → Freight Charges
→ Just select the correct column and link it with the right ledger.
Reset Button
→ Made a mistake? Click this to clear and re-map everything.
Save & Proceed
→ After mapping, click this button to go to the processing screen.
Save Mapping
→ Want to save time next time? Save this mapping format and Suvit will remember it.
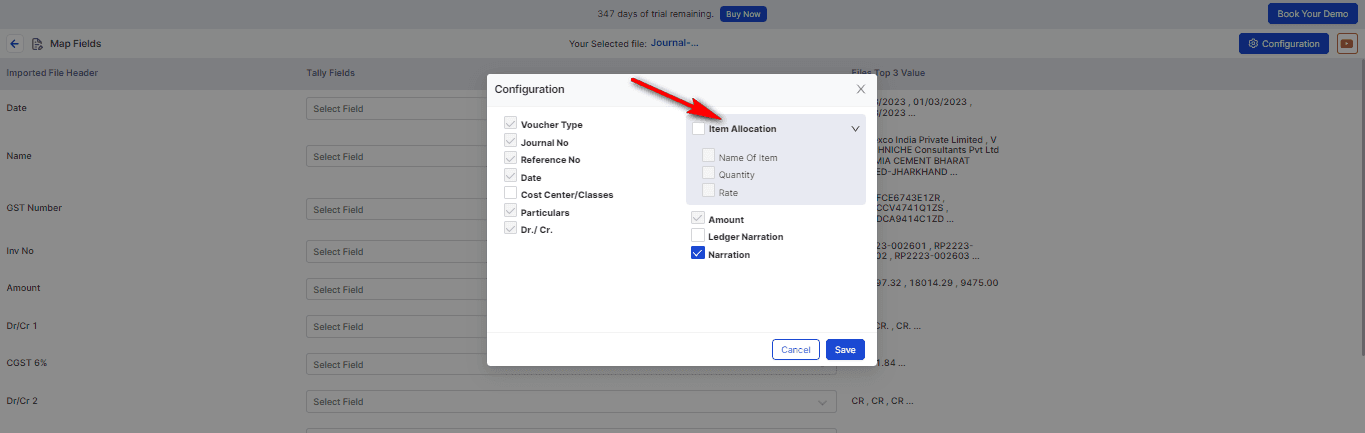
If your journal has items, go to Configuration.
→ Then find and enable the Item Allocation field.
→ This makes sure item-wise details are recorded properly.
Want to learn how to push journal data to Tally? 👉 Learn More