Purchase: Common Tax with Different GST in Horizontal Row
Modify and upload purchase sheets with varied tax rates using Suvit. Map smallest taxable amounts, duties, and ledgers step-by-step for accurate Tally entry.
Instructions

Steps to follow
Sheet Modification Click Below
--> Excel Sheet Modification
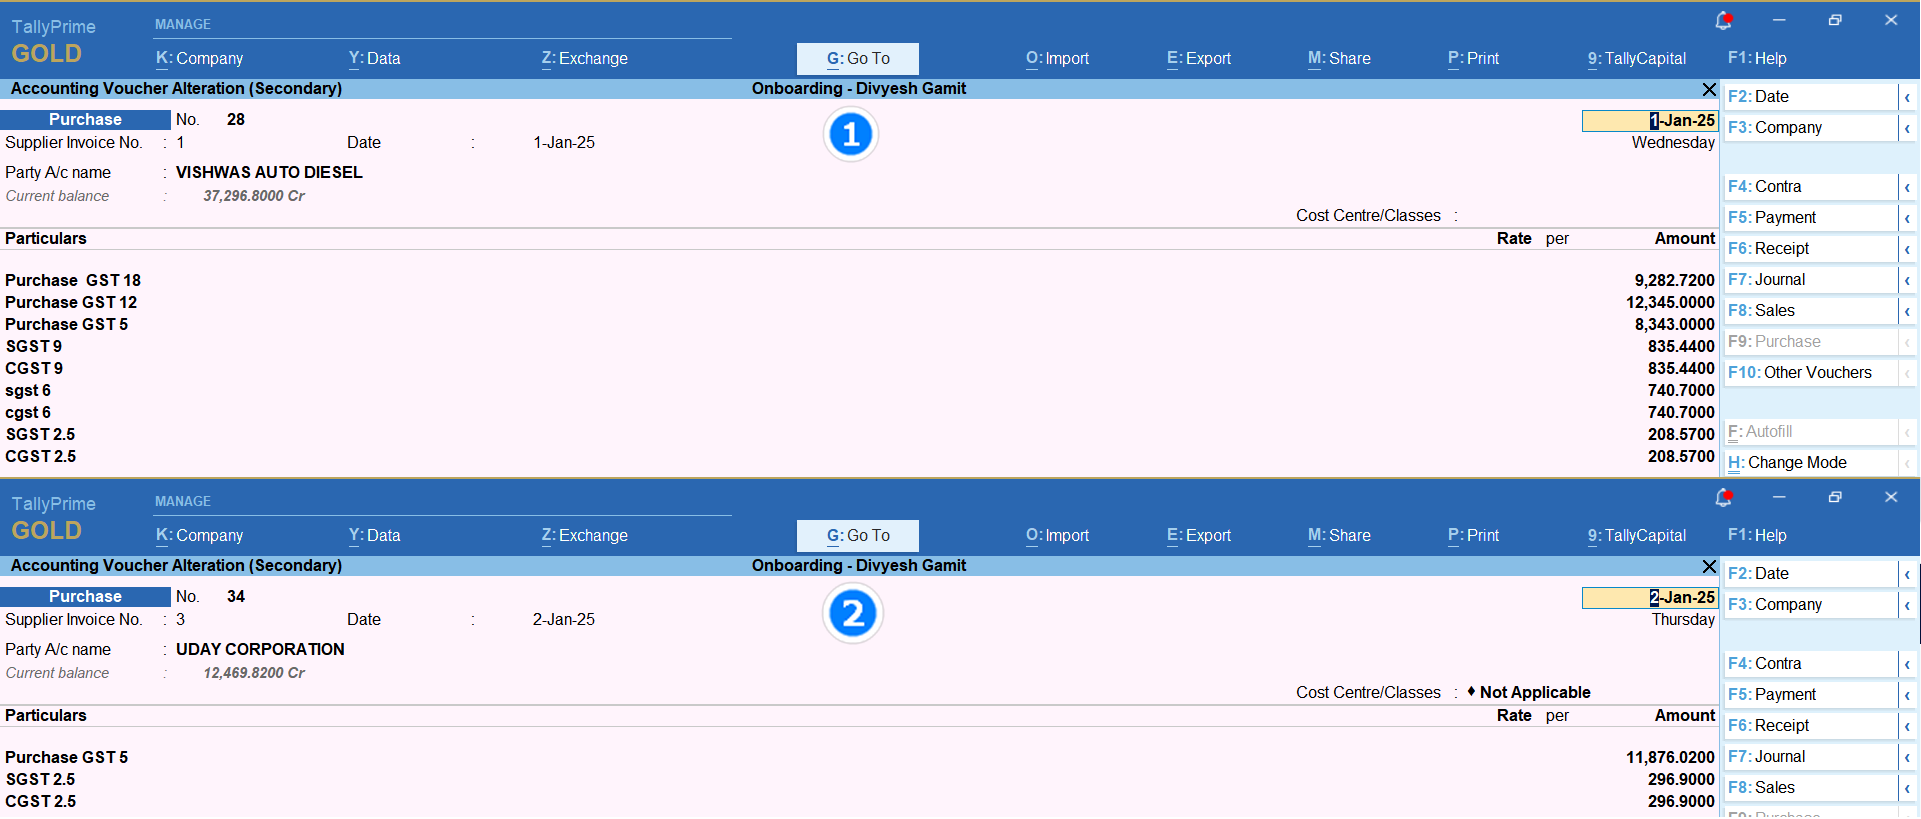
- A. Common Taxable Amount for each Bill
- B. In excel sheet bifurcated (separates) duties & taxes amount should be there.
- C. Add one row with name Purchase Ledger and enter **Common Sales account** name also known as GST Ledger which will goes to particular.
**Some other data should hvae in Excel Sheet**
- 3. GST number ( Not Mandatory )
- 5. Place of Supply (Not Mandatory )
- 6. Particulars ( Smallest Sales account GST rate name )
How to upload Excel sheet Click Here
Mapping
- Click on file to open Mapping Process*
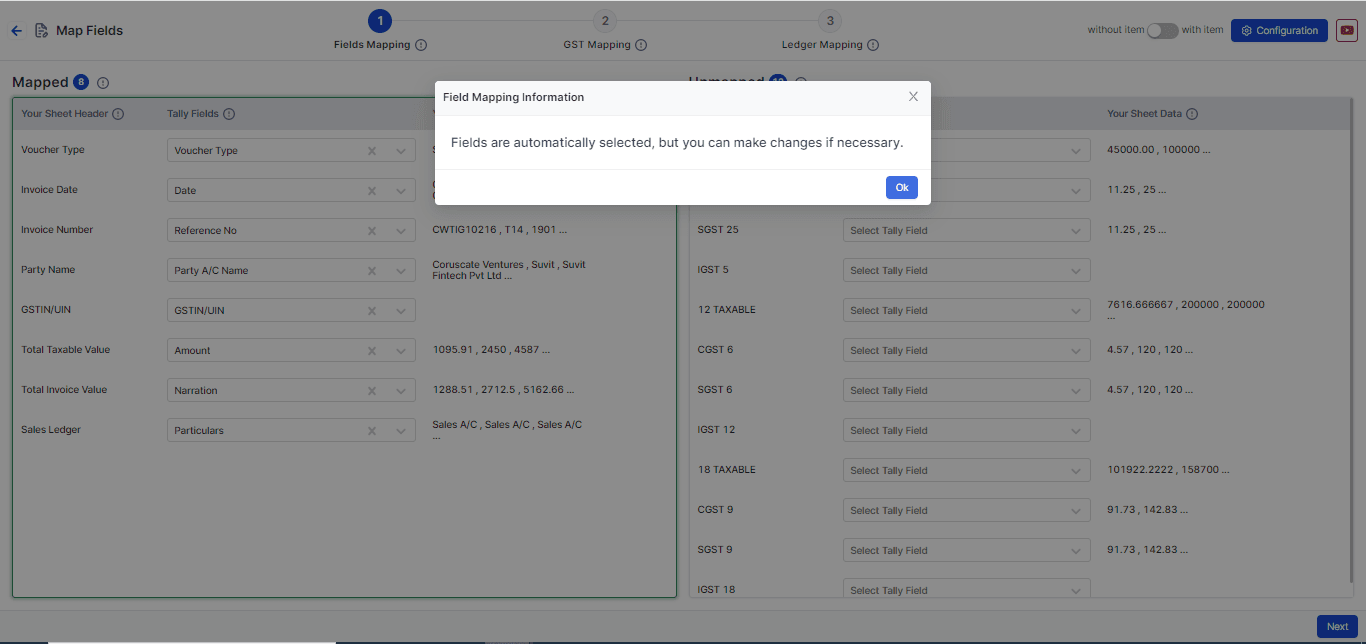
Step 1: Field Mapping
Note: In this sheet you have to map **Smallest Taxable amount** in **Amount**
- As per this sheet we have mapped the GST Tax Rate 5
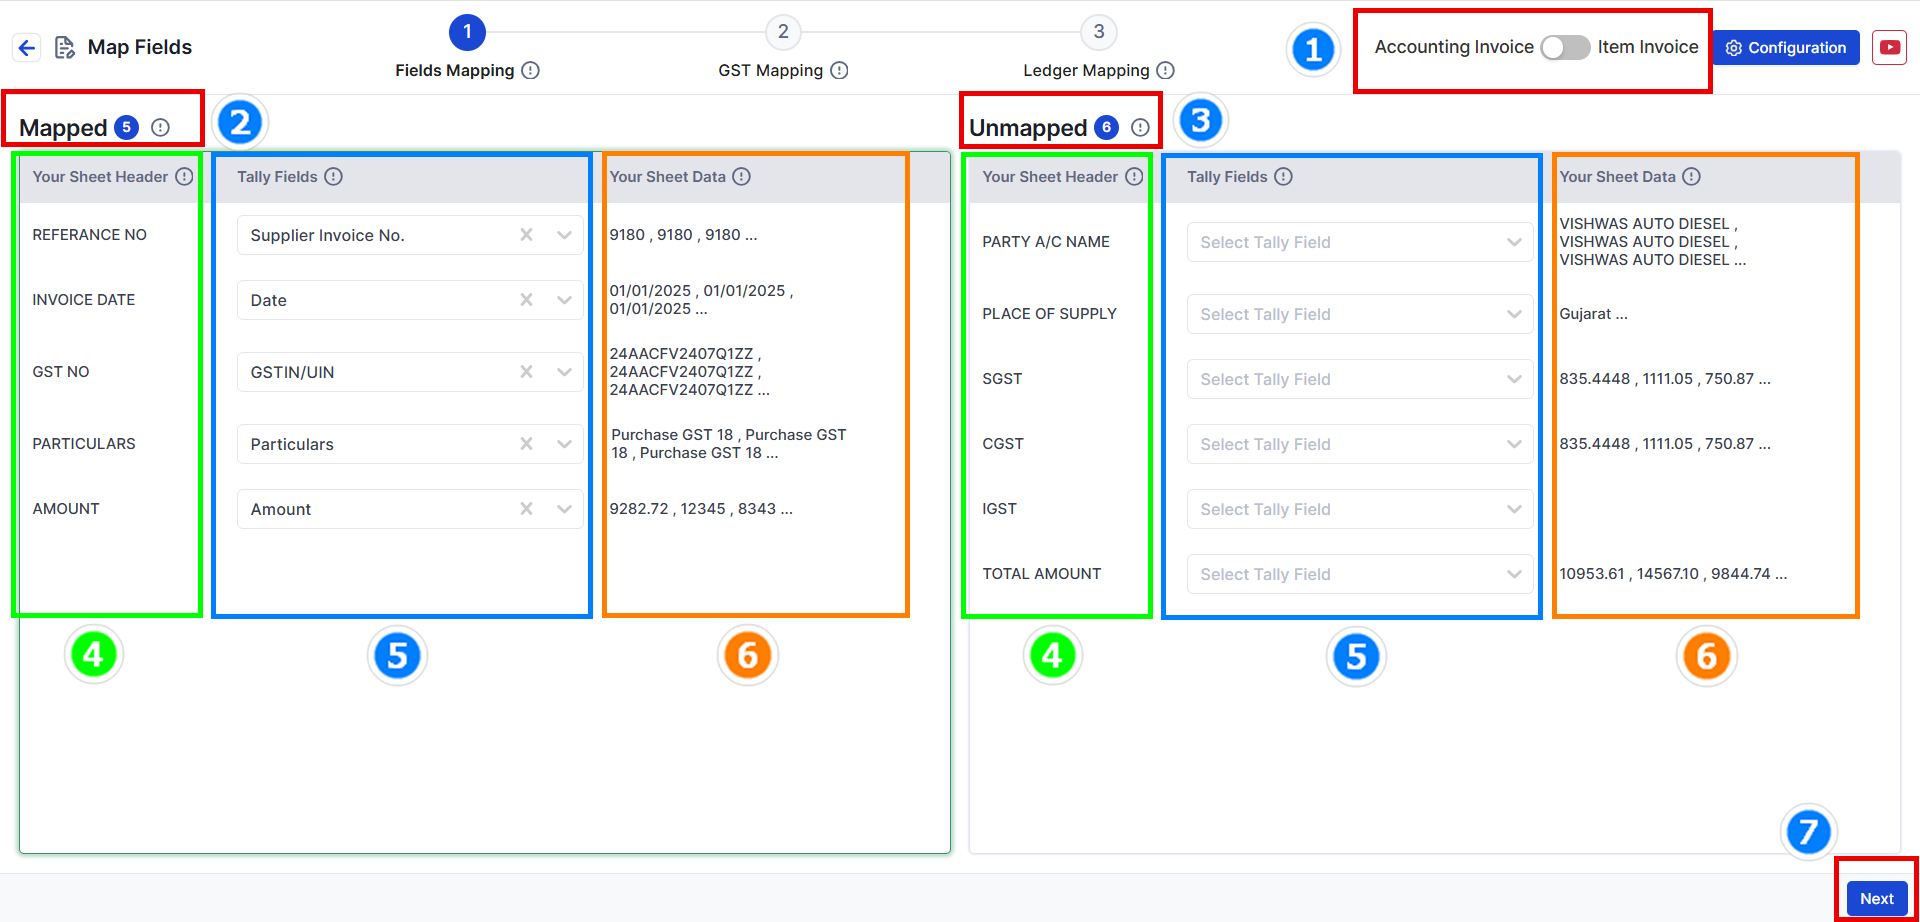
- Choose your data type: Decide if your data has items or no items. For this example, we will choose Without Item (see the image above).
- Mapped Fields: These are fields that the system has matched automatically from your uploaded data.
- Unmapped Fields: These are fields not matched yet. You need to select the right Tally fields for them. (Not all fields need to be matched.)
- Your Sheet Header: The headings from your Excel sheet will appear here. This helps you understand the data easily.
- Tally Fields: These are fields matched with Tally filed. You can change them if needed.
- Your Sheet Data: Shows the top 3 values from your Excel sheet to help you cross-check the data.
- Press Next to go to the GST Matching step
Step 2: GST Mapping (Map Your Tax Ledger).
- Here we will map the Duties & Taxes and its details
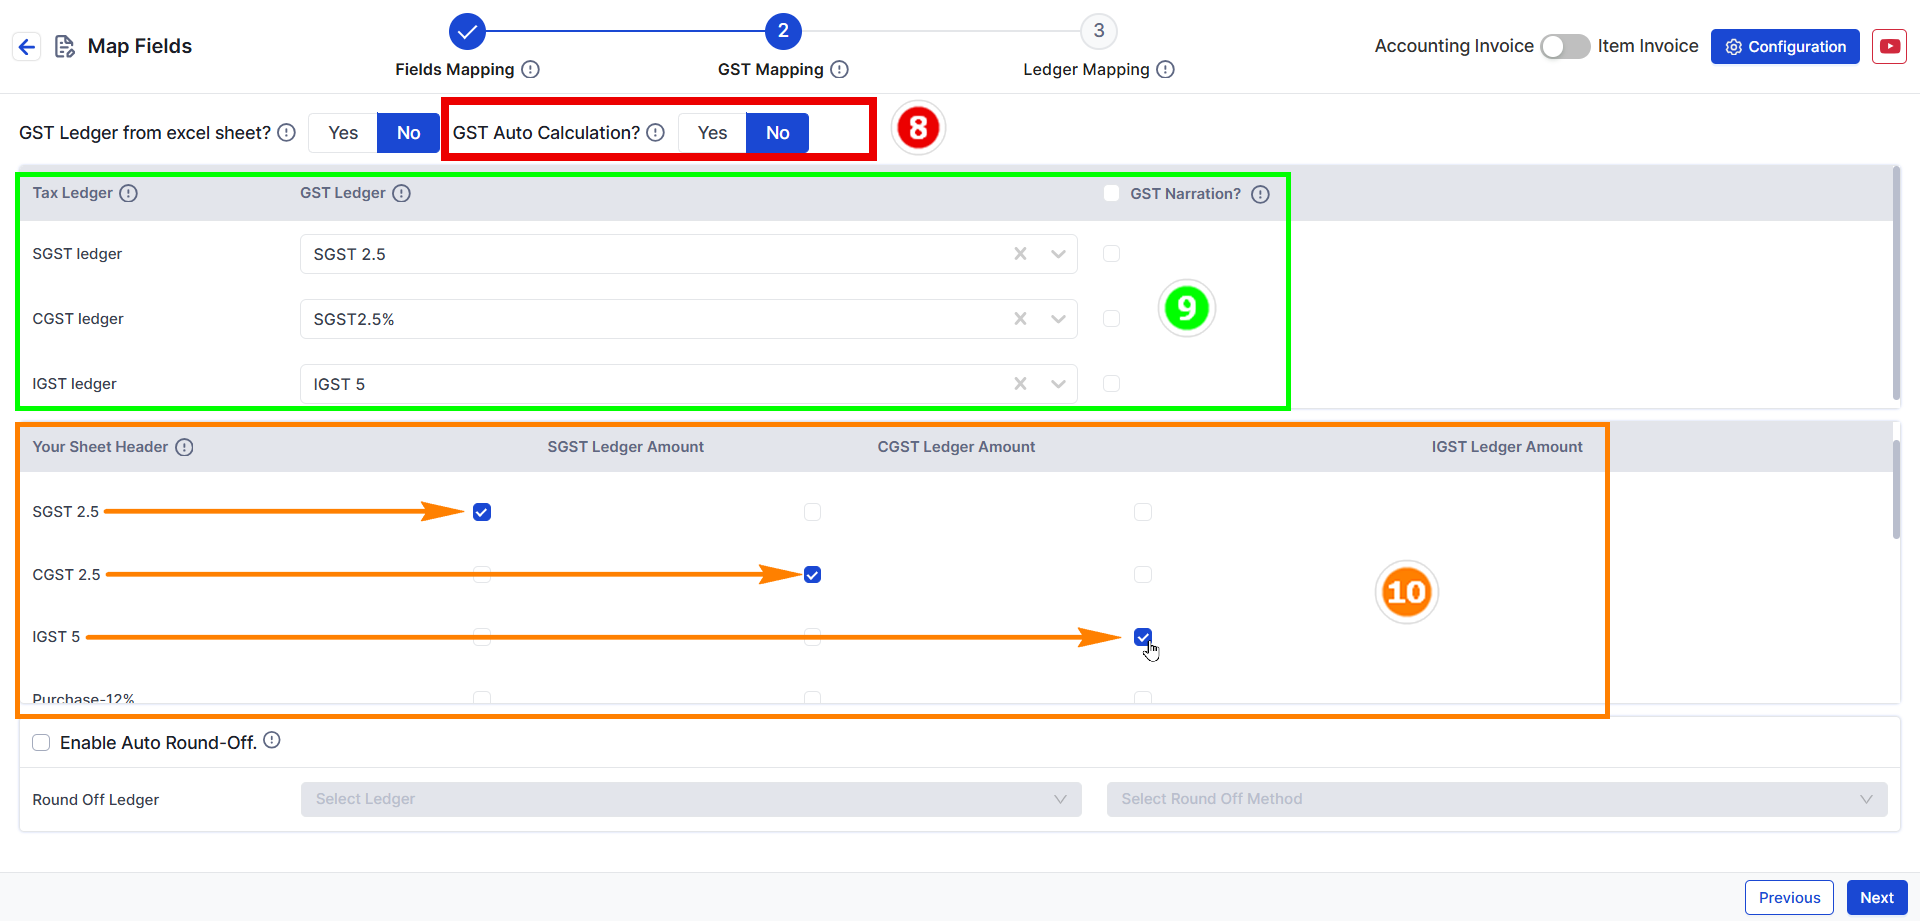
- Change GST Auto Calculation to NO
- Select Duties & Taxes ledger name ( If you have taken Purchase 5 then select SGST 2.5 , CGST 2.5 and IGST 5 respectively )
- Select Duties & Taxes amount of which you have selected in Step 9
- Click Next for 3rd Stage mapping.
**Note**: SGST, CGST, and IGST Tax Ledgers are mandatory fields that must be mapped. You can also map the round-off ledger from below option.
Step 3: Ledger Mapping
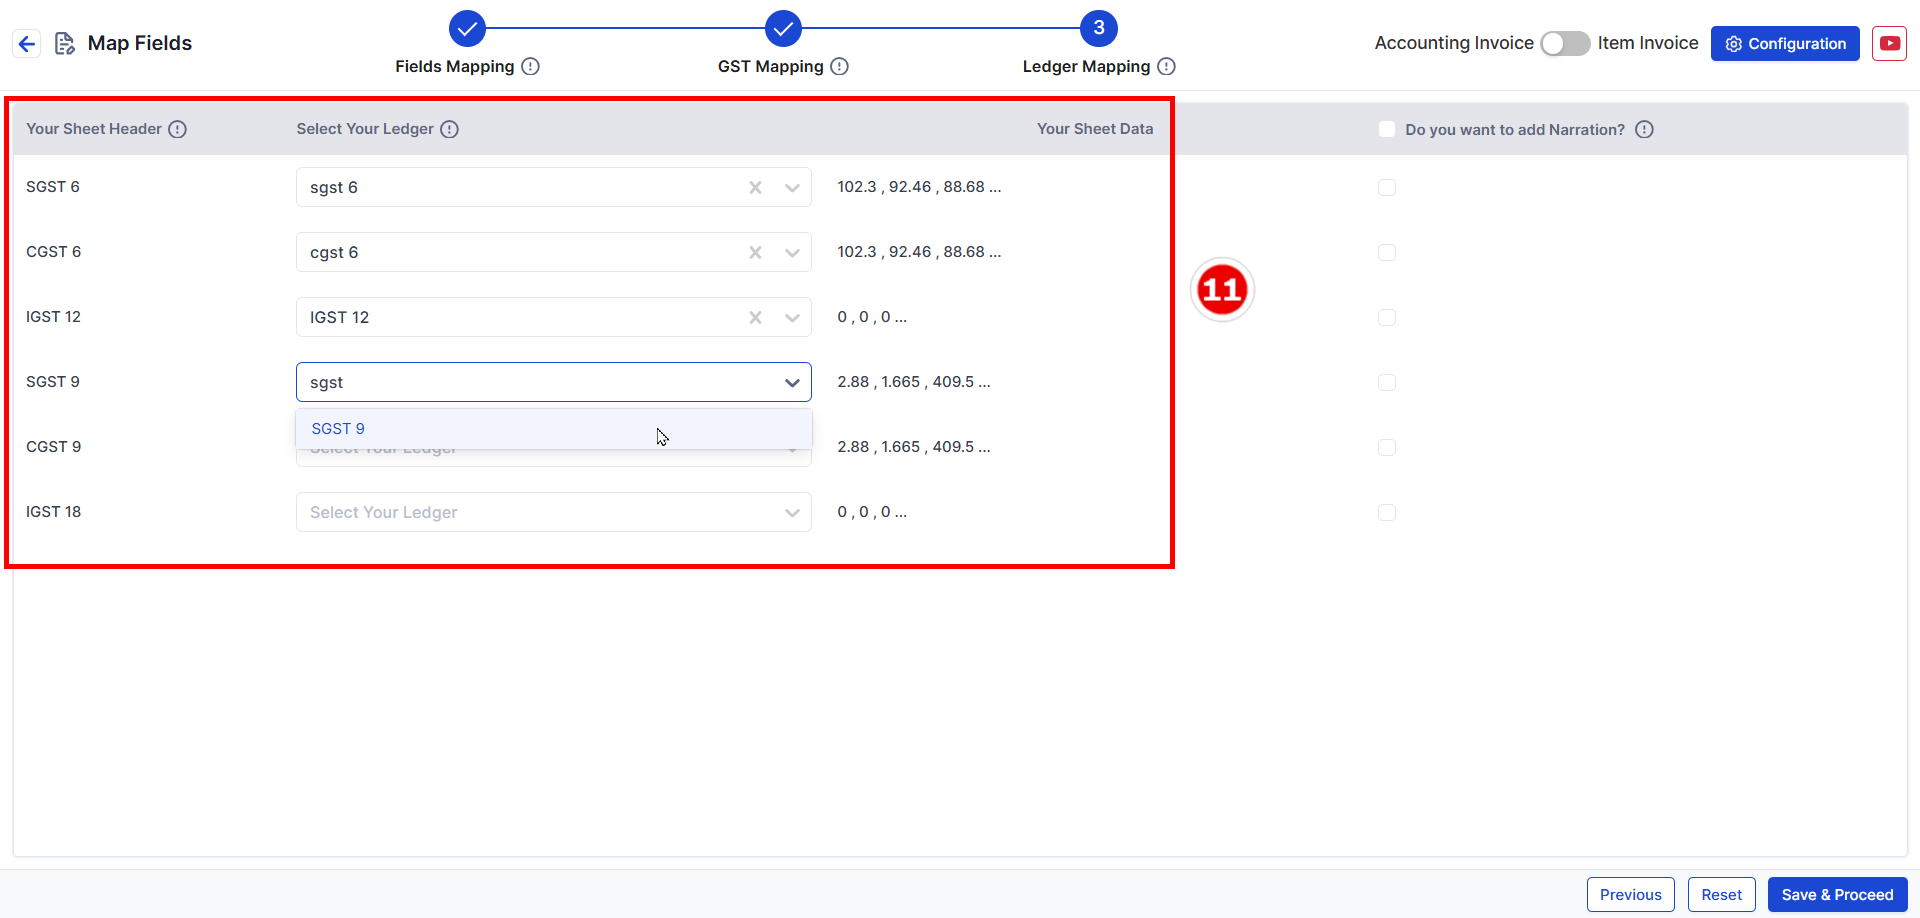
- Select remaining TAXABLE AMOUNT and its DUTIES & TAXES amount in decreasing Order (small to big).
- Click Save & Proceed to move to the process screen.