Purchase Bill With Item-Multiple Tax-Common GST (Duties & Taxes)
Handle purchase bills with multiple items and tax rates using a common GST ledger in Suvit. Follow step-by-step Excel upload and mapping for Tally accuracy.
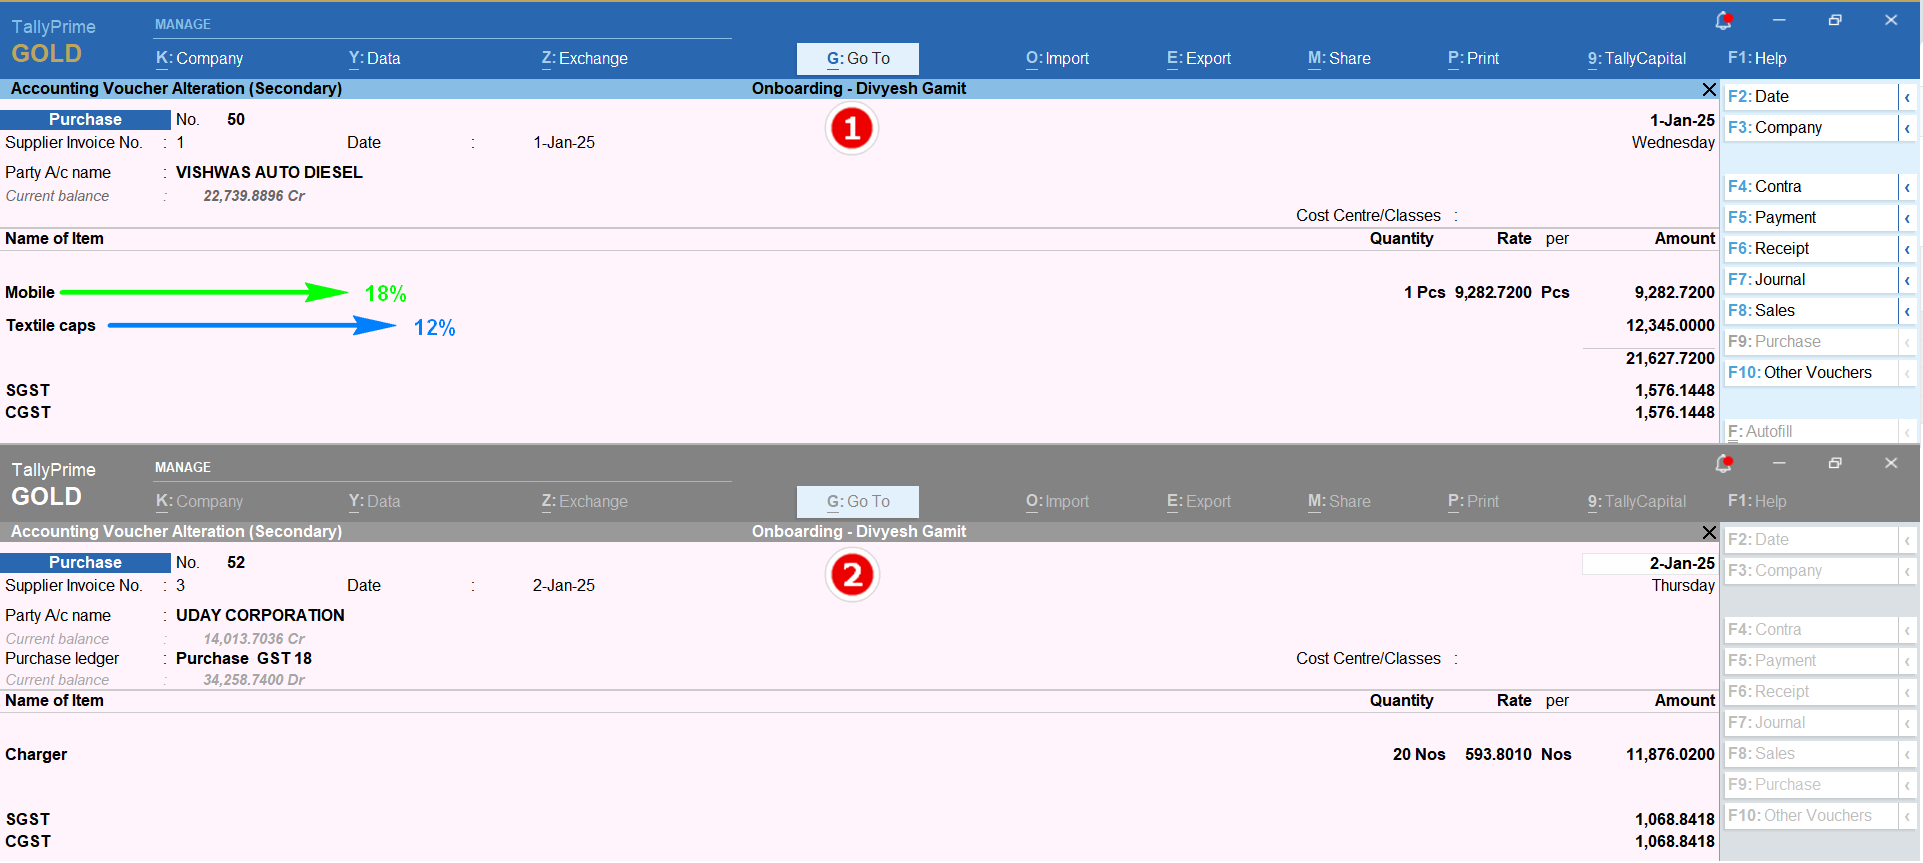
If your bill includes **items with multiple tax rates** but uses the same **GST ledger (Duties & Taxes)**, you can enter it as follows:
- A bill with a single or multiple items.
- A bill with a single or multiple tax rates, using the common GST ledger (Duties & Taxes).
**Data requirement for excel sheet**

⇒ **You need at least 7 types of data in your Excel sheet for mapping:**
- 1. **SUPPLIER INVO:** A unique bill number for each purchase.
- 2. **INVOICE DATE:** The date the purchase happened.
- 3. **PARTY NAME:** Name of the client (as entered in Tally).
- 4. **PURCHASE LEDGER:** The purchase account name (GST Ledger).
- 5. **NAME OF ITEM:** Product name (e.g., Mobile, Laptop).
- 6. **QUANTITY** or **Rate** (both cannot be mapped together).
- 7. **AMOUNT:** Total price before tax (Quantity × Rate = Taxable Amount).
⇒ **Not Mandatory list**
- 8. **GST NO:** Client's GST number.
- 9. **PLACE OF SUPPLY:** State or city where the item was delivered.
- 10. **SGST, CGST, IGST:** Duties & Taxes amounts (required only for **Manual Calculation**).
- 11. **TOTAL AMOUNT:** Grand total including taxes (for verification).
How to upload an Excel sheet:Click Here
Mapping
- Click on your file to open the Mapping Process.
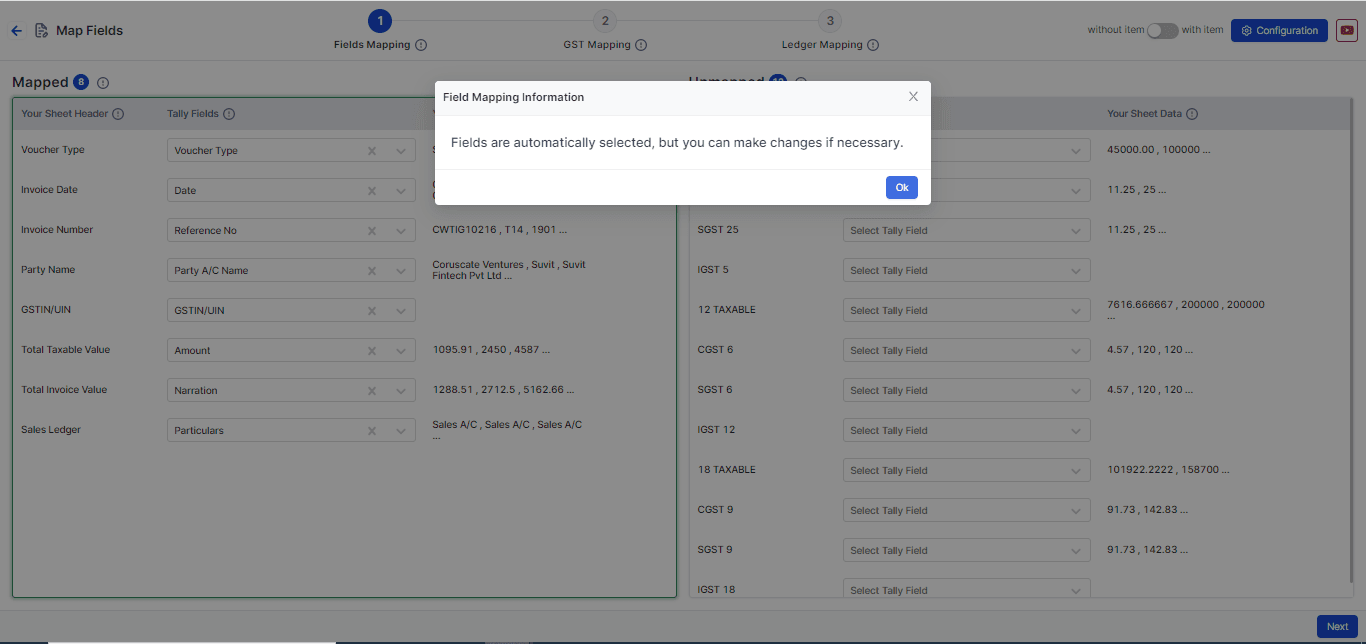
Step 1: Field Mapping
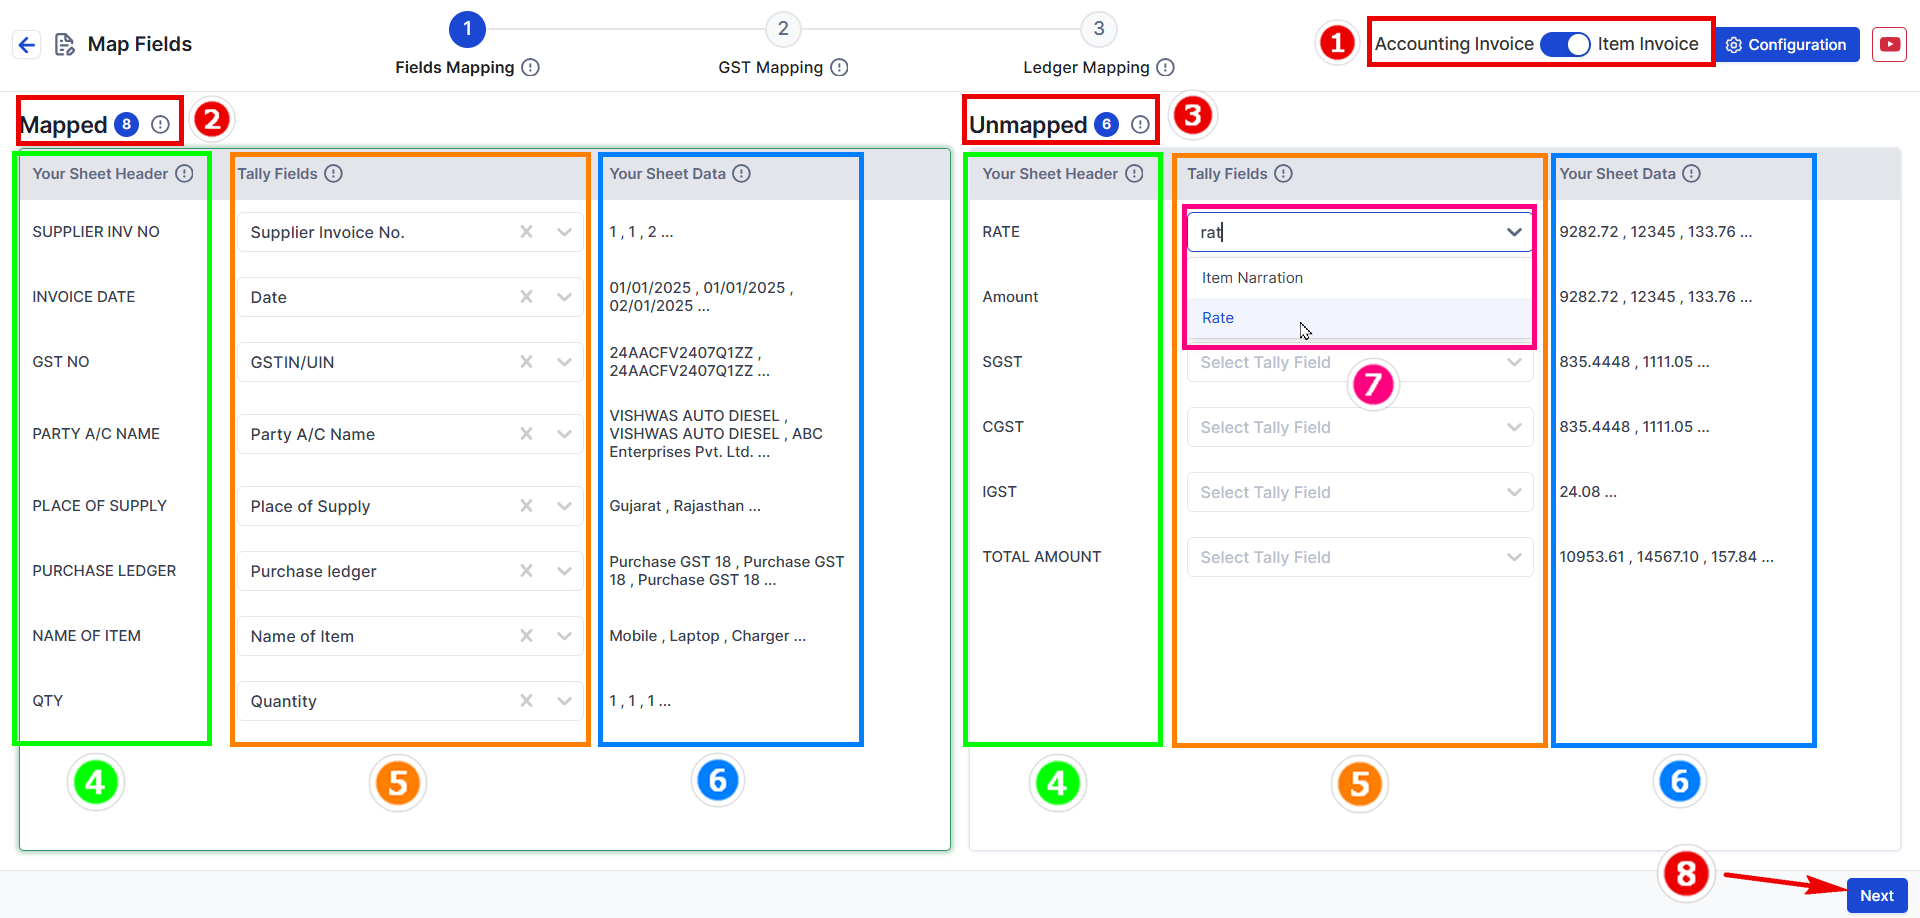
- Choose your data type: Select Item invoice.
- Mapped Fields: These are matched fields from your uploaded data.
- Unmapped Fields: Fields not yet matched. Choose the correct Tally fields for them.
- Your Sheet Header: Shows headings from your Excel sheet.
- Tally Fields: Fields matched with Tally. You can change them if needed.
- Your Sheet Data: Shows sample data for cross-checking.
- Tally Fields Selection: Choose the correct field from the dropdown.
- Press Next to move to GST Mapping.
Step 2: GST Mapping (Map Your Tax Ledger)
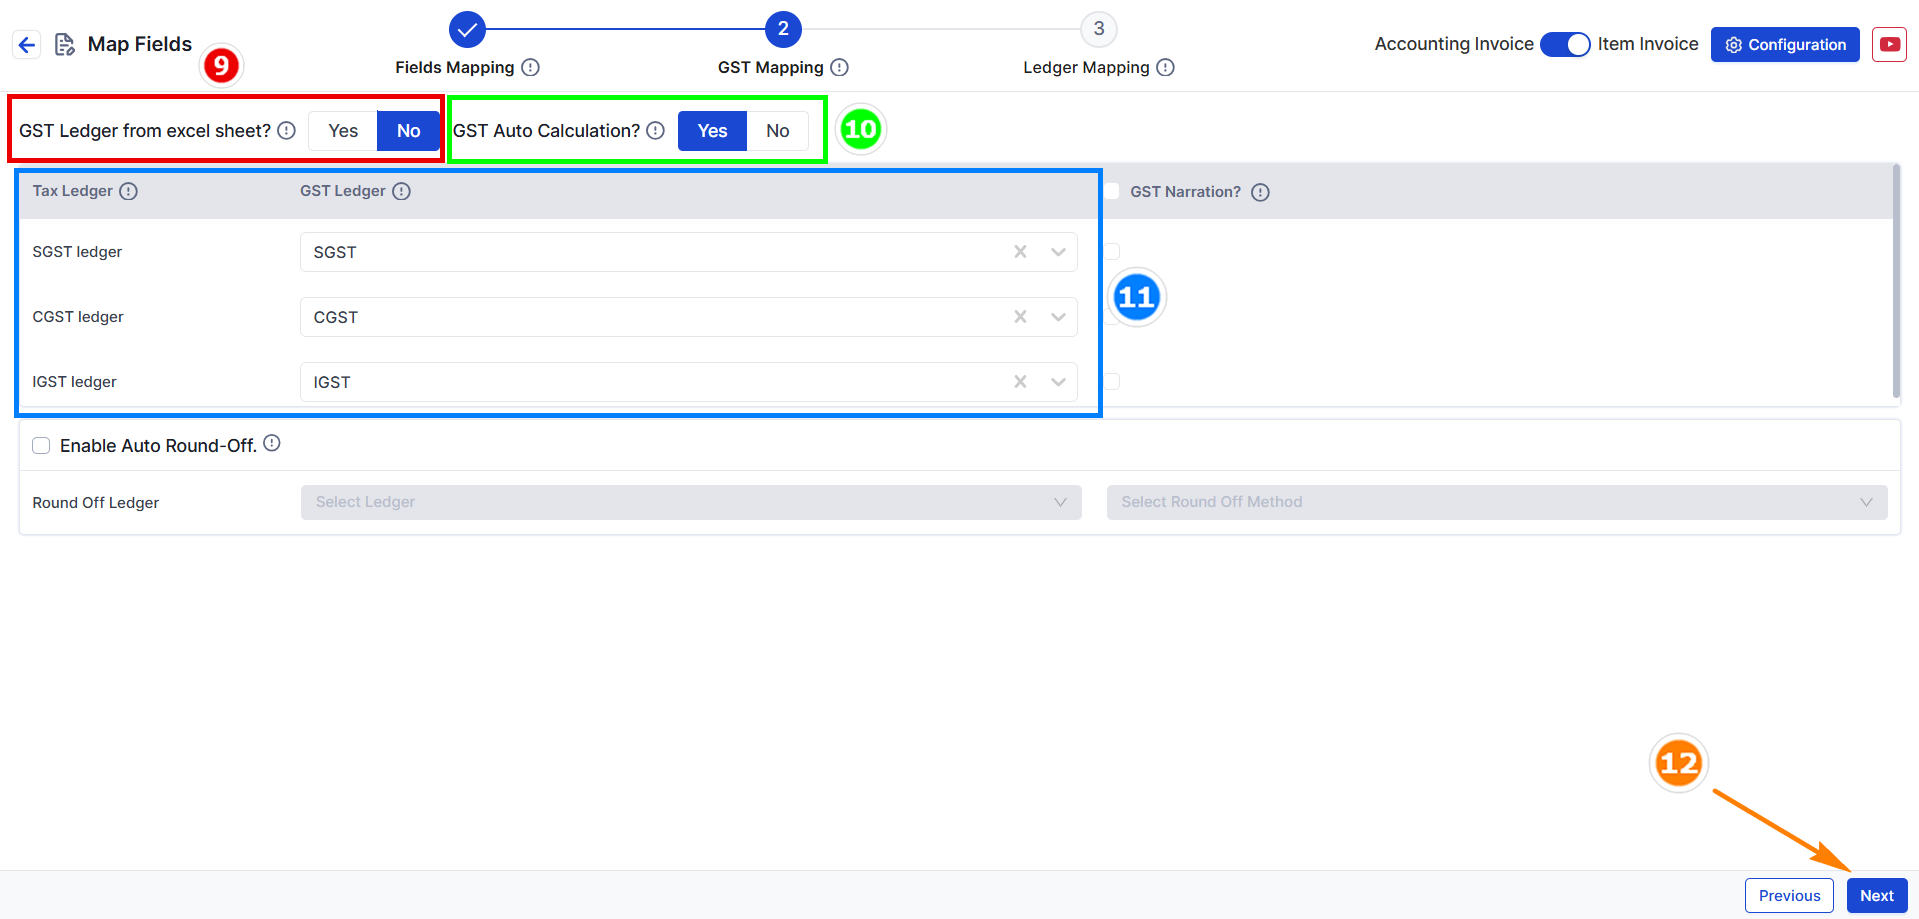
- GST Ledger from Excel Sheet: Keep this as it is.
- GST Auto Calculation: If GST rates are already defined in Tally, leave this setting as it is.
- Duties & Taxes: Choose a common Duties & Taxes ledger.
- Example: For an 18% GST rate, select SGST 9, CGST 9, IGST 18.
- Press Next to move to Other Ledger Mapping.
How to pick Duties & Taxes amounts from the Excel sheet:
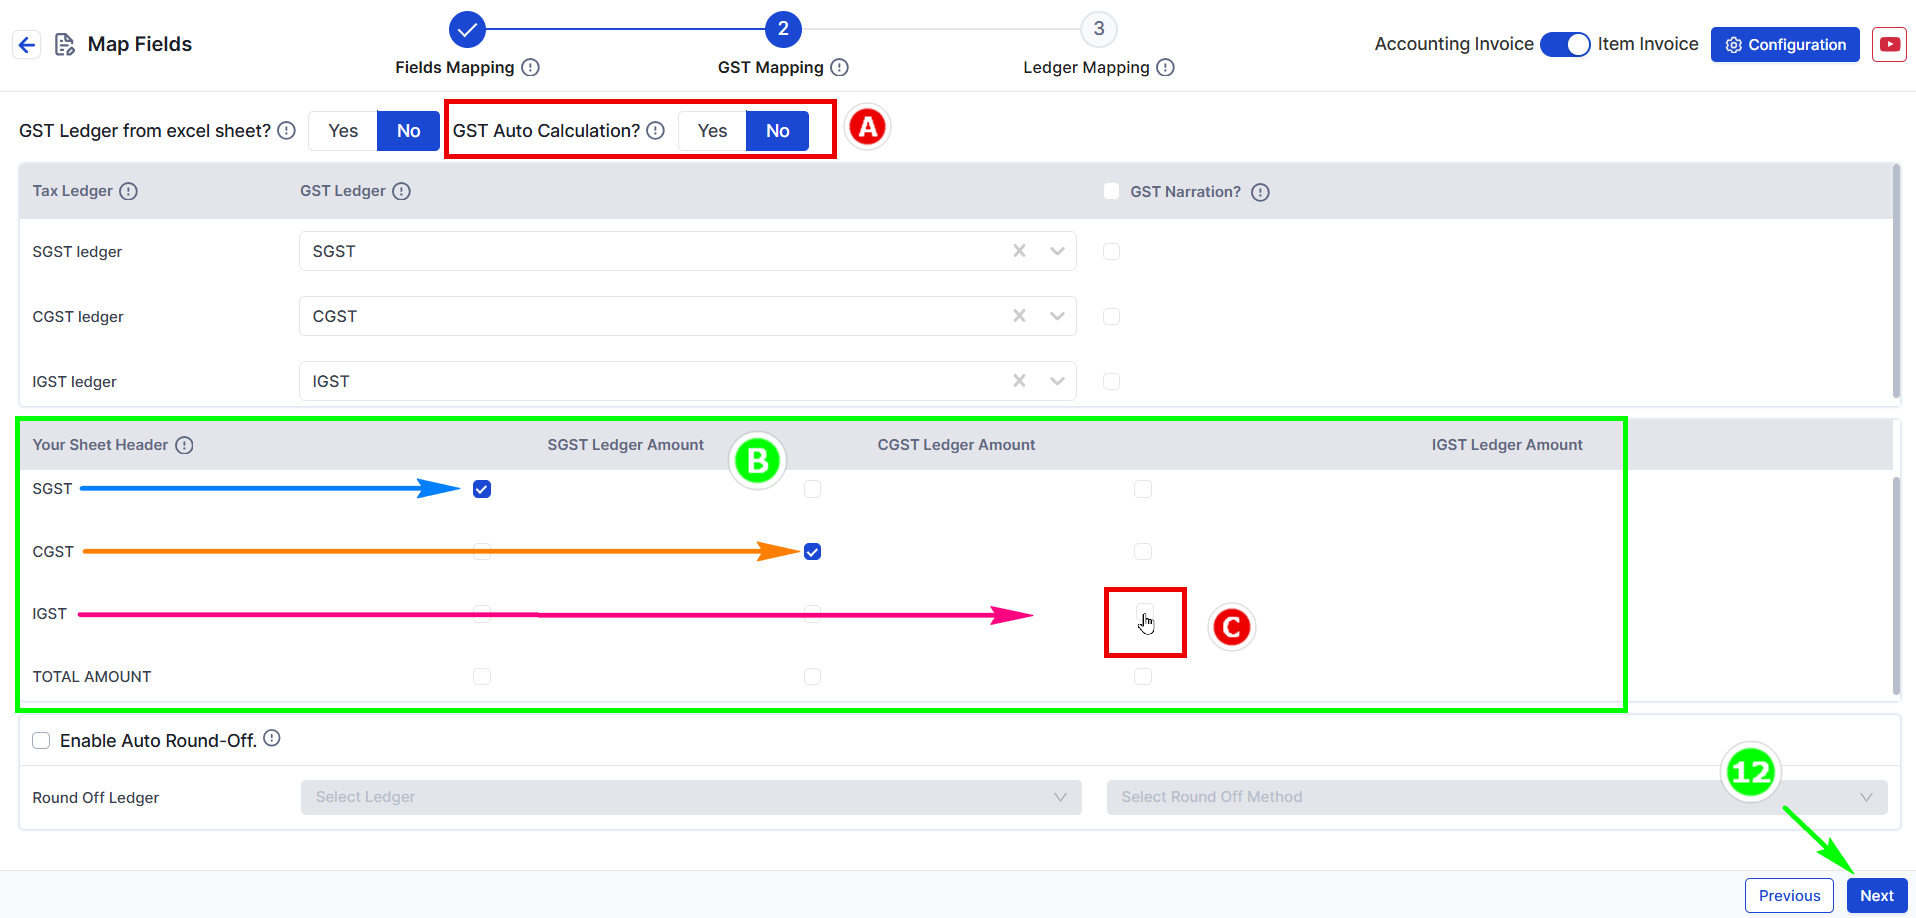
- A. Manual Calculation: If you click NO, pick the Duties & Taxes amounts (SGST, CGST, IGST) from your sheet.
- B. Tick-mark the tax amounts: Use the tick option to assign Duties & Taxes amounts.
- C. Verify amounts for SGST, CGST, IGST from the sheet.
Press Next to move to Other Mapping.
**Note:** SGST, CGST, and IGST Tax Ledgers are mandatory. You can also map the round-off ledger.
Step 3: Ledger Mapping
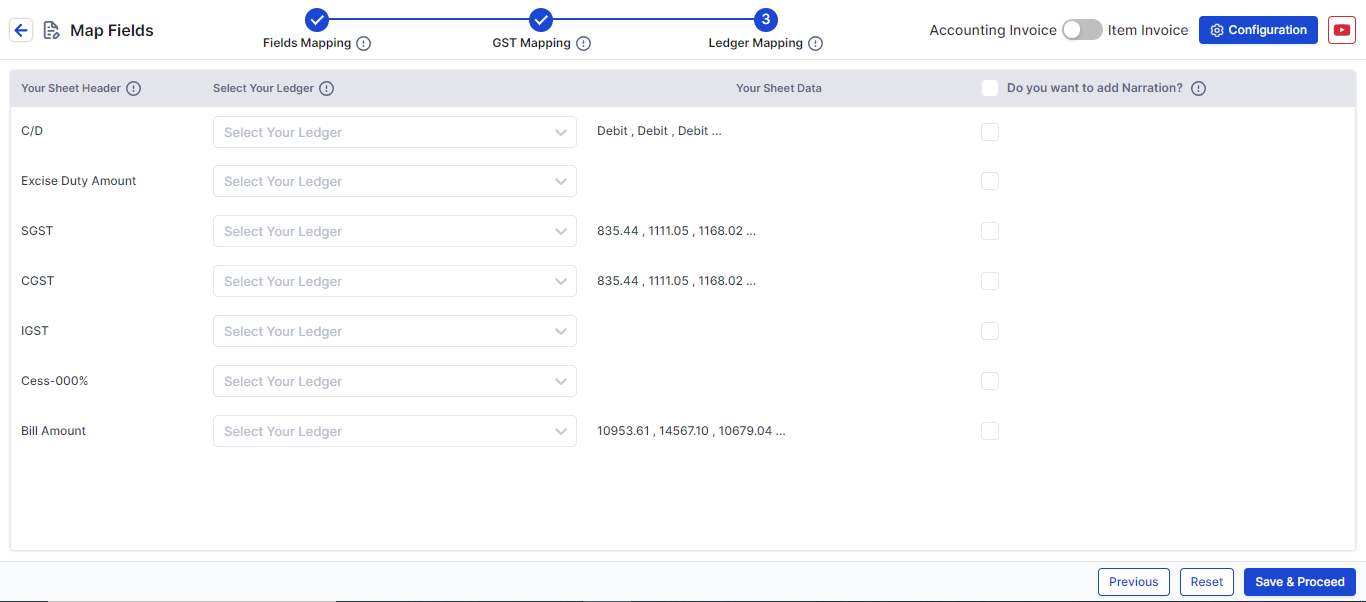
-
In this step, map additional fields such as Discount or Freight Amount by selecting the appropriate Excel header and Tally ledger.
-
Click Save & Proceed to finalize the process.
-
This format will be saved for future uploads in Suvit.