Uploading Purchase/Purchase return data through an excel sheet
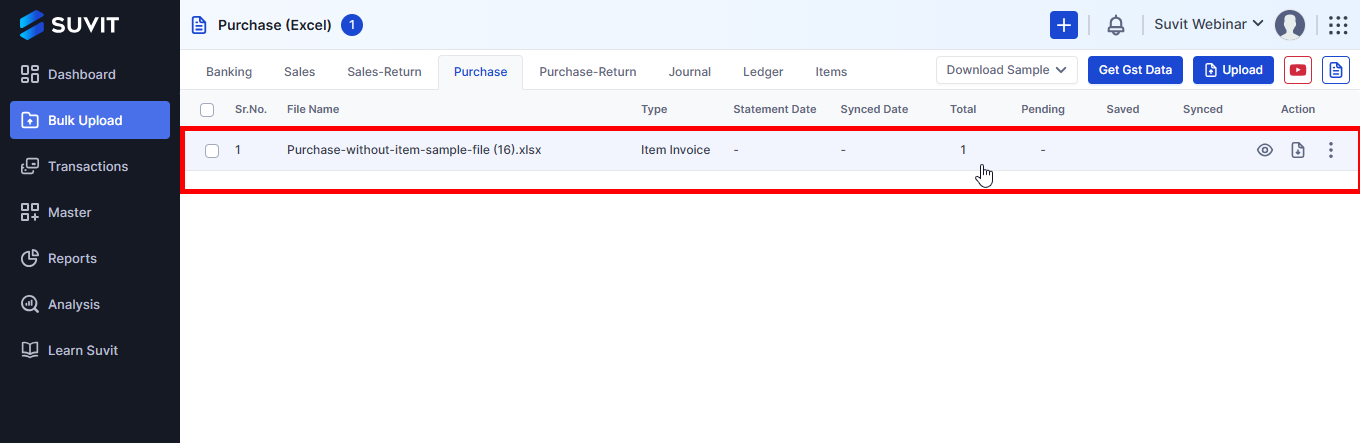
When you load the purchase data into SUVIT, it creates a new worksheet, but the original purchase data worksheet stays the same.
You can access directly by using below link
Step 1: Navigate to Purchase/Purchase Return
- Click on Explore Now Under Data Entry Automation
- Bulk Upload -> Purchase or Purchase Return
Step 2: Upload File
- Click on "Upload File" to upload the Excel sheet (Upload pop-up screen will appear).
- A Select the file from your system using Click to Upload.
- B Click on "Upload" to upload your document.
Step 3: Access the mapping screen
- After uploading, click on the file as per shown in above image to proceed to the mapping screen.
You may find this useful :
- To proceed, complete the Data Mapping Next step.