How to Review and Sync Vyapar Entries in Suvit
Learn how to review and sync Vyapar sales and purchase transactions in Suvit. Use filters, check sync status, and fill in missing details before syncing the data.
Steps to Review and Sync Vyapar Entries in Suvit
Step 1 - Navigate to Transactions
To begin, go to Explore Now → Data Entry Automation → Transactions and select either Sales or Purchase, depending on your data.
Step 2 - Identify Vyapar Entries
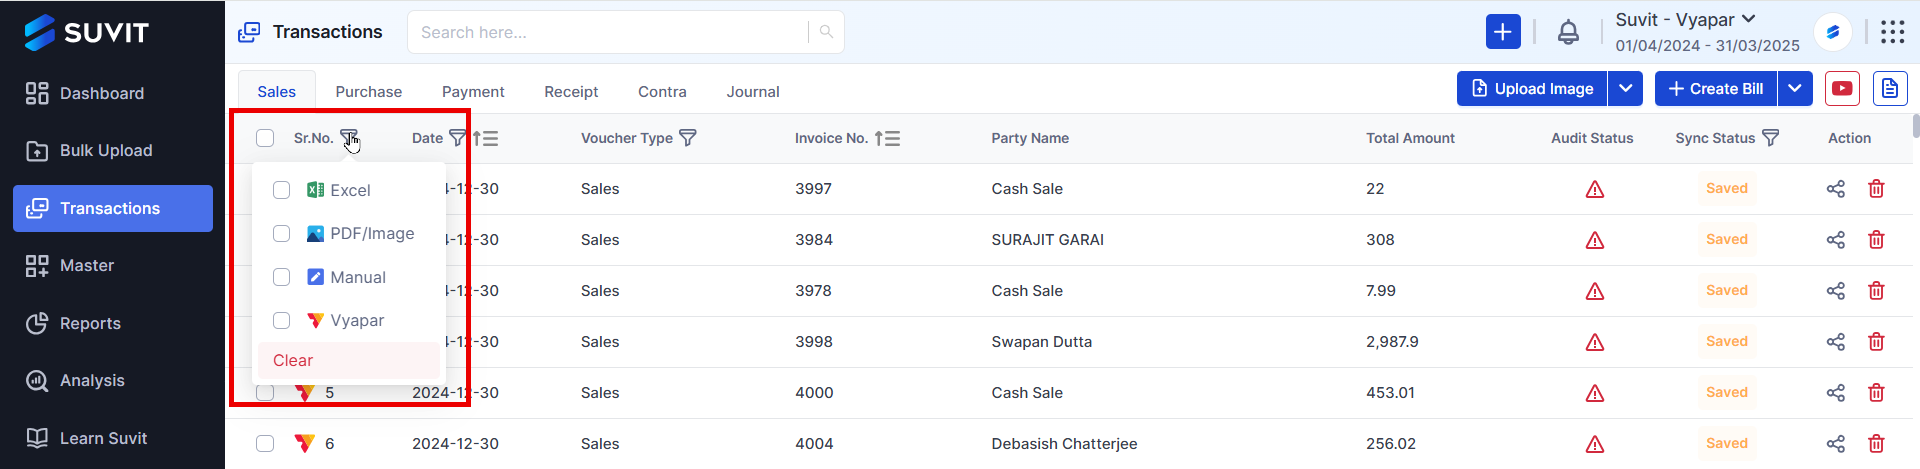
- Use the filter options to quickly locate transactions imported from Vyapar.
- This will help you separate Vyapar entries from other data.
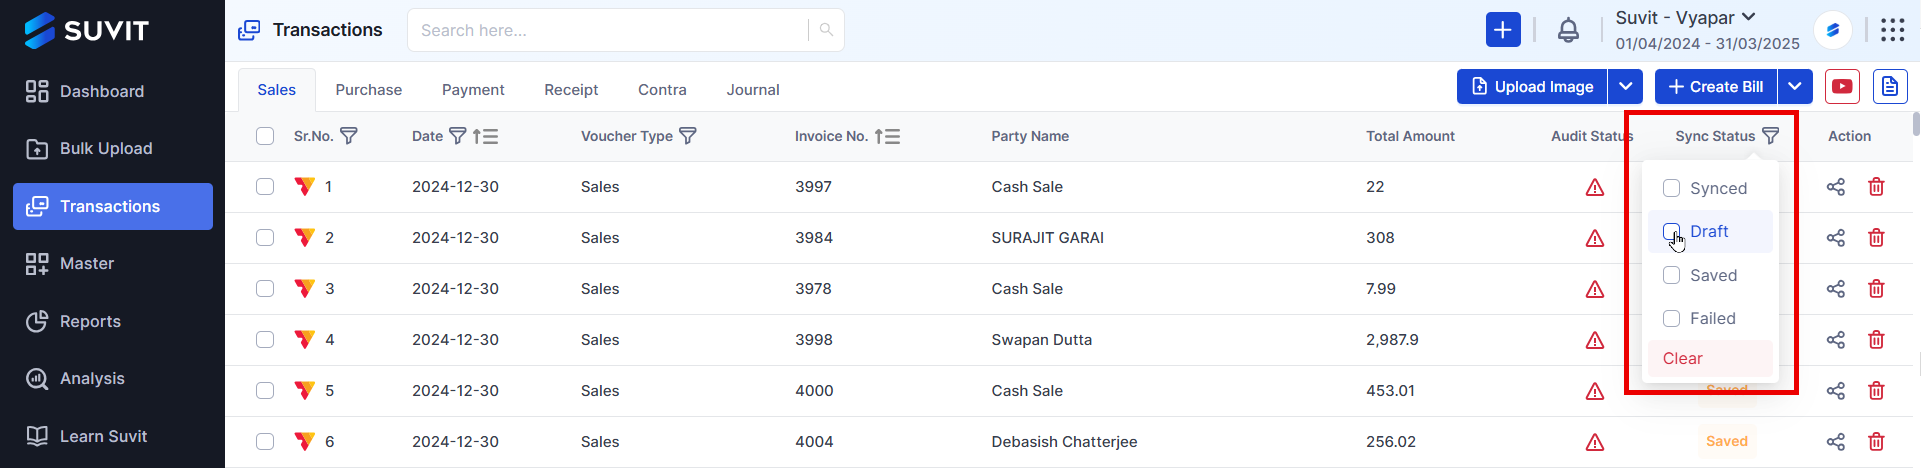
Step 3 - Check Sync Status
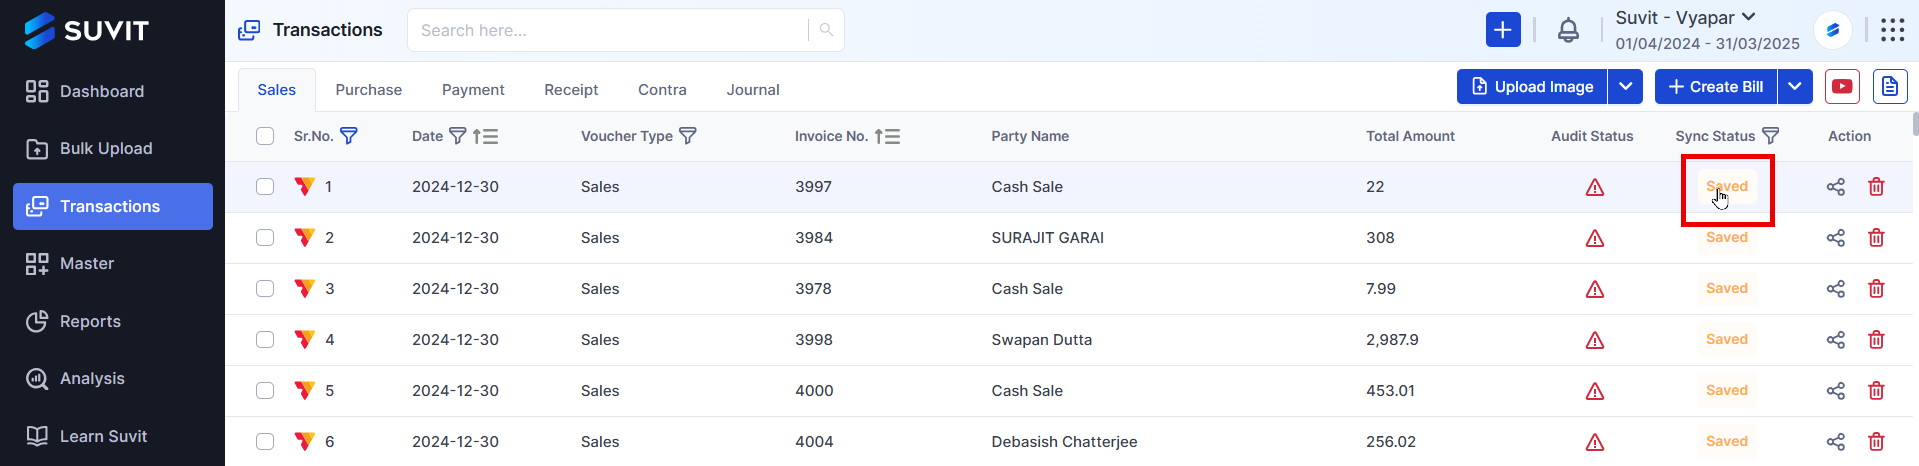
- Apply the Sync Status filter to identify bills that require modifications.
- If a bill is not synced due to missing details, it will be marked accordingly.
Step 4 - Open and Edit Draft Bills
- Click on the draft bill that requires changes.
- Fill in any missing details, such as GST rates, ledger selection, or other necessary fields.
Step 5 - Review and Save
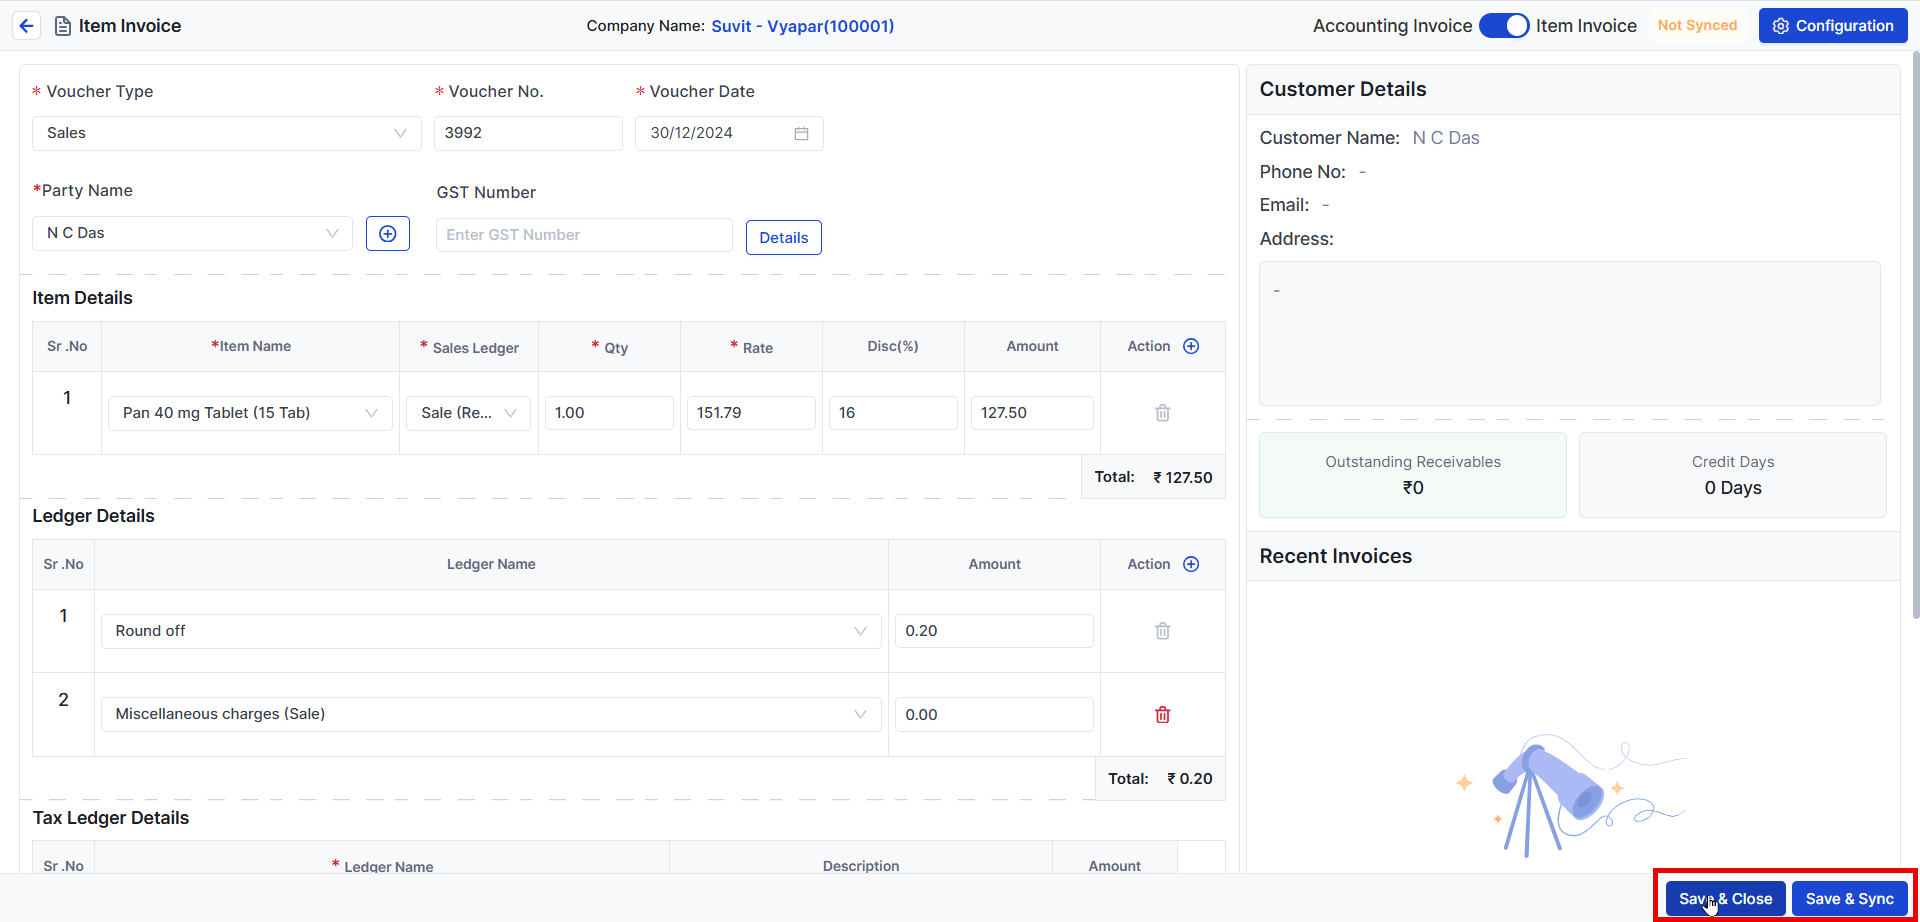
- Double-check all details before syncing.
- Once all required details are entered, click Save & Close to save the changes or Save & Sync to sync it immediately.
- If needed, refer to this guide for step-by-step invoice creation:
🔗 How to Create Sales and Sales Return Invoices
Step 6 - Send Data to Tally
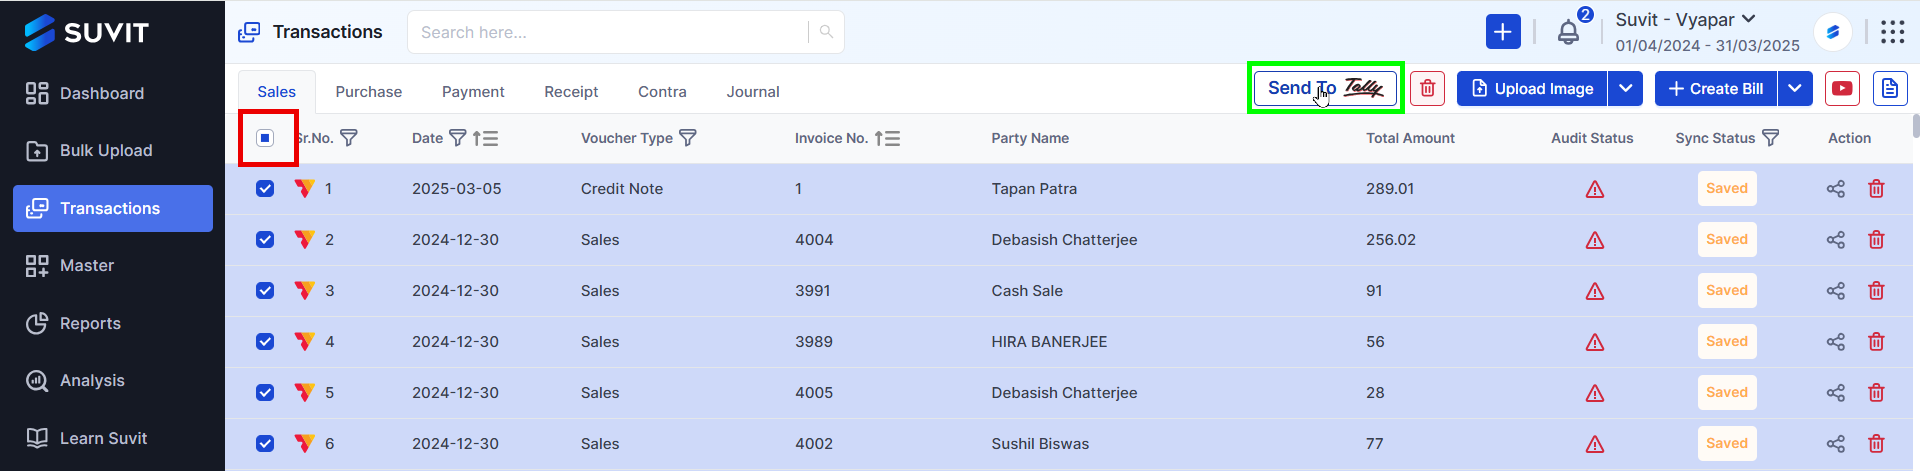
- After all modifications are done, select the entries you want to send.
- Click the Send to Tally button to export the data to Tally for final processing.