Bulk Upload Sales or Sales Return Excel Sheet from Client Accounts
Learn how to upload sales Excel sheet, track their status, and manage sales transactions efficiently in Suvit.
Bulk upload Sales or Sales Return Excel sheet.
Step 1: Bulk Upload
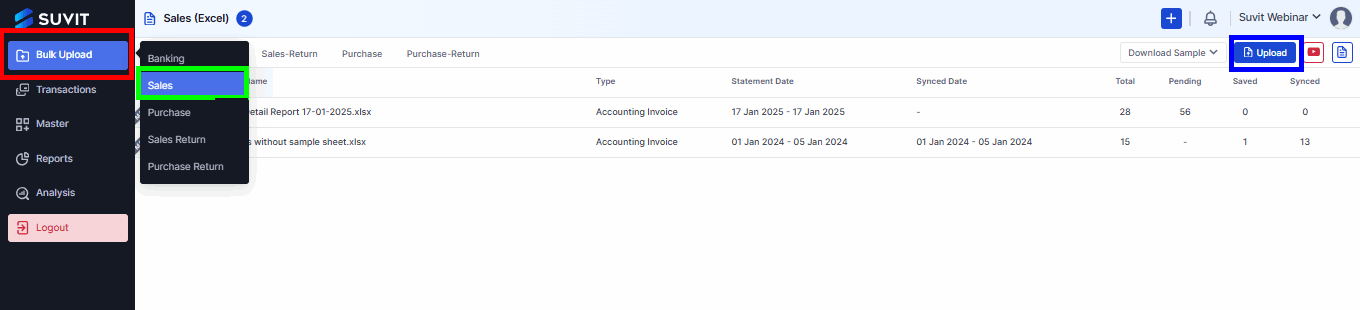
- Go to Bulk Upload → Select Sales or Sales Return.
- Click "Upload File" to upload an Excel sheet (a pop-up screen will appear).
Step 2: Download Sample
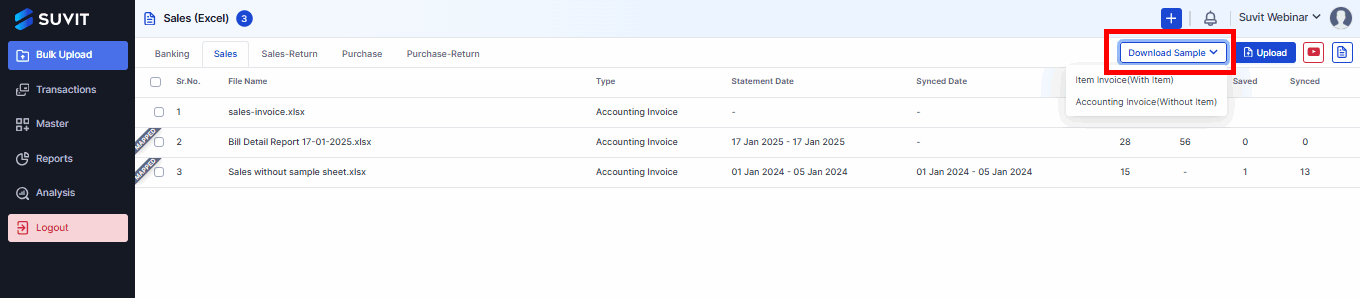
- If you need a reference, you can download a sample file from here. This helps ensure your data is in the correct format before uploading.
- Item Invoice – Includes item details.
- Accounting Invoice – Does not include item details.
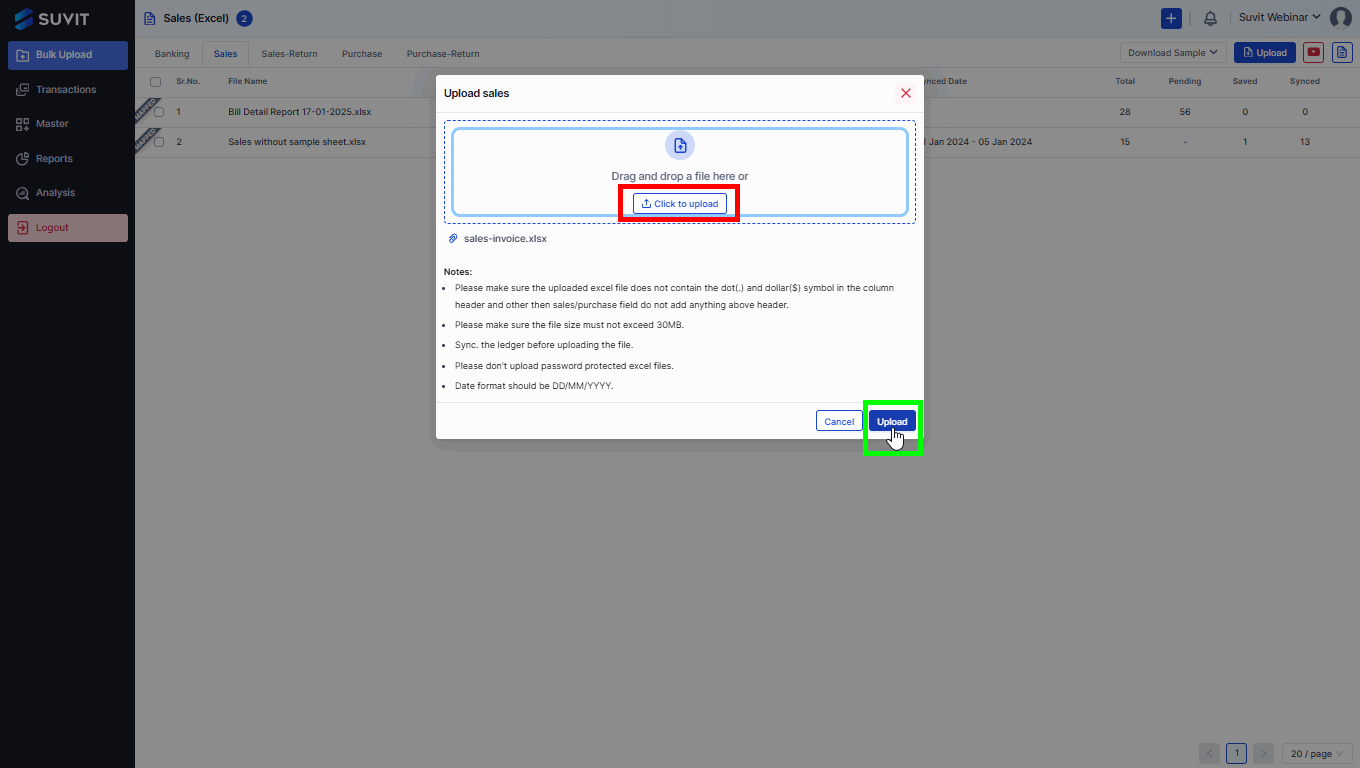
Step 3: Select & Upload File
-
Click on "Click to Upload", to select the Excel file from your system.
-
Once selected, click "Upload" to start the document upload.
Step 4: Review Uploaded Excel sheet
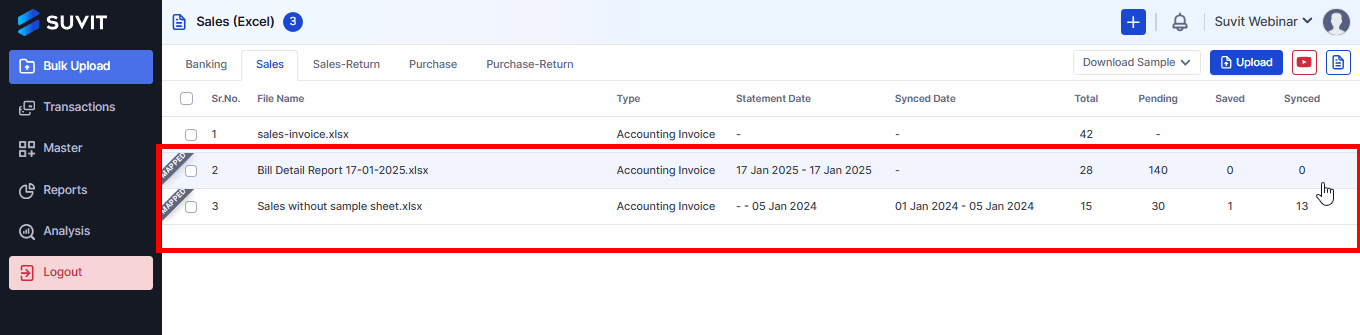
- The uploaded sales Excel sheet will be visible in the system.
- After completing the mapping process, you can view the uploaded Excel sheet in the Sales (Excel) section, where you can review details like File Name, Type, Statement Date, Synced Date, Total Entries, Pending Entries, Saved Entries, and Synced Entries.
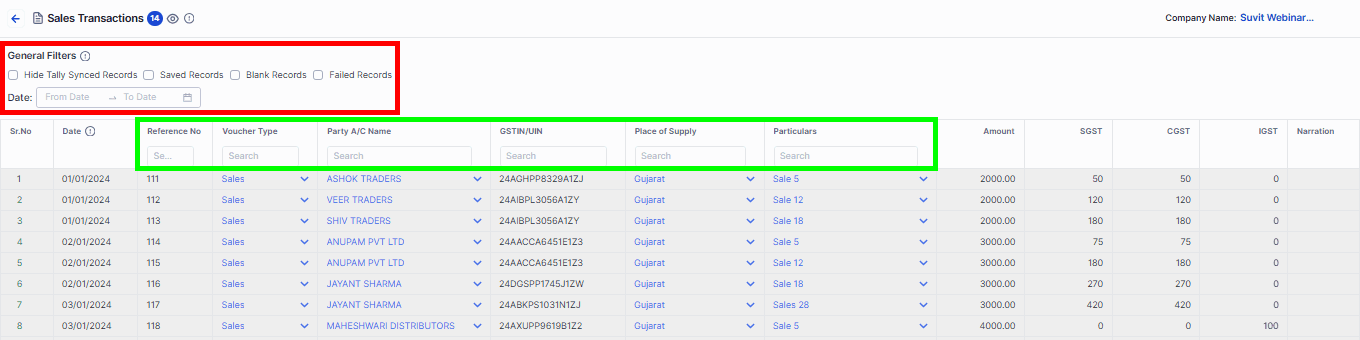
Step 5: Sales Transactions Overview
This page allows users to view and manage uploaded sales records efficiently.
-
General Filters – Refine records using filters like Saved, Bank, and Failed Records, or set a date range Check the General Filters Guide.
-
Search & Filter Options – Quickly locate transactions by Reference No, Voucher Type, Party A/C, GSTIN, Place of Supply, or Particulars.
-
Sales Transactions Table – View key details such as Date, Reference No, Party A/C, GSTIN, Amount, Taxes (SGST, CGST, IGST), and Narration.
Use these tools to track, filter, and view your sales transactions with ease.