Fetch GSTR 2B Data in Purchase from GST Portal
Quickly fetch Purchase GST data from the GST portal using Suvit’s “Get GST Data” feature. Read the article for steps and a complete user guide.
Accessing GST Data in Purchase
In Purchase, accessing GST (Goods and Services Tax) data has never been easier. With the introduction of the "Get GST Data" button, users can now seamlessly retrieve their GST data directly from the master GST API. This article provides a comprehensive guide on how to use this new feature to fetch GST data efficiently.

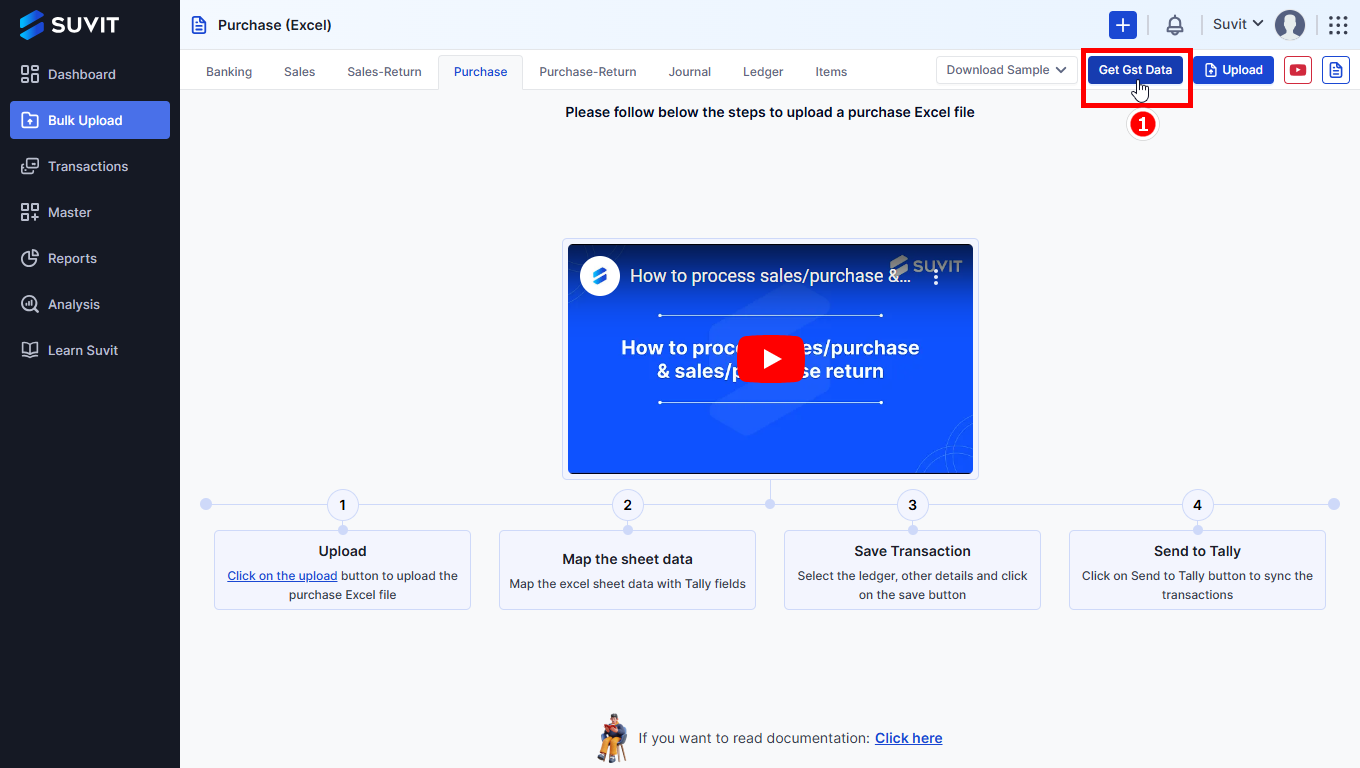
- Click on Data Entry Automation →Bulk Upload -> Purchase → "Get GST Data"
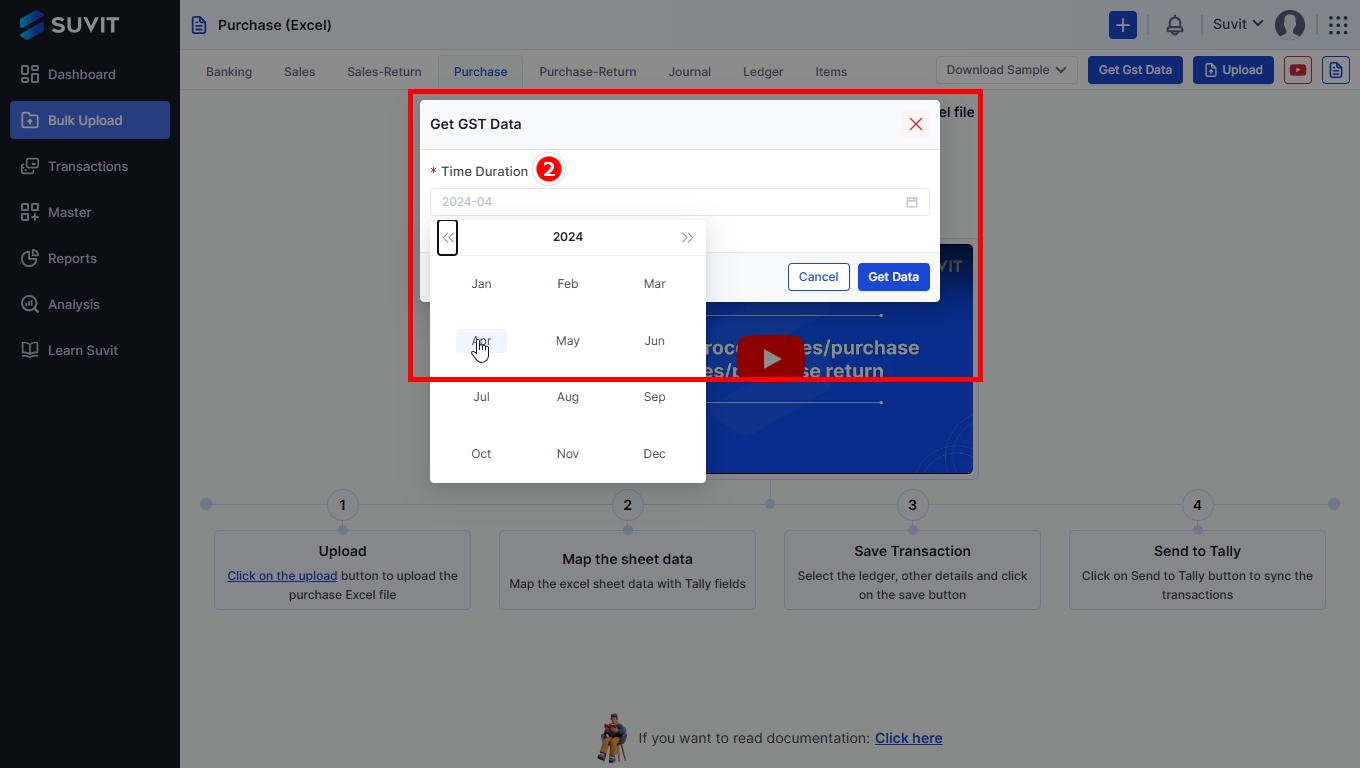
Step 2: Selecting the Time Range

- To specify the desired period for GST data retrieval, users can select a time range using date pickers or other relevant tools provided within the pop-up window. This allows users to narrow down the data they want to fetch, whether it's for a specific month.
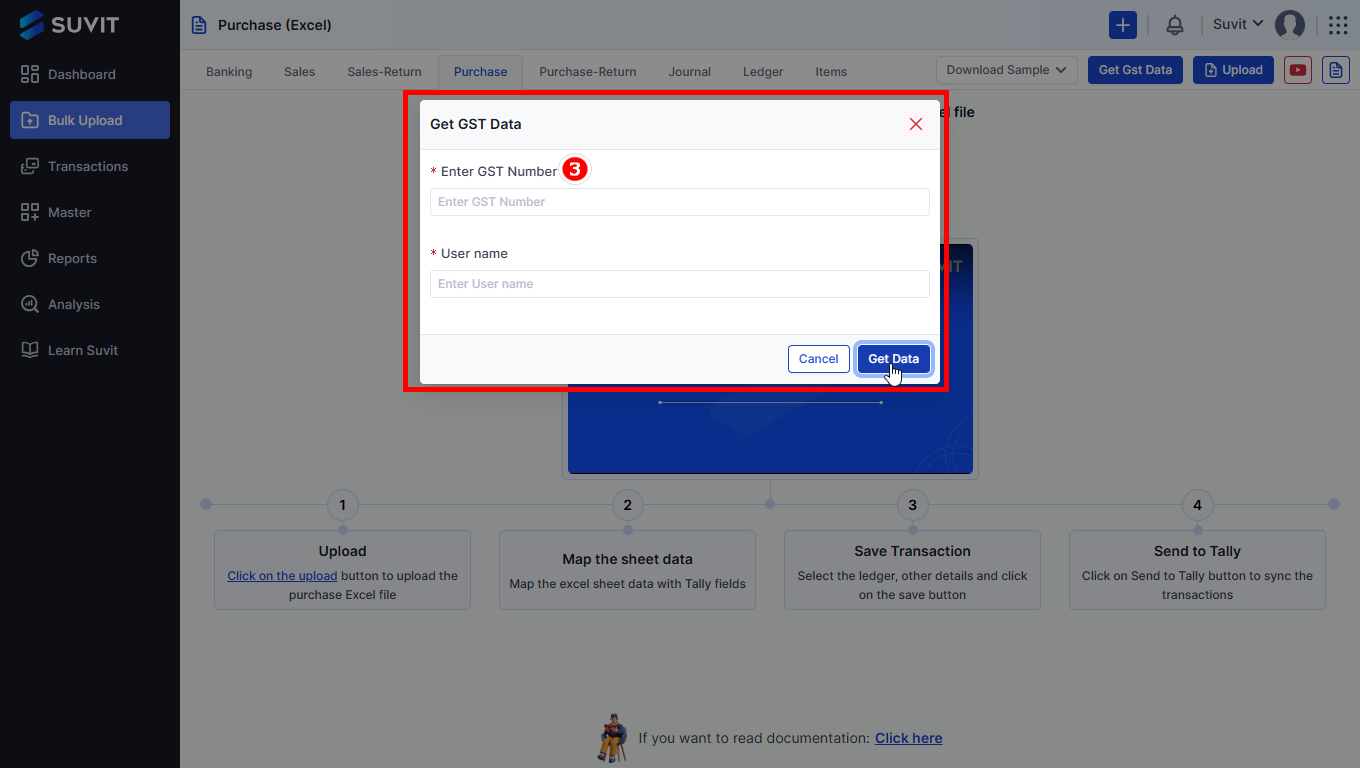
Step 3: Pop-Up Selection

- Upon clicking the button, a pop-up window will appear, prompting the user to enter specific information. Once you enter the required information, you will be asked to enter the OTP.
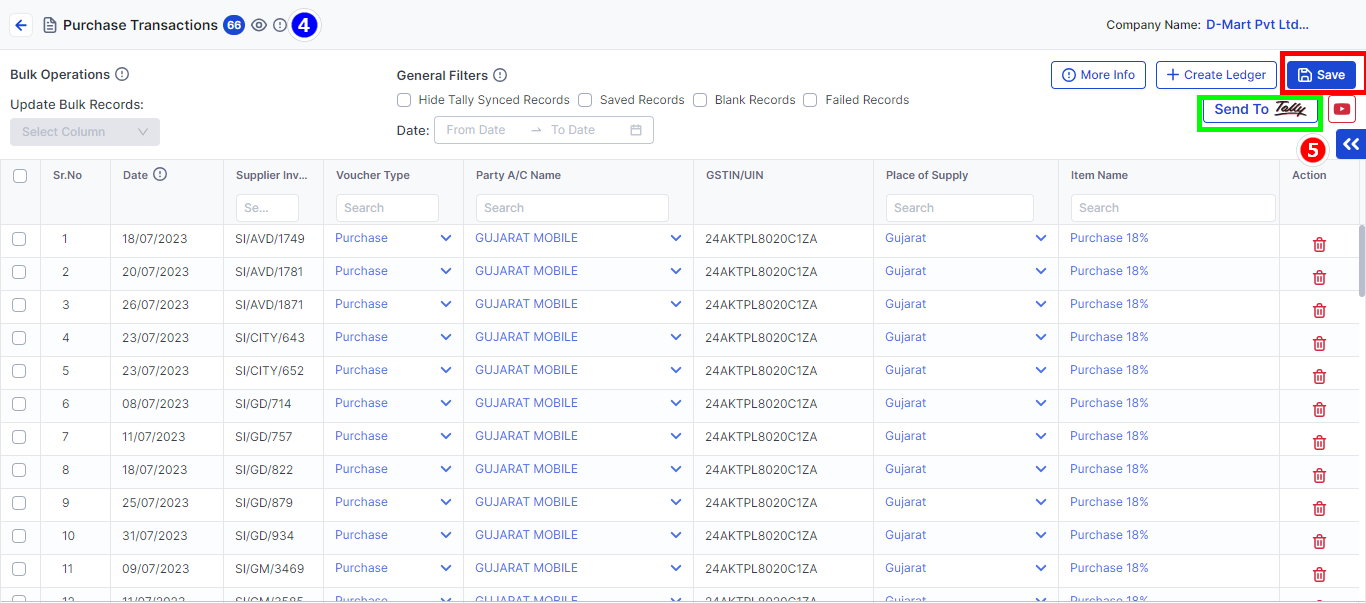
Step 4: Viewing Fetched Data

- Once the data has been successfully fetched, the platform will present the retrieved files as a listing page. Users can navigate and view the fetched data within this interface.
Step 5: Saving and Sending
After data retrieval, users can perform various actions on the fetched GST data, such as:
- Saving: Save the mapped data to preserve it for future reference or reporting.
- Sending: If required, users can send the data to designated recipients, such as tax authorities, accountants, or other stakeholders.
You may find this useful :
- Learn how to upload Purchase/Purchase Return data through an Excel sheet Learn more.


