How to Format and Upload Choice Broker Purchase Excel Sheet in Suvit
Learn to format and upload your Choice Broker Purchase Excel in Suvit. This guide covers date formatting, field mapping, GST setup, and ledger mapping.
🔍 Overview
- This guide will help you format your Choice Broker Purchase Excel Sheet and upload it to Suvit
📝 Preparing the Excel Sheet
Step 1 - Remove Unwanted Data
- Delete unnecessary data from the Choice Broker Excel sheet before proceeding.

- Select Date Column -> Go To Data -> Text to Column
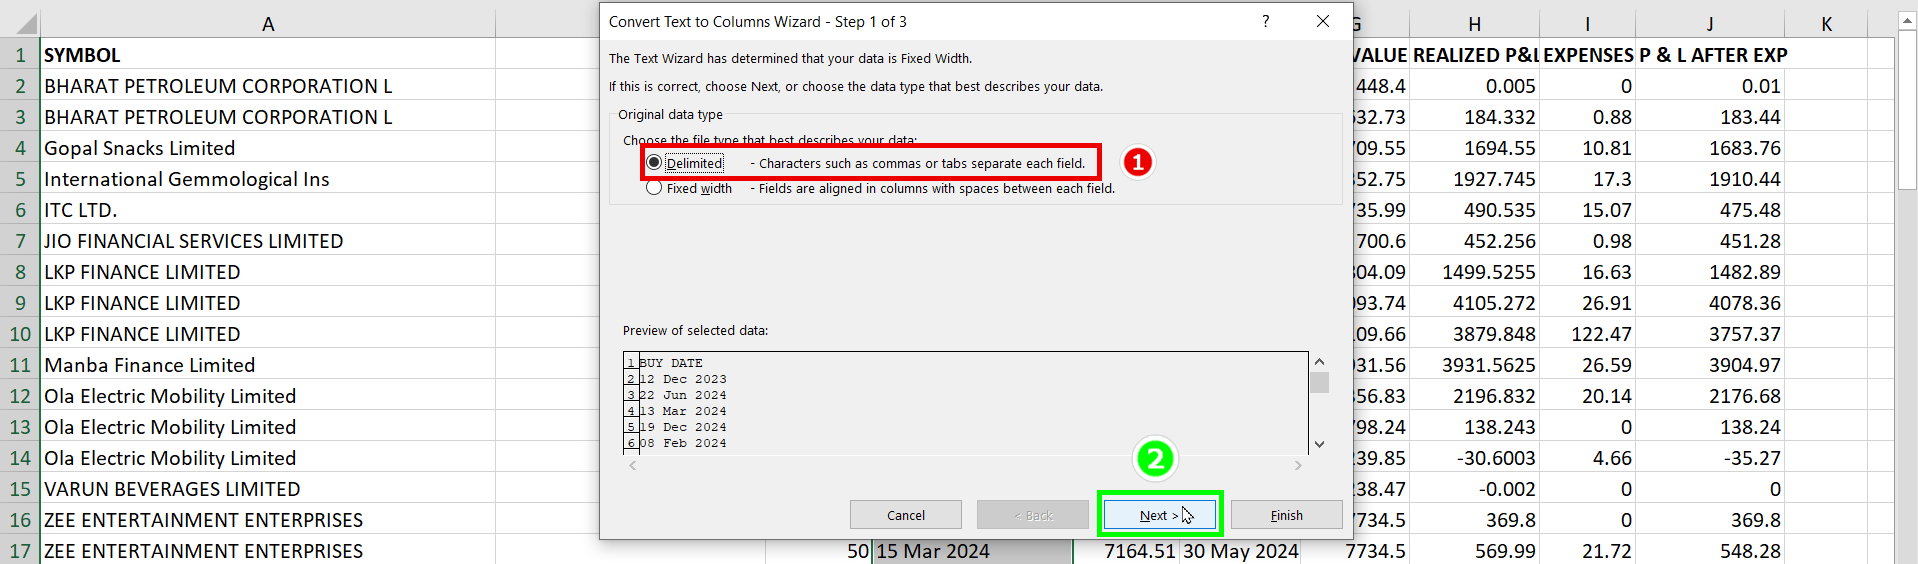
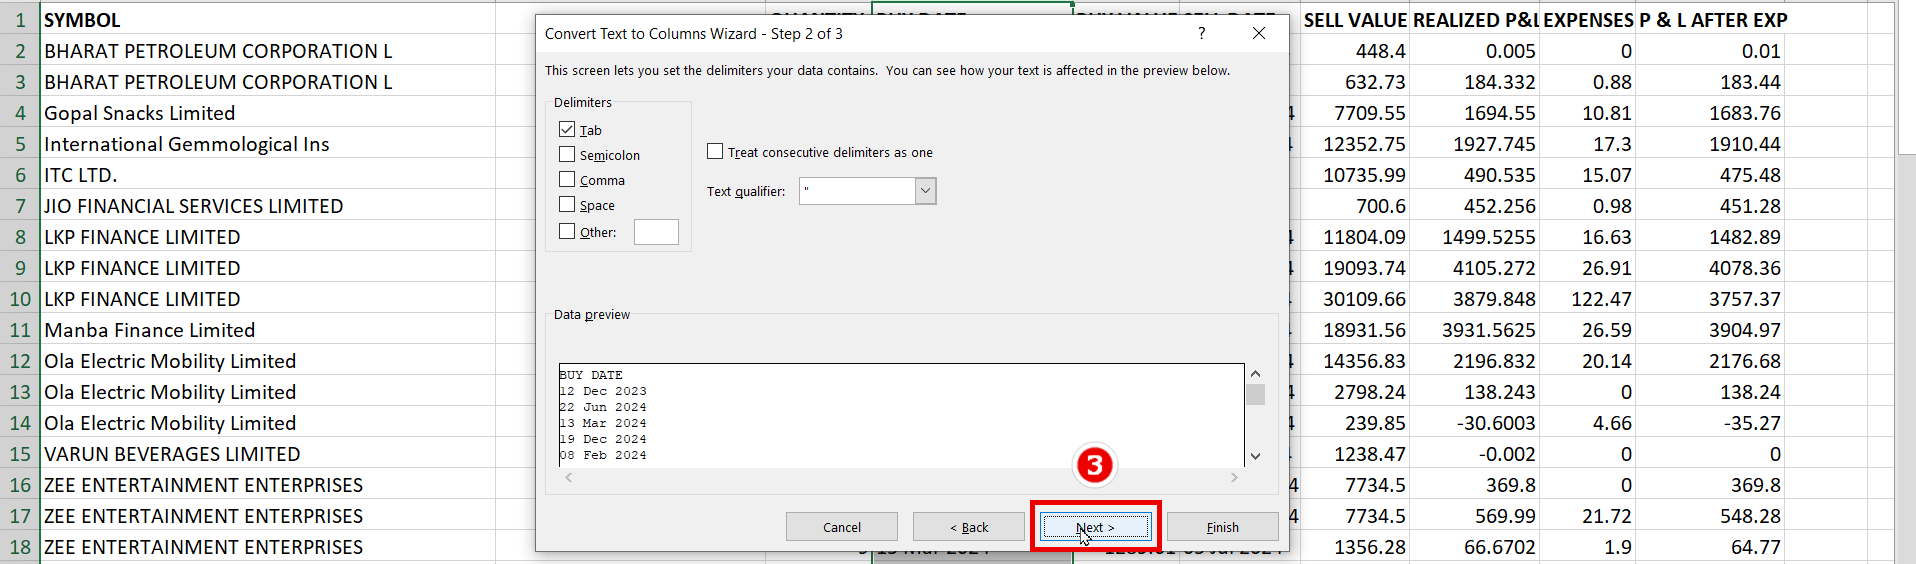
- Select Delimited -> Click Next
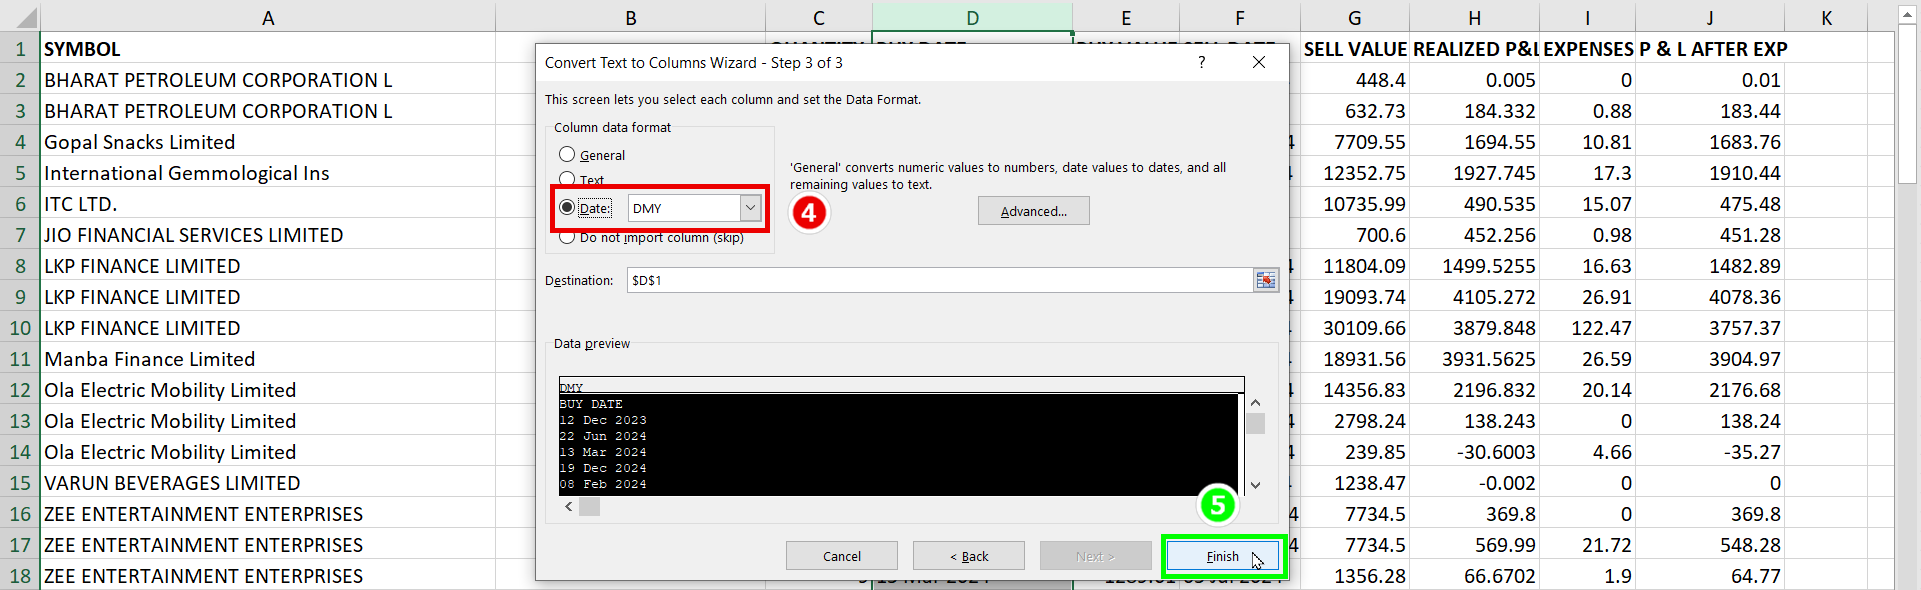
- Select Date (DMY)-> Click Finish
- Convert the date format into DD-MM-YYYY using Date Format
Step 3 - Add Required Details
✅ Before saving, add:

- For invoice number add Supplier Invoice Number
- Party Name: Add clients name
- Purchase Ledger : Add Purchase ledger name
- For example: Purchase (Choice Broker) ledger added in Purchase ledger column
💾 Save the Excel Sheet.
📤 Uploading the Purchase Sheet in Suvit
Step 4 - Upload the Excel Sheet
- Login to Suvit.
- Click on Explore Now under Data Entry Automation.
- Select Purchase and click on Bulk Upload.
- Select and upload the prepared Choice Broker Excel sheet.
🔄 Mapping Process
Step 5 - Field Mapping
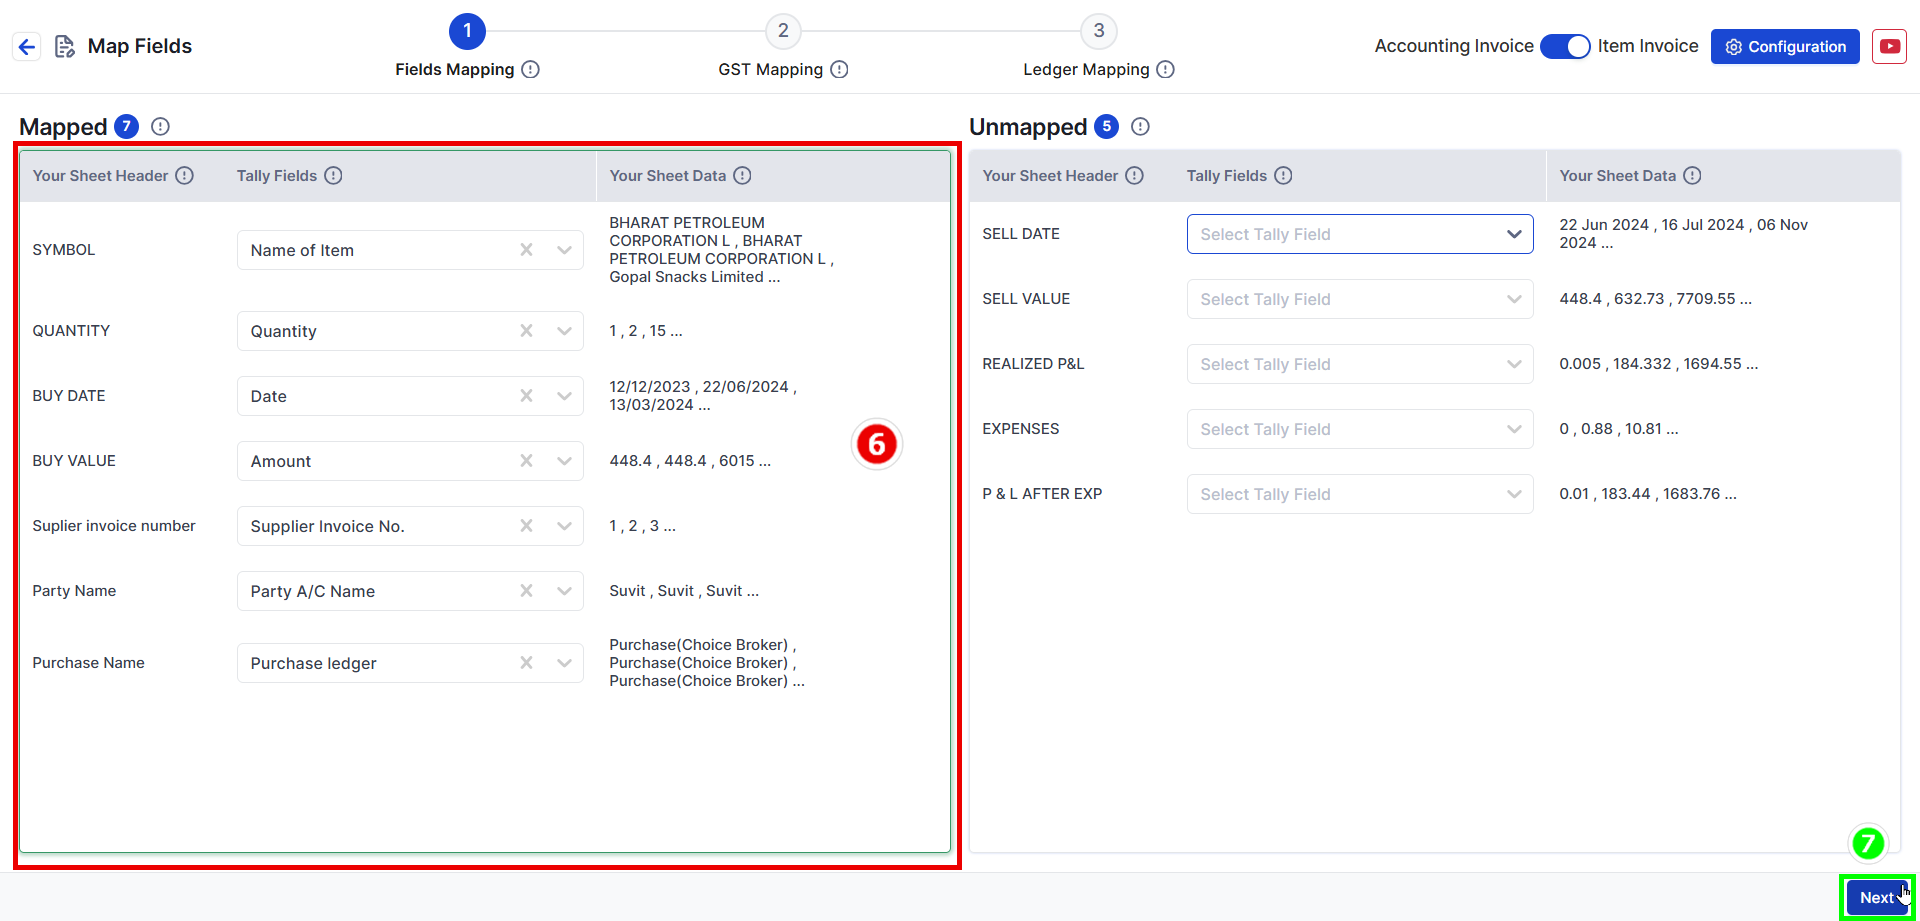
Here is the formatted table based on Choice broker data:
| Excel Sheet Heading | Mapped Column in Suvit |
| SYMBOL | Name of Item |
| QUANTITY | Quantity |
| BUY DATE | Date |
| BUY VALUE | Amount |
| Suplier invoice number | Supplier Invoice No. |
| Party Name | Party A/C Name |
| Purchase Name | Purchase Ledger |
- This table correctly maps the given fields to Suvit’s column structure while maintaining the format.
Step 6- GST Mapping
✅ No changes required : Changes can be done if required.
- Here we have taken Default Settings
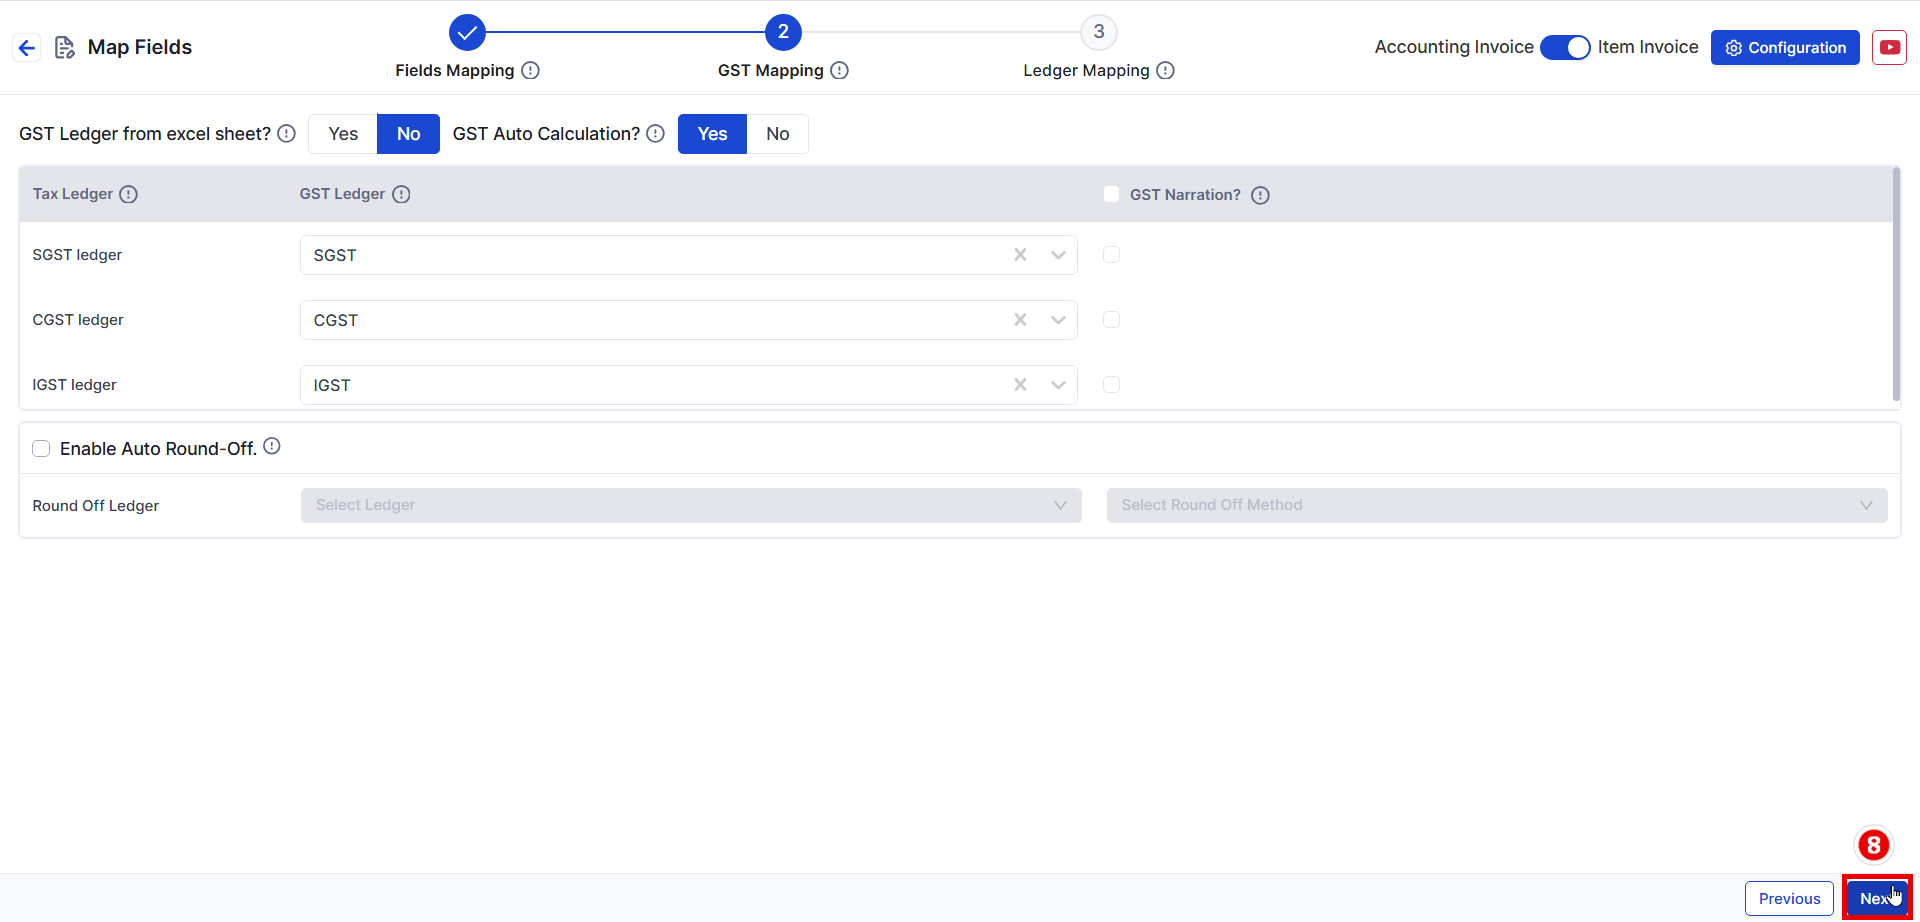
- Duties and Taxes are mandatory to map
- Click Next
Step 7 - Ledger Mapping
-
Map other charges such as Stamp Duty, Brokerage Charges, Expenses etc., if required.
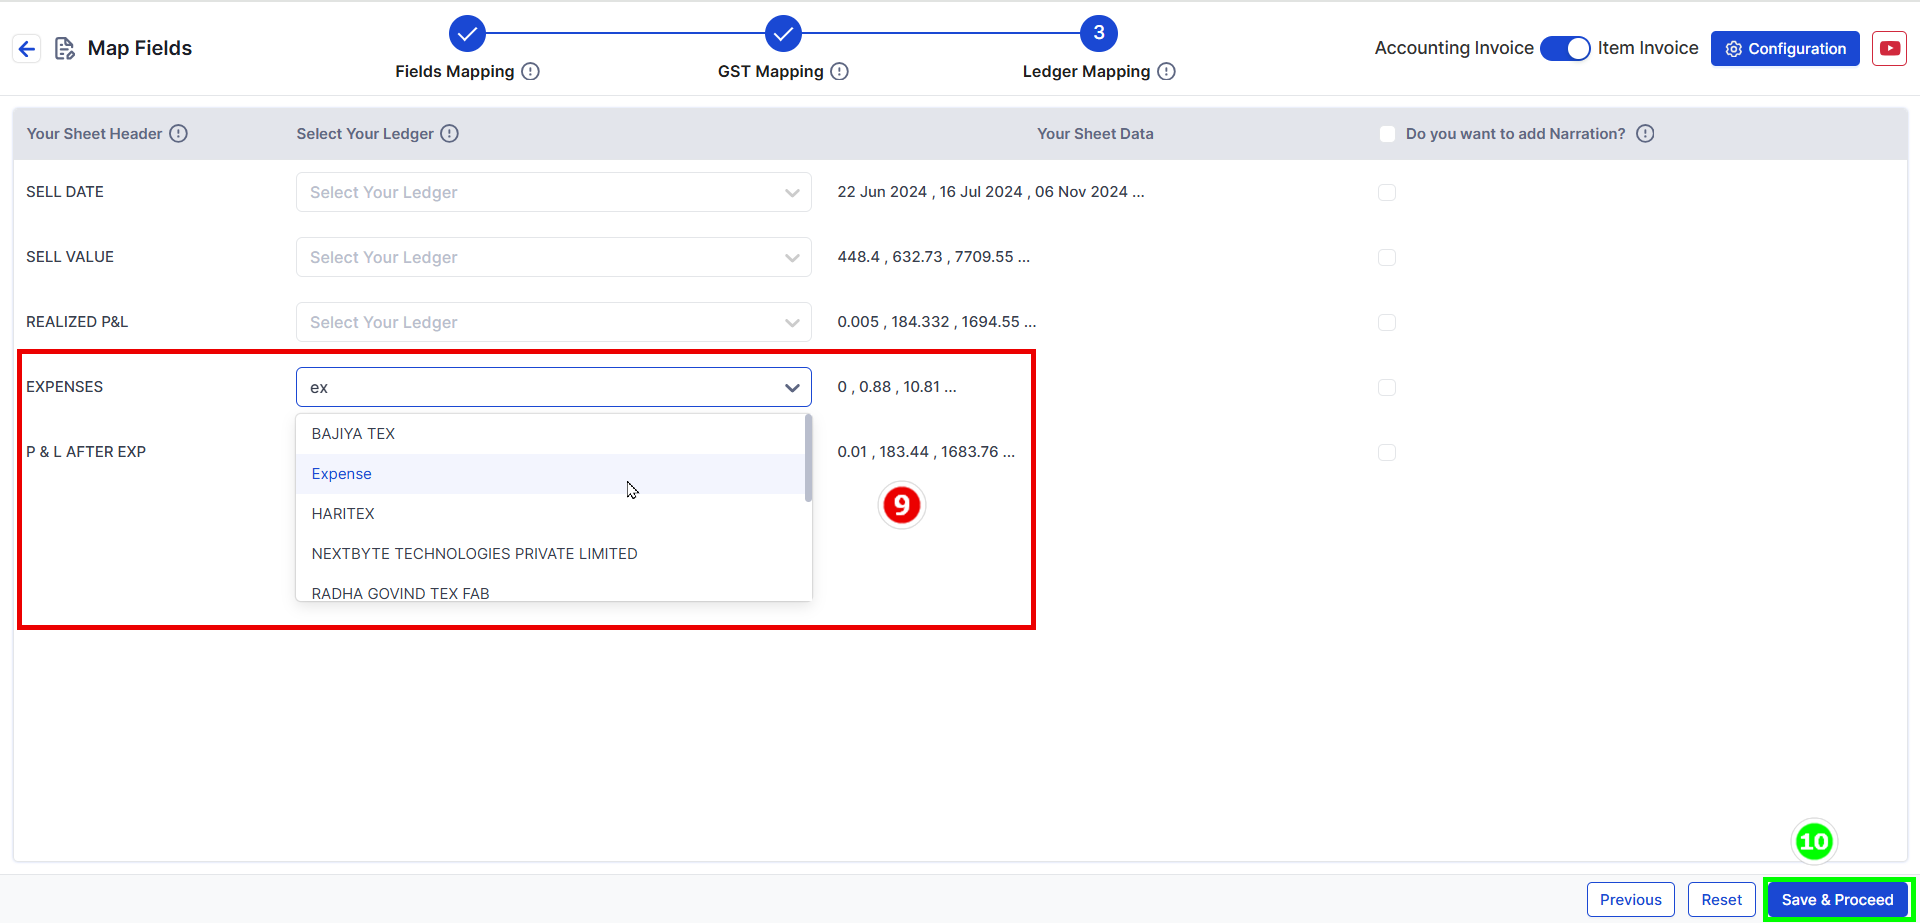
-
Use dropdown -> Search & Select desired ledger name
-
Click Save & Proceed.
Similar method can be used for Sales Entry
📚 What's Next?