Learn to process purchase Excel sheets with horizontal GST rates and map SGST, CGST, IGST fields for smooth Suvit upload and seamless Tally integration.
 A. If you have a purchase excel sheet which looks like the image above, in which GST TAX Rate is given horizontally or in a row.

**Some other data should be in the Excel Sheet**
Note: In this sheet you have to map **Smallest Taxable amount** in **Amount**
- As per this sheet we have mapped the GST Tax Rate 5
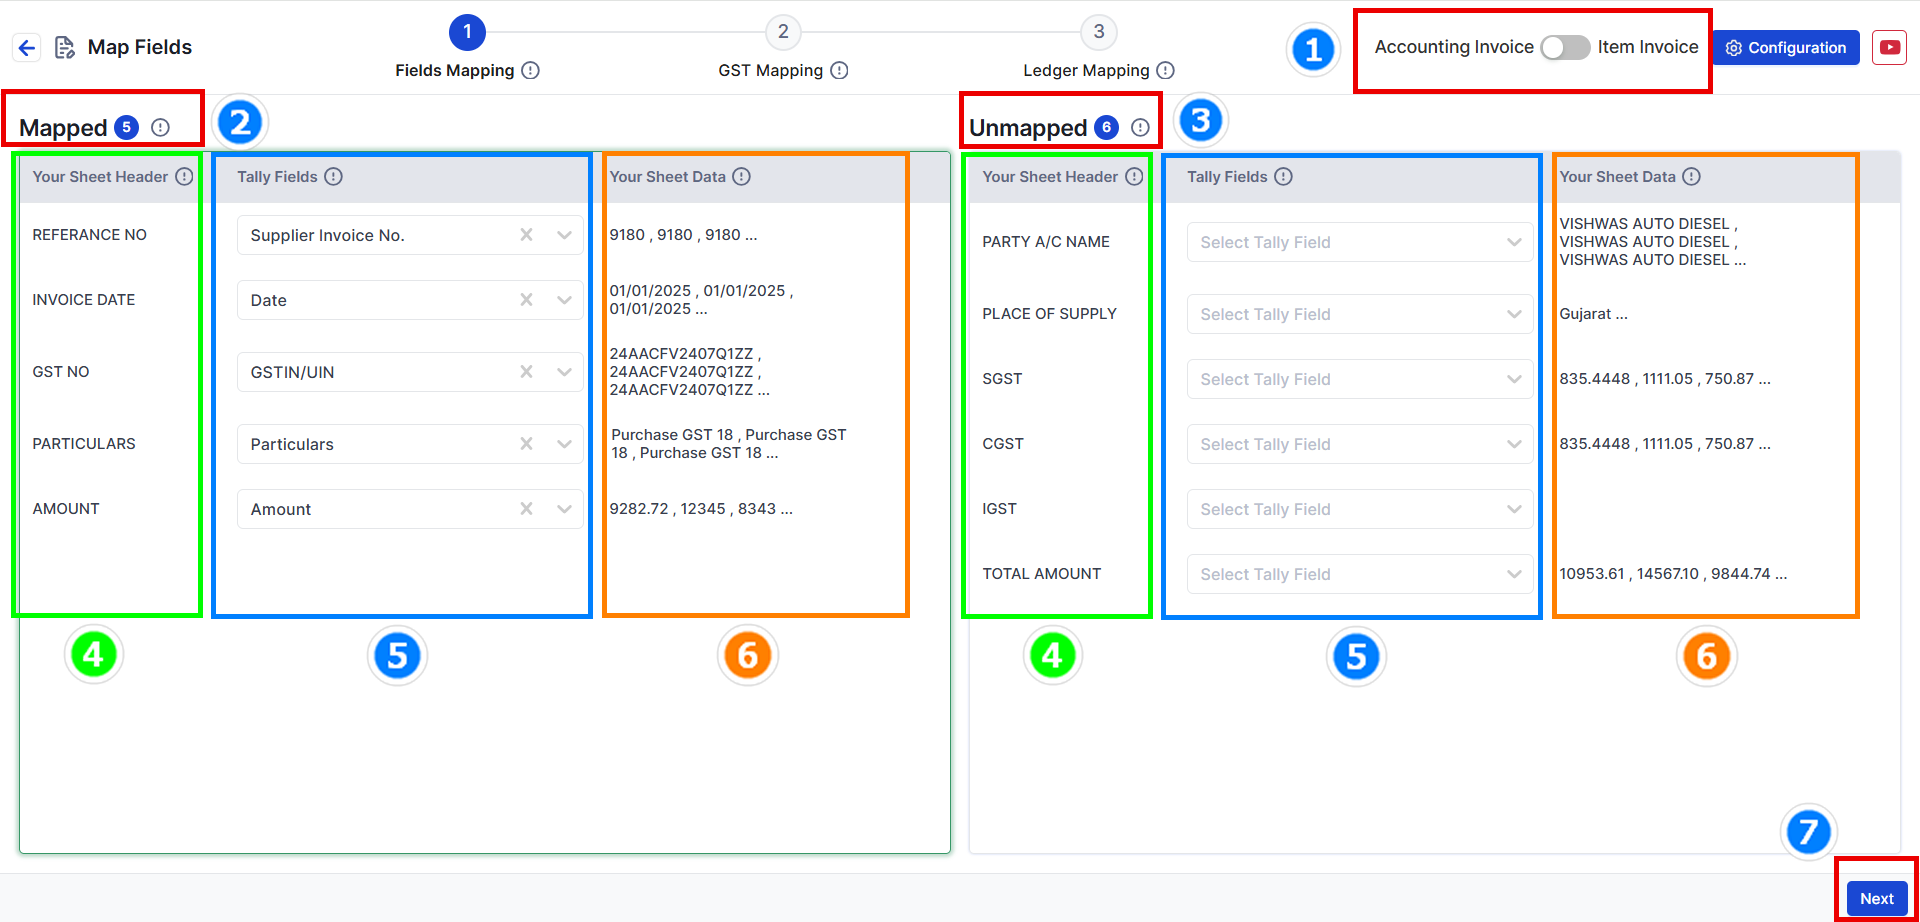
1. Choose your data type: Decide if your data has items or no items.
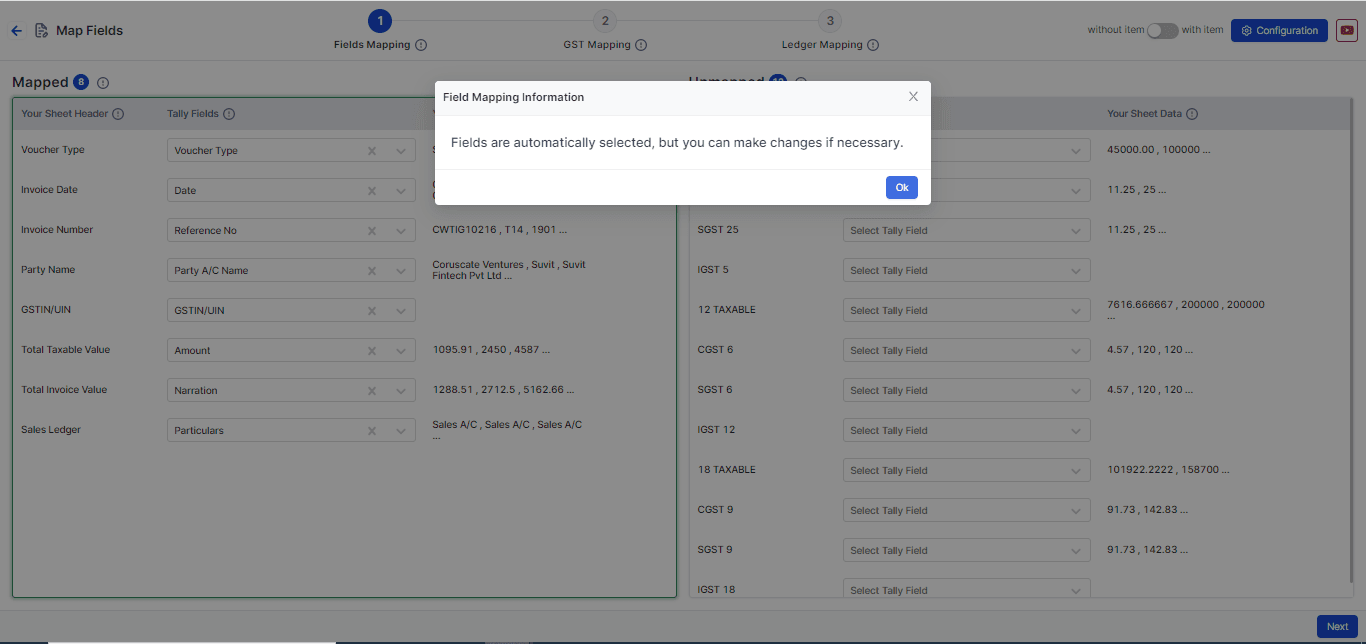
2. Mapped Fields: These are fields that the system has matched automatically from your uploaded data.
3. Unmapped Fields: These are fields not matched yet. You need to select the right Tally fields for them. (Not all fields need to be matched.)
4. Your Sheet Header: The headings from your Excel sheet will appear here. This helps you understand the data easily.
5. Tally Fields: These are fields matched with Tally filed. You can change them if needed.
6. Your Sheet Data: Shows the top 3 values from your Excel sheet to help you cross-check the data.
7. Press Next to go to the GST Mapping step.
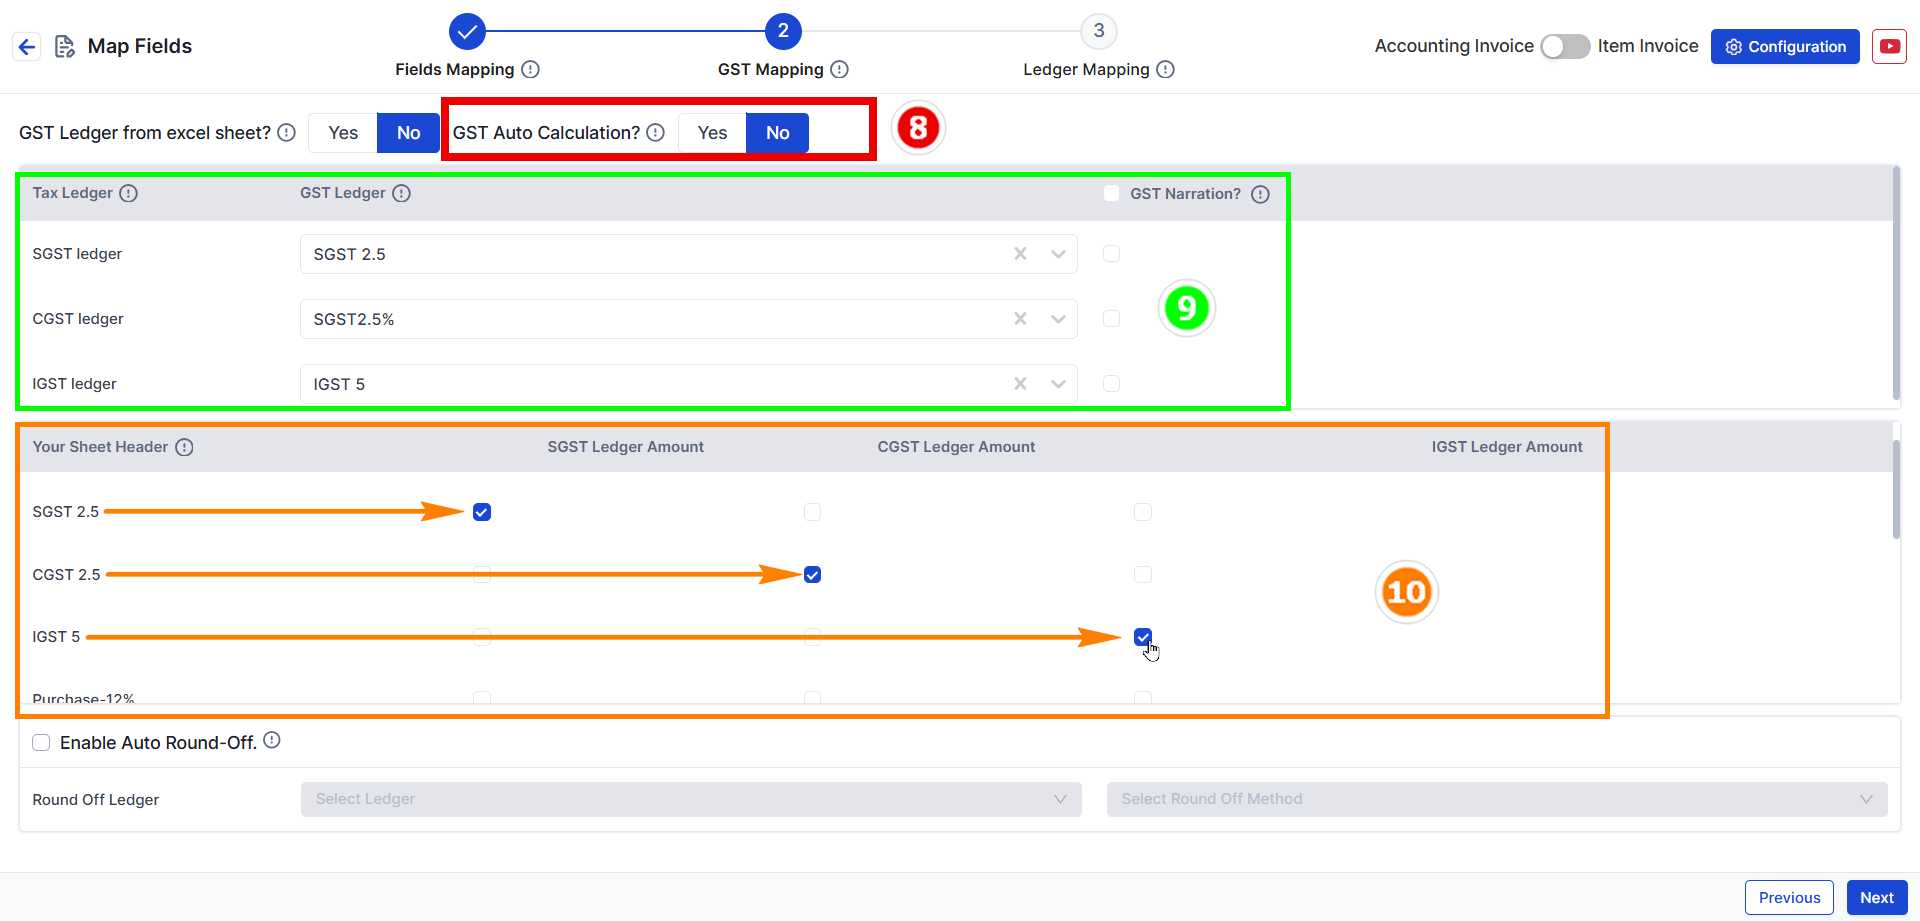
8. Change GST Auto Calculation settings to No 9. Select SGST Ledger name in front of SGST, similarly for CGST & IGST as shown in the above image.
10. Duties & Taxes: You can select common Duties & Taxes ledger.
**Note**: SGST, CGST, and IGST Tax Ledgers are mandatory fields that must be mapped. You can also map the round-off ledger from the below option.
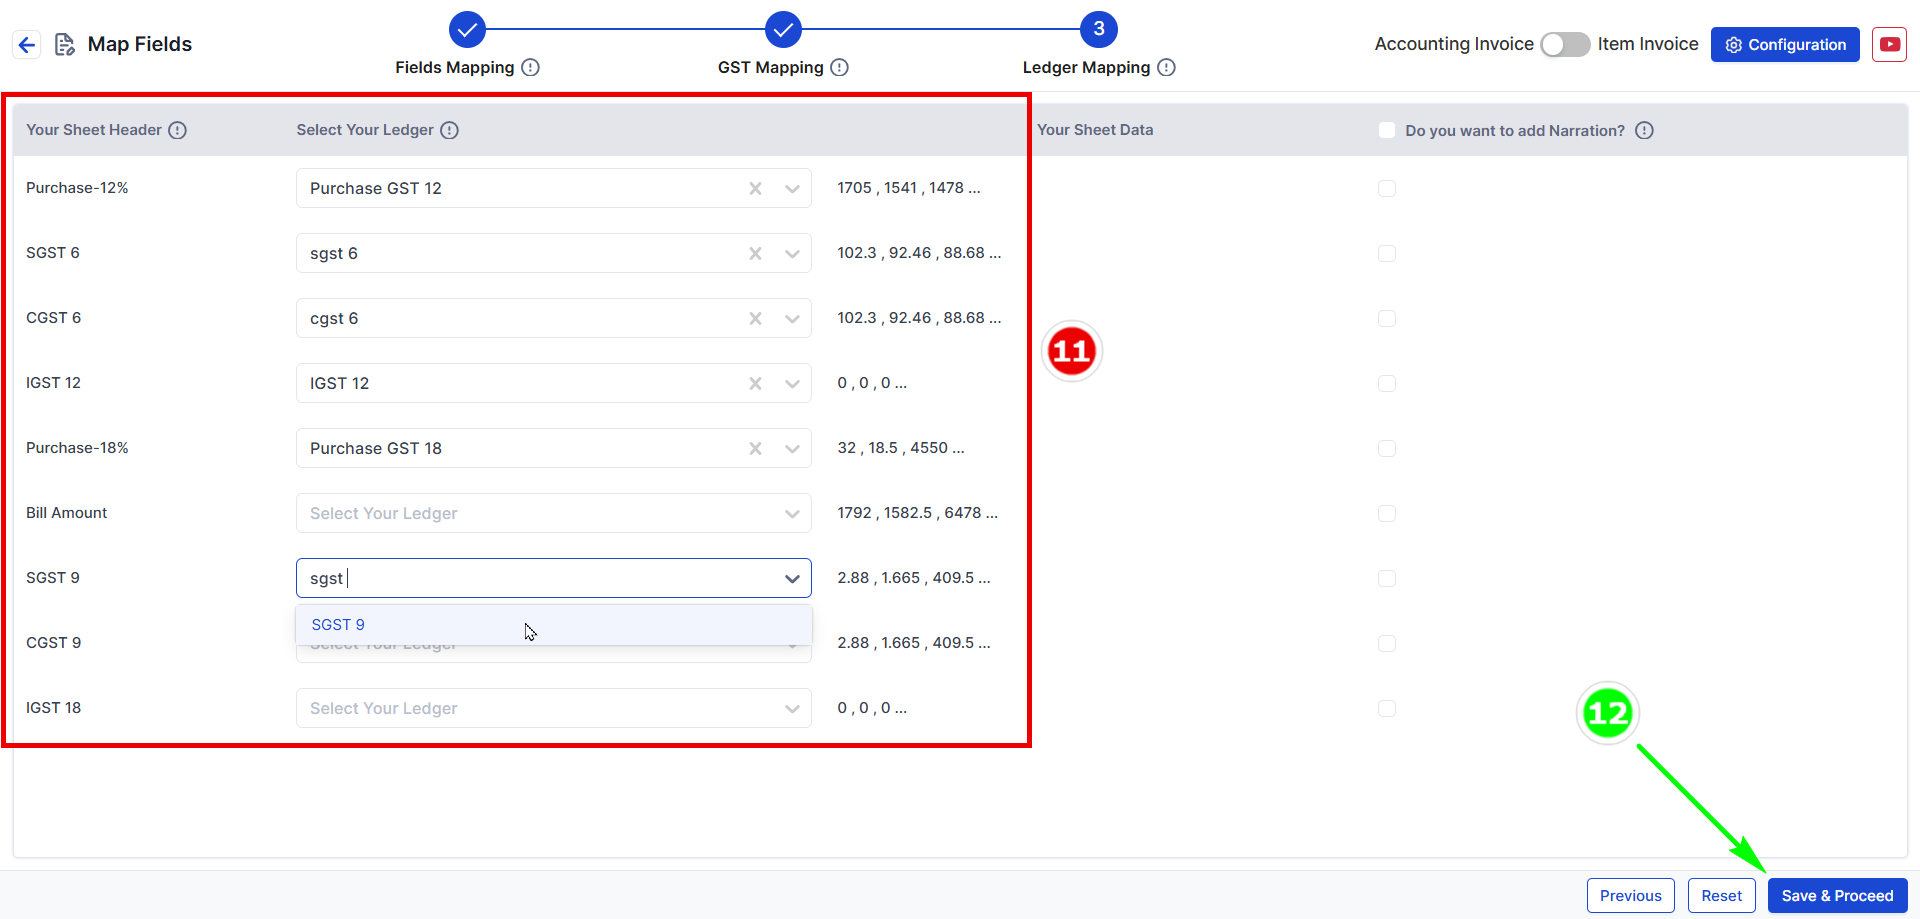
11. Select remaining TAXABLE AMOUNT in increasing order (small to big).
12. Click Save & Proceed to move to the process screen.