Learn how to process the Zerodha (tradebook) Stock/Share Excel purchase sheet in Suvit, including Sheet Preparation, Uploading to Suvit & Mapping Data
This guide will help you format your Zerodha Purchase Excel Sheet and upload it to Suvit including mapping the Order Number and Order Date fields.
📝 Notes
Make sure there is only purchase (buy) data in excel sheet. Sales (sell) data can be removed using filter)
🗑 Delete unnecessary data from the Zerodha Excel sheet before proceeding.

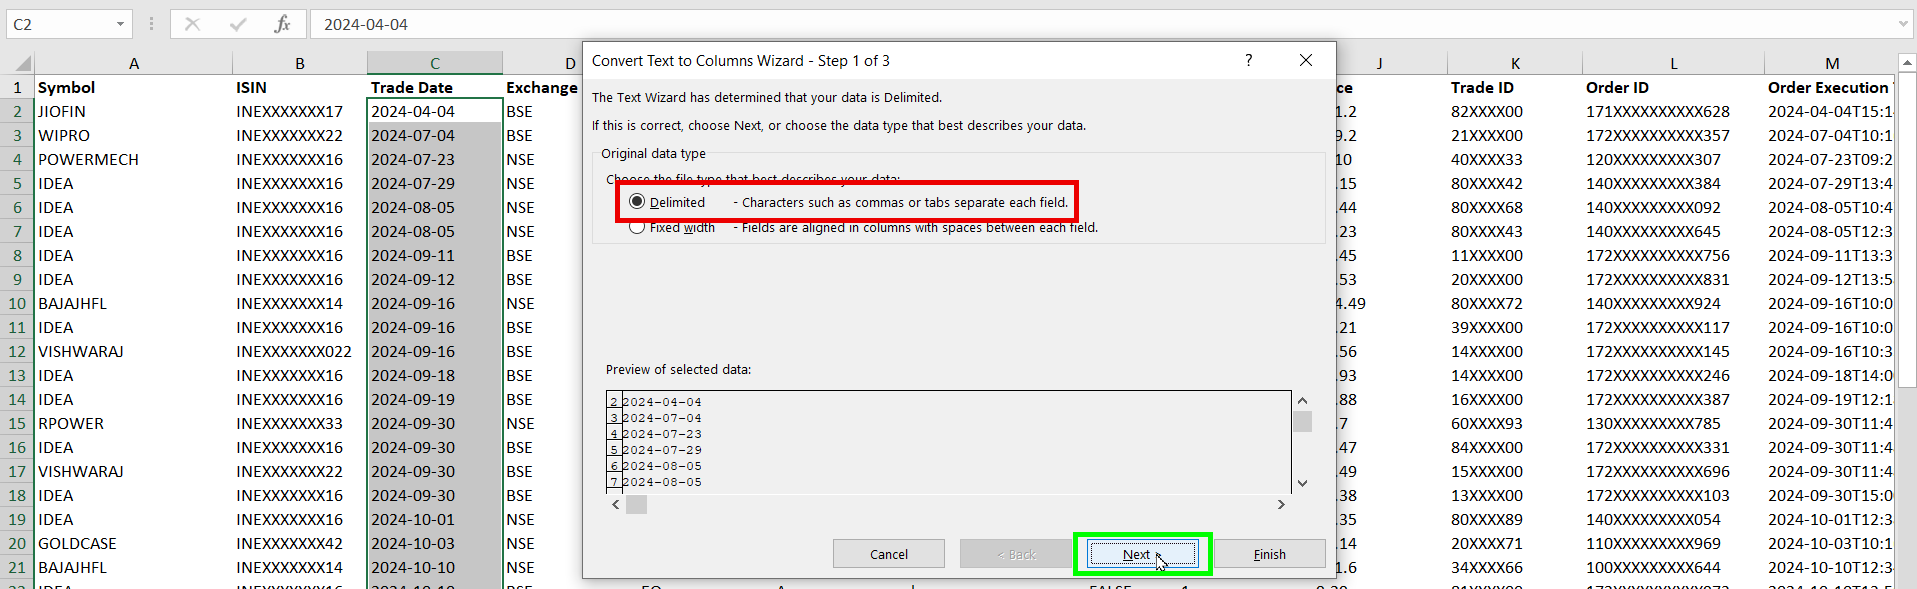
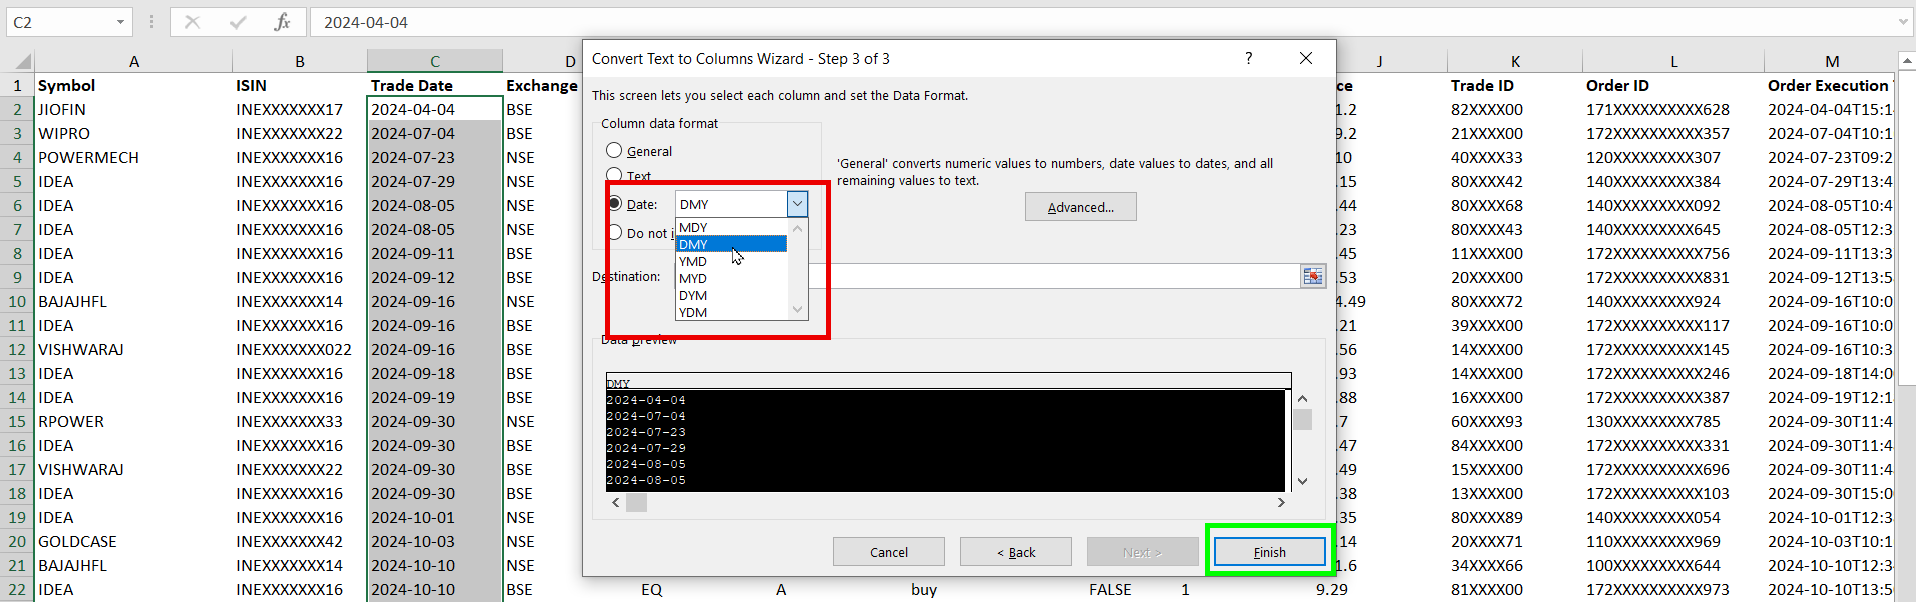
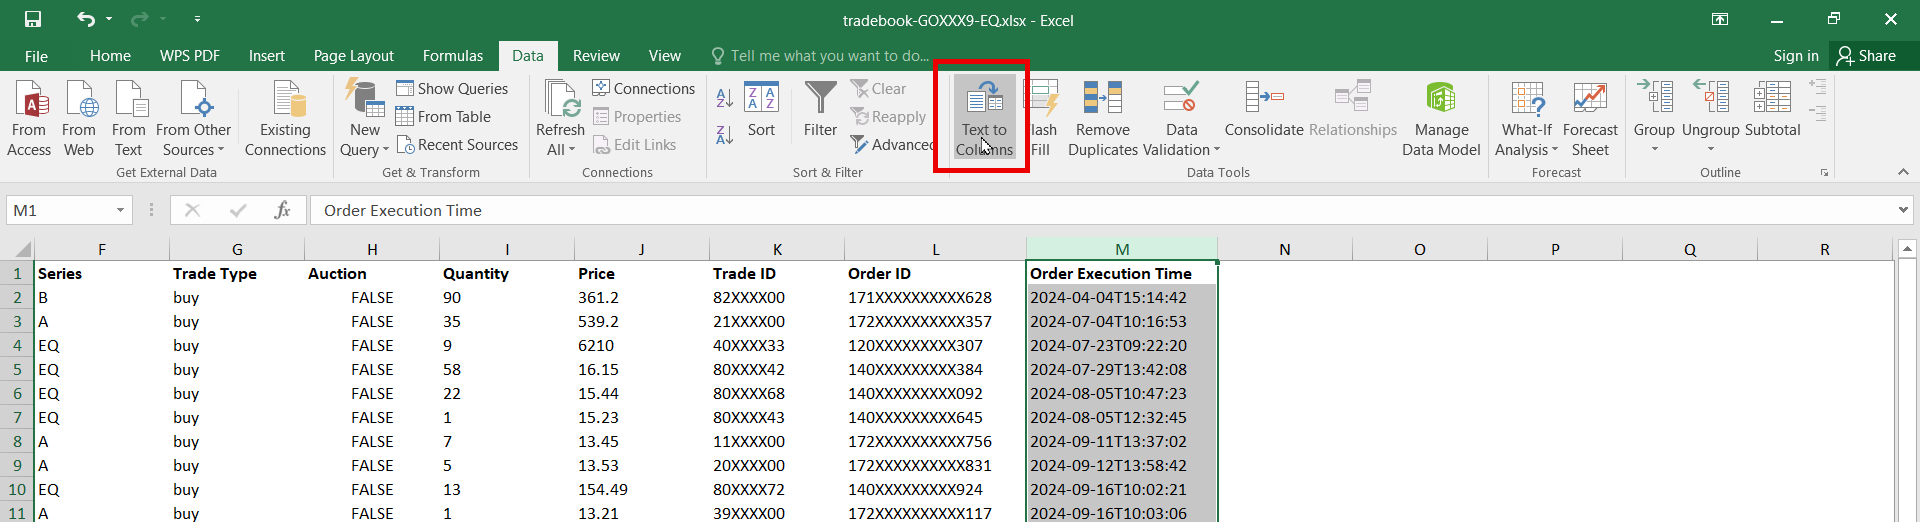
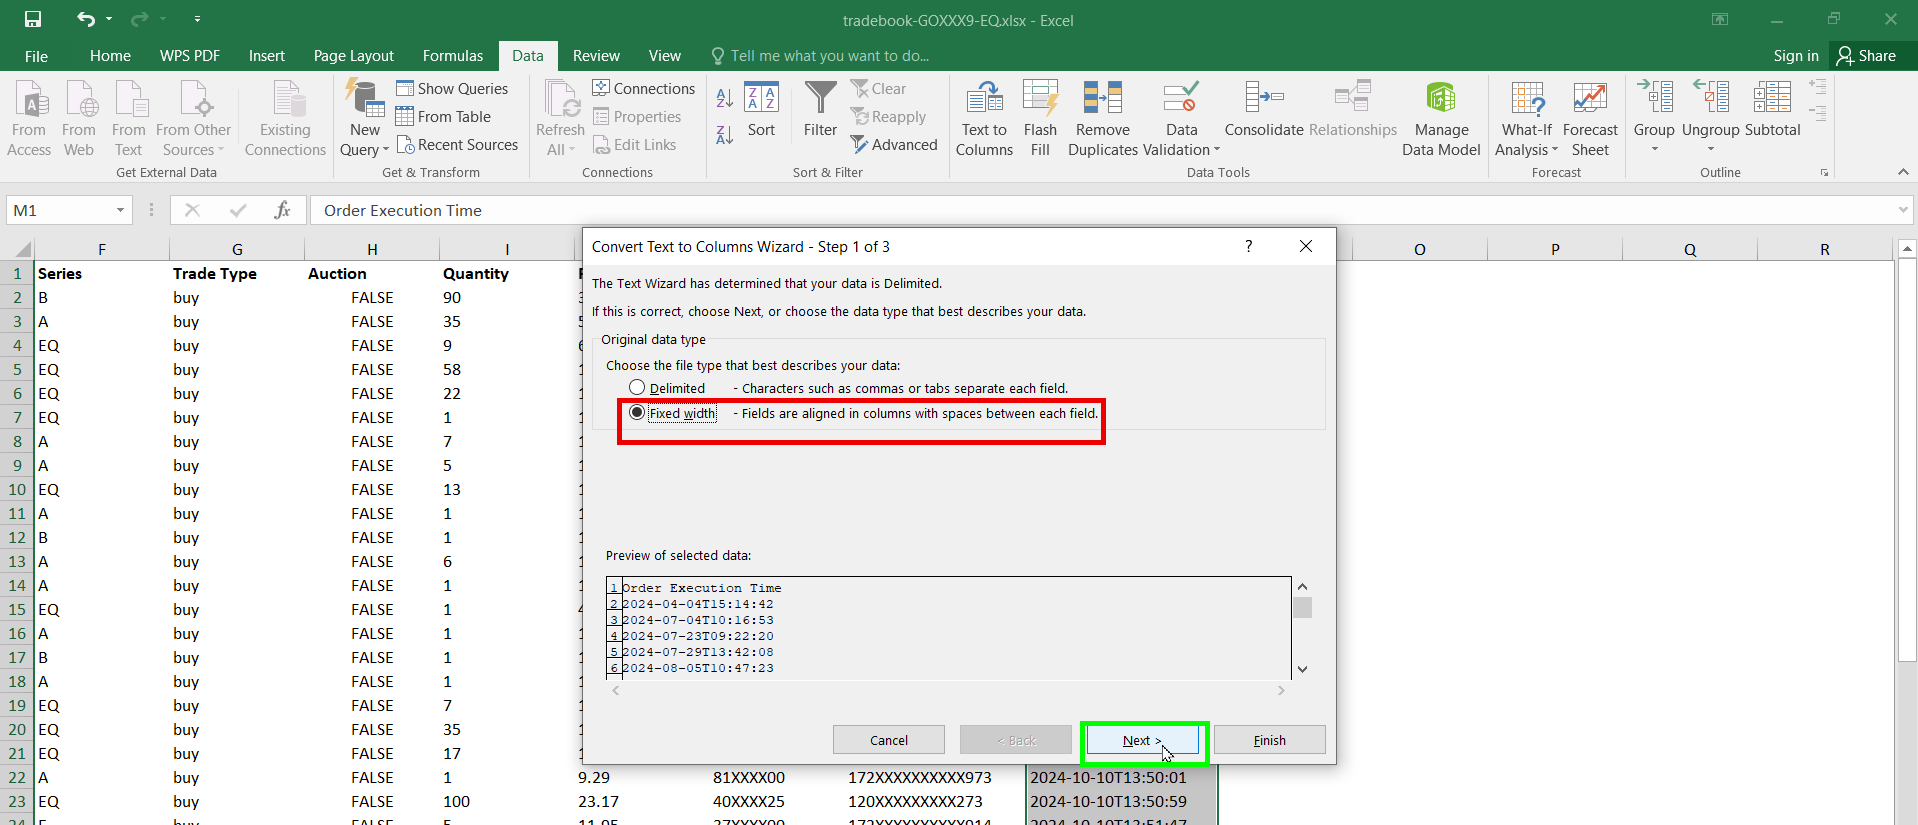
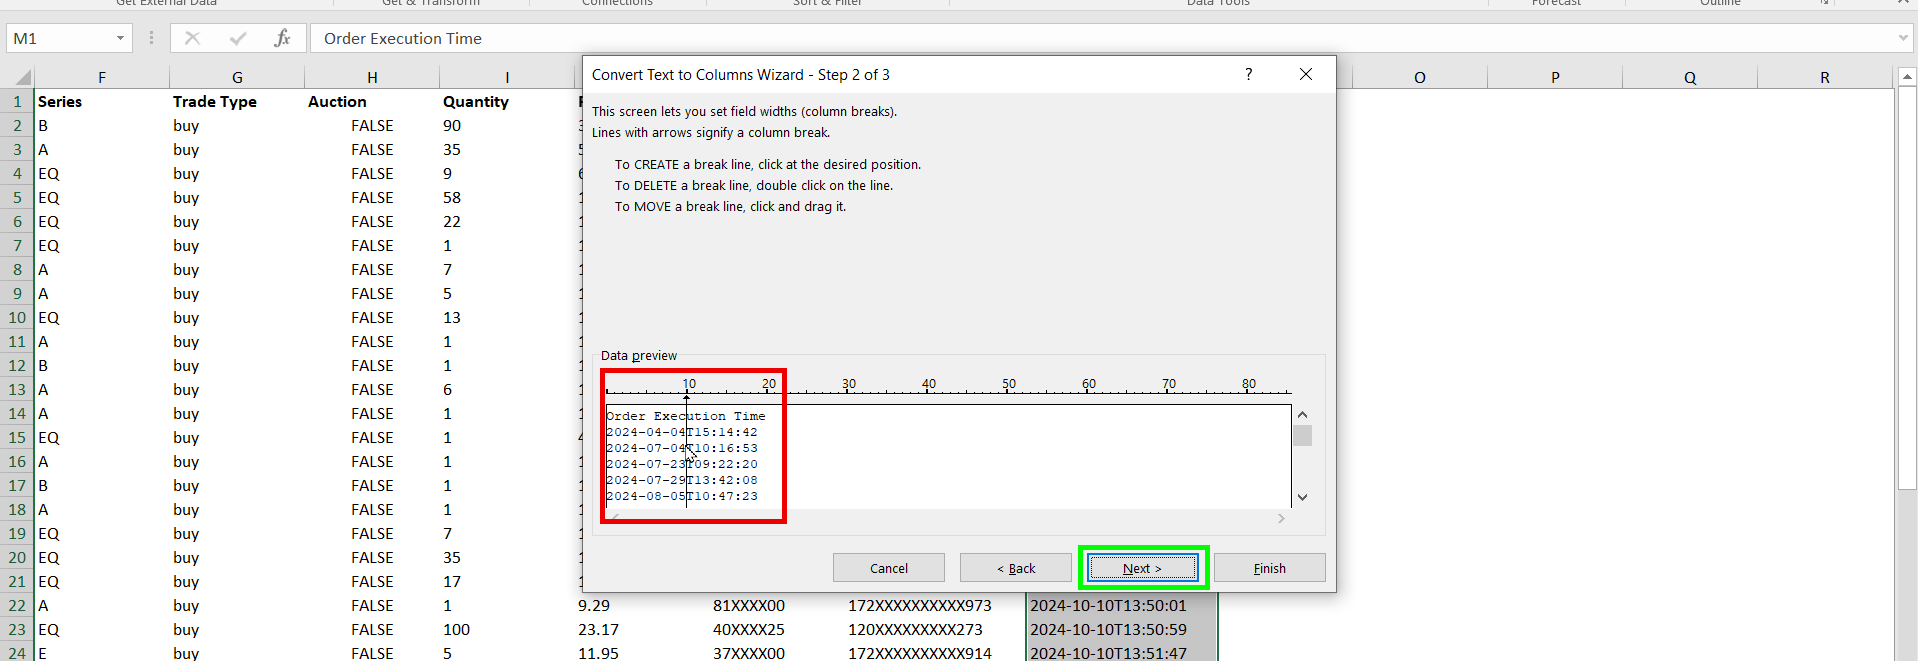
⏳ Modify the Order Execution Time Format using the steps below:
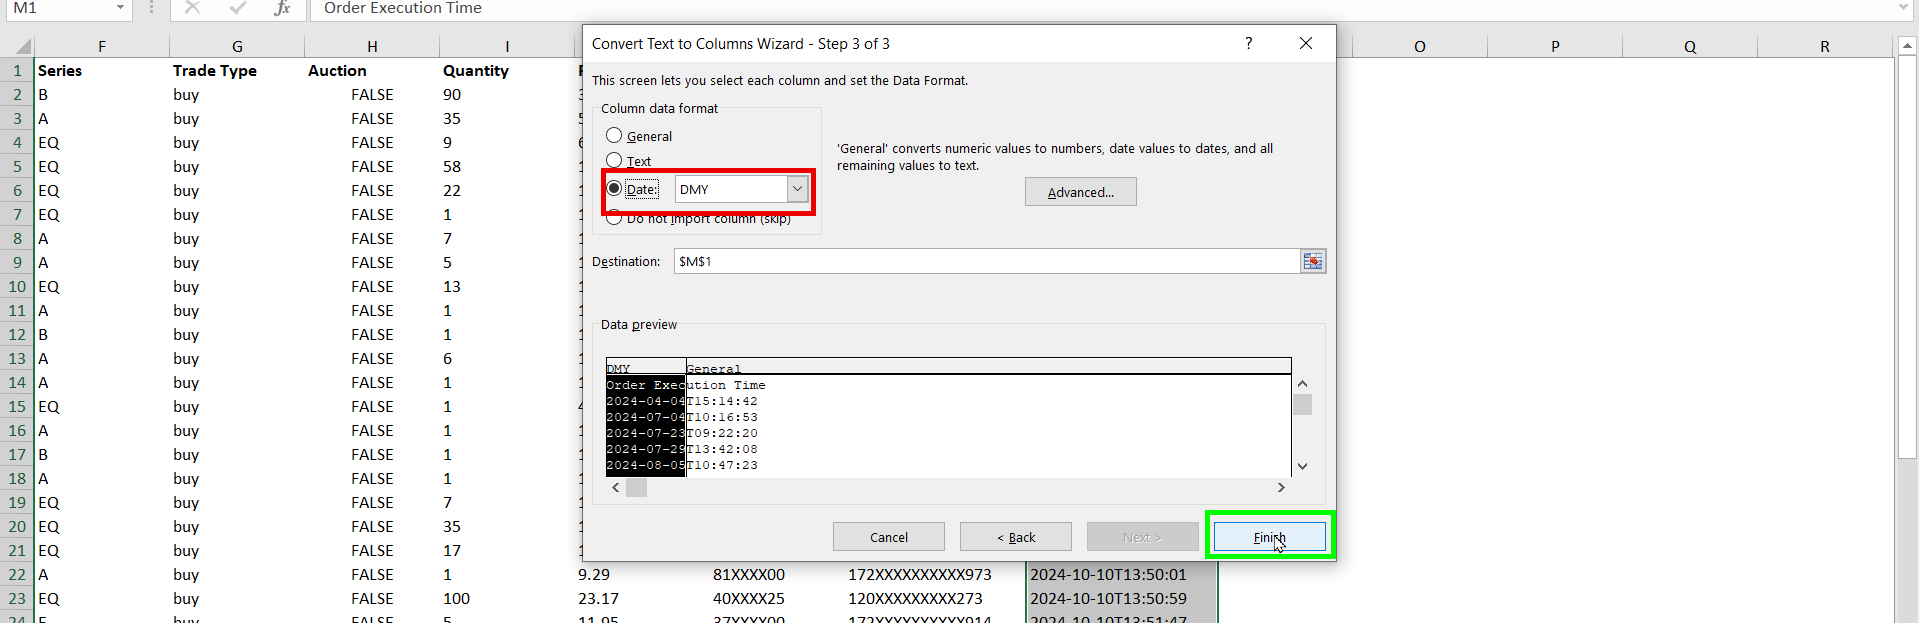
✅ Before saving, add:

💾 Save the Excel Sheet.
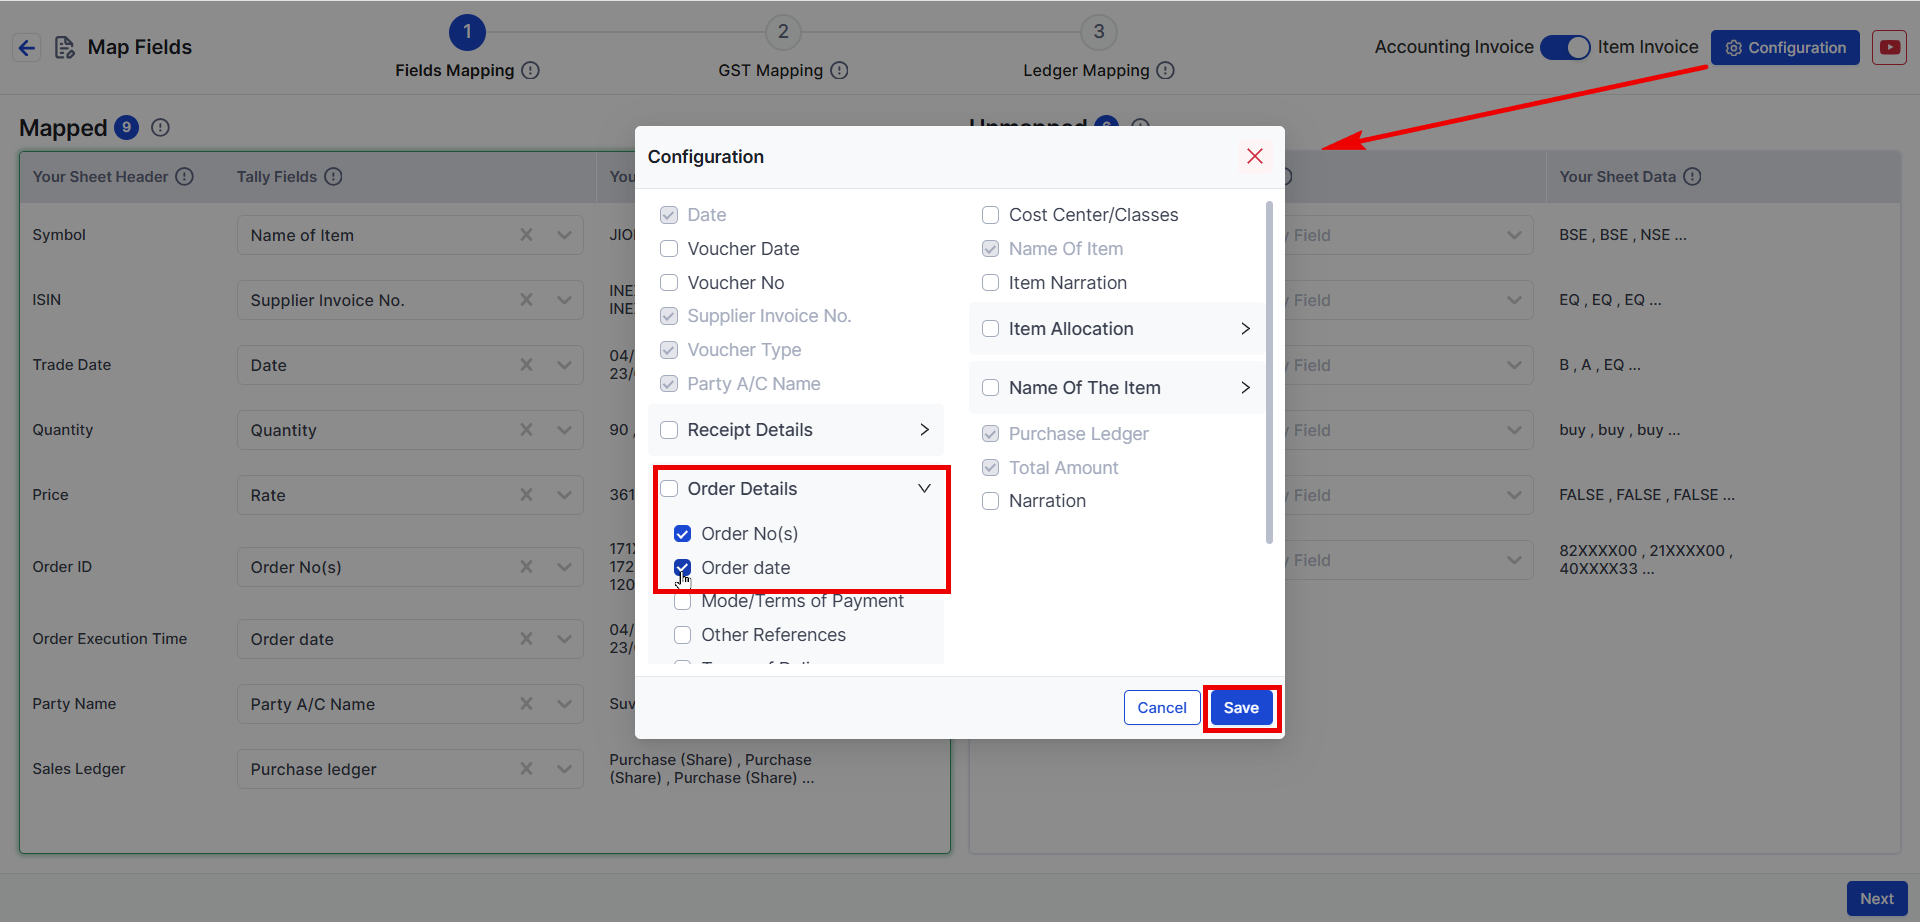
If needed, enable Order Number and Order Date under Order Details:
Open the Purchase Sheet in Suvit.
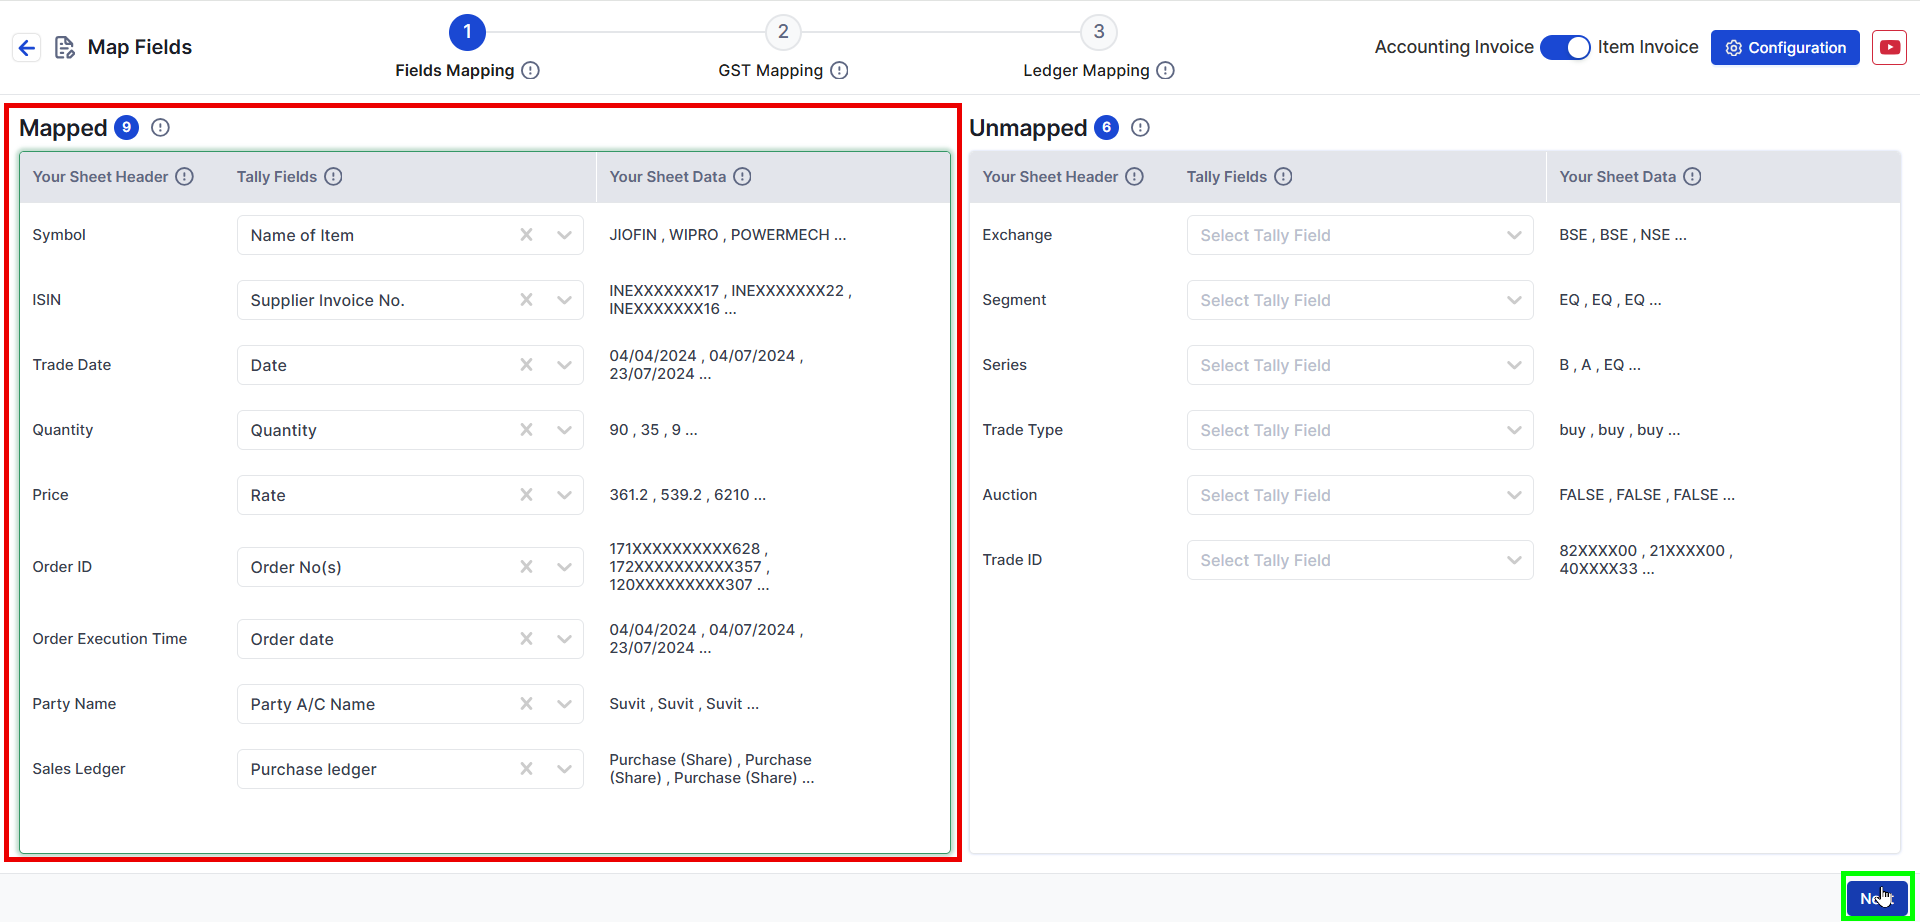
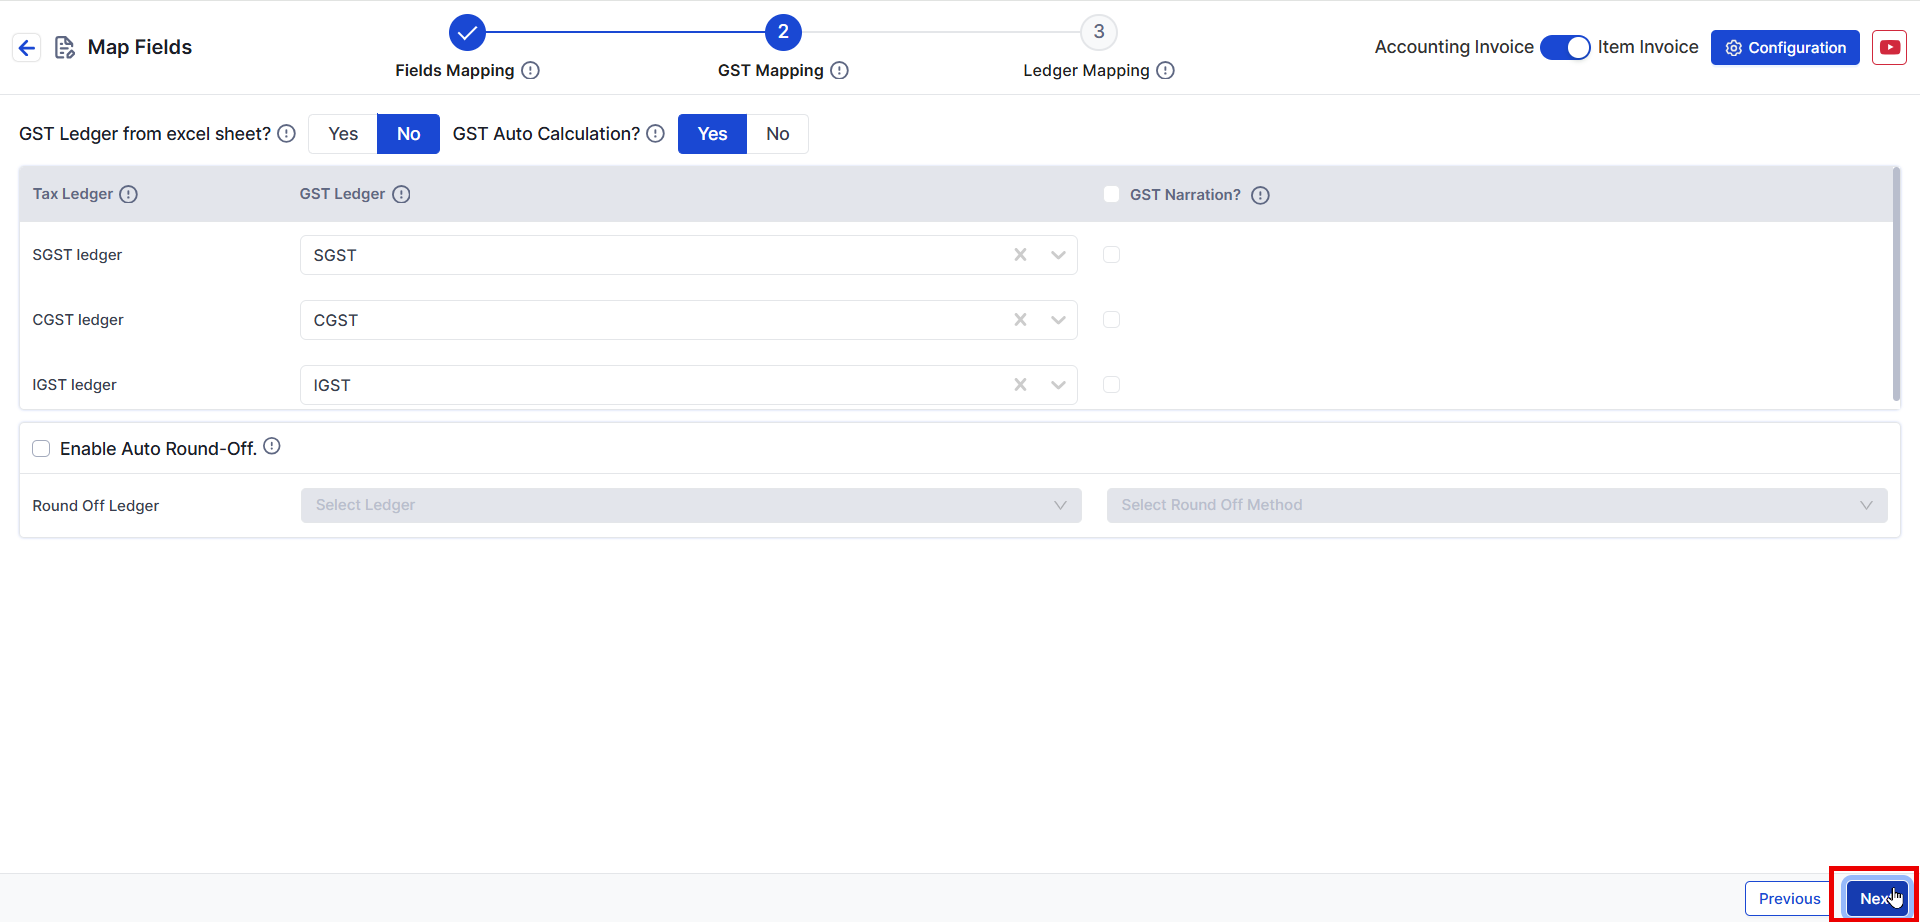
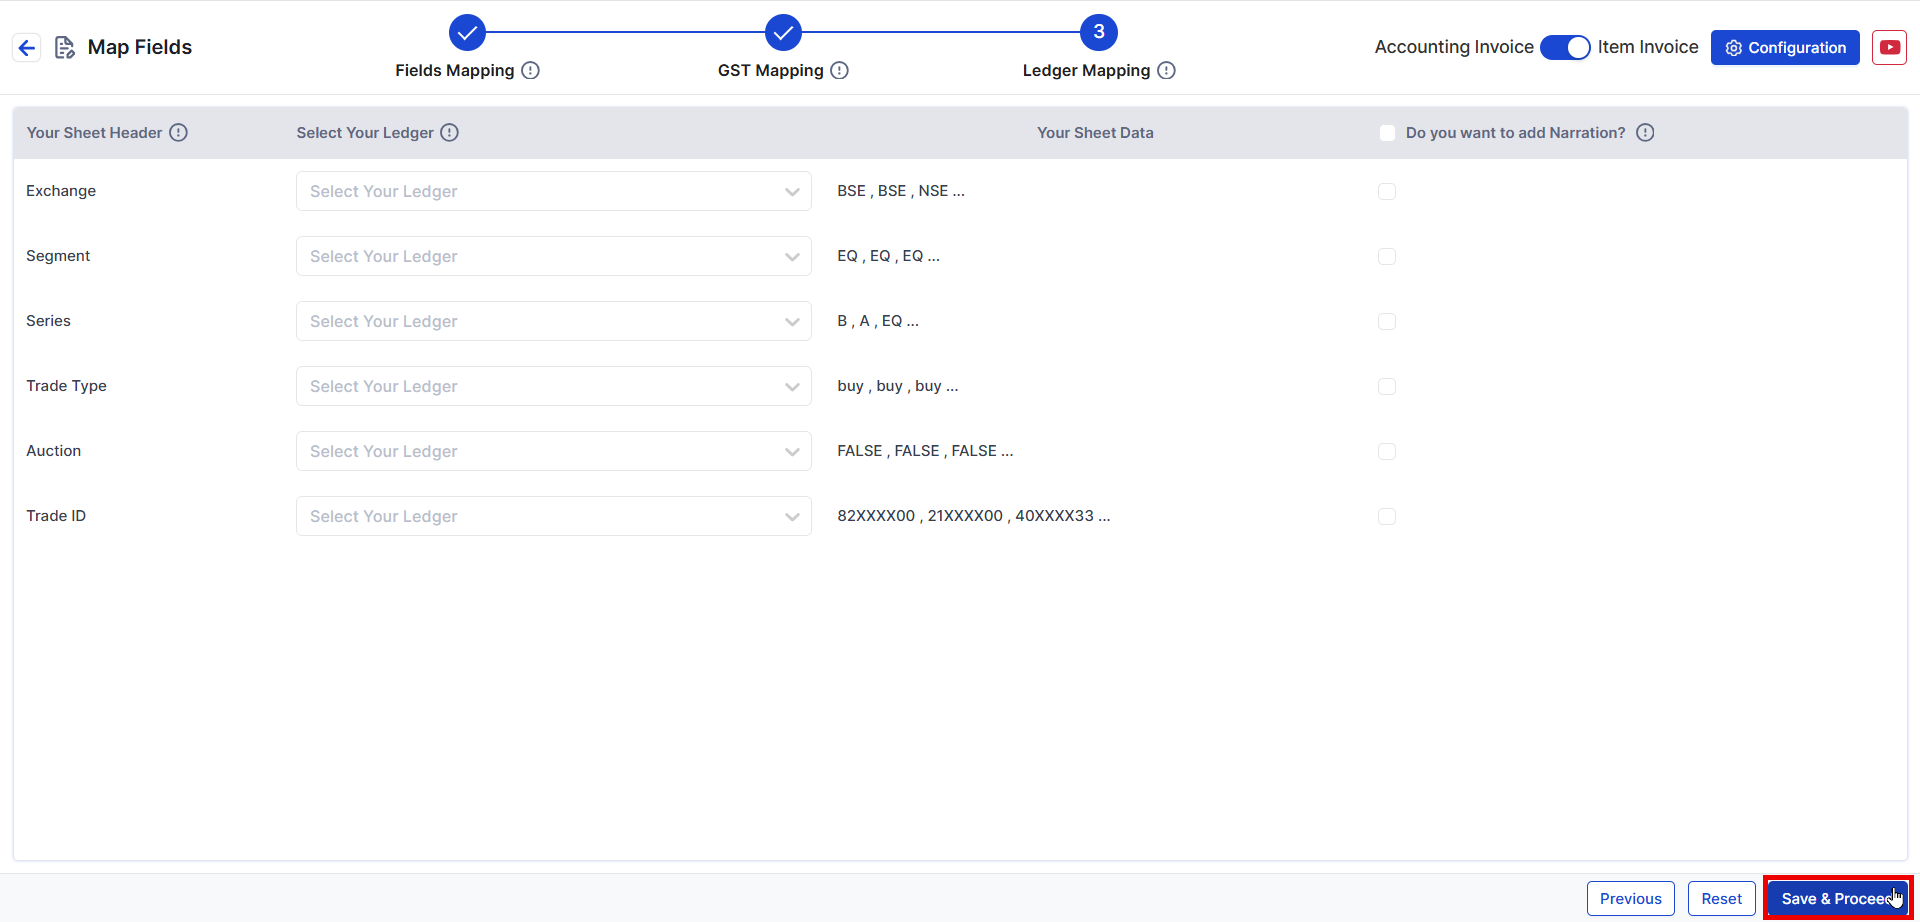
✅ No changes required Changes can be done if required. Click Next.
✅ You have successfully uploaded the Zerodha Purchase Excel Sheet with Order Number & Order Date! 🎉
How to create Stock item and Party Name
To learn more about next step: How to send data to Tally?