How to create personalized roles for users in Suvit?
You can create multiple roles with the help of role management and manage the access for your users so that they can upload the documents.
Creating personalized roles for users in Suvit
For a visual guide, watch this video:
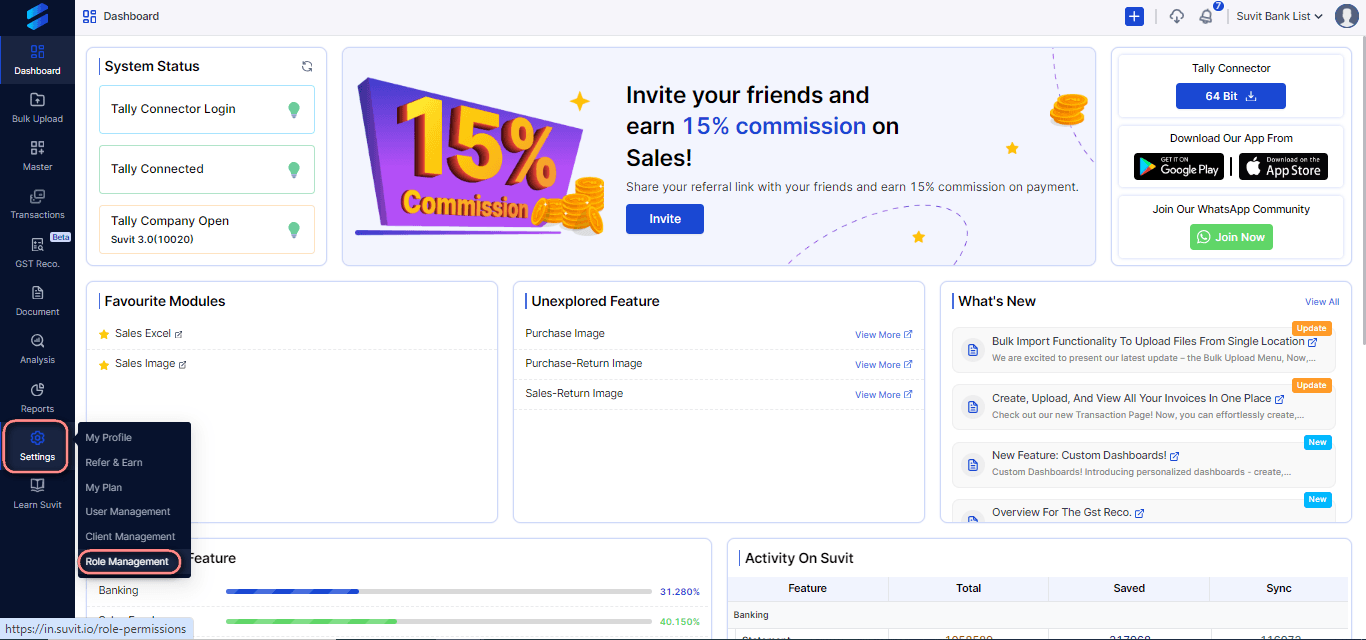
Step 1: Access role management
Sign in to Suvit using the Primary account (Main Account).
Click Role Management from the left menu.
Step 2: Create a new role
On the Role Management page, click Create New Role.
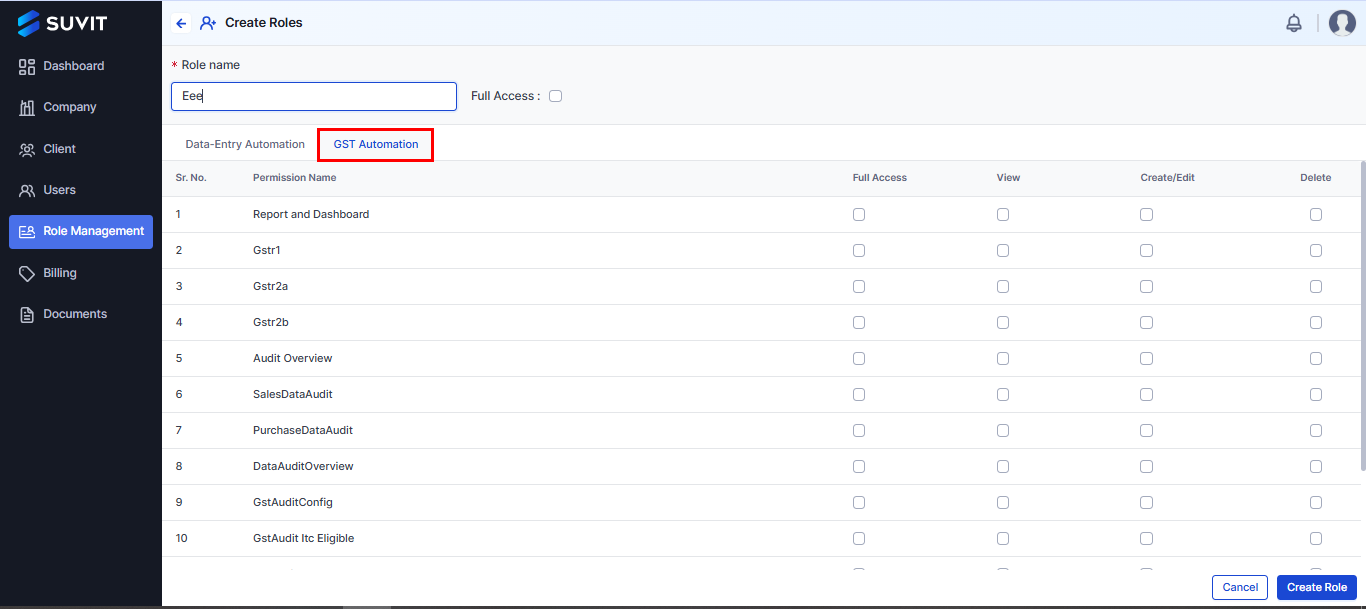
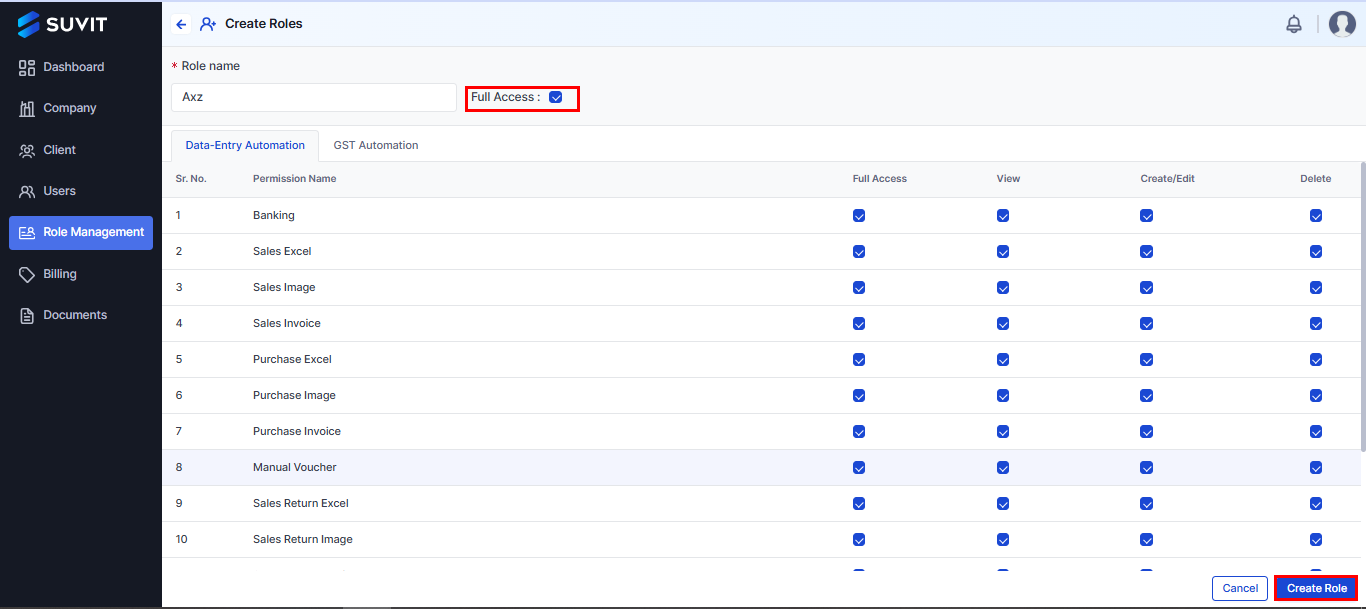
Step 3: Configure role settings
Enter a Role Name as per your needs.
Enable Full Access to grant complete control over permissions, including viewing, creating, editing, and deleting data. This also allows users to manage company subscriptions and settings.
Note: Granting full access allows users with this role to add and subscribe to companies.
Step 4: Select the role type
On the Create Roles page, choose from two role types:
Data-Entry Automation
GST Automation
Select Data-Entry Automation for data-related tasks.
Select GST Automation for GST-related processes.
After choosing the role type, click Create Role.
Step 5: Edit or delete roles
Once created, the role will appear in the Role Management list. You can edit or delete roles as needed learn how to edit a user role Click Here.
Step 6: Assign roles
After creating the role, you can assign it to your users and clients.