How to create personalized roles in Suvit?
You can create multiple roles with the help of role management and manage the modules your Users can work in.
Role Management Guide
Step 1: Go to Role Management
- Sign in to Suvit with the Primary account (Main Account)
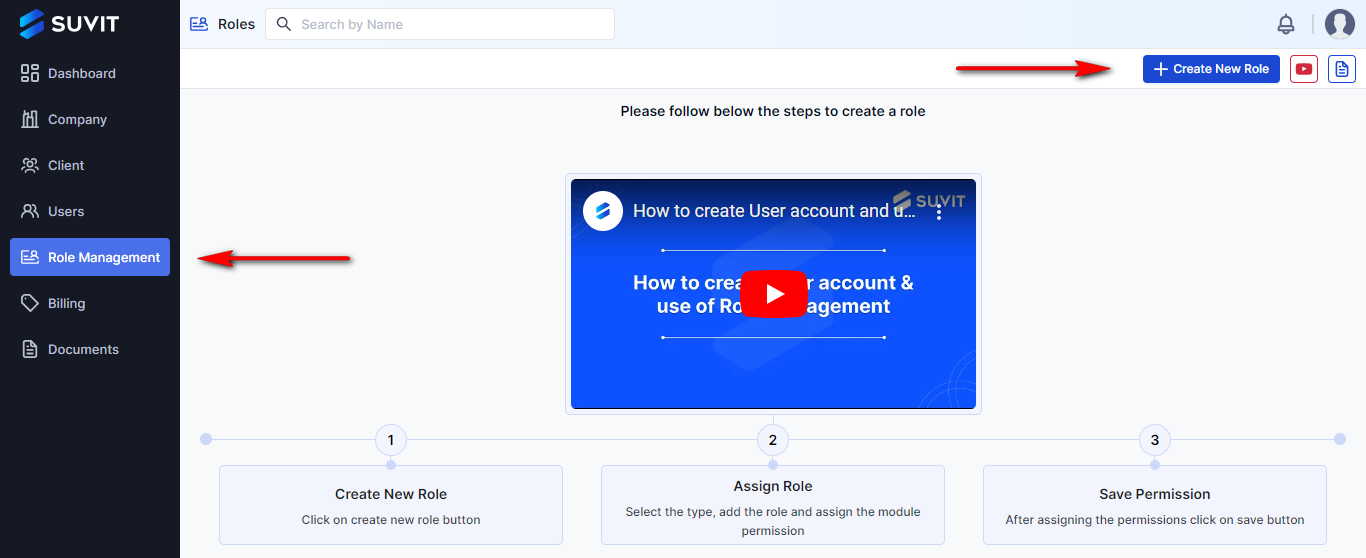
- Click on Role Management from the left menu, then click on "Create New Role".
Step 2: Create a New Role

- On the Role Management page, click on Create New Role.
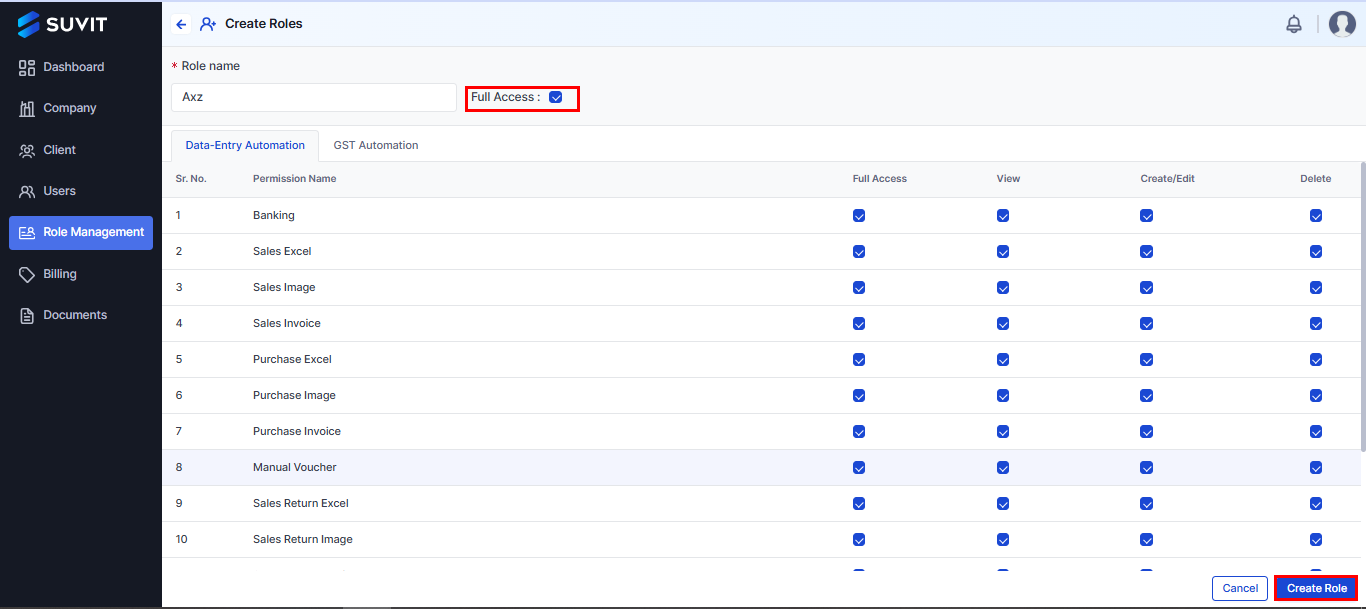
Step 3: Name the Role and Set Permissions
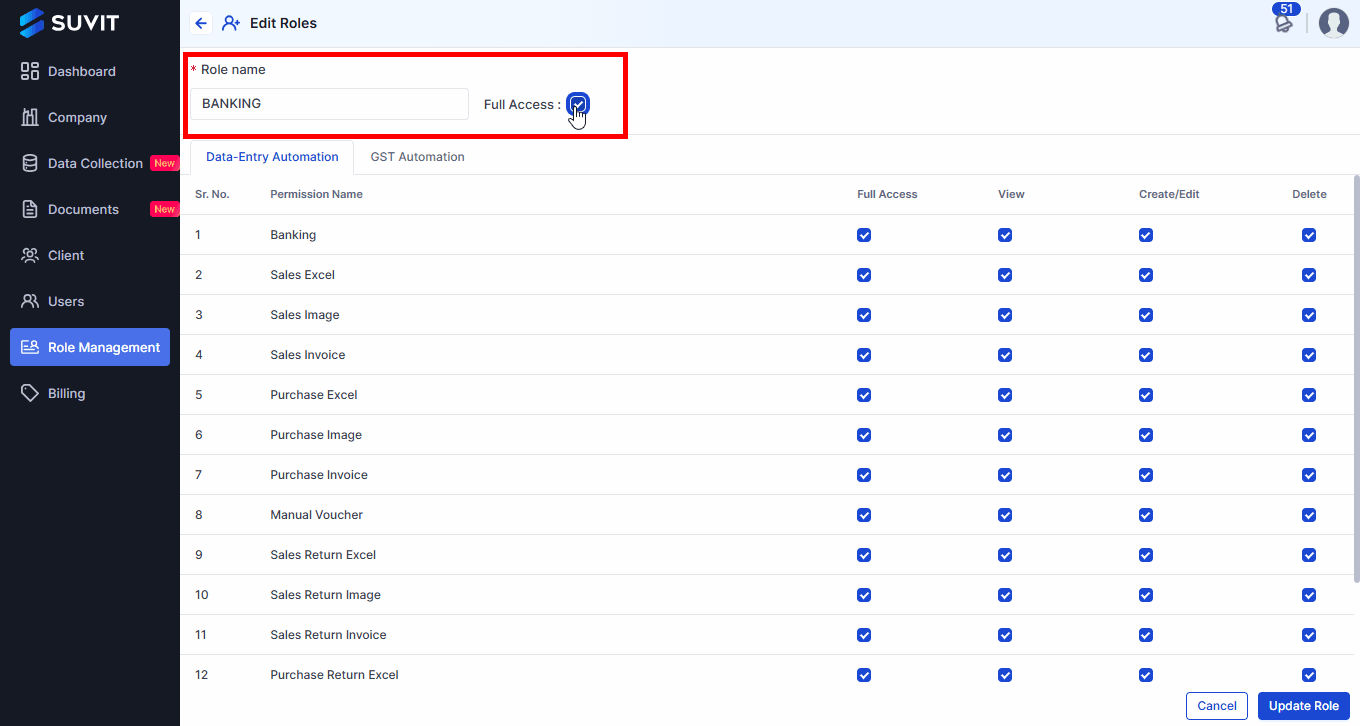
- Provide a Role Name based on your requirements.
- Enabling Full Access grants complete control over all permissions, including viewing, creating, editing, and deleting data. Users with full access can also manage company subscriptions and settings without restrictions.
**Note**: If you give full access using this option, the user who gets this role can add and subscribe to companies.
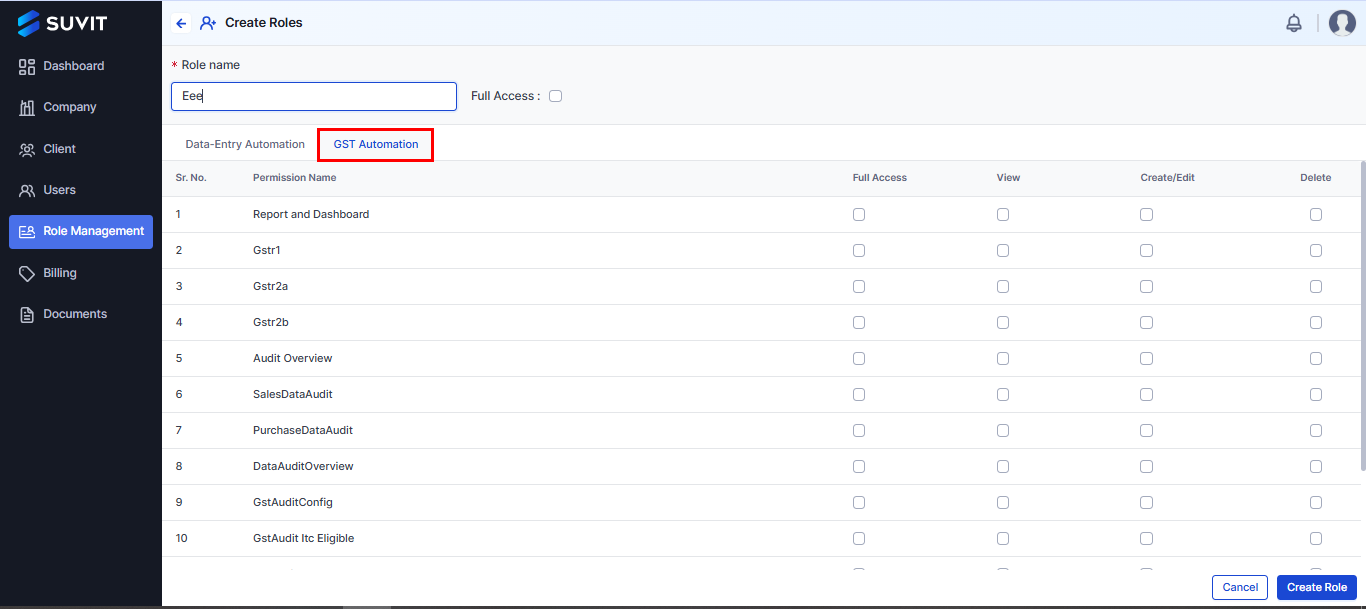
Step 4: Select the Role Type
- On the Create Roles page, you will have two default role types:
- Data-Entry Automation
- GST Automation
Select the role type based on your requirement:
- For Data-Entry Automation, select the Data-Entry Automation role.
- For GST Automation, select the GST Automation role.
- Choose the Role Type and click Create Role .
Step 5: Role Created Successfully
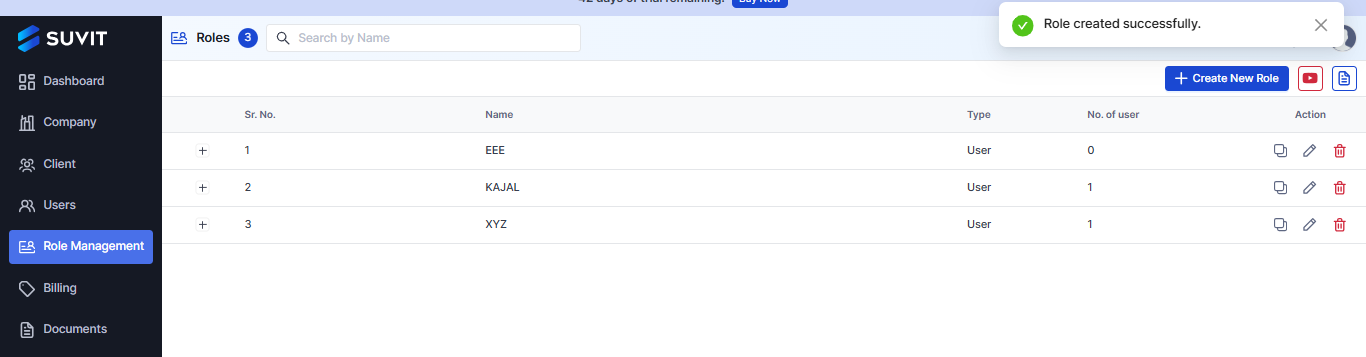
- Click "Create Role". Upon successful creation, a confirmation message will appear "Role Created Successfully".
Step 6: Assign Roles to Users
- Now you are ready to assign Roles to your Users.
- To learn how to add a user, Click Here.
Note: Update the user role system whenever a new feature is added to Suvit.
You may find this useful :
- How to Create a Client account in Suvit ? Learn more
- For information on how to edit the role of a user, Learn more