How to Map AJIO Sales Sheets in Suvit (with Preparation Guide)
Learn to map AJIO sales sheets in Suvit. This guide covers sheet edits, field, GST, and ledger mapping for accurate and efficient sales data integration.
### Overview
AJIO sales sheets contain specific columns that need to be mapped correctly in Suvit to ensure smooth data processing. This guide explains the step-by-step process for mapping the AJIO sales sheet.
Sheet Modification

- Ajio Sales Sheet looks like
Date Modification

- Change the Date Format into DD-MM-YYYY or DD-MMM-YYYY (27-MAY-2025)
Sales Ledger

- Add Sales Ledger Column in Excel sheet and fill the data according to Gst Rate Applicable (Sales Account Ledger)
Tally Settings
- Before uploading make sure Tally Setting is set to yes for order details
- For Sales → Alt+G (Go To) → Create Voucher → F8 (Sales) → F12 (Configure) → set Provide Dispatch, Order, and Export details to Yes.
Accounting Allocation Setup
-
1 → Enable Accounting with Inventory in Company
- Gateway of Tally → F11 → Integrate Accounts with Inventory → YES → CTRL + A to save
-
2 Enable Default Accounting Allocation in Voucher type
- Alter Voucher Type → Sales/Purchase → → F12 →Allow Setting of Default accounting allocation → Yes → CTRL + A to save
- Now in Voucher →Enable default accounting allocation → Yes → CTRL + A to save
-
3 Enable Use Inventory Allocation of Ledgers
- Alter → Ledger → Sales Account (Sales Ledger Name) → F12 → Use Inventory Allocation for Ledgers → Yes → CTRL + A to save
- Enable Inventory values are affected → Yes → CTRL + A to save
Steps to Upload AJIO Sales Sheet
- Login into Suvit→ Click on Explore Now under Data Entry Automation
- Select Sales and Click on Bulk Upload → Click on Upload File and select the AJIO sales sheet.
- Click here for detail steps.
Mapping
- Mapping in Suvit helps streamline data entry by aligning uploaded files with the required fields in Tally. By correctly mapping columns such as voucher numbers, dates, ledger names, and amounts, it ensure accurate data transfer, minimize errors, and automate repetitive tasks, making accounting faster and more efficient. 🚀
Follow the below steps for Mapping:
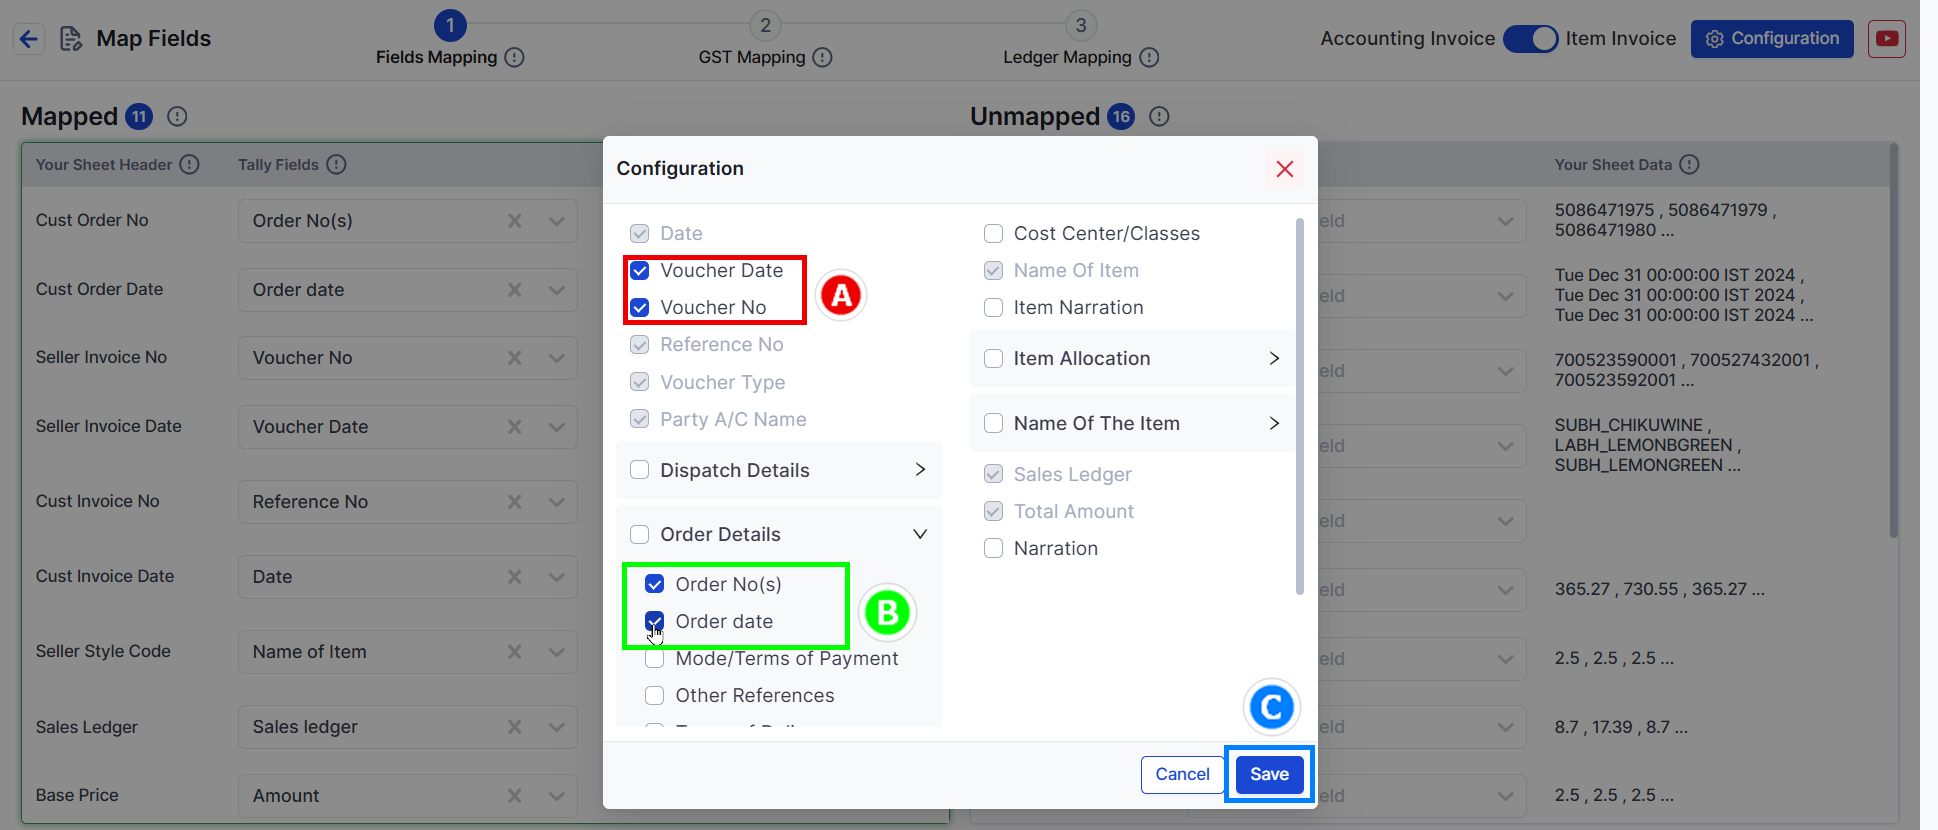
Suvit Configuration

Step 1 -> Field Mapping
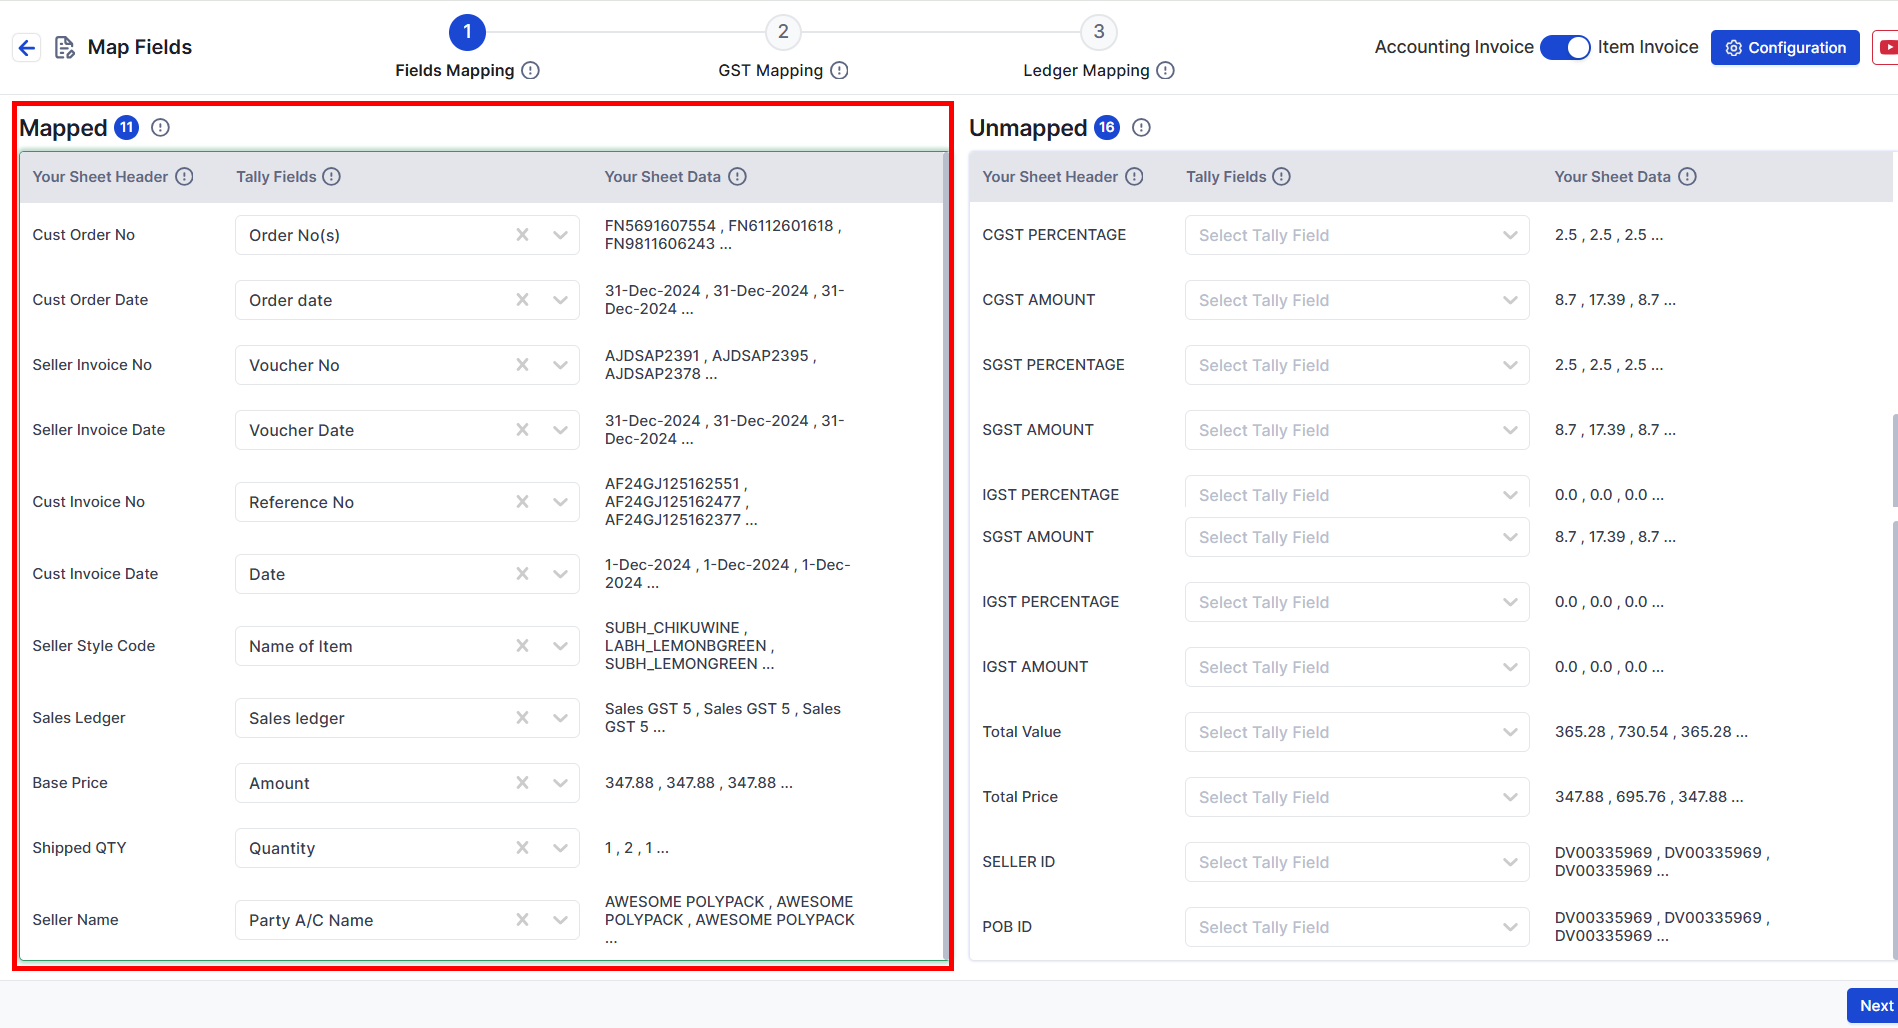
- Manually map each column according to AJIO's sales format
- If you use same heading every time system will Auto Map the Entire data
- Below is the sample data to mapp Ajio excel sheet heading in Suvit
| Ajio Sheet Heading | Mapped Column in Suvit |
| Cust Order No | Order No(s) |
| Cust Order Date | Order Date |
| Seller Invoice No | Voucher No |
| Seller Invoice Date | Voucher Date |
| Cust Invoice No | Reference No |
| Cust Invoice Date | Date |
| Seller Style Code | Name of Item |
| Sales Ledger | Sales Ledger |
| Base Price | Amount |
| Shipped QTY | Quantity |
| Seller Name | Party A/C Name |
Note : Above is the sample mapping you can change according to the requirement
Step 2 -> GST Mapping
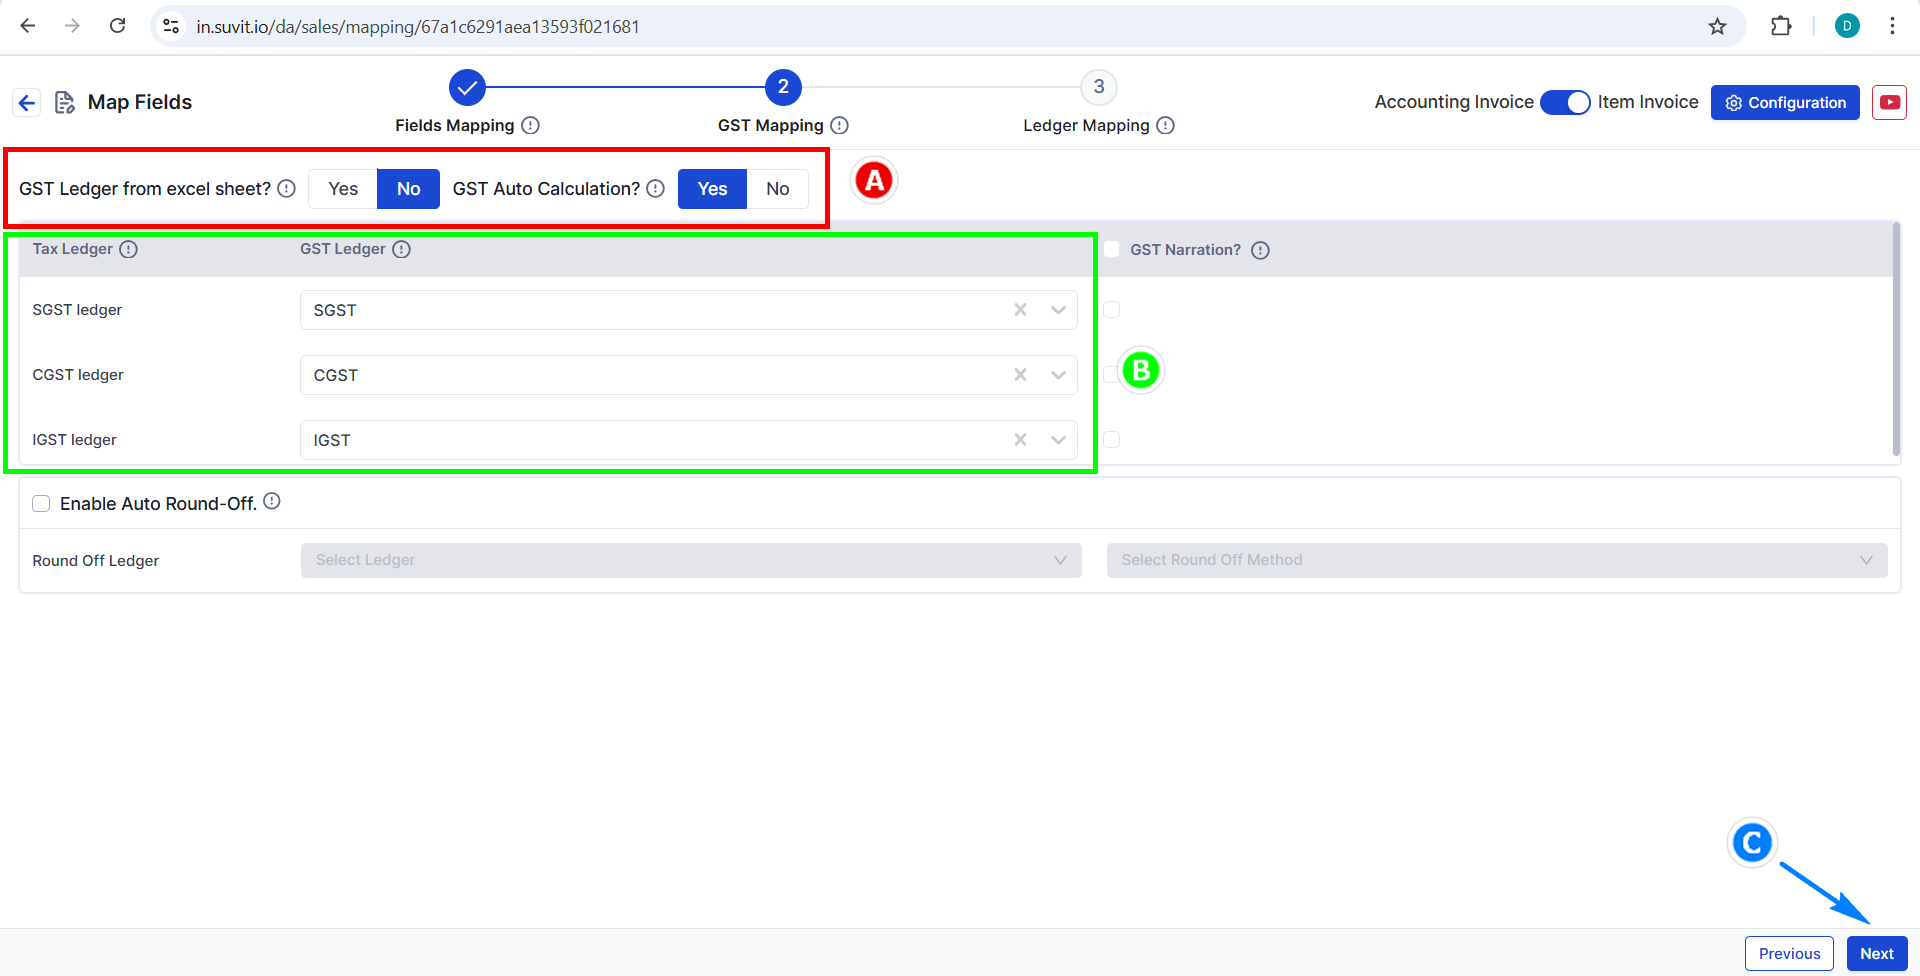
- A → This will help you to choose data form Tally or data from excel sheet. Change the Settings as per the Requirement
- By default common Duties and taxes will be get selected , changes can be done according to the requirement
- Map the GST field . How to use multiple Duties & TaxesLearn More
- B → Select the Required GST Ledger by using drop down menu.
- How GST Auto Calculation works Click Here for more details.
- C → Click Next for Ledger Mapping
Step 3 -> Ledger Mapping
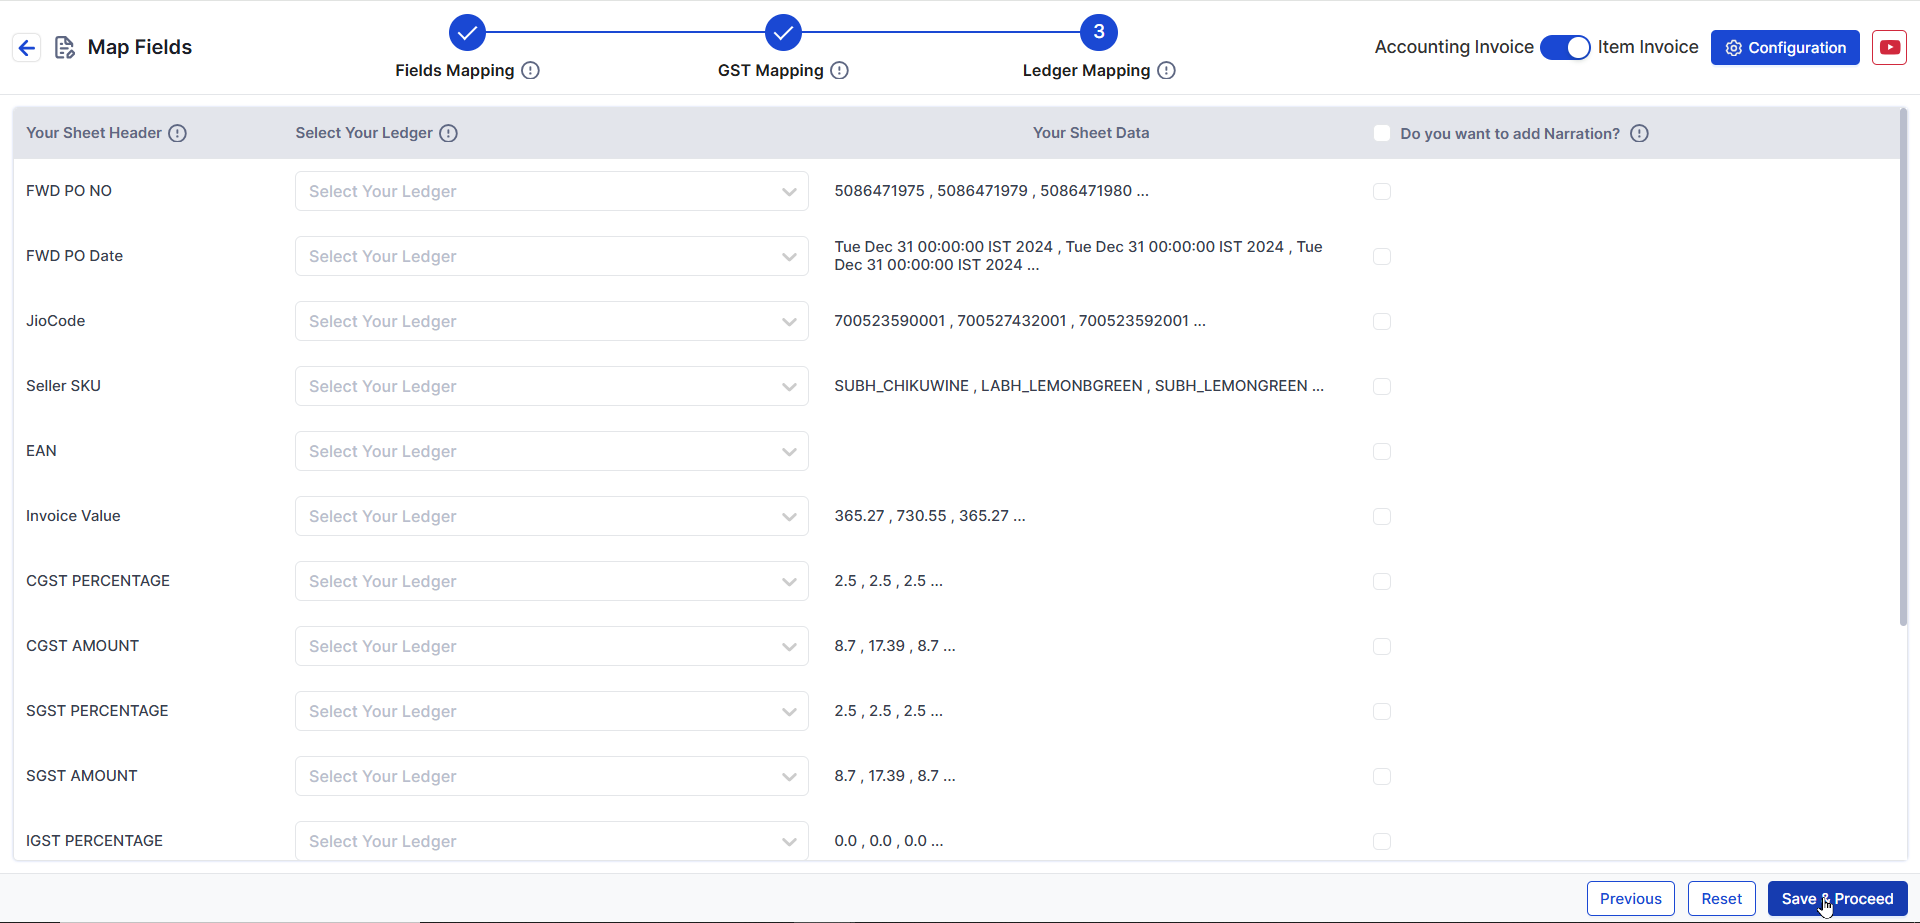
- This stage is optional for mapping.
- Map additional ledgers like TDS, Discount, Cess, etc. here. Click Here to learn how to map them.
Save Mapping
- Click on Save Mapping. Suvit will store this mapping for future uploads.
- Ensure that column headers match exactly with AJIO’s sales format.  For every upload
- If any discrepancies arise, manually adjust the mapping.
You may find this useful