Import the bank statement
This article will help you understand how to import a bank statement/ how to upload bank statement from Suvit to Tally with all possible steps and setup.
Step 1: Sign In
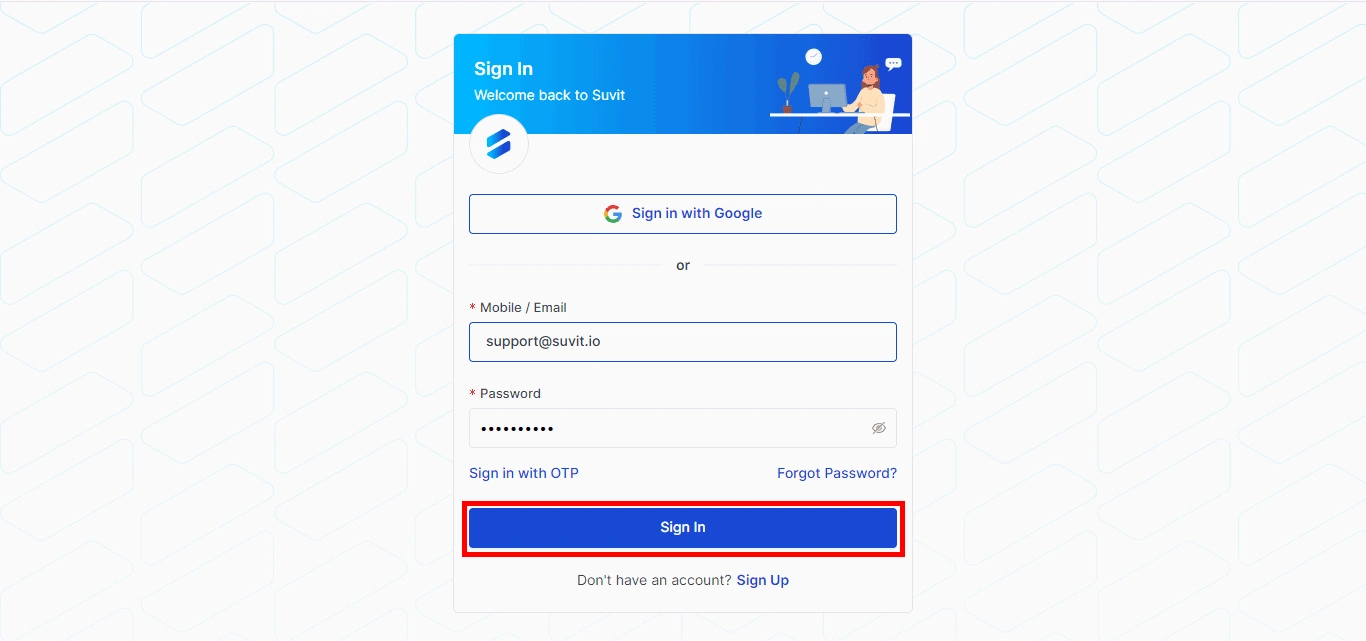
- Visit Suvit.
- Enter your Email and Password.
- Click the Sign In button.
Step 2: Navigate to Bulk Upload → Banking
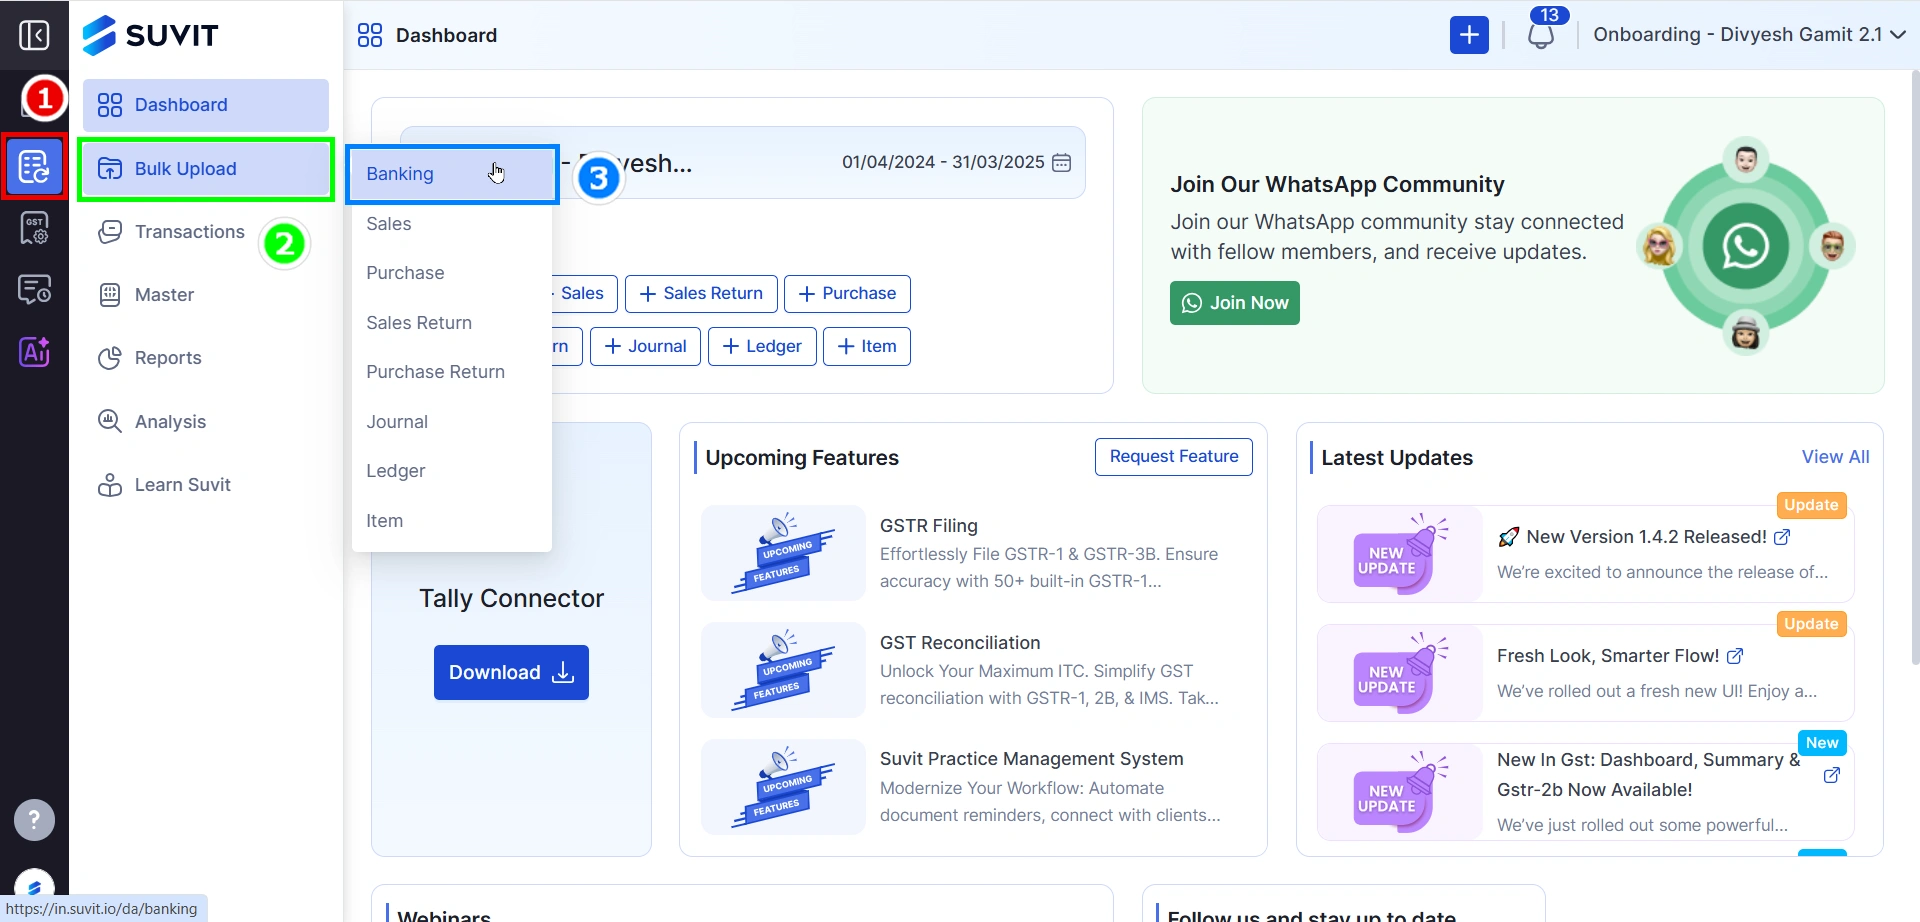
- From the sidebar (Data Entry Automation), click on Bulk Upload.
- Under the Bulk Upload section, choose Banking from the dropdown list.
Step 3: Choose the Company
- Click on the top-right corner dropdown to view available companies.
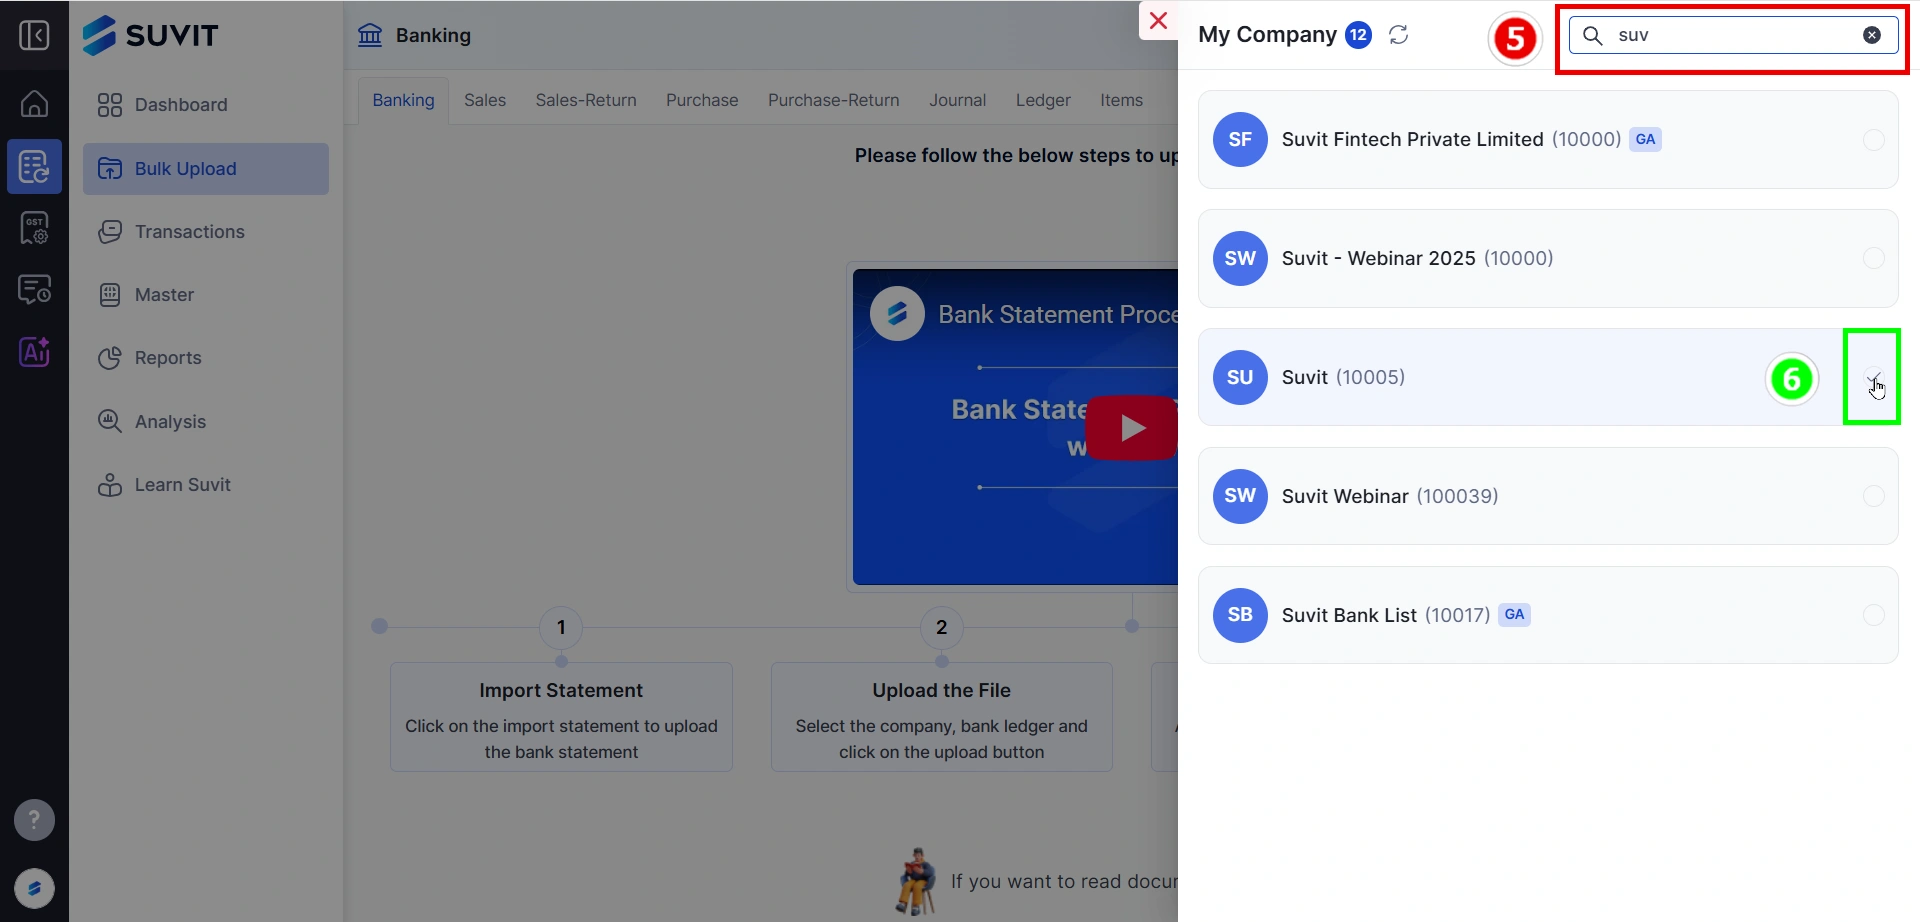
- Use the search bar to type part of your company name (e.g., “suvit”).
- Select the box beside the desired company.
Step 4: Import the Statement
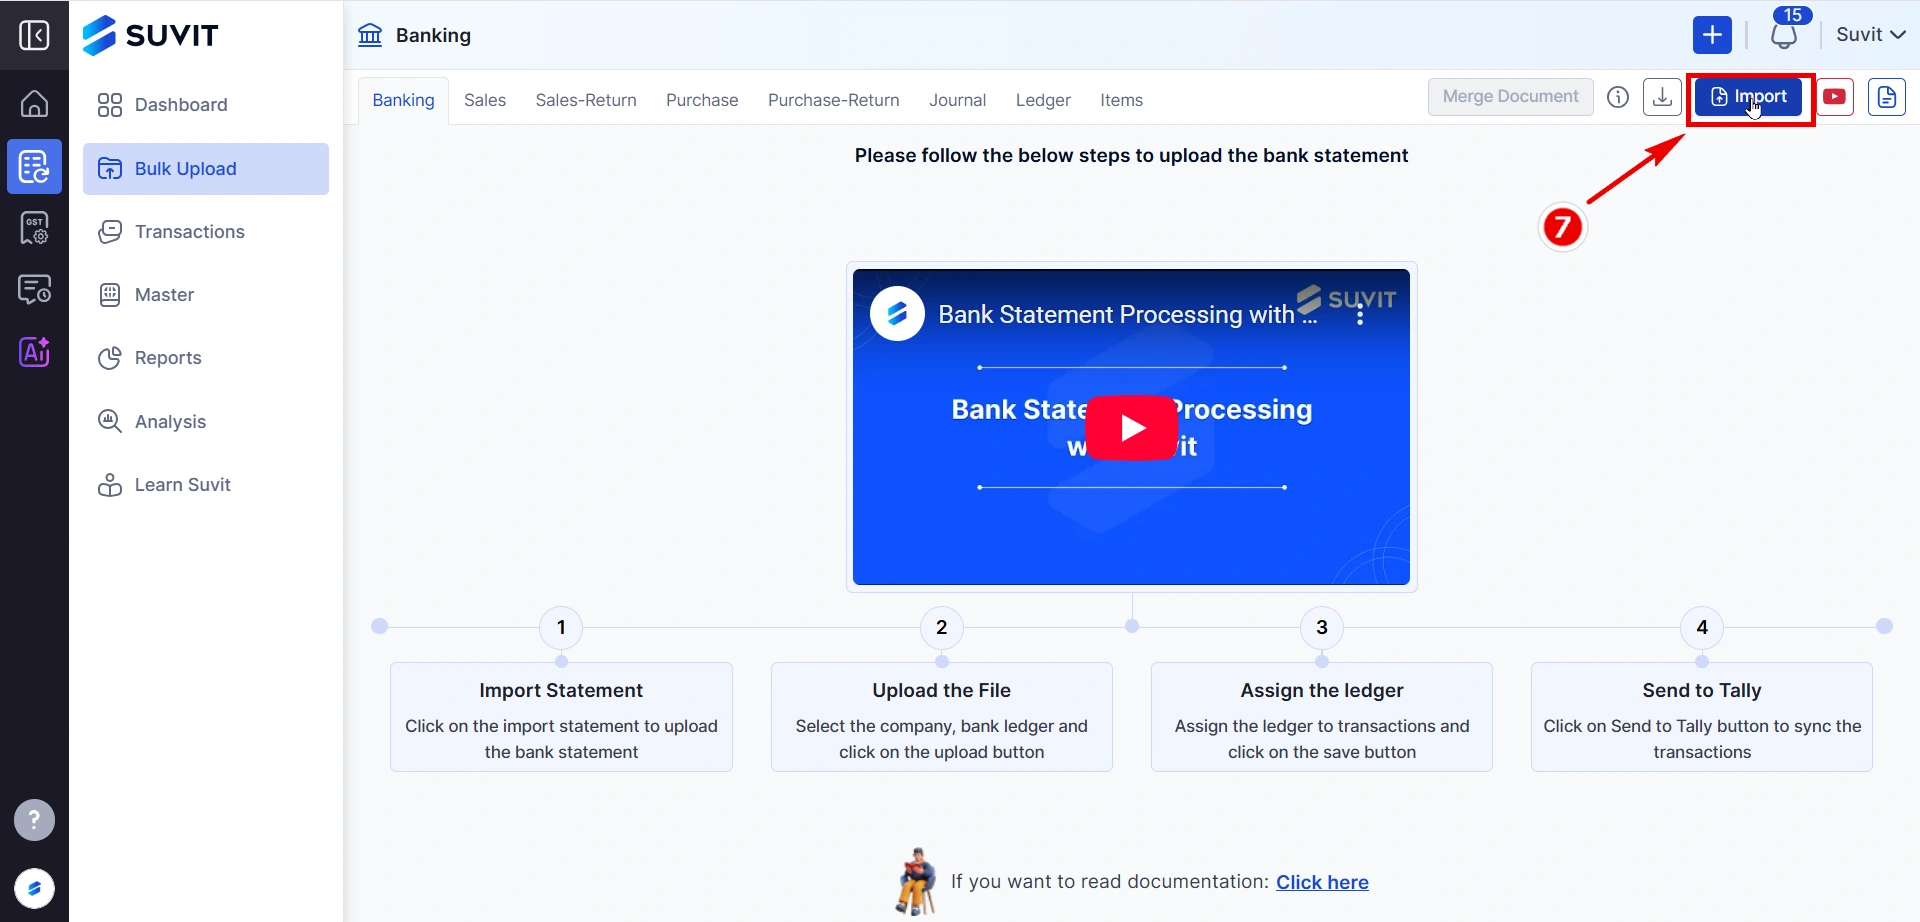
- Click the Import button located in the top-right section of the Banking screen.
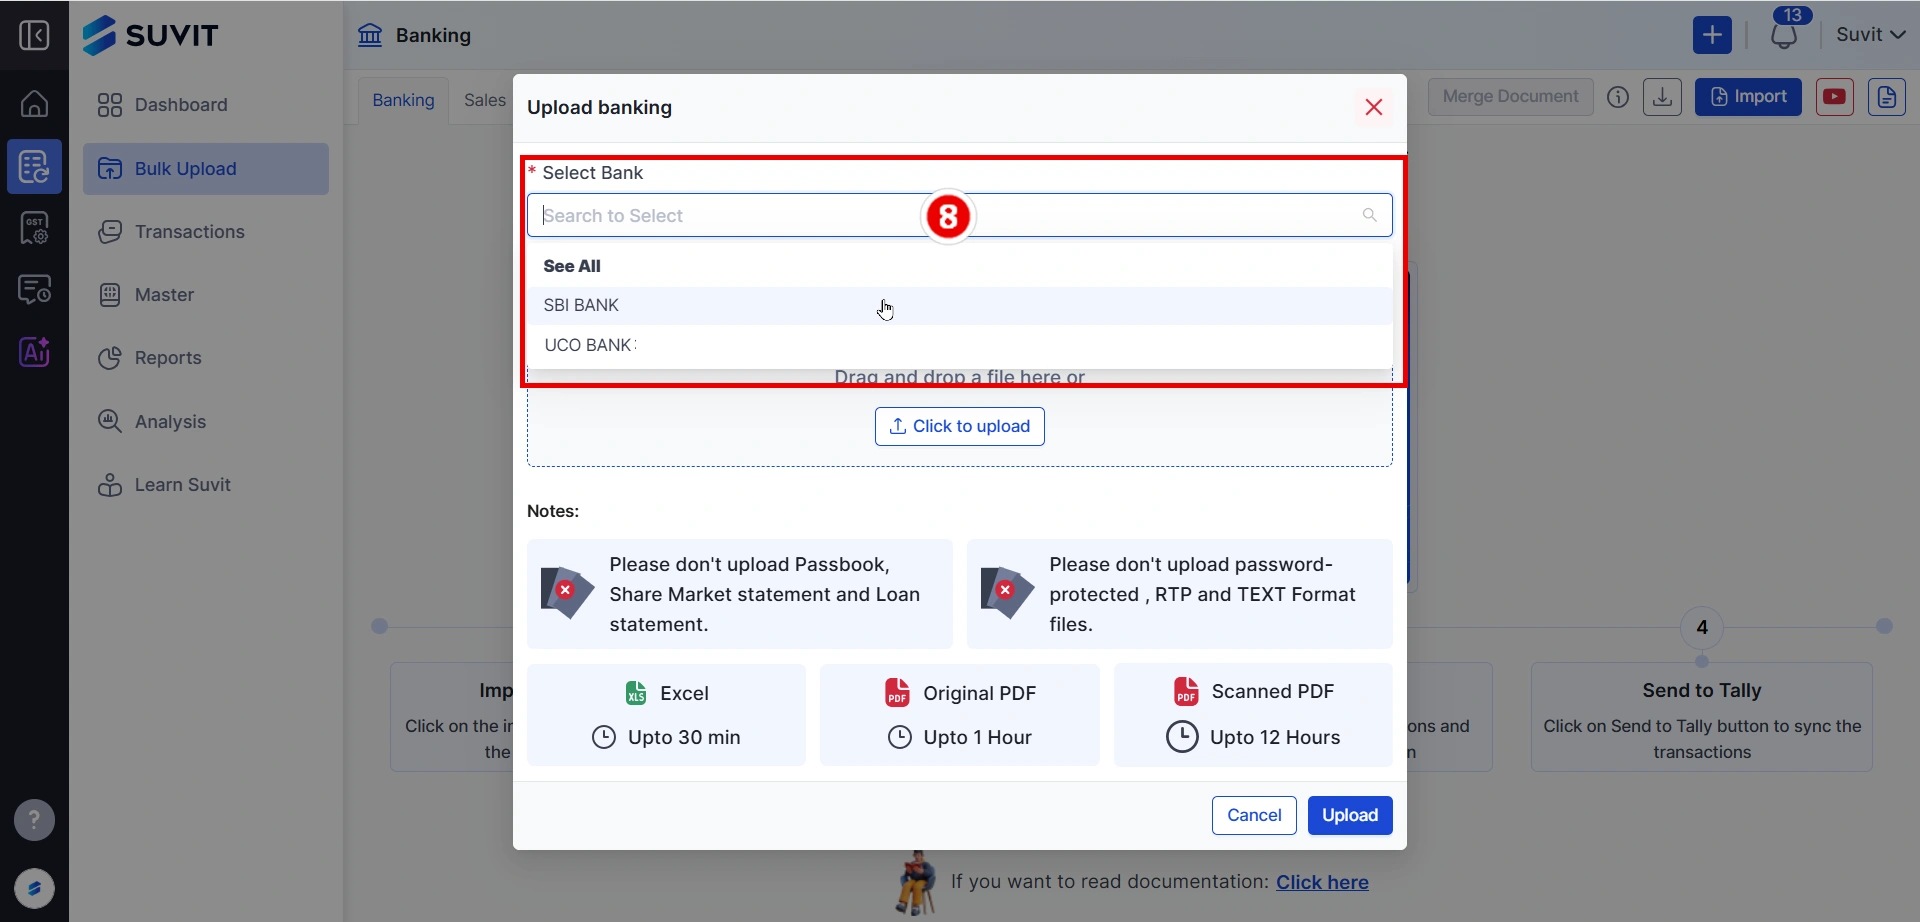
Step 5: Select Bank & Attach File
-
From the pop-up window:
- Choose the relevant Bank (e.g., SBI Bank, UCO Bank).
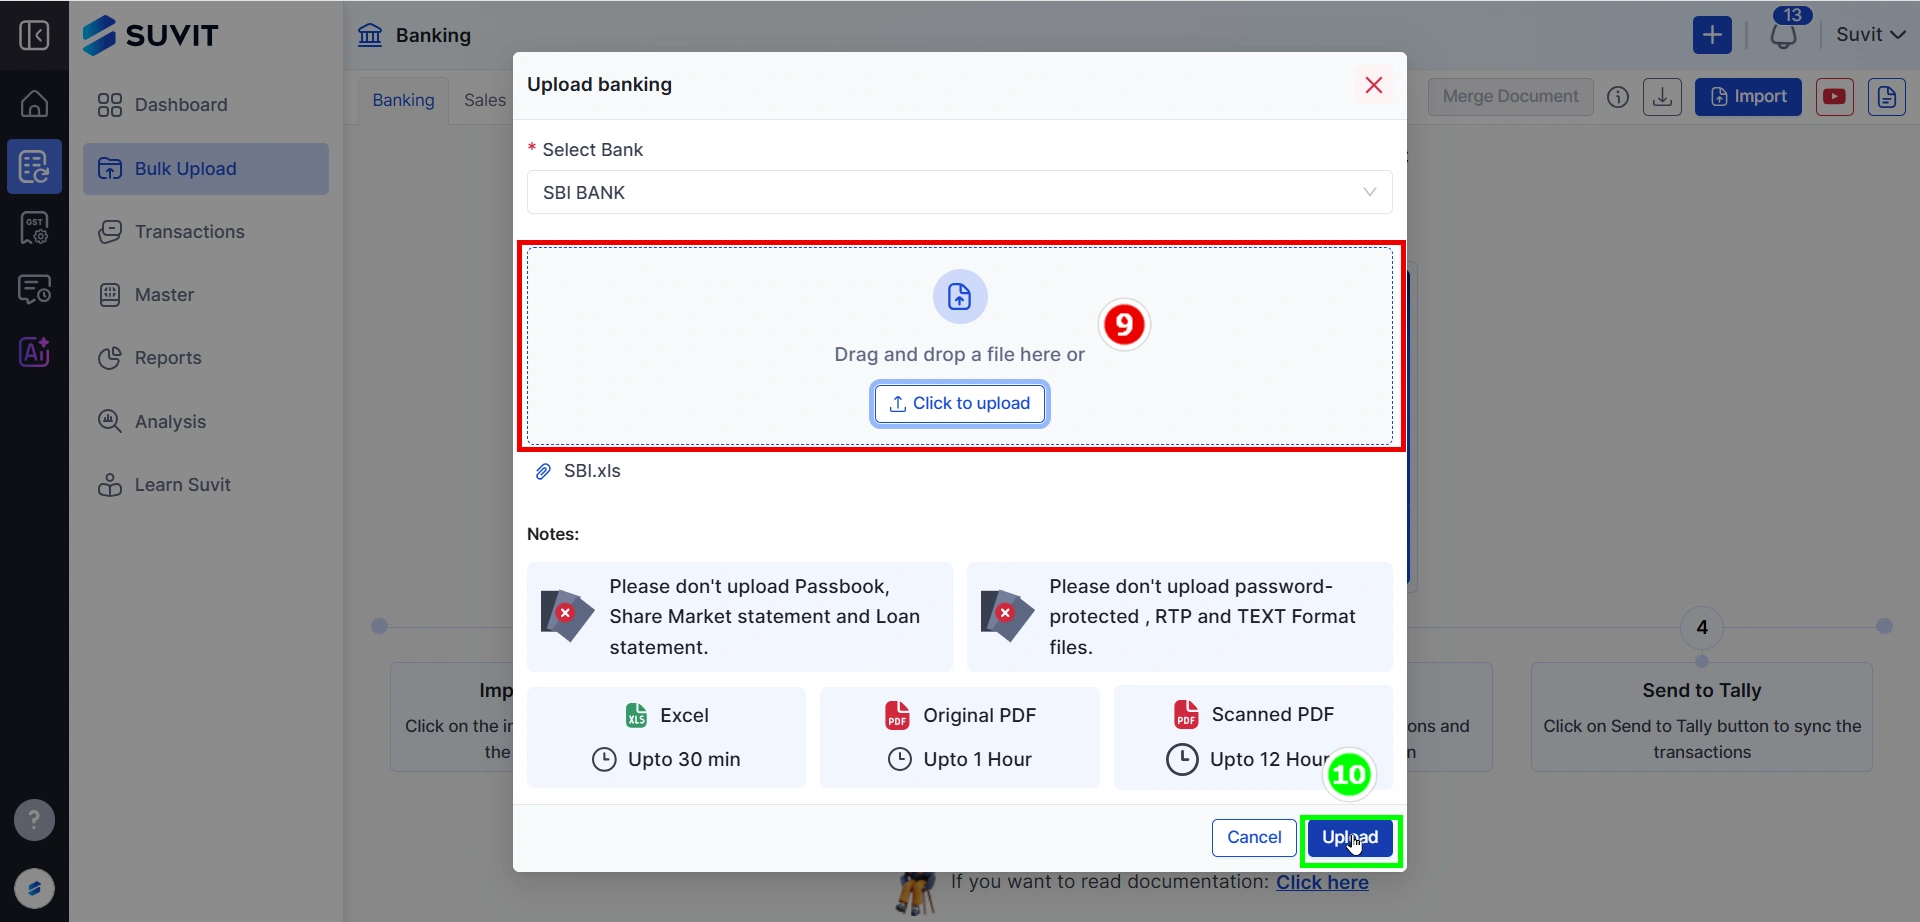
Step 6: Upload the File
-
Drag and drop the file or click to upload.
-
Ensure the correct bank and file are selected.
-
Click the Upload button at the bottom-right.
⚠️ If a document with the same name already exists, a warning about duplication will appear.
Step 7: Processing Status

- After clicking upload, the file will appear in the Processing state.
- Wait until the status changes to Complete or Failed.
🕒 If the processing takes too long, try refreshing the page using Ctrl + Shift + R.
⏱ Document Processing Times
- Excel Sheet: Up to 30 minutes
- Original PDF: Up to 1 hour
- Scanned PDF: Up to 12 hours
🛑 Unsupported File Types
❌ Passbooks
❌ Share Market Statements
❌ Loan Statements
❌ Password-Protected PDFs
❌ RTP/TXT formats
❌ Dot Matrix font formats
Helpful Links